gift
Clean With Cleaners You Can Eat by Raven Ranson
will be released to subscribers in: soon!
  • Post Reply Bookmark Topic Watch Topic
  • New Topic
permaculture forums growies critters building homesteading energy monies kitchen purity ungarbage community wilderness fiber arts art permaculture artisans regional education skip experiences global resources cider press projects digital market permies.com pie forums private forums all forums
this forum made possible by our volunteer staff, including ...
master stewards:
  • Carla Burke
  • Nancy Reading
  • r ransom
  • John F Dean
  • paul wheaton
  • Jay Angler
stewards:
  • Timothy Norton
  • Pearl Sutton
  • Tereza Okava
master gardeners:
  • Christopher Weeks
  • M Ljin
gardeners:
  • Jeremy VanGelder
  • Matt McSpadden
  • thomas rubino

The Very Frustrating Saga of Trying to Learn to Process Wool

 
pollinator
Posts: 327
Location: Fairfield, Idaho, USA
106
hugelkultur purity monies dog duck books chicken cooking food preservation fiber arts medical herbs
  • Likes 19
  • Mark post as helpful
  • send pies
    Number of slices to send:
    Optional 'thank-you' note:
  • Quote
  • Report post to moderator
Sometimes you do something or find something really cool and want to share it but today I am documenting the saga of me struggling with learning something new. I am hoping someone will be willing and able to tell me if I am doing something wrong and once I finally figure it out I am hoping that this saga will help others know what to watch out for before doing the same things I did.

So last spring I decided to learn how to process my own wool and I found a guy across town that raises sheep that was willing to give me some wool. He had several giant bags (more like bales) of sheep's wool in his barn that he told me he's been saving up because the wool mills have stopped buying wool. He has thousands of pounds of the stuff just sitting there from just a couple years' worth of sheep shearing. He said I could have as much as I wanted and I said I would start with just a bin full so I could learn how to process it. He gave me a bin and insisted on giving me a sackfull, too. The sack of wool came in handy in the early spring to help me insulate a the chicken brooder I built out of scrap when we had a cold spell.

The first thing that I did with my wool was wash a small batch of it and I carded it into fluff that I used to make a wonderbag. That worked pretty well. The carding was a bit time consuming and not all of the grass bits came out but it was good enough for what I needed it for. So after doing my test batch I decided to wash the bin of wool all at once.


Washing a large amount of wool outside
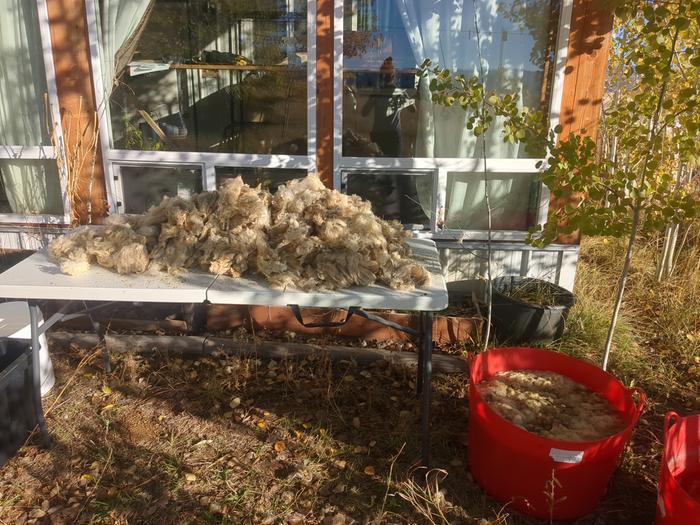
So I set up all of my equipment outside. I had a skirting table, two bins, the bin full of raw wool, a couple of 5 gallon buckets, some greywater-friendly soap, and some sunshine. I wished that I had done this in the summer because the wool would have dried faster, but this was a pretty nice fall day.


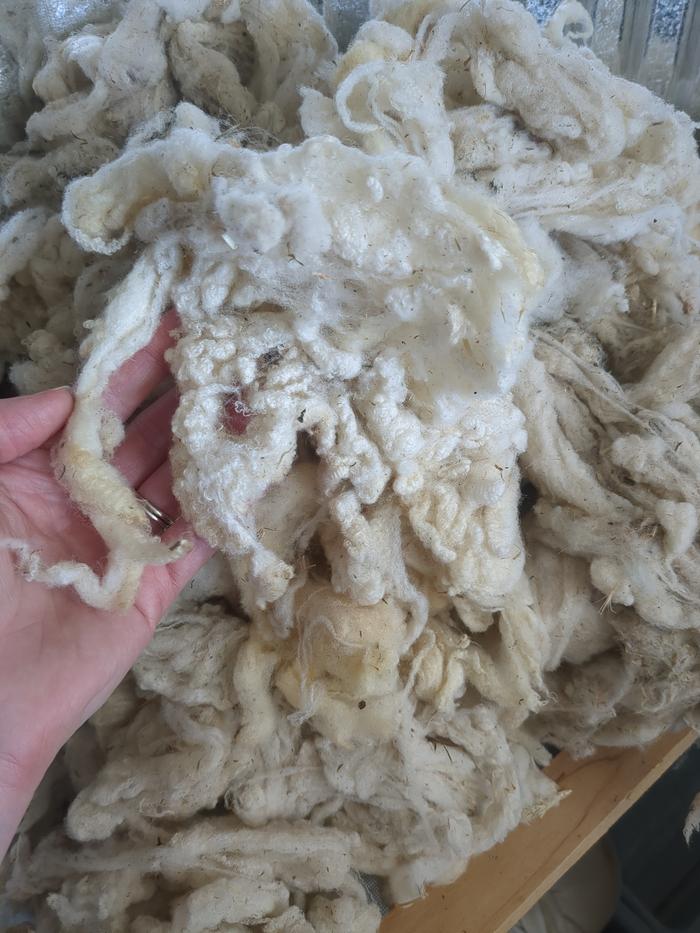
Here is the wool before processing.


I laid everything out on the skirting table and tried to pick off chunks that I didn't want. I picked off poop and big pieces of plant matter, but the entire thing was caked in massive amounts of tiny pieces of plant matter and grass and if I tried to pick those out by hand it would probably have taken me years. I figured these tiny pieces would probably come out during processing so I focused on the big pieces. I also realized that I needed to wash this in two loads. It ended up taking me 8 hours to give each load 3 washes and I think 5 rinses. I did this outside so I was able to just tip the buckets over to let the water out instead of ruining the plumbing inside the house.


First challenge: heating the water
The first major challenge I had was trying to heat up enough water fast enough for the tubs. Each tub load soaked for at least 30 minutes. I tried several methods of heating up the water. Because the tubs were so large, I dumped a couple 5 gallon buckets of water in that I filled up at the spigot (cold water) and then heated up with hot water to try and warm it up.

I tried heating up water on my little camping stove and on the death ray. This took too long and didn't give me enough hot water. Even when I had both going at once.


I then started a fire in the fire pit and heated up both my pots over the fire which worked better but still took too long and required a massive amount of wood and time to maintain the fire.


I eventually resorted to having two giant pots of water always heating up on the stove inside the house, but this required a ton of hauling water back and forth.


In the end, I don't think that I actually got the water hot enough to properly clean the wool and the reason I think this is because the wool was still super sticky, but I didn't realize that until I started trying to spin it.

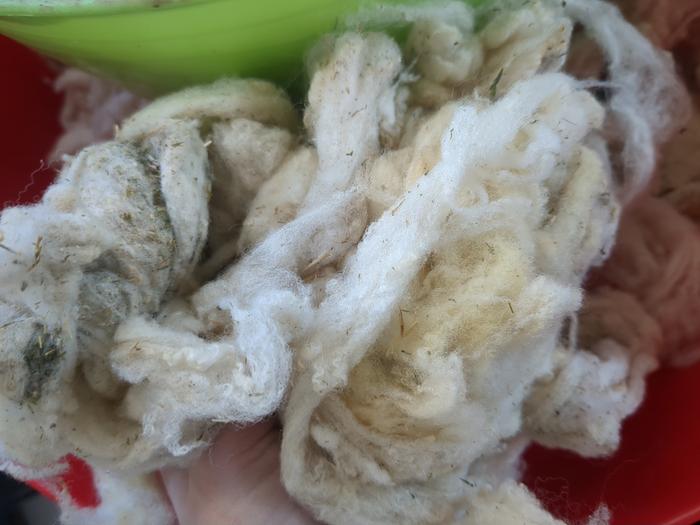
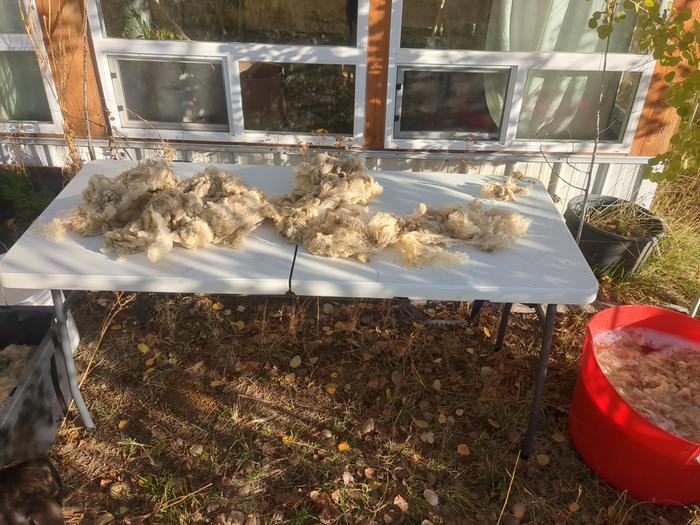
So after I finished washing everything, I gathered it up and laid it on some wire shelves in the greenhouse to air dry. It took maybe a week to dry and I went in periodically and flipped it around. You can see in this first picture that there is still a ton of green grass in the wool, but the color is way whiter than the dirty yellow it was in the beginning.


Here it is all dried.


Next challenge: carding and spinning
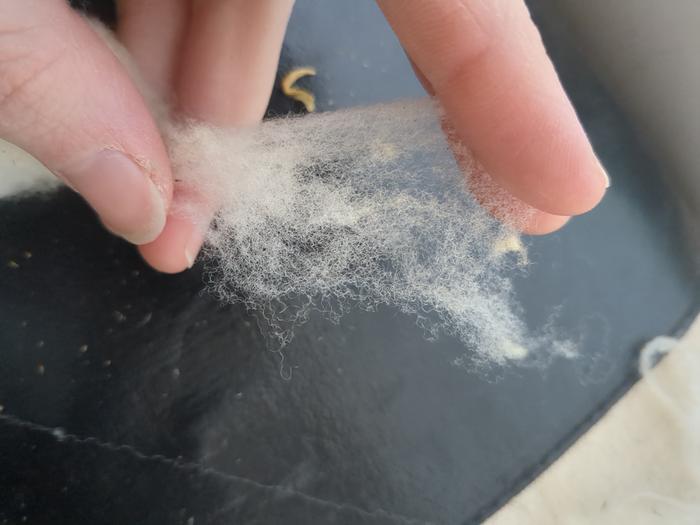
So I have never spun wool before and if I could go back and give myself any advice it would be to buy some already processed wool for spinning and learn how to do that first so I know what the wool is supposed to feel like and look like. I cobbled together a drop spindle with some sticks and then I tried spinning some wool that I carded into fluff just like I had done earlier with the wool for my wonderbag. This did not go well at all.

Here is my makeshift drop spindle.


Here is the wool I attempted to card. It is still pretty dirty and honestly very sticky. I did not know what I was doing and I later did a bunch of research and discovered that my technique was totally off. I needed to be carefully aligning the fibers into "rolags." Also all of the tutorials I found online were using some big curved hand carders that I could only find on specialty online stores for a ton of money. I got mine for cheap on Amazon and I am still not sure if they are going to work or not. At the very least I found that they are excellent for grooming my dog.


I tried spinning this sticky fluff and it was super lumpy and kept breaking.


Being unsure if the issue was my wool or the drop spindle, I ended up purchasing a drop spindle online (these were easier to find than the hand carders) and the same thing happened when I tried to spin with it, so I knew that there was something wrong with my wool.


Washing smaller batches of wool inside
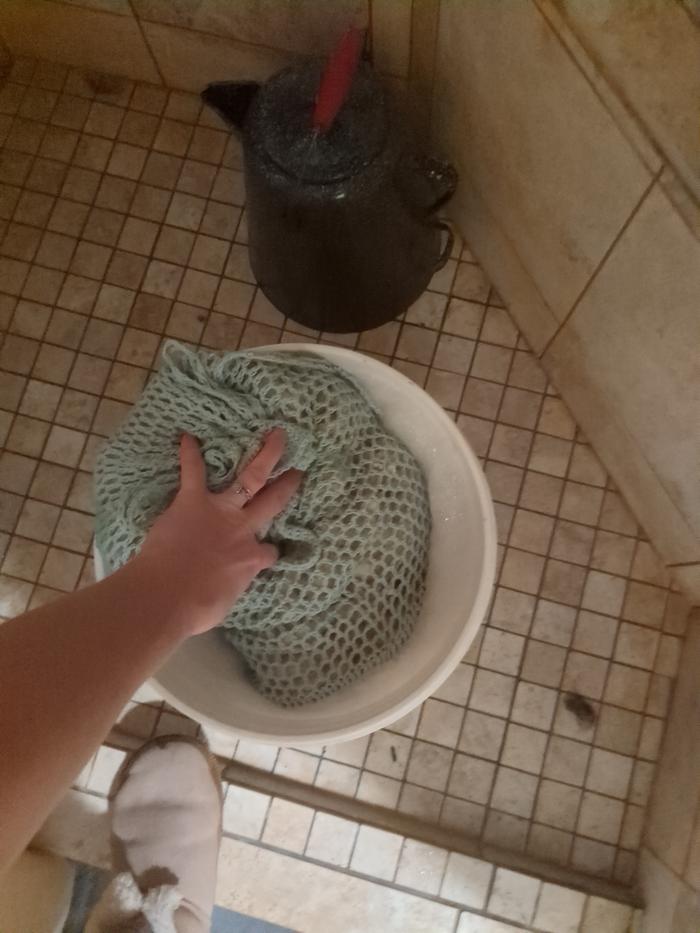
So now that I knew that something was wrong with my wool, I decided to experiment. Because it was still super sticky and had a bunch of organic matter still stuck in it that wasn't coming out when I was carding it (incorrectly, I might add), I thought that maybe I hadn't gotten the water hot enough to properly clean the wool the first time. So I decided to wash smaller batches inside in the hot shower with more hot water from the stove to try and get more lanolin off. My hypothesis was that a lot of the grass was stuck on because of the lanolin (which is what I'm thinking is causing the stickiness).

I took a small bag of the wool and washed it in the shower.


I tested out heating up water on the electric stove and heating up water on the rocket stove. The electric stove heated up faster, which surprised me.


After I washed the wool, I didn't have anywhere to dry it since it was now getting into winter and the greenhouse (which isn't insulated) was frozen, so I just hung the bag up behind the stove. This was a bad idea and took maybe a month to dry out.


As an experiment after washing it, since it was still pretty dirty and sticky, I tried carding the whole thing (by trying to separate the fibers into fluff and see if that would help the grass fall out...again, I still didn't understand carding at this point because I did not understand spinning yet). After carding it, I washed it again.


I ended up building a little drying rack with some junk wood and stainless steel screen material and hanging it from the mantle so I could lay out the wool to dry. This was a much better idea.


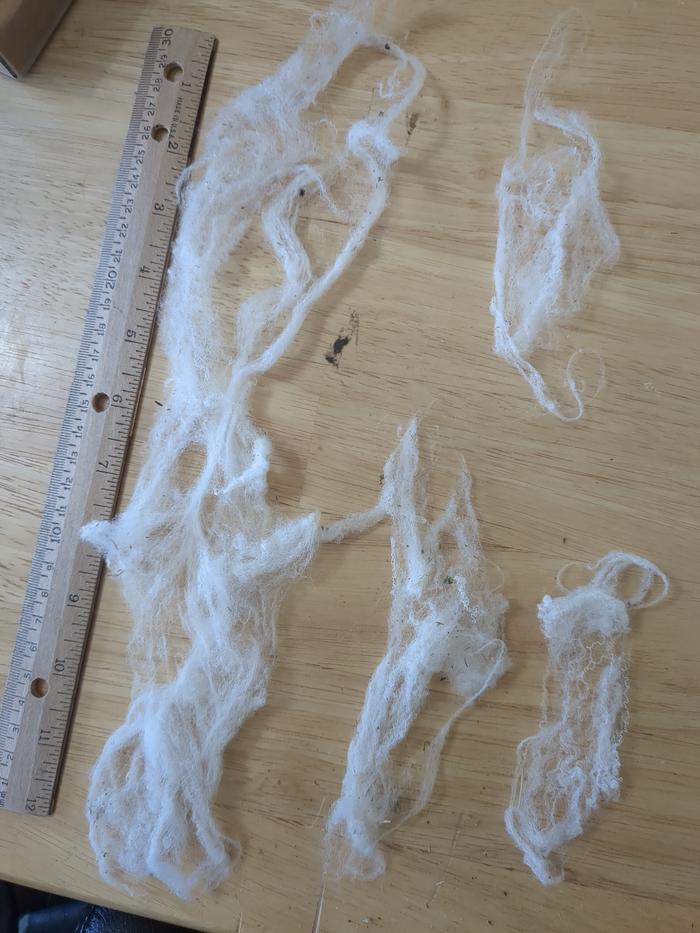
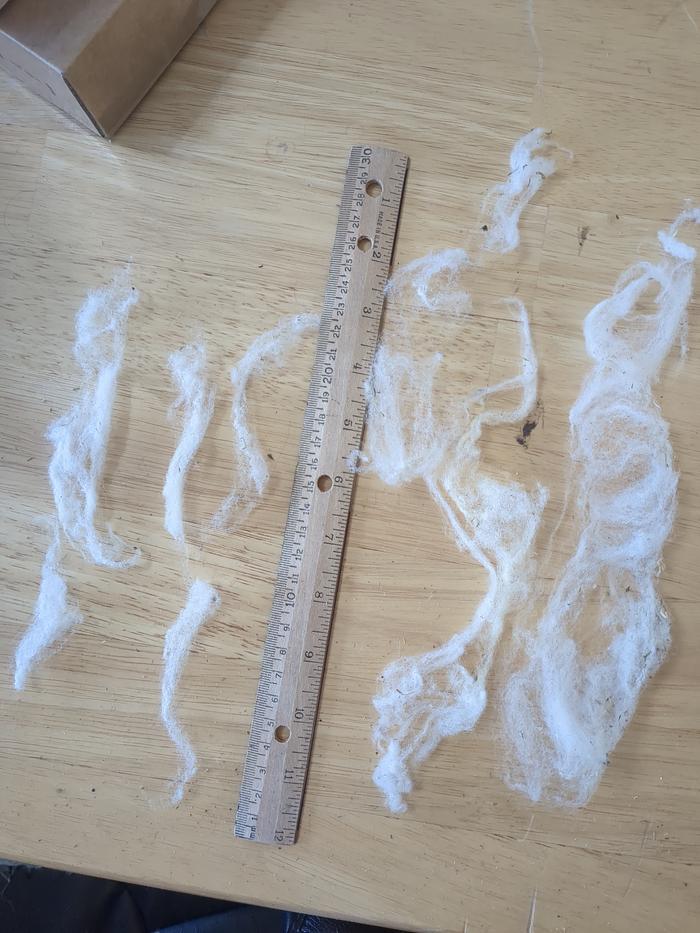
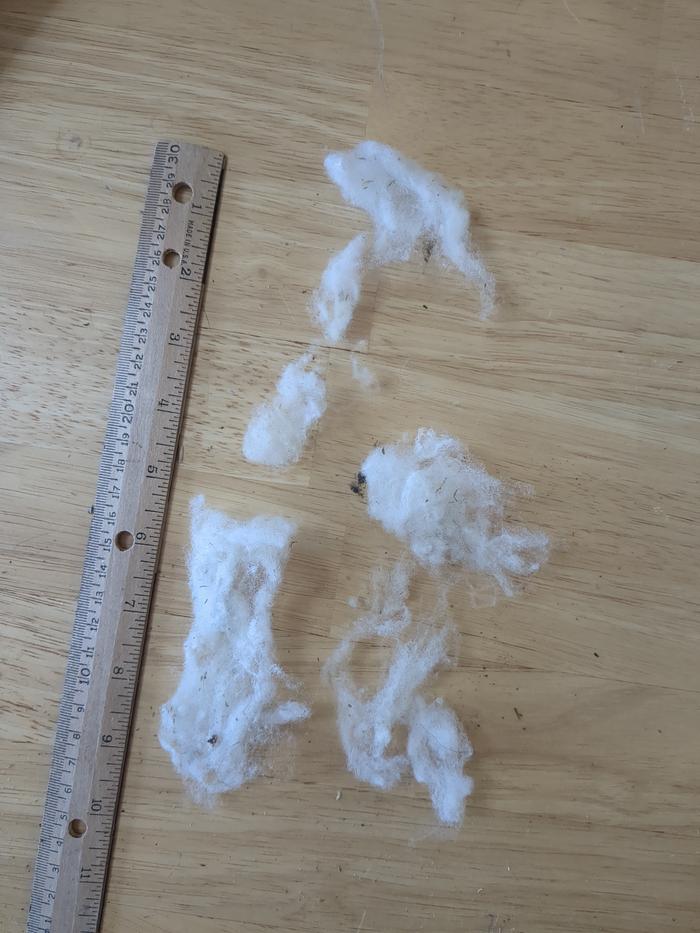
After the wool was washed and dried, it looked quite a bit cleaner.


After this stuff dried, I tried to spin it again on my new drop spindle and ended up watching many videos on spinning and carding and I just could not get it to work. I learned that I had been carding improperly and was worried that I had ruined the wool. I also knew that the large amount of wool that I had previously washed still needed to be washed again because of how sticky it was but I started avoiding the whole thing because it stressed me out and I was worried about ruining everything (even though the wool was free, I had still put a lot of time and effort into this process).


Washing a large amount of wool inside
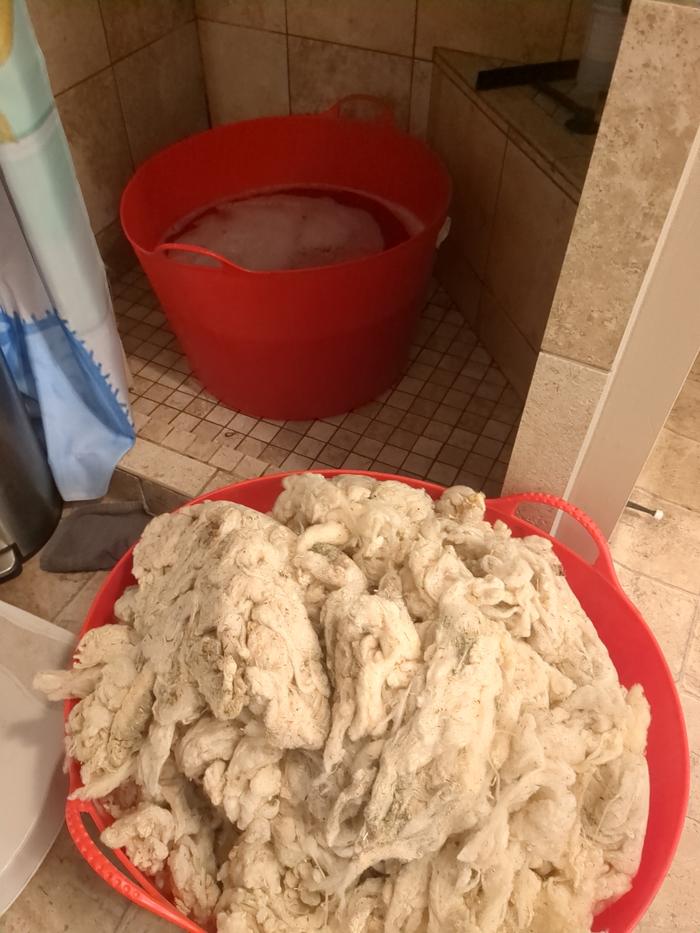
I finally built up the courage to wash half of the remaining wool in the shower (in the middle of winter) this morning and I discovered that it definitely needed more washing and the hotter water was definitely getting more dirt off. When I had previously washed this wool outside, I got it to the point where the water was running clear. But this time the water was definitely pretty dirty. I gave it two washes and two rinses.

Here is my wool before washing. I had two tubs and I only washed one tub-worth today. Although I did need the second tub so I had to dump half of the wool on the ground so I could use the tub.


Here is all of the wool and the tub in the shower getting ready for the first wash.


I was able to fit both tubs in the shower so I could transfer the wool between wash and rinse (or second wash).


After half a day of washes and rinses, the wool that I washed (in the tub) still looks exactly the same as the wool that I did not wash today (on the floor). It is also still very sticky. If it weren't for the dirt in the water, I would not be sure that I actually did anything.


This ended up being too much wool to dry effectively in this small space. I've got the stove running and a dehumidifier going but we'll see how long it takes for everything to dry. I also need to watch the dogs carefully to make sure they don't eat any of it.


Remaining questions and struggles
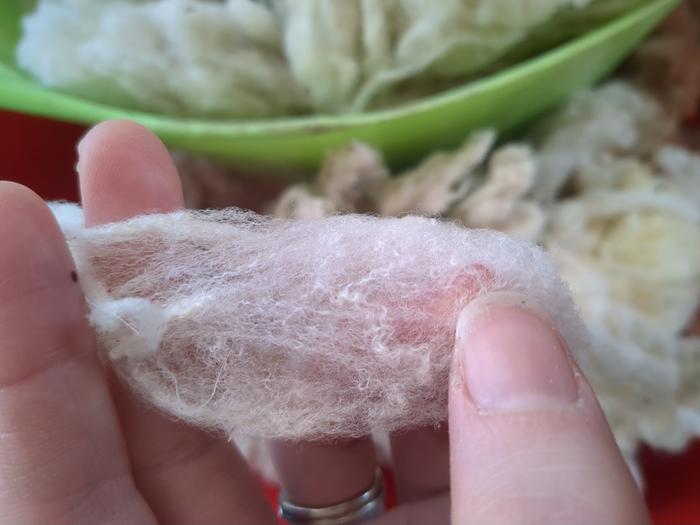
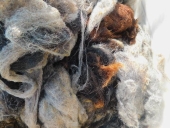
Here is what the wet fiber looks like close up. You can see there is still a ton of organic matter in it. One thing that everyone on the internet kept warning about is making sure your fibers don't felt...but then they don't really explain to you how you know if your fibers are felted. Is there any way someone could look at this and tell me if I accidentally felted my fibers? Would that account for why the organic matter is not coming out? Will the organic matter come out when I card the wool properly? Why is it still so sticky? Can I still spin it if it's sticky?


If you have sat through this entire thread, thank you for reading. And I would greatly appreciate any and all comments, suggestions, observations, tips, etc.! I'm honestly so frustrated at this point and I don't know how much more effort is needed to get this wool to be usable or if I should give up and go get another batch.
 
steward and tree herder
Posts: 12697
Location: Isle of Skye, Scotland. Nearly 70 inches rain a year
6613
6
transportation dog forest garden foraging trees books food preservation woodworking wood heat rocket stoves ungarbage
  • Likes 14
  • Mark post as helpful
  • send pies
    Number of slices to send:
    Optional 'thank-you' note:
  • Quote
  • Report post to moderator
Oh Hal, this brings back memories! I still have a load of fleece I was given to play with - actually the dag ends, but much of it was quite usable if not perfect. Washing and drying was a lot of work! I just rinsed mine in cold water to get the worst of the poo out, and it did take a long time, and yes I had dog help too!
I'm not sure why you're having such trouble with the spinning, maybe the fibre length is too short? Your wool looks pretty crinkly to me which ought to help. Do you know what breed of sheep the fleece came from? I don't think the 'stickiness' is a bad thing at this stage - you can (and maybe should?) wash the yarn after it is spun too.
I hope someone who knows wool chips in.
 
Rusticator
Posts: 9605
Location: Missouri Ozarks
5240
7
personal care gear foraging hunting rabbit chicken cooking food preservation fiber arts medical herbs homestead
  • Likes 15
  • Mark post as helpful
  • send pies
    Number of slices to send:
    Optional 'thank-you' note:
  • Quote
  • Report post to moderator
Washing and drying is so much easier, so much less water-intensive, using the suint method. Start with hot water (100 - 105°f) at the beginning of a hot week: 90°F+. Put the tub somewhere away from normal human traffic, then fill the tub with hot water, load in a fleece, gently use a plunger to make sure it's all thoroughly wet. Once you're sure it's all wet, cover it and leave it be. Once a day or so, go check on it, and gently plunge it, some more. After about 6 days, lift out the fleece, draining/squeezing as much of the liquid back into the tub as possible (might want to wear long gloves). Move the fleece into a 2nd tub with fresh water, and rinse until the water runs clear, drain it, and set it up to dry.

Now for the neat part - put another fleece into the same 'icky' suint water. Gently plunge, cover, and leave it. Check every day, gently plunging, as needed. This fleece will only take about 5 days. The next will only take about 4 days, and the next, only 3 - as long as you're still using the same suint. So, you can get 4 whole fleeces cleaned in 1 wash tub, and a few repeats each of the rinse tub. The suint water will stink - but the fleeces will smell sweet. After the 4th fleece, empty the suint water into your soon to be VERY happy garden, and start again.
 
pollinator
Posts: 486
Location: Oz; Centre South
139
trees books cooking fiber arts writing
  • Likes 10
  • Mark post as helpful
  • send pies
    Number of slices to send:
    Optional 'thank-you' note:
  • Quote
  • Report post to moderator
My sympathy, Hal.  Been there and had similar results. . . mass processed a single fleece in the bathtub.   Clumped together, and was mostly useless, especially for spinning.
Further down the road, I bought a new spinning wheel and decided to be super kind to it, since I'd worn out the brass orifice on my previous best friend. This meant that all the fleece I was going to spin had to be washed first - the paddock grit had done the damage.  Now I process in small batches.  
The locks are separated from the fleece, and placed in an orderly fashion - all tips, the dirtiest bits - pointing in the same direction - into those mesh bags with a zipper meant for laundering 'unmentionables' and other small items.   I use the 2 smallest sizes for the convenience of being able to wash the wool in the laundry trough, or a bucket.   Water temperature from the tap is 50°C,  so I make it hand-hot, adding cold.  NEVER running the tap water onto the fleece!  Add detergent, and if the fleece is super sticky, or sometimes nearly running with lanolin, I add about 20 mls (4 teaspoonsful) of de-natured alcohol.  This tip I got from a mass processor - lanolin whisked away, no damage to fleece.   Then after a soak, and a gentle squeeze**, the fleece is rinsed in same temperature water.  The idea is no shocks - no felting.   Then the bags of still orderly locks are dried - takes very little time.   All there is to do before spinning is to comb out each lock using a dog comb - all the veg. debris falls out ( an apron is a good idea at this stage)  I place the combed locks in a suitable container ( I use a basket) until there is enough to spin.  Again, all tips pointing in the same direction.
I like to spin from the cut end, the wool seems to slide better.  Usually I spread out the combed out lock and start to pull out the amount I'm going to spin - this takes a bit of practise to gauge it.  
Tie a leader thread - yarn about the thickness you are aiming for - onto the spindle, near the weight, and wind up the shaft turning clockwise, and half-hitch around the hook.  I turn a drop spindle clockwise using thumb and forefinger to get the spindle moving.  With thumb and forefinger of other hand holding onto the overlapped leader and the beginning sliver of wool, give the spindle shaft a couple of twists clockwise to get twist into the join.  Then the action is hold to prevent the twist from getting into the fibre supply, extend the fibre by pulling upwards, smooth bottom fingers up allowing the twist into the newly created thread, hold, pull out more fibre, and repeat until the spindle slows down.  [ Lower hand prevents the twist getting into the yarn until the fibre has been drawn out ready.] Then, wind newly created actual yarn onto the spindle shaft, leaving enough free to go back up to the spindle hook, half hitch again, and repeat.  I wind a figure-8 with the yarn around a thumb and little finger to avoid snarls before winding on.   NB I use a bottom-weighted drop spindle.
It is awkward to start, so I'd advise to go slowly at first.  The spindle can be supported, say on a table until the confidence is up to letting it go and drop towards the floor.    
The finer the wool, the more twist it needs to hang together, and the lighter the spindle needed.  
**  water can be tipped onto the compost
I found that the amount of time used to wash small batches amounted to not much more than the bulk process/waiting for it to dry/then cursing at the result.
https://spinoffmagazine.com/what-would-a-world-overrun-by-spinners-look-like/
I hope you can follow my ramblings, if not the link will prove useful.  When and if you need to ply two yarns together, well, that's another story!  
 
Carla Burke
Rusticator
Posts: 9605
Location: Missouri Ozarks
5240
7
personal care gear foraging hunting rabbit chicken cooking food preservation fiber arts medical herbs homestead
  • Likes 6
  • Mark post as helpful
  • send pies
    Number of slices to send:
    Optional 'thank-you' note:
  • Quote
  • Report post to moderator
Wow. I feel bad that I didn't read more closely, the first time. Please accept my apologies, for that. While my first post is still what I'd advise, now that I've had more time to read it more fully (Wednesdays are insane, here, and trying to read and respond on my phone can be weird), I have questions, before I go much further:

1. Do you know what breed of sheep the wool came from? (This can make a big difference in how it can/ needs to be processed & spun)
2. Would you mind taking a small clump from a few different spots, and stretch them out to their full length, let them relax, then take a couple close-up pictures of them, next to a ruler? I'm looking for a few things in this, primarily the crimp & staple length, but also to see if I can figure out the cut length, and condition of the ends. All these things are even more important than the sheep's breed, when it comes to processing & spinning methods & tools.
3. Do you know how long the shepard had the wool before they gave it to you? If the wool is more than a few years old, it can become very brittle and almost not worth much more than insulation, or compost.
4. Can you possibly carve a sharpish point on the bottom of the shaft of your spindle?
5. Do you have a super-smooth bowl that would be shallow enough to place that newly sharpened point into, and spin your spindle like a top, without bumping the whorl against the sides?

Next up - all that VM (vegetable matter) will need to be picked out. The suint method tends to dissolve and release more vm than scouring, but no washing method will eliminate it all. There are mechanical pickers that can eliminate a lot of the vm - but, ultimately, there will need to be a lot of hand picking. This is huge, and is best accepted as part of the processing. Most of the folks I know who process their own - and come to enjoy it - have turned picking out all that vm into mind of a zen/ meditative thing.  We have a good-sized piece of fabric to lay on our laps, and sit between or in front of 2 baskets: one filled with the wool top be picked, one with all they've already picked. Get comfy, because you're going to be there for a while. Take a small handful of vm filled wool, and start picking all the stuff out. Some will just fall out, as you separate the fibers - but that fabric on your lap is there to catch it. When that handful is clean, do it into the basket of finished wool, and get another handful of the vm cluttered wool. This process can take many hours, if there is a lot of vm, but it's worth it, for the quality it produces. Take all the breaks you need/ want. But, if you want really nice wool, this is where the rubber meets the road.

Hand cards aren't for cleaning out the vm - they're for aligning the fibers(after the vm is gone, to make it easier to spin. I know a good number of people who prefer dog brushes (slicker type) to hand cards. Hand cards are expensive and heavy. Those rolags you mentioned? Those are what you take off of the cards, at this stage, hence the name 'rolags'. Dollars are one of the types of processes that can be used to begin to spin from, because the note neatly arranged fibers make it much easier to draw out, as you spin.

Then, I have a suggestion that goes back to the reason I asked about the spindle point and the bowl. This is how one turns a 'drop' spindle into a 'supported' spindle, which in my opinion is far easier for a beginner to learn, especially helpful in learning how to draw out the fibers, because you can simply stop, without worrying about breaking the yarn, or the spindle.
I hope this helps, and I'll be watching this thread now, so all you have to do is ask, and I'll respond as soon as I can. I'm not a pro. In fact, I still consider myself a beginner, or novice, at most - probably always will, no matter how much I learn. But, where I have questions, I am pay off a group that will happily give me hands on help, and I've learned a LOT.
 
master gardener
Posts: 6025
Location: Carlton County, Minnesota, USA: 3b; Dfb; sandy loam; in the woods
3537
8
forest garden trees books chicken food preservation cooking fiber arts seed woodworking homestead ungarbage
  • Likes 11
  • Mark post as helpful
  • send pies
    Number of slices to send:
    Optional 'thank-you' note:
  • Quote
  • Report post to moderator
I can't tell if your wool is felted from looking at it. When it felts, the microscopic scales on the fiber interlock with the ones on the neighboring fiber and they don't want to come apart. It's caused by agitation and heat. Grab a lock or clump of your fibers and tease them apart. Do they come apart easily? Do the individual fibers slide along one another and then come free? If so, it's not (mostly) felted.

Also, I don't know the details but some people like to spin wool in the grease. I think it has to be relatively clean, and you'd want to read up on it, but knowing that people do that helped me be less anal about getting every last hint of grease or lanolin out.
 
Hal Schibel
pollinator
Posts: 327
Location: Fairfield, Idaho, USA
106
hugelkultur purity monies dog duck books chicken cooking food preservation fiber arts medical herbs
  • Likes 13
  • Mark post as helpful
  • send pies
    Number of slices to send:
    Optional 'thank-you' note:
  • Quote
  • Report post to moderator
Thank you for the replies so far Nancy, Carla, Jill, and Christopher! I'm glad that others can relate.

And next time I am definitely going to try the suint method. Depending on the year, we might have three months of 90+ degree weather or we might have only three days of 90+ degree weather.

And maybe I'm overreacting about the stickiness - it sounds like if I properly prepare the wool and figure out how to spin correctly I might actually be able to get something going that's not all clumpy (provided that it is not felted). I might have to buy some pre-processed wool to start learning how to spin just to get an idea of how it works.

I also hadn't heard of de-natured alcohol before but if that is what the large-scale processors are using, I can see why they weren't worried about all the organic matter in the wool when they were shearing it and packing it.

So the sheep farmer I got the wool from has three or four years' worth of bales in his barn (maybe around a dozen, I don't remember) that look something like this:


So they have hundreds of pounds of fleece in them and it's all mixed together and he just cut a hole in one and pulled some out for me. I think his plan is to hold onto all of this fleece until the wool mills start buying it again (he was making comments about how no one will buy wool anymore and the government is no longer using wool in military uniforms and stuff like that). But if it degrades pretty quickly, I'm not sure how well that plan is going to work out. He also told me what breed of sheep it came from but I don't remember what it was. He did make a lot of comments about how it's the best breed of sheep for wool in the world and is wonderful for spinning and that one of those bales is used to make a single Pendleton blanket. I think this batch is from last spring (I didn't get to it right away because it seemed like a daunting task).

Here is my attempt at stretching out the fibers next to a ruler. Not being familiar with raw wool and what counts as a single lock, I may have done this totally wrong.

This first one is the wool that I washed just outside:


This second one is the wool that got washed both outside and again in a big batch in the shower:


Here also is the stuff that I "carded" into fluff and then washed again. Definitely hard to pull apart into straight locks. Might be able to do it with the brushes.


Also, these are the carders that I got. If you try to find hand carders on Amazon, this is the only style I could find. It said it was for wool so I didn't question it.
And this is the spindle that I ended up buying. Is the point sharp enough? I'm not sure I understand what you mean with the bowl.
 
Nancy Reading
steward and tree herder
Posts: 12697
Location: Isle of Skye, Scotland. Nearly 70 inches rain a year
6613
6
transportation dog forest garden foraging trees books food preservation woodworking wood heat rocket stoves ungarbage
  • Likes 6
  • Mark post as helpful
  • send pies
    Number of slices to send:
    Optional 'thank-you' note:
  • Quote
  • Report post to moderator

Carla Burke wrote: Then, I have a suggestion that goes back to the reason I asked about the spindle point and the bowl. This is how one turns a 'drop' spindle into a 'supported' spindle, which in my opinion is far easier for a beginner to learn, especially helpful in learning how to draw out the fibers, because you can simply stop, without worrying about breaking the yarn, or the spindle.


I hadn't heard of supported spindles - Flora posted a useful video here on how it works - I may have a go with that next time - I have difficulty joining the next piece of wool in - especially once the spindle bundle gets a bit heavier. My wool is rather hairy generally so ends up very fine yarn somehow.
 
Carla Burke
Rusticator
Posts: 9605
Location: Missouri Ozarks
5240
7
personal care gear foraging hunting rabbit chicken cooking food preservation fiber arts medical herbs homestead
  • Likes 11
  • Mark post as helpful
  • send pies
    Number of slices to send:
    Optional 'thank-you' note:
  • Quote
  • Report post to moderator
From what I can see in your new photos, it doesn't *look* like there's much (if any) felting, largely because it seems you're able to pull the fibers apart, fairly easily. So, I would set aside the spindle, for now, and start with cleaning the vm out of what you haven't tried to spin, yet. That will give you time to watch videos and learn more. Another thing I think would be helpful, would be to look for a local fiber arts guild. They're easy to find, just by looking up 'fiber arts guild in _____', filling in the blank with your town or county. There will usually be a contact person, and you can ask them if their guild has any folks who spin. Fiber arts folks are typically thrilled to share their knowledge and skills, and you may also find conventions that have classes. There are several conventions within a day's drive of me, one is only an hour away, every July. That one charges a $40 registration fee for the whole weekend, and the majority of the classes/ workshops run $25 - $50, usually including a generous portion of supplies, and often include equipment that you get to keep. Hands-on help is so much better than videos...

Ok, so what you're using is a top-whorl drop spindle. Personally, I much prefer a bottom whorl, whether it's a drop or supported one, because I find them more stable, in the spin - far less wobble - so they're easier to learn on. I made my first one with a piece of pencil-sized dowel, sharpened in a pencil sharpener, with a little round molding disk from a hardware store, for the whorl. You could also use (as r. Ranson seminars) an apple. Or a blob of clay or modeling clay, or an old cd - or you can spend big chunks of cash. It's all up to you.

I'm going to give you a few links, here.  

Support spindling for beginners - and she's human and makes mistakes, too:


Jillian Eve, aka Evie has an entire channel devoted to processing, spinning, knitting, etc. Here's a fun one from her, as she teaches someone else on a drop spindle:


And Jillian Eve's own channel. She scours, rather than using the suint method, and I think in this one, she's using a drop spindle. But, if you peruse her channel, you can find something in just about everything - including spindle choices, distaffs (which *can* help, even with a spindle)


  • Likes 10
  • Mark post as helpful
  • send pies
    Number of slices to send:
    Optional 'thank-you' note:
  • Quote
  • Report post to moderator
Attached are pictures of a wool picker that I designed and built back in 2015. Actually, I built three and had plans to sell them until my life threw a wobbler-LOL.

Perhaps a few Permies buddies might want to make s ma similar one for themselves.

I have an iPhone, and it saves videos as .mov - if any can play .mov’s and want to see the videos of the picker in action, I guess I’ll need your email address. Or if a kind Permies soul would convert them so they could be posted.

The wood is hemlock: next cheapest to pine but stronger.

The nails are not stainless-I used what I had on hand.

The yellow strips on the underside of the head or carriage piece are from a bit of plastic sign material purchased at a sign shop.

The idea of making my own wool picker was one of those “necessity is the mother of invention” things.

A shrewd fellow sold me several bags if wool? Putting the good wool on top of each bag, and the impossibly snarled wool below. (Grrrr!)

I am accustomed to living within a small budget, so the thing to do was to dedign and make my own darned picker. I was NOT going to bury that wool in the garden, although the plants probably would have liked that idea!

The prototype picker was made with free wood that a kind neighbor pulled put from under his house (where he stored all of his extra lumber.)

I then made two more out of store-bought lumber (hemlock for strength and budget friendly).

The thing is that regular nails rust so thus has to be kept in a dry location.

My “Super Picker” as I called it, is roughly around 2-1/2 to 3 feet long.

One can get the idea from the two videos, then work up the dimensions from there.

I’m still recouping from successful cancer treatments which had to nearly got rid of me to get rid of the cancer…talk about tossing the baby out with the bathwater almost -LOL.

I only mention this to explain why my 2 pickers (I gave one to a friend) are in storage.

However if anyone wants specifics, I think one of the pickers might possibly be unearthed.

Being quite thrifty (think: a wee bit tight), aI have been scavenging free fiber for decades.

A few observations and take it fir what it is worth: an efficient soap is not necessarily good for scouring animal fibre.

Original, plain Dawn is a winner in the “cheap” category.

If wool is older than it was said to be, the lanolin will become horrifically sticky. That is not good. Bury it around your plants and search fir other wool to use for spinning.

I used to teach folks the basics of drop spindles and the first class having each person make their own with a slender dowel and 3 old CD disks-LOL.

Sure,  like a Schacht spindle better, but a homemade one is a good start fir messing about with a drop spindle.

Another thought is to not expose wool or other mammal fibers to boiling hot water. I have found that temperature extremes are hard on the fibers. And unless you WANT to felt wool, avoid extreme changes in water temperature.

If the wool has a problem which suggests very hot water or strong soap, then it is s gonber and unresurrectable. As cheap as I am, I do not say that lightly. But years of stubborn, sad experience have taught me what can be and what should not be scoured, picked, spun and knitted or woven. Some giber us too damaged, making the process a misery and the end product a crying shame and an utter waste of time.
IMG_0470.jpeg
Picket locks closed and dtsys yogether-even when upside down-with a cotter pin in either side
IMG_0475.jpeg
Ready to slide the carriage back and forth to pick
IMG_0482.jpeg
Picked wool ready to be combed or carded
 
Posts: 400
154
4
  • Likes 14
  • Mark post as helpful
  • send pies
    Number of slices to send:
    Optional 'thank-you' note:
  • Quote
  • Report post to moderator
First off, kudos for learning a new skill, and in the most difficult possible way! Don’t give up. Might make you feel better to know that custom mills (where you pay them to turn your will into yarn) will refuse wool with too much vegetable matter. It is hard to deal with.
I learned to spin at about 7. Self taught, as my mother is a knitter but not a spinner.- neighbor cut a circle out of an old countertop, stuck a dowel through the center, sharpened one end, and put a metal hook through the other. He also was not a spinner… but I used it by resting the pointer end on the floor, which actually was easier for learning. My mother got me a nice batch of precarded wool. The yarn was terrible. So was the next batch she got me. It probably took 2-4 lbs before I got decent looking yarn. So really, don’t get discouraged.
A few possibilities to make it easier: first, look up willowing wool. I think there is a good thread and video on this site. It is a way to get rid of some of the vegetable matter and prepare the wool for carding without expensive equipment. You will still have to handpick.
Second, take advantage of the youtube videos others recommended for carding. It won’t magically make your yarn good, but a nice fluffy even roll will certainly help.
Third, for joining the next piece of wool: don’t wait until you have a little tuft. When the previous roll is maybe 3/4 gone - but with a good palmful left - lay the next one on and start feeding iff both. Much easier this way. Take it slow, and don’t give up!
 
Posts: 162
56
  • Likes 10
  • Mark post as helpful
  • send pies
    Number of slices to send:
    Optional 'thank-you' note:
  • Quote
  • Report post to moderator

Hal Schibel wrote:
In the end, I don't think that I actually got the water hot enough to properly clean the wool and the reason I think this is because the wool was still super sticky, but I didn't realize that until I started trying to spin it.


Really valuable journey, learning how wool works 😊

So many have given great suggestions.

My only question is, the “stickiness” you’re describing.
Lanolin isn’t really sticky. It’s more oily, and if a little remains in the wool, it only makes the wool feel better to work with over the long term. It’s lubricating for ones fingers..

Where stickiness sometimes shows up is in an individual sheep’s wool (it’s not by breed) when they have something which is known in layman’s terms as “scurf”.

Scurf is a fungal type skin condition and it usually affects one or two or a small number of animals in a flock - not usually the whole flock.

It’s not something that can be washed out.

And it’s sometimes difficult to tell before washing if it’s even there. Sometimes it shows up as a yellow color. But there are benign reasons for yellow coloring too, so that’s not a reliable indicator.

So for knitting, spinning, weaving. making clothing and so forth, wool with “scurf” in it, isn’t useable.

The wool can still be used for composting, insulation, etc though.

So I’m not sure if that is what you’re dealing with, but knowing this info is good anyway, on your wool experiences…

Here is a brief video I found on Scurf:

https://m.youtube.com/watch?v=d3pR9X5Vsj4


Hal Schibel
pollinator
Posts: 327
Location: Fairfield, Idaho, USA
106
hugelkultur purity monies dog duck books chicken cooking food preservation fiber arts medical herbs
  • Likes 10
  • Mark post as helpful
  • send pies
    Number of slices to send:
    Optional 'thank-you' note:
  • Quote
  • Report post to moderator
Wow, thanks for all the tips everyone! I finally decided to buy some wool to learn to spin before I really tackle this lot and I will have to look more into wool picking and willowing.

The thing about scurf would make a lot of sense with what I am dealing with (if lanolin is not sticky then that should teach me not to ask ChatGPT what is wrong with my wool, lol). If you look at the whole lot of it maybe a fifth of the wool is really yellow. I'm not sure if scurf is something that shows up in large amounts or if it's just bands of it on some locks of the wool but it's hard to pry apart and when I start trying to card it my hands and the carders just get really sticky. The wool is also feeling pretty stiff so I'm starting to think that this is just not a good batch of wool. I might just try and turn it all into stuffing and see if there are any small pieces that might be salvaged for spinning. It sounds like stickiness is not normal.

I'm not sure if you can see all the yellow clumps in this picture:
 
tuffy monteverdi
Posts: 162
56
  • Likes 8
  • Mark post as helpful
  • send pies
    Number of slices to send:
    Optional 'thank-you' note:
  • Quote
  • Report post to moderator
It can occur in large parts of wool fleeces, if bad, but occurs starting at the skin side and grows out from there.
Can certainly be patchy too.

Yes it really sounds like, from your stickiness descriptions, that this is a scurf-filled fleece. One can’t always see it, just looking at the fleece. It’s sometimes not as yellow as it can be. And again there are other reasons for yellowing that aren’t scurf-related.

Not worth your time as it will NOT come out. It won’t even felt that well 😬
You could compost it in veggie beds are under tree mulches?
 
Right! We're on it! Let's get to work tiny ad!
permaculture thorns, A Book About Trying to Build Permaculture Community - draft eBook
https://permies.com/wiki/123760/permaculture-thorns-Book-Build-Permaculture
reply
    Bookmark Topic Watch Topic
  • New Topic