• Post Reply Bookmark Topic Watch Topic
  • New Topic
permaculture forums growies critters building homesteading energy monies kitchen purity ungarbage community wilderness fiber arts art permaculture artisans regional education skip experiences global resources cider press projects digital market permies.com pie forums private forums all forums
this forum made possible by our volunteer staff, including ...
master stewards:
  • Nancy Reading
  • Carla Burke
  • r ranson
  • John F Dean
  • paul wheaton
  • Pearl Sutton
stewards:
  • Jay Angler
  • Liv Smith
  • Leigh Tate
master gardeners:
  • Christopher Weeks
  • Timothy Norton
gardeners:
  • thomas rubino
  • Jeremy VanGelder
  • Maieshe Ljin

PEP Badge: Oddball

BB oddball - sand badge
 
pollinator
Posts: 1495
855
2
trees bike woodworking
  • Likes 3
  • Mark post as helpful
  • send pies
    Number of slices to send:
    Optional 'thank-you' note:
  • Quote
  • Report post to moderator
Approved submission
Bike hand grip / bar-ends upgrade

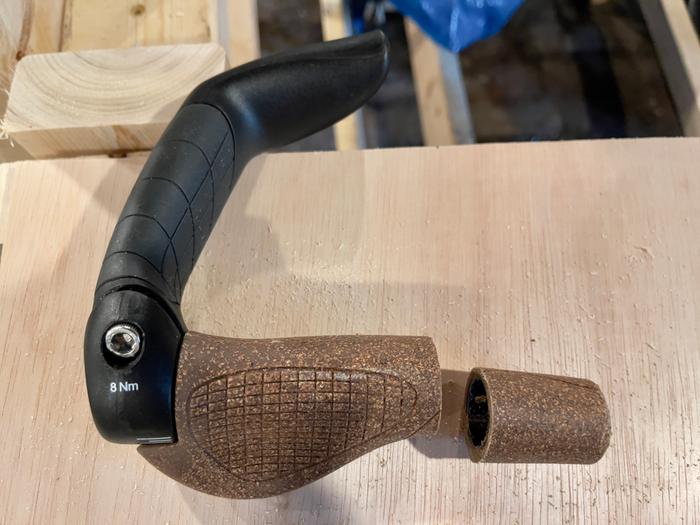
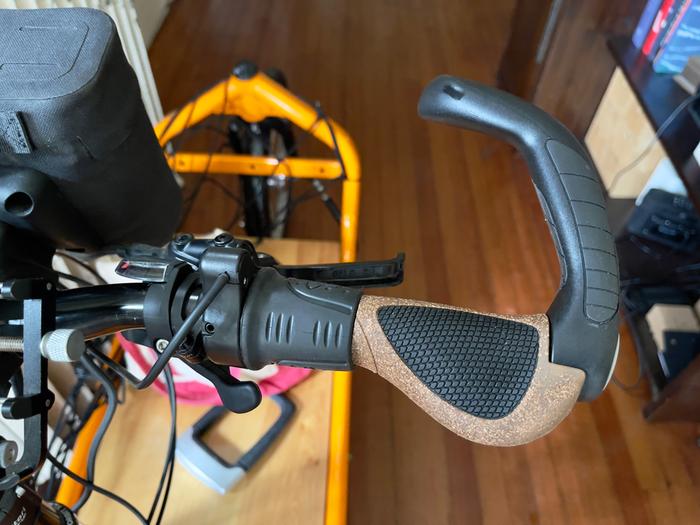
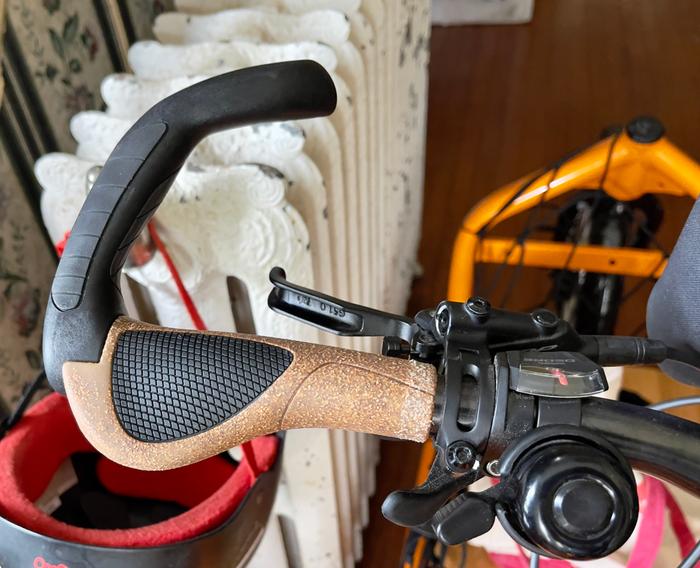
Since moving to Hudson Valley, NY, I’ve been riding much further than I had in NJ. This is a joy but my default hand grips are far from ideal. They have excellent grip but are very hard and there’s no ability to change positions. I’ve found that I’ve been getting tingles in my hands. In addition, when I added the front hub and throttle, the right grip stuck out a couple of inches and there was no way to modify it. It was ok but I was never happy with it.

I’ve had my eyes on some Ergon grips since I bought the bike but as my frequent bike trips were typically fifteen minutes or less, I couldn’t really justify the upgrade.

I bought GP5 Biokork which are almost biodegradable with cork, seagrass and rubber made from vegetable oil.

Here’s the old grips:


Right grip sticks out due to adjacent throttle

After old grips are removed


Less bar to work with


Cut to fit the space available


“Dry fit” - all bar furniture loose for fitting. Removed old bike computer mount.


Right grip / bar-end fitted


Left grip / bar-end fitted

Just back from the shops. Big improvement. There is significantly more surface area so less pressure. The bar-ends give me at least two other grip options which is nice on long rides.

Total time with test fitting, test ride and a few tweaks was about half an hour. I’m sure a pro would have taken half the time . . . Can I get a quarter point?
Staff note (gir bot) :

Someone approved this submission.
Note: I certify and award 1/2 point.

 
pollinator
Posts: 259
Location: New Zealand
307
chicken food preservation fiber arts woodworking homestead
  • Likes 5
  • Mark post as helpful
  • send pies
    Number of slices to send:
    Optional 'thank-you' note:
  • Quote
  • Report post to moderator
Approved submission
This badge bit is for completely replacing the sleeves on a woolen shirt.

My favorite woolen shirt was in the mending box for some time with a 'too hard basket' repair needed. I had previously added elbow patches and replaced the cuffs, but the fabric of the main sleeve was disintegrating. After 9 years of wear, this is to be expected, but it was still sad, and I wasn't sure exactly what to do.

In the end I decided that major surgery was required. I carefully unpicked the existing sleeves, removed the added elbow patches and cuff, and used this as a pattern for cutting a new pair of sleeves. I then put in new plackets, sewed on the old elbow patches and cuffs, and re-inserted the sleeves. It fits just as well as before, and is a bit less breezy around the cuff/elbow. The new material is black 100% wool I purchased new from a local fabric shop and checked with a burn test (burning hair smell, fine ash--no beads).

This repair is a step beyond what was commonly done historically (more usually, replacing cuffs and collars is about it), and no longer considered cost/time effective. However, as the main body of the shirt is still in good condition, and I fancy the pattern, I decided to go forward with fixing it. It took me about 4 hours to do the sewing part, and an additional hour to unpick everything. About 1 hour of the sewing time was taken up with me fiddling around with the placket because I couldn't remember how I'd done it before, and the geometry is a bit confusing.
mb-bb-oddball-013-sleeves-1.jpg
Fabric of sleeves thinned out and disintegrating; cutting new sleeve
mb-bb-oddball-013-sleeves-2.jpg
Making the placket; finished repaired shirt
Staff note (gir bot) :

Someone approved this submission.
Note: I certify and award 3 points.

 
Edward Norton
pollinator
Posts: 1495
855
2
trees bike woodworking
  • Likes 1
  • Mark post as helpful
  • send pies
    Number of slices to send:
    Optional 'thank-you' note:
  • Quote
  • Report post to moderator
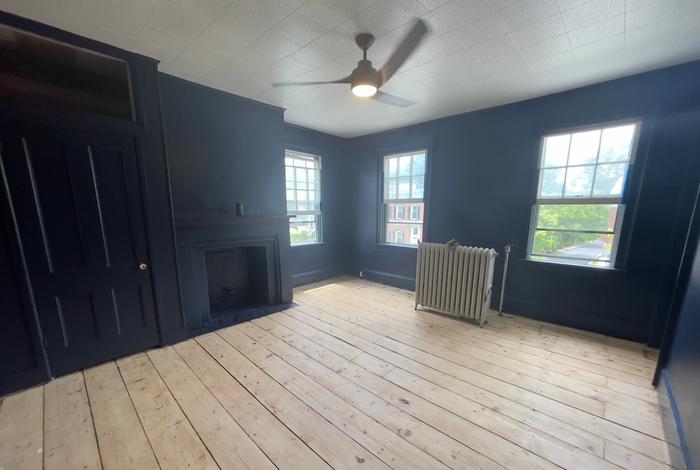
Redecorating 5 rooms
2000sqft of wall, 700+ sqft of ceiling, many doors and a heck of lot of trim

I learnt doing the sand and straw nest badges that Otis likes a house to be a home. When we bought this house it had been empty for three years. The previous owner kept a lot of cats and was a heavy cigar smoker. Even with my experience completing the Nest badges I wasn’t going to remove all the filth left behind and besides, wall colour is something deeply personal and we really wanted to make this house a home.

We started with Pinterest, collecting ideas. Having lived in the tropics with very bright sunshine and white walls we decide to go for deep dark rich warming colours that wouldn’t have looked out of place in the 1850’s when our house was built. I also wanted my bedroom to be dark as I’m super sensitive to light. Dark blue sits opposite golden yellow on the colour wheel, and we had white pine boards to restore, so a perfect and harmonious match.

We both like simplicity, so rather than pick a different shade for trim, we decided to paint all the trim the same colour as the walls. It also makes painting a little easier as you don’t have to tape up edges even though we used a trim paint for the woodwork and an eggshell paint for the walls. I did wanted to strip and restore the doors but they have many layers of lead paint, so after much research and discussions on Permies I decided to paint them and document my findings for the next owner of the house. I may revisit the doors when I have a safe space or process to remove the paint. This was also part of another Permies discussion.

My son picked a lighter blue for his room. We went for a sumptuous green blue for my wife’s office. It’s very calming and looks absolutely gorgeous.

I had another conversation on Permies about least evil paint. I have to be practical and match reality and my wife’s wishes with permaculture aspirations. I wasn’t going to be making my own paints this time, so I went for the best manufactured options that kept everyone happy. We settled on Clare an online only paint company. Here’s their blurb about the paint.The big brand paint companies have eco / green lines but still produce a huge volume of toxic ick. All of Clares paints meet the same standard. And they had colours we loved.

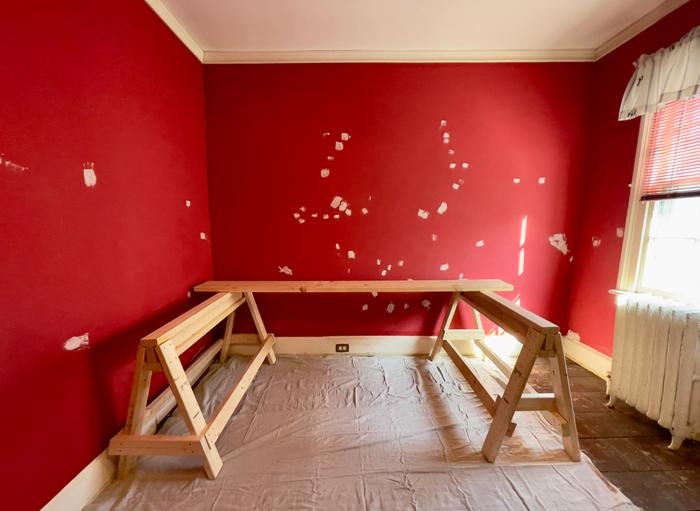
Next up, I needed a way to easily paint high ceilings, so I built a couple of saw horses I could use with a plank.

I did my best to keep my environmental impact as small as practical using wood, metal and natural materials rather than plastic for paint trays, poles, rollers etc. I upcycled textiles when I need to protect floors from drips. I also bought really good quality and expensive brushes which I meticulously cleaned after ever session and are still in excellent condition.

RoomDimensionsCeilingPerimeterHeightWall Area
Master Bedroom15’04” x 14’08”2256010’600
Red Room15’04” x 11’00”1695310’530
Home Office10’08” x 11’01”1184410’440
Bedroom One11’07” x 8’07”99404’ - 7’240
Bedroom Two11’08” x 8’07”100414’ - 7’240


For each of the five rooms I worked through the following steps:
- Assess and put together a task list
- Remove nails, hooks, door furniture etc.
- Remove cable TV cables and sockets
- Remove phone cables and sockets
- Strip wallpaper (study only)
- Remove cast iron radiators
- Clean trim, doors, window woodwork etc.
- Use feather duster to remove all cobwebs
- Make good, filling and sanding all dinks, holes, cracks
- Remove doors - left on until after sanding to minimise dust spreading into the rest of the house
- Turn off electrics, remove anything attached to the ceiling - lights, ceiling fans and smoke alarms.
- Run extension cables from another room and set up lots of clip on lights for maximum visibility
- Typically two coats on the ceiling
- Reinstall or replace lights, fans, smoke alarms, turn on electrics
- Tape ceiling edge
- Two coats on ceiling trim in the rooms that coving
- Two coats on the walls
- Two coats on remaining trim and doors
- Replace light switch and electric socket plates (this is still ongoing to due to budgetary constraints and is a being documented for a different oddball).
- Install door stops
- Reinstall door furniture
- Reinstall doors
- Reinstall radiators
- Make good on any ‘holidays’. When I was a kid helping my dad decorate, he used to call any areas where the paintwork need touching up ‘holidays’. I don’t know if it’s just my dad or it’s a generic if not slightly esoteric description.
- I was also restoring all the floors so the baseboard trim was painted and installed last.

I worked on these five rooms over an eight week period as I had to juggle lots of other priorities including:
- Relocating
- Making good at the rental property
- Restoring the floors
- Plumbing emergencies
- Feeding the family!

Paint also takes time to dry and I wanted to make sure the previous coat was bone dry first before continuing with the next task.

Here are some pictures that show the process I went through.


Research stored on pintrest


Study Before


Master bedroom before


Red room before


Bedroom 1 before


Bedroom 2 before


Saw horses


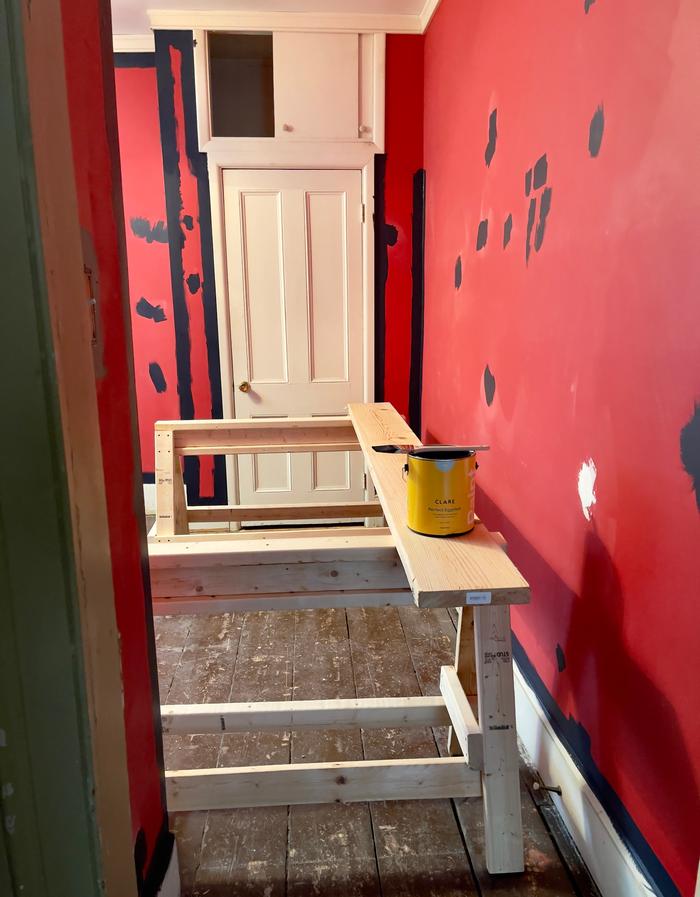
Making good in the red room


More making good in the red room


Making good in the master bedroom


Painting coving / ceiling trim


Radiator removal


Ceiling fixtures removed


No more red in the red room


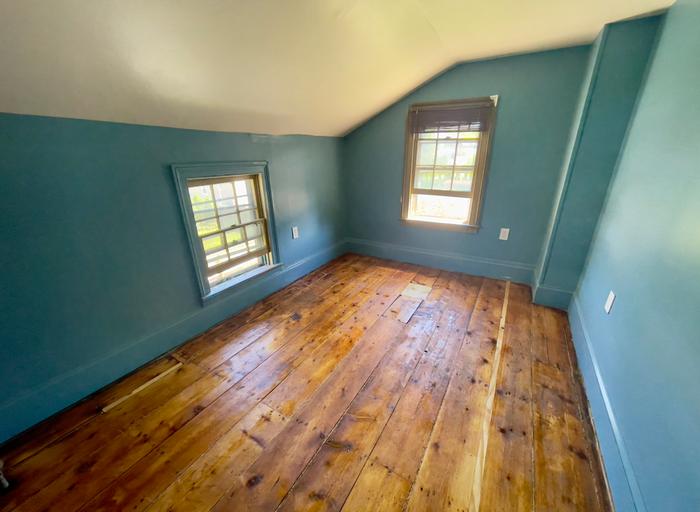
Bedroom one painted


Bedroom two painted


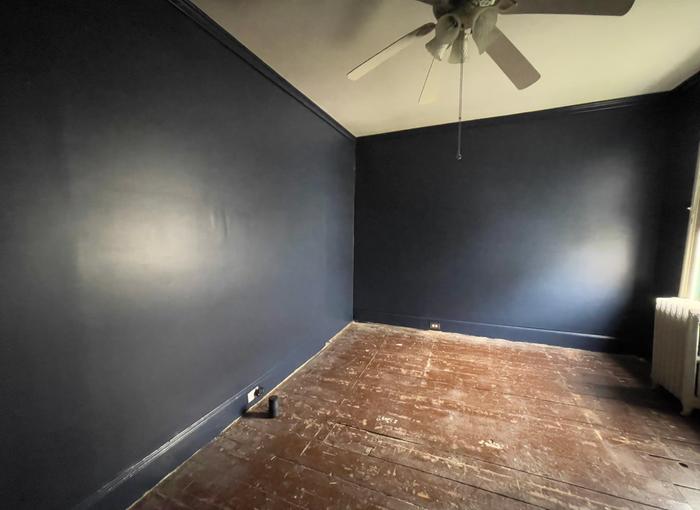
Study painted


Master bedroom painted


Staff note (Edward Norton) :

I converted this to a regular post as it consists of many parts that have their own badge bits

 
gardener
Posts: 325
Location: NW Washington - Zone 8b (15 to 20 °F / -9.4 to -6.7 °C)
270
2
cattle goat foraging trees earthworks cooking building solar sheep wood heat
  • Likes 5
  • Mark post as helpful
  • send pies
    Number of slices to send:
    Optional 'thank-you' note:
  • Quote
  • Report post to moderator
Approved submission
A neighbor was clearing blackberries to make room for doing some planting and discovered a street sweeper brush that must have washed in during a past flood.  I rescued it from going to the dump and repurposed it for a scratching post for my cattle.  The inner diameter was about 10 inches, so I cut a 12 ft length off the top of a Western Red Cedar log that was too small to run through the sawmill, but just the right size to fit inside the sweeper brush. I peeled the bark off the cedar post, and trimmed the knots flush.  I used the tractor auger and then hand post hole digger to dig a 4 ft deep hole.  I buried the fatter end of the post, tamping around the post while backfilling.  Then I used the tractor to lift and set the sweeper brush down over the top of the post.  Within minutes, the cows were already using it for the intended purpose!
20220814_181124.jpg
Sweeper brush in blackberry patch.
20220903_114157.jpg
Log peeled and trimmed, starting to dig hole.
20220903_114538.jpg
Cleaning up the hole with post hole digger.
20220903_121358.jpg
Post installed, buried 4 ft deep.
20220903_121455.jpg
Setting the sweeper on the post.
20220903_121714.jpg
Awe, now that feels good!
Staff note (gir bot) :

Someone approved this submission.
Note: Certified for 2 oddball points!

 
pollinator
Posts: 95
111
  • Likes 2
  • Mark post as helpful
  • send pies
    Number of slices to send:
    Optional 'thank-you' note:
  • Quote
  • Report post to moderator
Approved submission
Oddball BB submission: Hay Shed

While this might better be described as small, rigid fence, I have been calling it the hay shed.  The animals at the pond at Wheaton Labs, rather than grazing, prefer to pillage the new bales of hay that Samantha brings up.  They got so committed to this behavior that they basically couldn't be let out to graze at all, and instead had to be fed exclusively by throwing hay in to them.  I built the 'shed' to protect the hay so that they could diversify their diet and daily routine again.

The material is all dead pine and fir.  I tried to select the least-rotted stuff around so that it lasts a little while, but I didn't feel this project warranted cutting down live trees in the area.  The base was reasonably well flattened out by hand, and shallow post holes were dug.  The posts were seated in the holes, surrounded by and sitting on rocks to keep them isolated from ground moisture and extend the life a bit.

The gate was made out of two chainsaw-ripped dead trees and two cross braces for strength and to flatten it out into plane (since it was built on uneven ground, it had a bit of potato-chip shape to it initially).  I happened to find a tree with a perfect integral handle built in!  I had to fell it very slowly and carefully though because it wanted to fall right on that branch and snap it.  I had three hinges in my car from a door I had replaced years ago... just a happy coincidence.  The two little cat ears above the gate (added shear resistance for the gate frame) came from one log that had almost exactly a 90deg twist over its length when split, lucky again!  I tried to leave branches that could be used in-plane as cross braces and other cool-looking features; I still haven't yet figured out what to do with the trident-post.

Here's a video of the initial gate fit:

 https://www.youtube.com/shorts/_uxZtphg0LM  

The whole thing got wrapped in remesh and then got a second wrap, offset up by half a square, to keep the animals from sticking their tiny heads through to get that sweet, sweet hay.

Between felling, cutting, and carrying the lumber, gathering rocks and doing the earthworks part, roundwood assembly, hinge/gate mounting, and wrapping with wire, the whole thing probably took me about two and a half complete days.

Here's a video of the animals, they still go for the fallen hay around it, but they don't test the shed:

https://youtu.be/Jib3yEiTyV0

Edit: fixed the first youtube link
FinishedShed.jpg
Complete shed with a second, offset wrap of remesh
EarlySide.jpg
One of the sides before the barn raising
LevelGround.jpg
Ground leveled out and sides put up
GroundDetail.jpg
Stones for 6" underneath each post, and surrounding the posts (these are what was available in the area)
Stones for 6
JointDetail1.jpg
Some joints showing the flats
JointDetail2.jpg
Another joint with flats, and a flat on the outside to get better screw depth
FrameNoGate.jpg
Complete frame before attaching the gate
OneWireWrap.jpg
Gate attached and one wrap of remesh. The sheep have tiny heads and can stick them through, so a second wrap, offset by half, was required
Staff note (gir bot) :

Paul Fookes approved this submission.
Note: I certify this oddball thread complete for 11 points.  Great job David

 
Edward Norton
pollinator
Posts: 1495
855
2
trees bike woodworking
  • Mark post as helpful
  • send pies
    Number of slices to send:
    Optional 'thank-you' note:
  • Quote
  • Report post to moderator
Approved submission
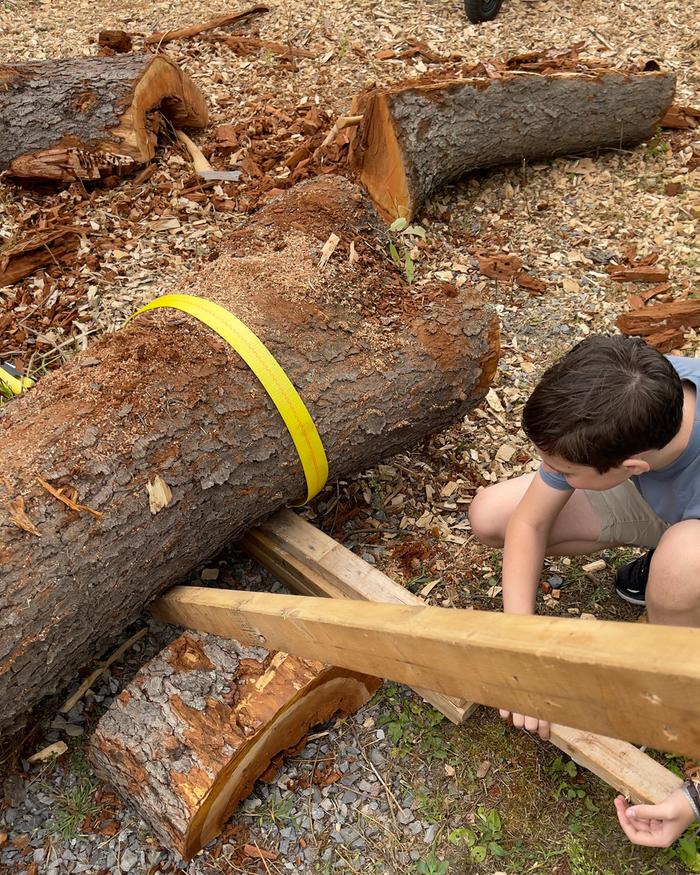
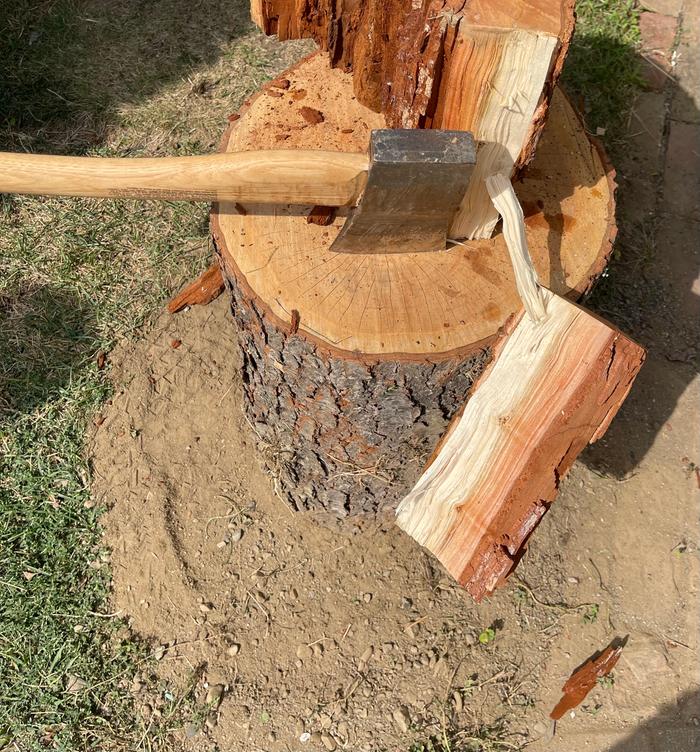
Chopping block for firewood

I recently signed up to Chip Drop and selected all options - logs and chip. My first log drop was two 13ft cherry logs. I started a conversation on permies “Human Chainsaw” about what to do with them and whether I should invest in a katanaboy, which I did.

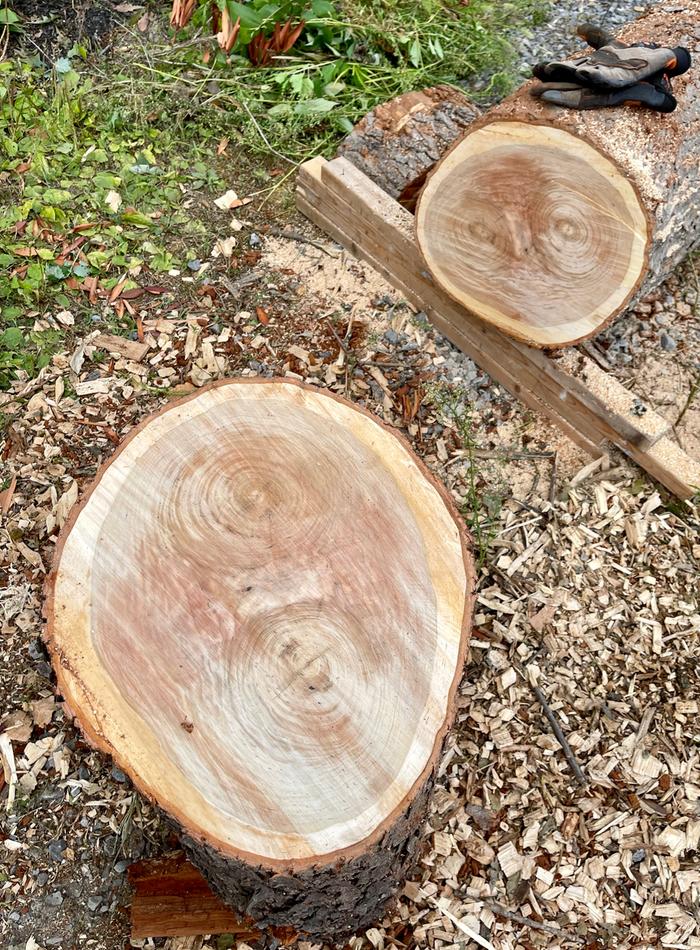
The smaller log split into two equally sized trunks at one end.  I decided to use this section as a chopping block for firewood as my short term solution was very short term.


And besides, there’s something deeply satisfying about having a proper chopping block and the hard cherry wood is ideal.

With the help of my youngest, we levered the end up and used some bits of 2 x 4 so the end was cantilevered. This avoids the saw pinching.


Then I set to with my Silky Katanaboy.


I was very happy with the finished surface and then hauled it round to it’s final location on the other side of the house


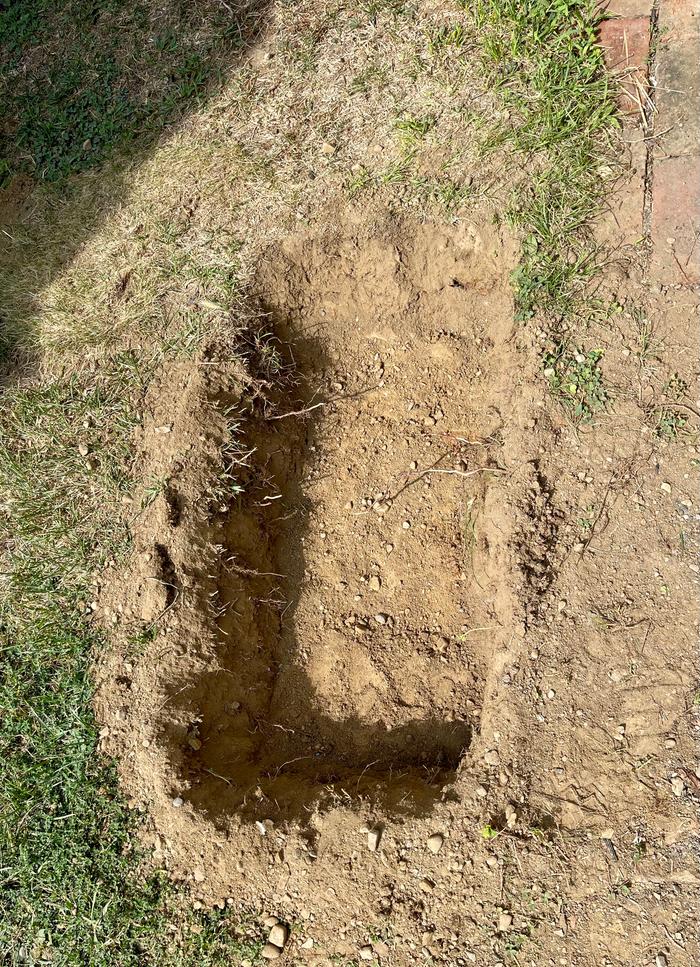
This is the location of the chopping block, near my future wood drying rack.


I dug out 8 inches of dirt using a trenching tool from Lee Valley I bought after another conversation I started on Permies - How would you dig a trench in this - tool advice please. Awesome tool . . .


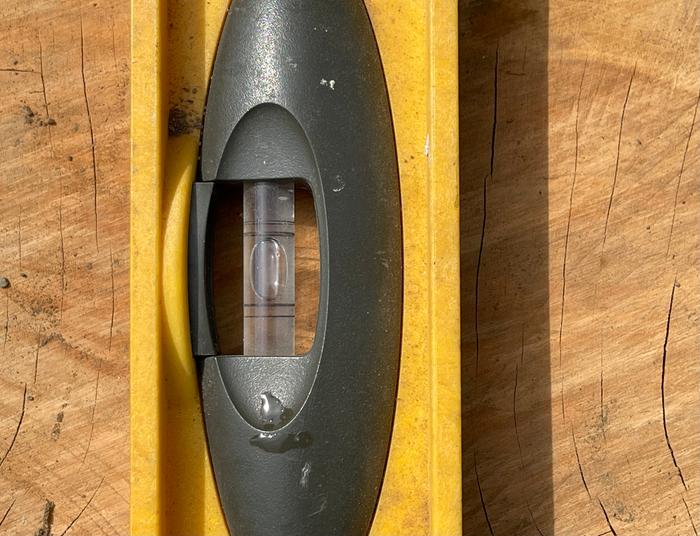
I backfilled and levelled - evidence of hard-work in the form of drops of sweat!


First piece of firewood successfully split


Now I need to build a sturdy firewood rack

Staff note (gir bot) :

M Broussard approved this submission.
Note: Certified for 1/2 oddball point.

 
Edward Norton
pollinator
Posts: 1495
855
2
trees bike woodworking
  • Likes 3
  • Mark post as helpful
  • send pies
    Number of slices to send:
    Optional 'thank-you' note:
  • Quote
  • Report post to moderator
Approved submission
I was going to post this as a Fix an electrical appliance BB but the issue turned out to be mechanical rather than electrical.

I also considered whether this was Clean and oil a power tool BB. This is beyond the scope as it required troubleshooting and dismantling the tool, parts  that aren’t designed to be taken apart by the consumer. The manual didn’t include any useful troubleshooting information except  “Tool service must be performed only by qualified repair personnel. Service or maintenance performed by unqualified personnel could result in a risk of injury”. It also says “ To maintain product SAFETY and RELIABILITY, repairs, any other maintenance or adjustment should be performed by Makita Authorized or Factory Service Centers, always using Makita replacement parts.

During my floor renovation project my belt sander wouldn’t start one morning. I knew it wasn’t a circuit breaker because it was clicking and I could feel the motor juddering and trying to turn over.

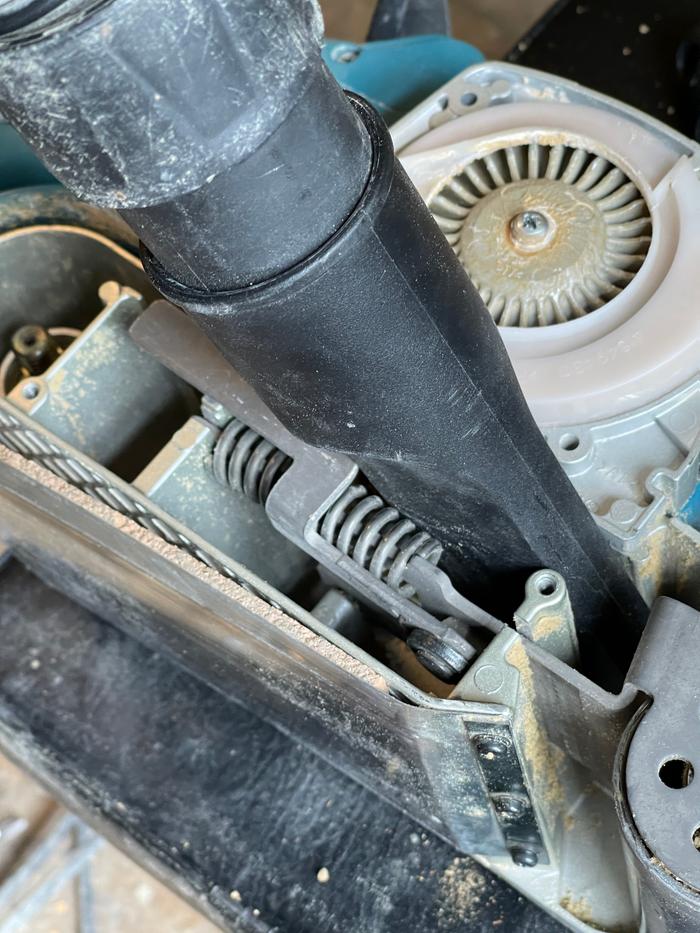
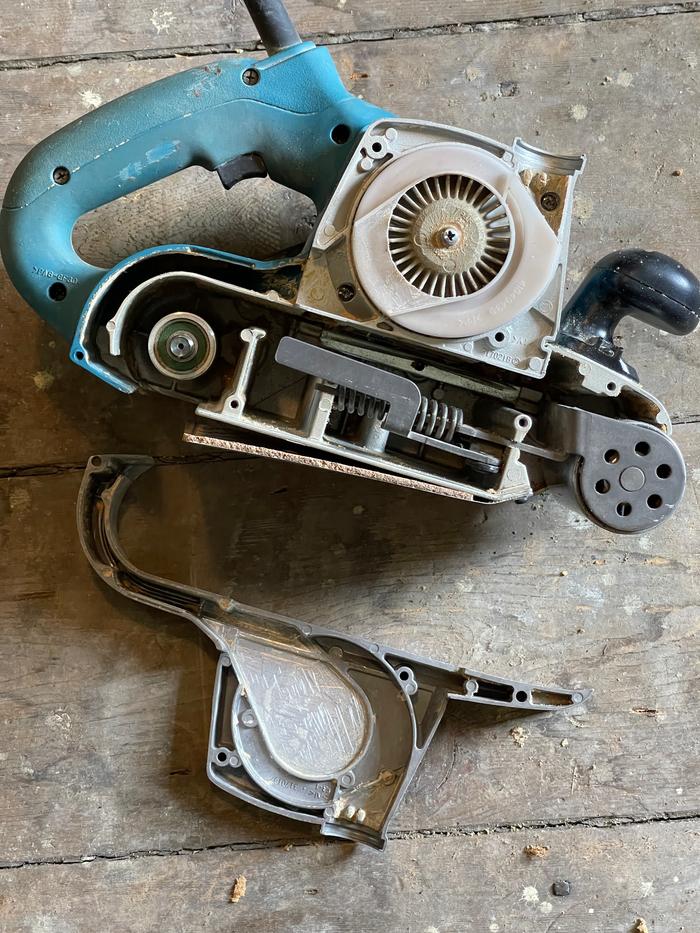
I started trouble shooting, removing the sandpaper belt looking for anything that could be jammed like a board nail. There wasn’t anything obvious so I took the case apart. The ducts leading from the belt to the fan motor were blocked. I had just finished sanding a room that had had many layers of paint. I had removed 99% but what remained and whatever had soaked into the surface of the boards had probably got hot and set overnight.

I used a long bladed screw driver and shop vac to clean all the ducts and the motor fan. Then I reassembled and carried on sanding two more rooms.


Inside of sander with blocker airways


After scraping / loosening the sawdust I used the vac to remove all the debris


Cleaned and ready for reassembly


Back in working order
Staff note (gir bot) :

Someone approved this submission.
Note: Certified for 1/2 oddball point.

 
gardener
Posts: 416
Location: 6a; BSk; Suburbia; 0.35 acres
177
5
kids forest garden foraging bike medical herbs rocket stoves
  • Likes 2
  • Mark post as helpful
  • send pies
    Number of slices to send:
    Optional 'thank-you' note:
  • Quote
  • Report post to moderator
Approved submission
I  mended a backpack strap. This doesn't count for quick darning since it's not technically a hole but I darned the strap many times over to ensure it wouldn't break for my 5yr old! I chose a smaller thread because a thicker thread wouldn't easily go through the synthetic fabric and so that I could match the thread size of the handle.
1_before.jpg
the handle ripped
the handle ripped
2_after.jpg
I had to make sure that it would be extra sturdy.
Staff note (gir bot) :

Someone approved this submission.
Note: Certified for 1/2 oddball point.

 
Edward Norton
pollinator
Posts: 1495
855
2
trees bike woodworking
  • Likes 2
  • Mark post as helpful
  • send pies
    Number of slices to send:
    Optional 'thank-you' note:
  • Quote
  • Report post to moderator
Approved submission
Temporary outdoor workshop

I really like working outside. It is my long term plan to build a workshop outside with large doors so it can be opened up when I’m working.

In the mean time, I need a temporary workshop to build my permanent workshop and this space will be used for many other things. It will keep my table dry, allow me to work outside when it’s raining and it’s positioned to provide a good amount of protection from the sun.

This conversation started with selecting a tarp and the good people at Permies lead me to Tentsmiths
See What do Americans call canvas and where can I buy it? for the full discussion.

I used biodegradable sisal cord, a 12 x 12 oilskin cotton tarp from Tentsmiths, some pegs from one of my tents, karabiners from my camping box, two 2 x 4’s and a couple of pieces of lumber salvaged from an old project and slate I found in a box in the basement when I moved in. I also needed so spikes so started another conversation on Permies. I ended up using 12 inch nails from Tractor Supply Co.
See 18 inch spikes

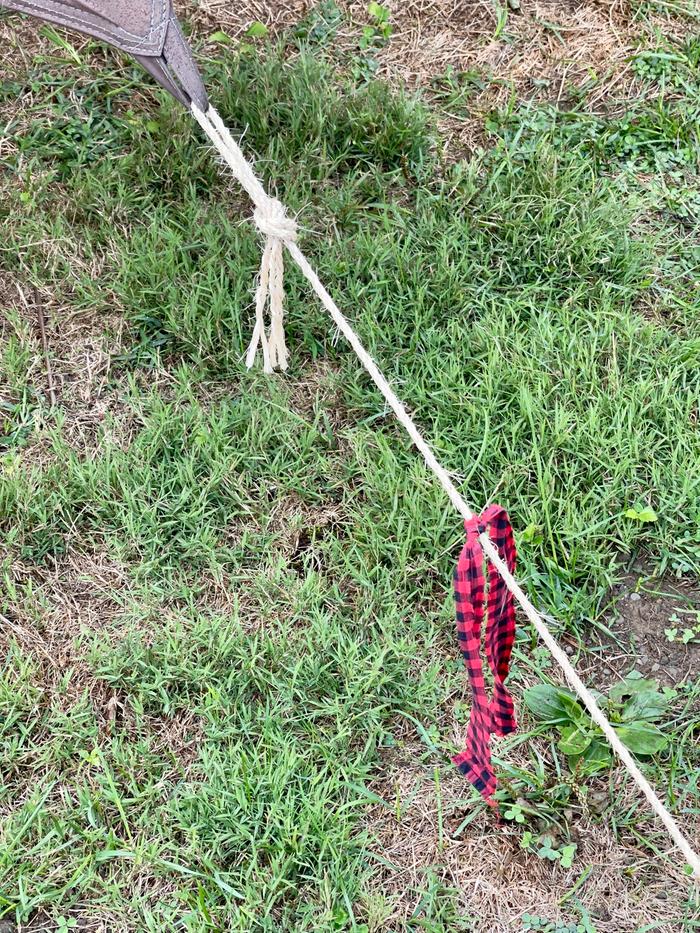
To avoid tripping on guy lines I used some fabric I harvested from an old shirt:
See My Badge Bit for harvesting textile materials


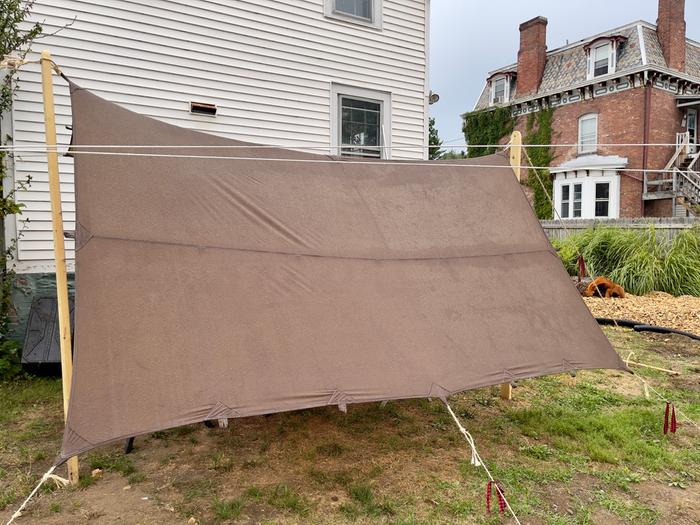
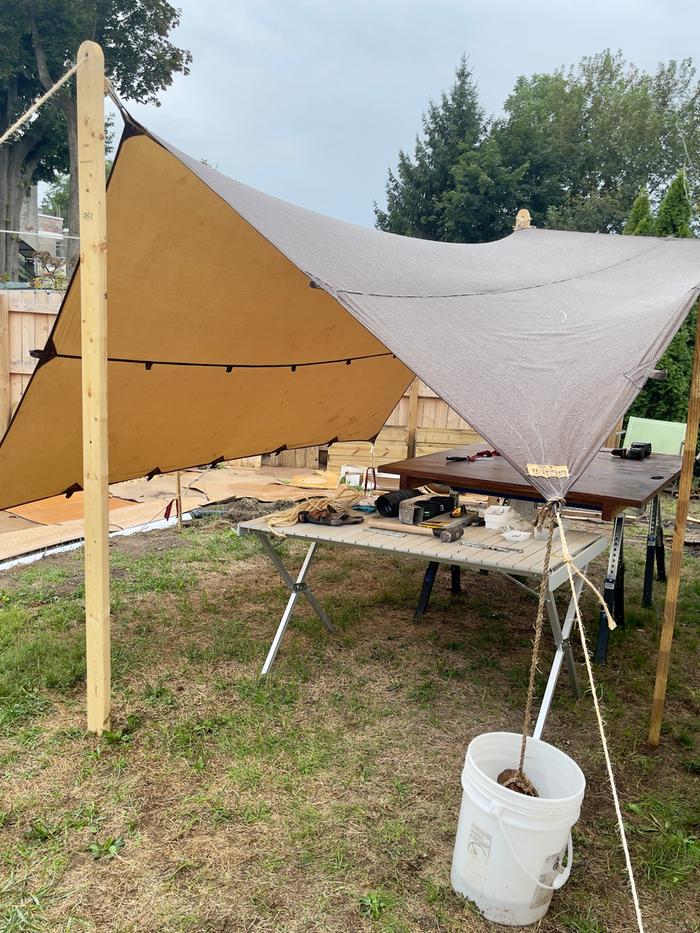
Here’s my finished shelter.


12 foot wide shelter facing South East


Shelter with easy access to work table


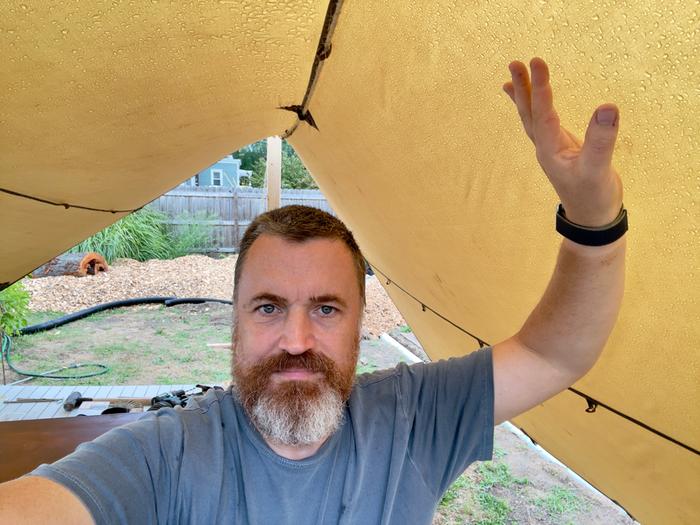
Plenty of height to work under (I’m not touching the cloth as that can lead to temporary leaks)


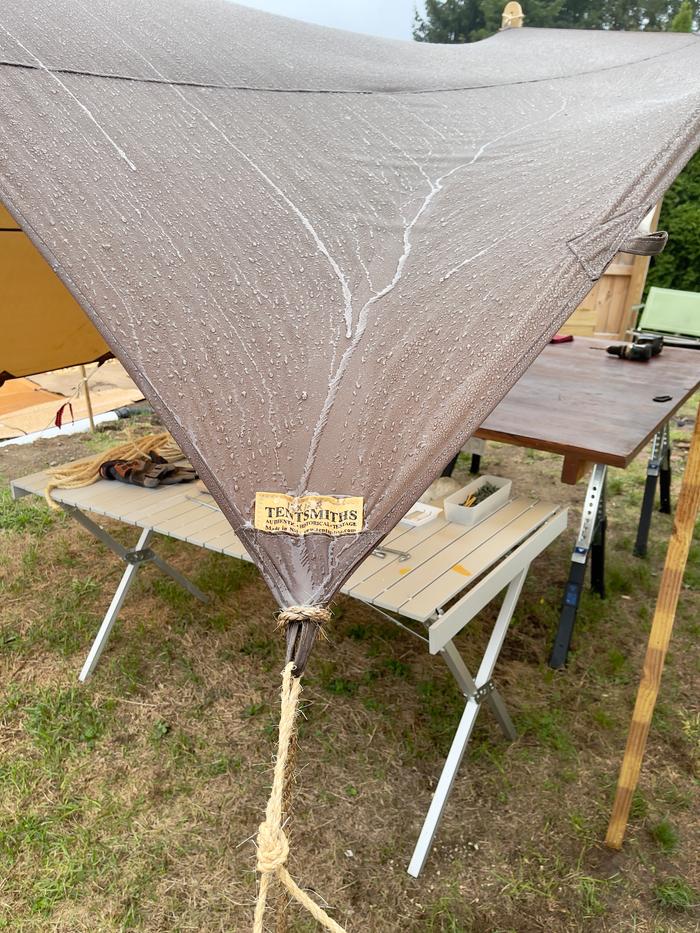
View from the other end with rain water harvesting feature


Half of the rain fall is collected in a bucket


Simple rain water collection using sisal rope, salvaged brick and bucket my neighbour put out for the bin men


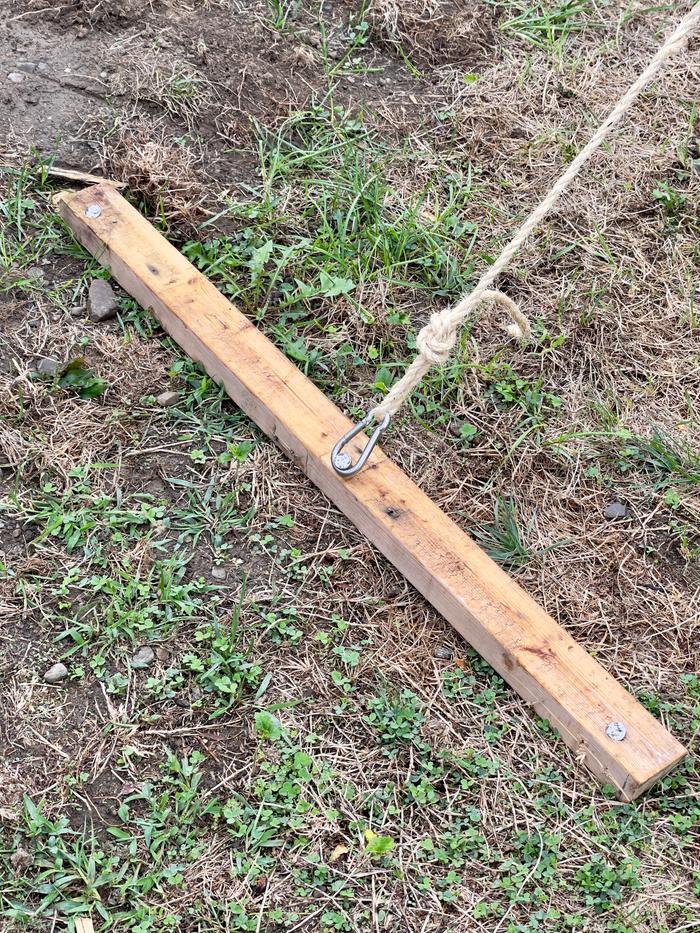
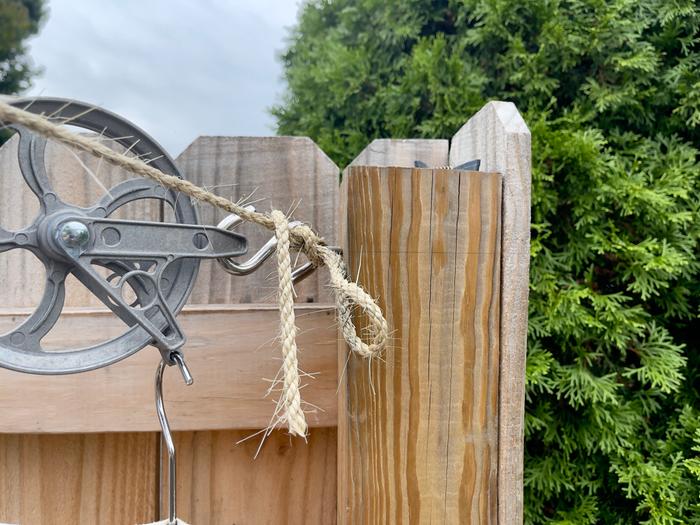
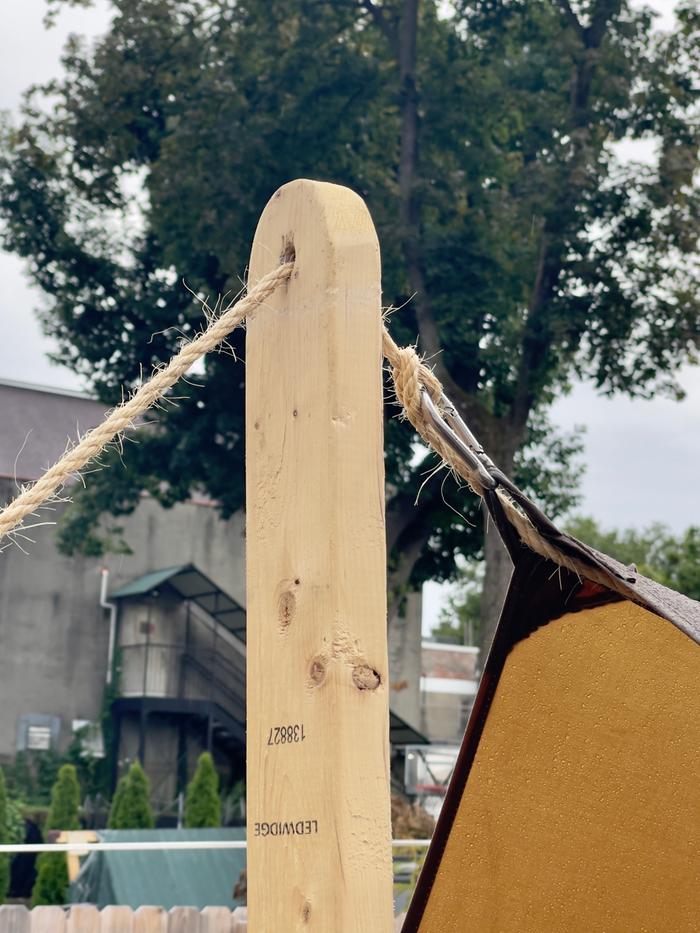
Ridge line anchored with salvaged lumber and 12 inch nails


Other end of the ridge line anchored to washing line metalwork all well above head height


2 by 4 “tent poles”


Cloth ties to help avoid tripping on guys


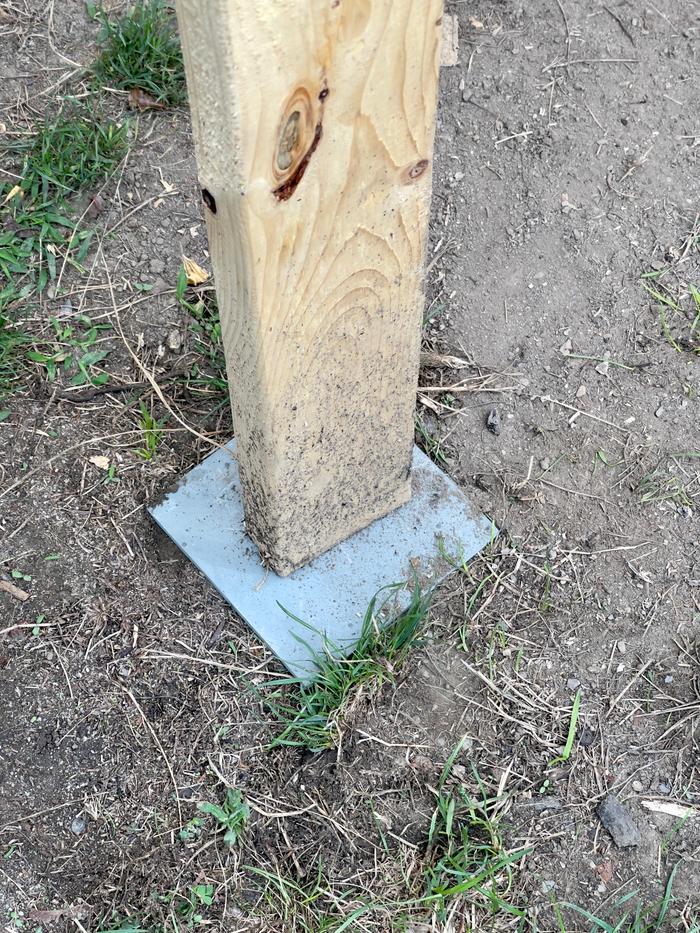
Late addition - slate to spread the load and slow down rot

This is temporary but needs to withstand a few months of autumnal weather. I used karabiners so I could quickly bring it in if we have exceptional strong winds or big snow forecast. I rounded the tops of the tent poles and placed them on thick pieces of slate to slow rot and stop them sinking into the ground.

When I’ve finished, the rope can be reused and ultimately composted. The tarp is part of my long term garden design as a large sail to protect new growth from 12 hours of sun until my trees are established.  Everything else will be repurposed.
Staff note (gir bot) :

Someone approved this submission.
Note: Certified for 3 oddball points

gift
 
The Humble Soapnut - A Guide to the Laundry Detergent that Grows on Trees ebook by Kathryn Ossing
will be released to subscribers in: soon!
reply
    Bookmark Topic Watch Topic
  • New Topic