

|

|
|
|
|

|

|

|

|

|


 7
7


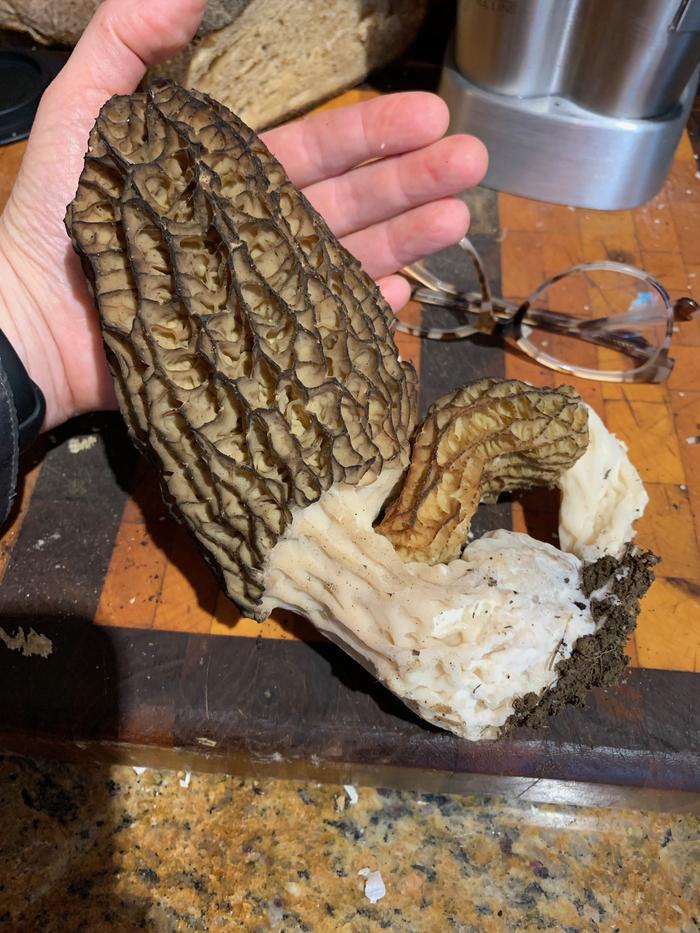
Ask me about food.
How Permies.com Works (lots of useful links)
6

Ask me about food.
How Permies.com Works (lots of useful links)
1
The wishbone never could replace the backbone.
2


Ask me about food.
How Permies.com Works (lots of useful links)
11


Ask me about food.
How Permies.com Works (lots of useful links)


The wishbone never could replace the backbone.
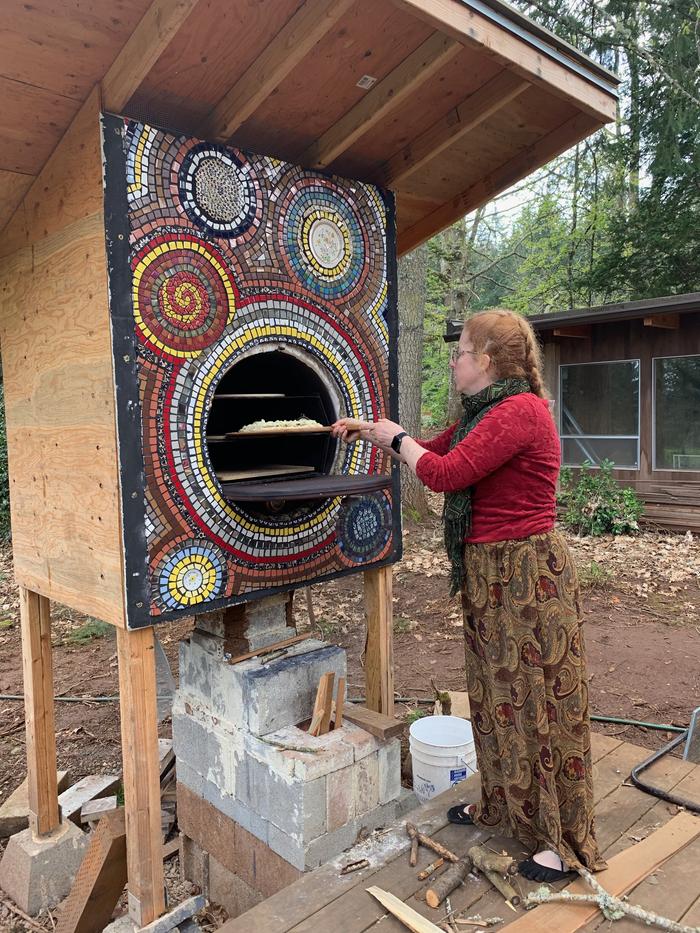
Julia Winter wrote:I got about this far done, and then the Kickstarter was over.
.
Middle Tennessee - zone 7a
1
Ask me about food.
How Permies.com Works (lots of useful links)
Julia Winter wrote:
The center of the lower right blue themed circle is also made from pieces of a fancy plate. I put a request on NextDoor for cracked/broken pottery and got a few really nice pieces.
Middle Tennessee - zone 7a
2
Regards,
Gagan
8


Ask me about food.
How Permies.com Works (lots of useful links)
3

Ask me about food.
How Permies.com Works (lots of useful links)
2

Ask me about food.
How Permies.com Works (lots of useful links)

Ask me about food.
How Permies.com Works (lots of useful links)
16

Ask me about food.
How Permies.com Works (lots of useful links)
 1
1
Ask me about food.
How Permies.com Works (lots of useful links)
1
Ask me about food.
How Permies.com Works (lots of useful links)
I converted the image to a JPG so we could see it!
Apparently, when I converted it, it cropped it. This one seems to be the full-size image:

Permaculture...picking the lock back to Eden since 1978.
Pics of my Forest Garden

|
Enjoy the full beauty of the english language. Embedded in this tiny ad:
Homesteading and Permaculture Bundle - More than 35 Things
https://permies.com/w/235626/Homesteading-Permaculture-Bundle
|


![[Download 5287FD66-99D7-4DC3-996E-FE7C5E4F1444.heic]](https://permies.com/templates/default/betaview/images/download-attachment.gif)


