|

|
|
|
|

|

|

|

|

|
 22
22


regards, Peter


 10
10
For all your Montana Masonry Heater parts (also known as) Rocket Mass heater parts.
Visit me at
dragontechrmh.com Once you go brick you will never go back!
7
Silence is Golden
For all your RMH needs:
dragontechrmh.com
7
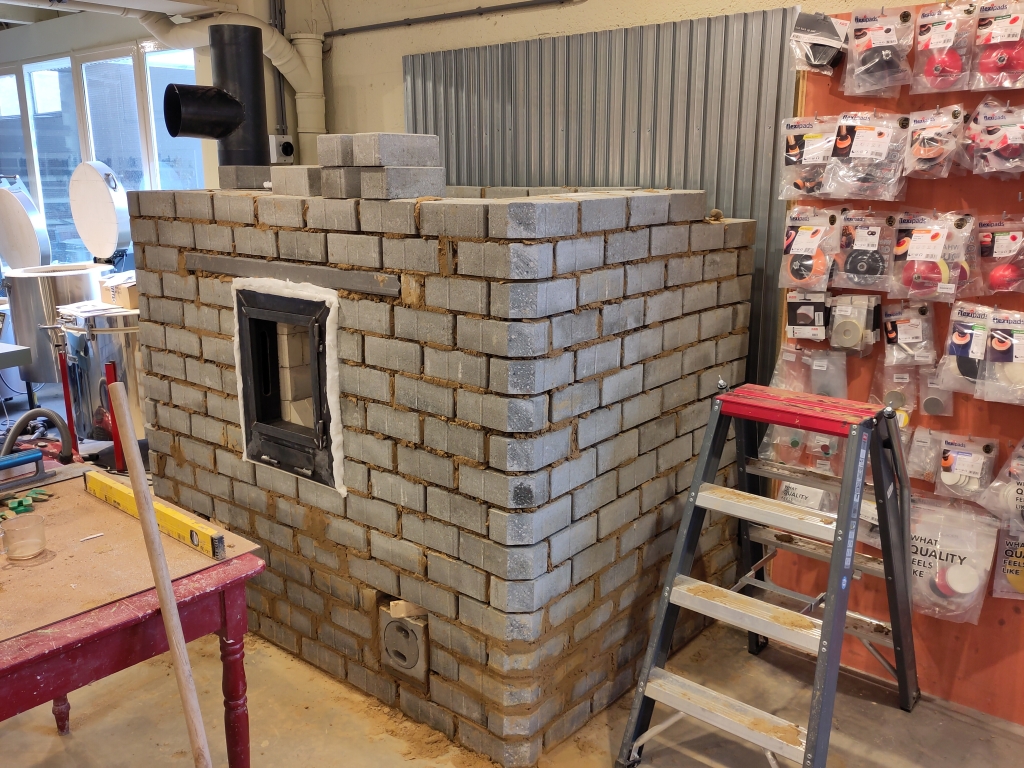
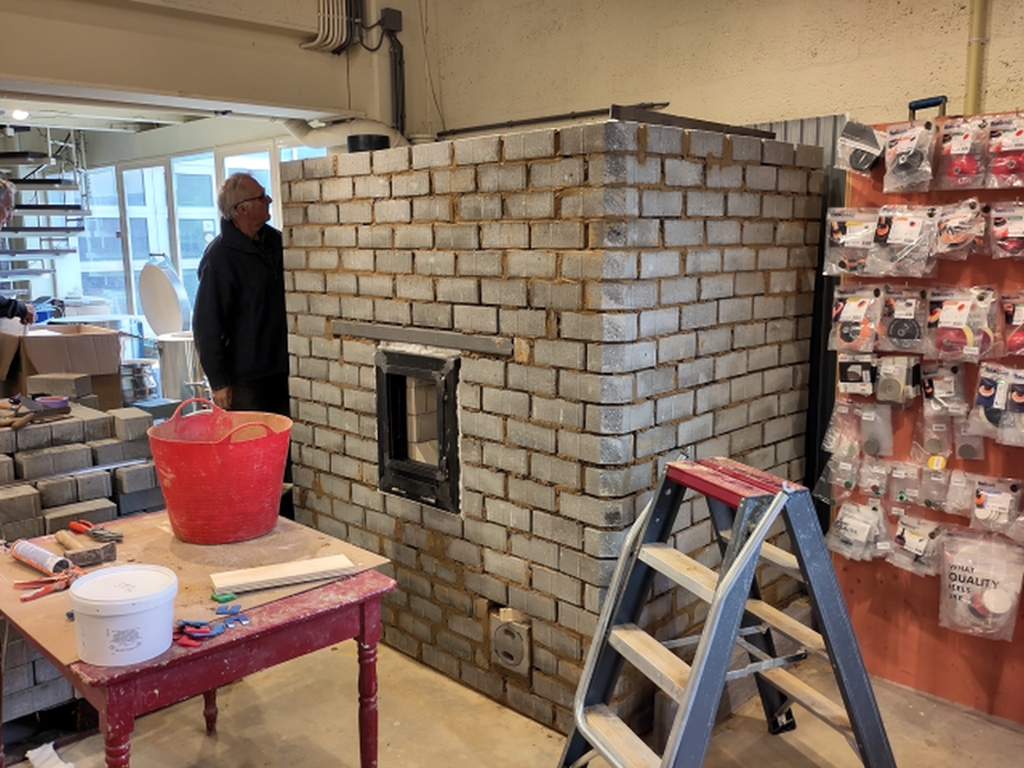
Gerry Parent wrote:Thanks Peter for posting another one of your builds as we watch it come to life.
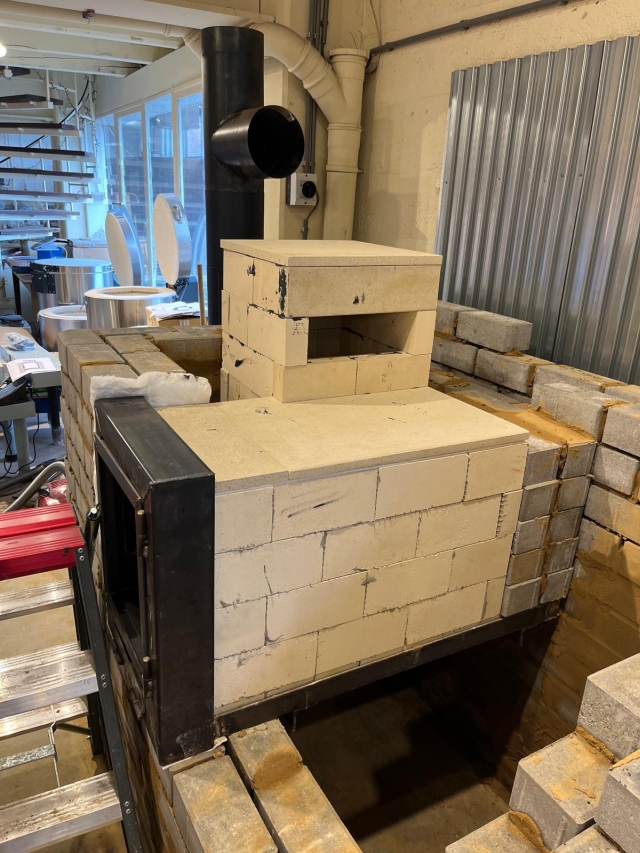
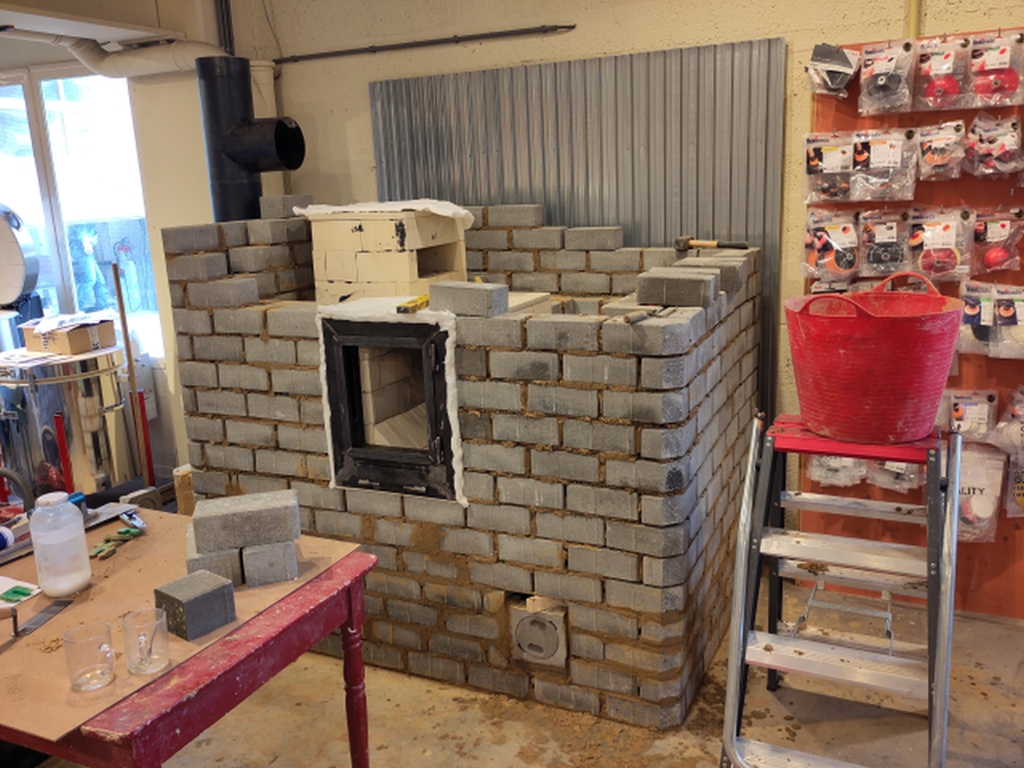
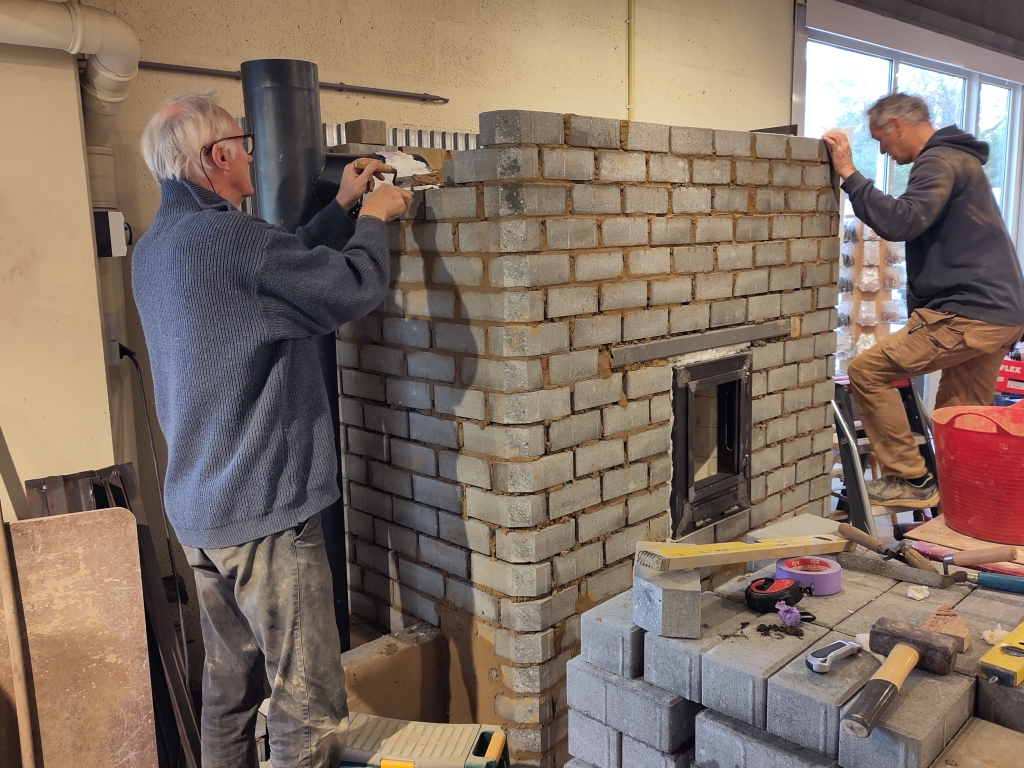
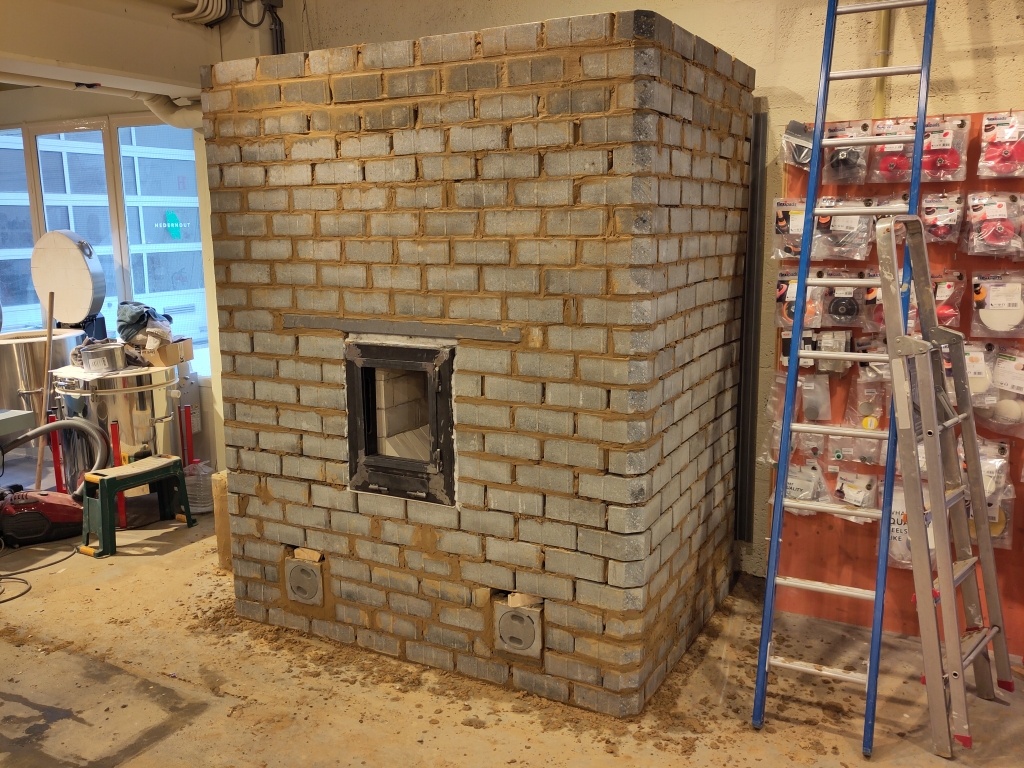
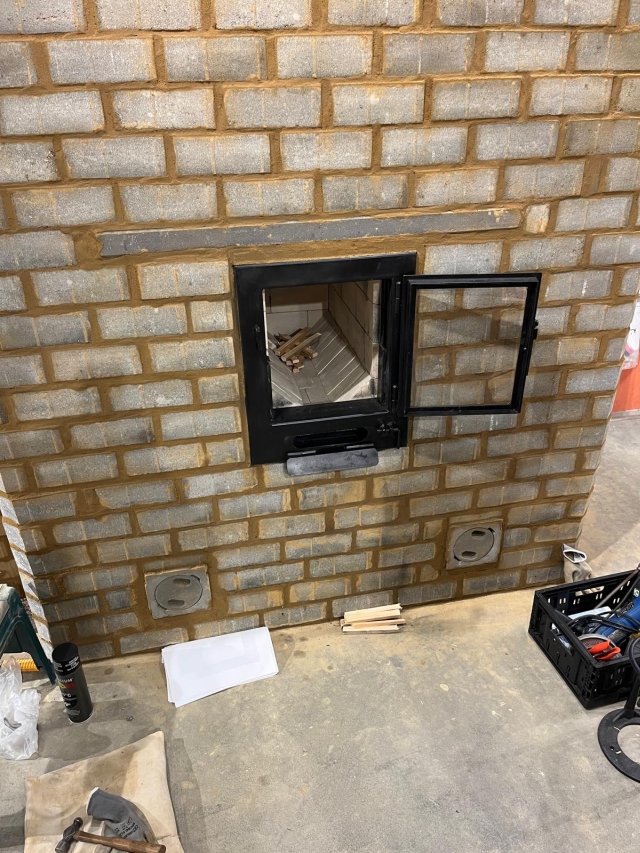
Several things in particular I like about this build are the high door and chamfered corner edges.
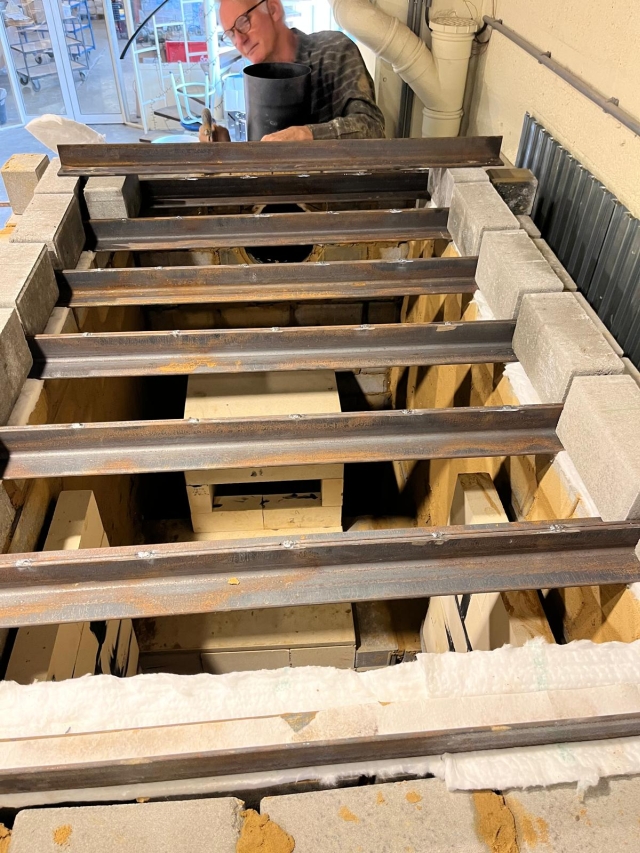
I'm assuming a steel plate was used to bridge the opening to the exhaust port?
Looking forward to seeing part 2 of the build.
regards, Peter


 8
8
Rocket surgeon and soil builder... healthy plants are all about the soil.
- My 6" Batch Rocket specs and materials list: https://permies.com/t/248275/Batch-Rocket-Double-Skin-Bell
- Batch Rocket detailed build thread with Q&A: https://permies.com/t/238503/Batch-Rocket-Build
8
6
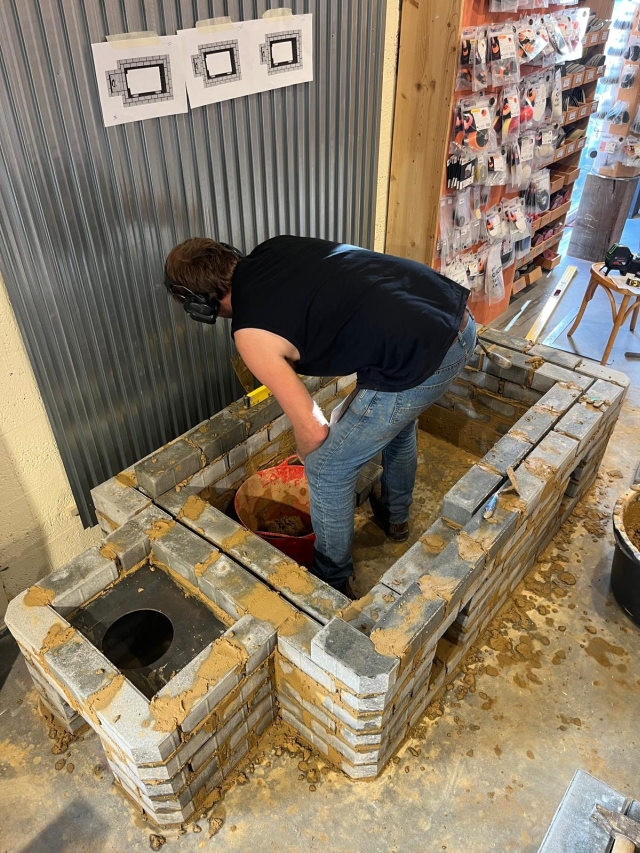
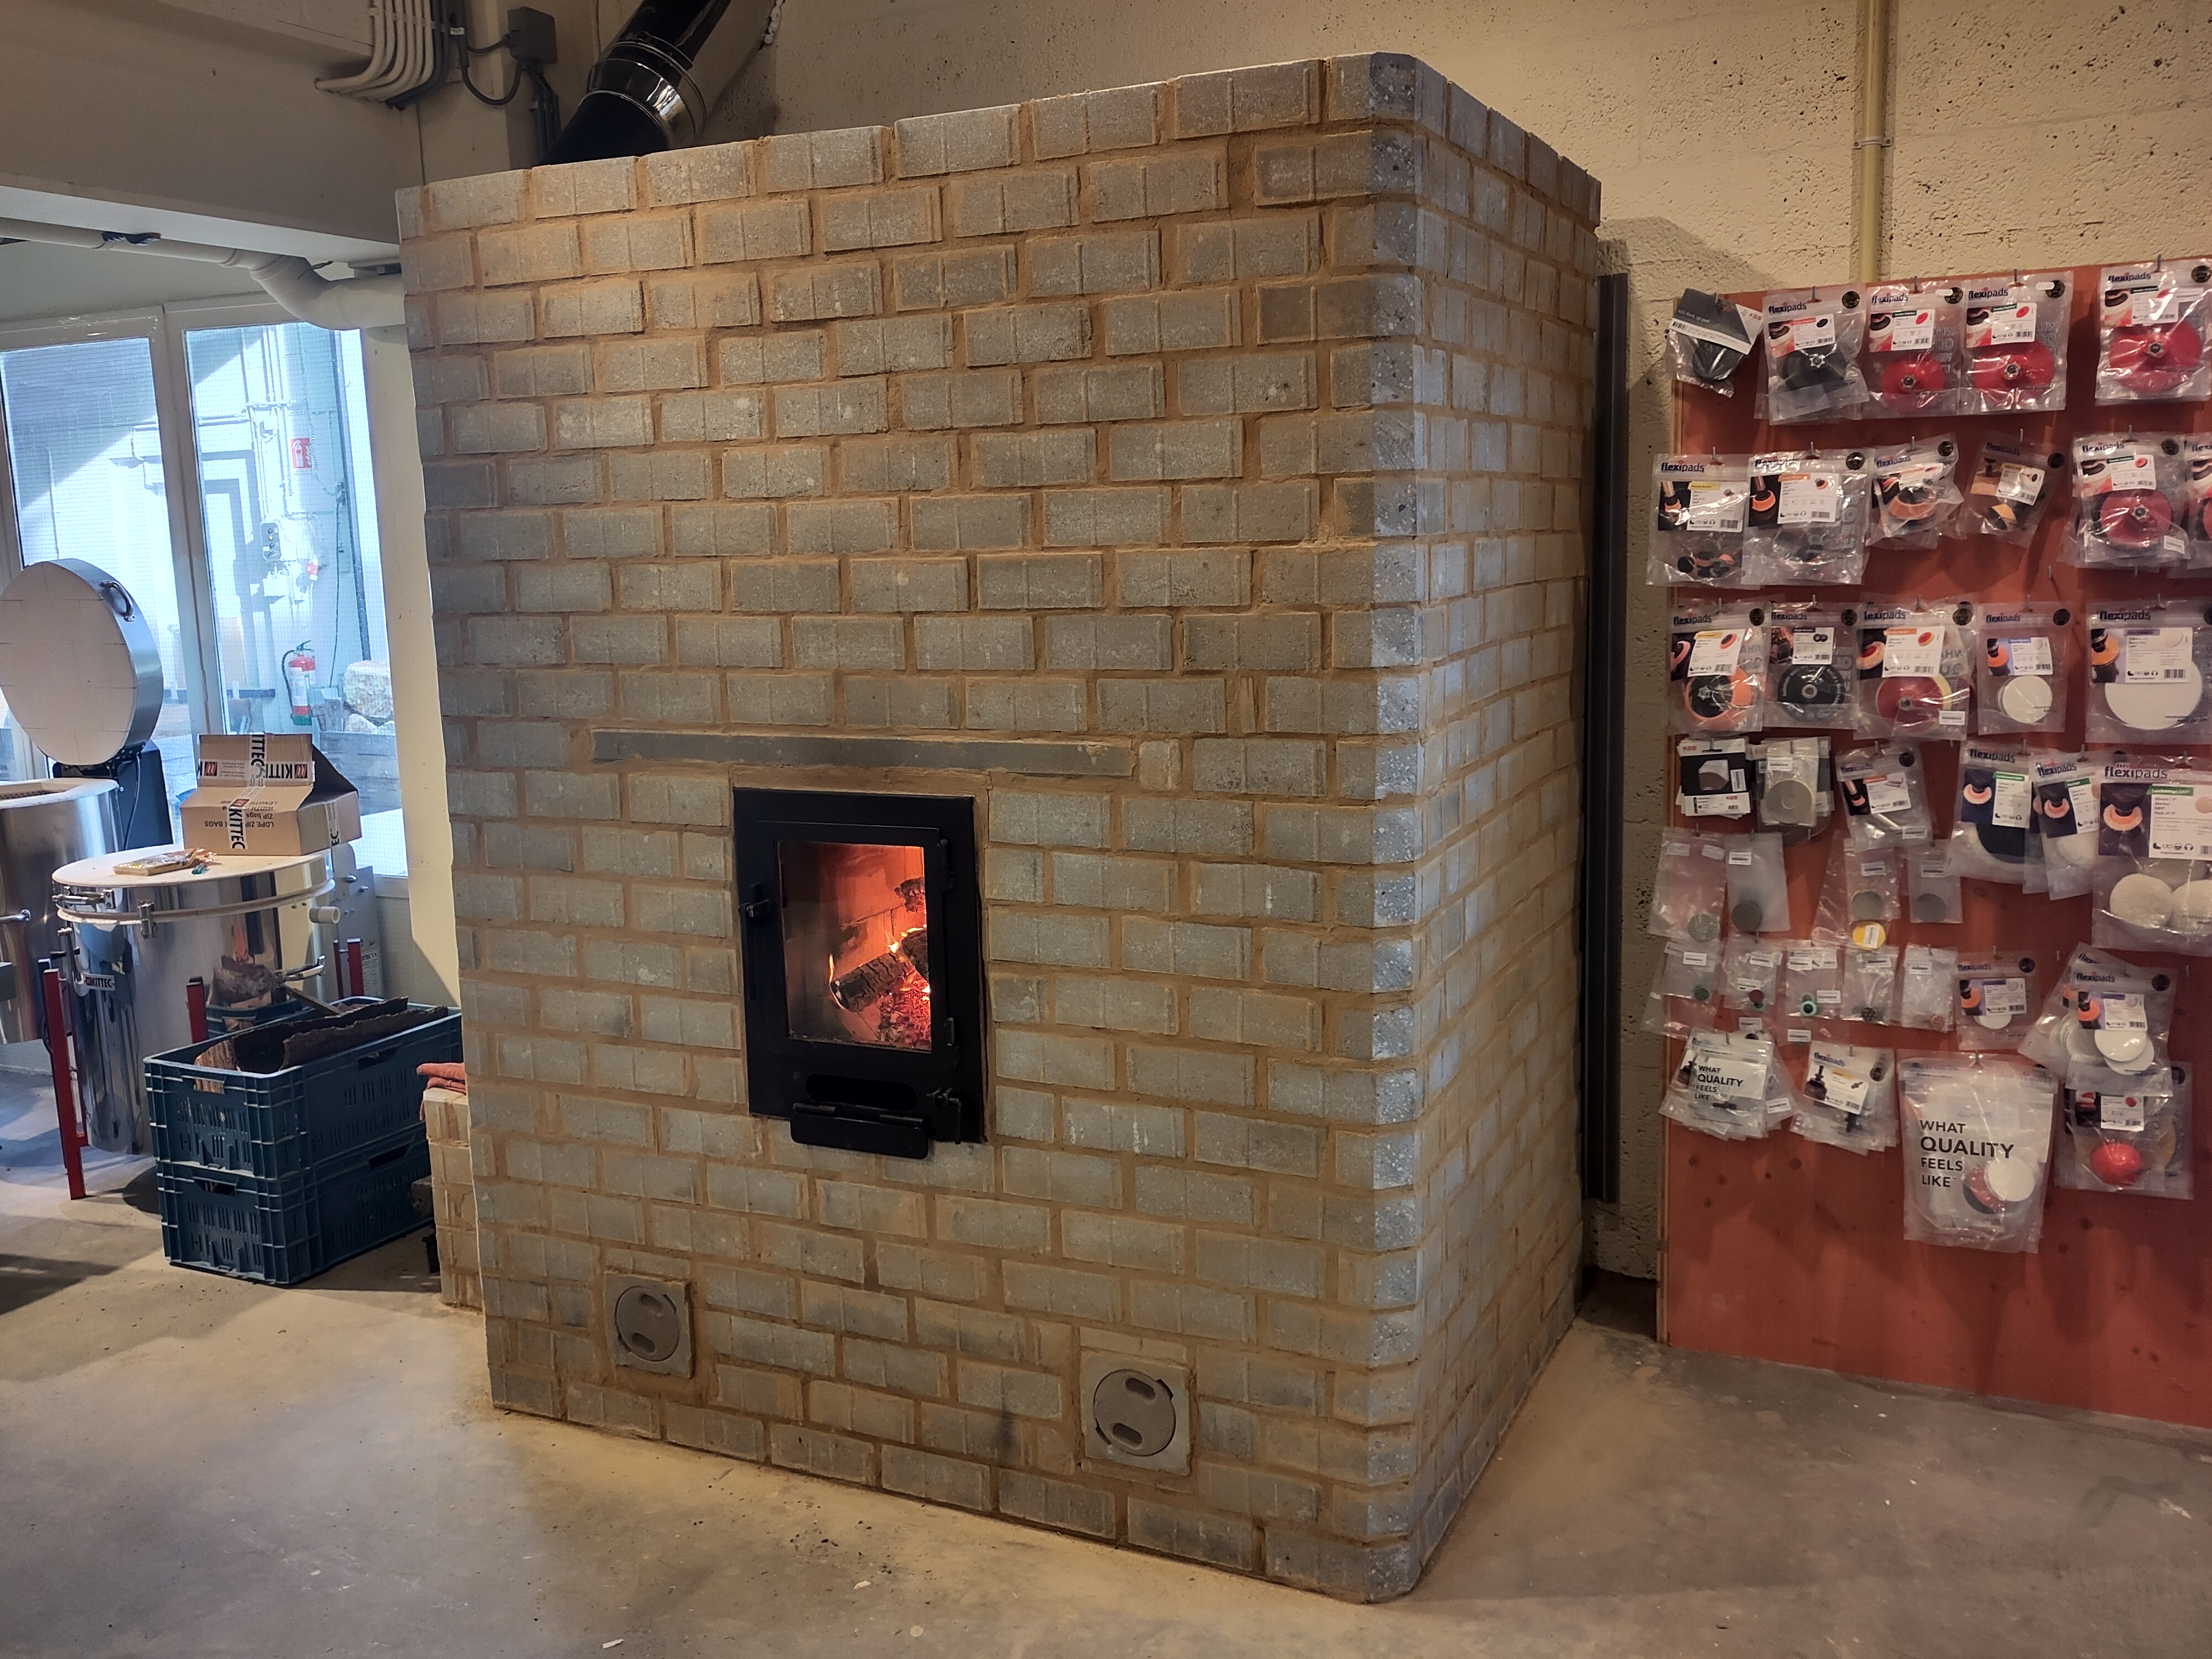
tony uljee wrote:the way i am reading it ,is the shop floor is 30 meters square ---not 30m2 ----so its 30 m x 30m equates to 900m2 which is 9690 sq ft
Rocket surgeon and soil builder... healthy plants are all about the soil.
- My 6" Batch Rocket specs and materials list: https://permies.com/t/248275/Batch-Rocket-Double-Skin-Bell
- Batch Rocket detailed build thread with Q&A: https://permies.com/t/238503/Batch-Rocket-Build


 6
6
Become extra-civilized!
11


regards, Peter
4
For all your Montana Masonry Heater parts (also known as) Rocket Mass heater parts.
Visit me at
dragontechrmh.com Once you go brick you will never go back!
5
7
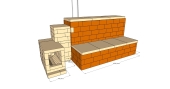
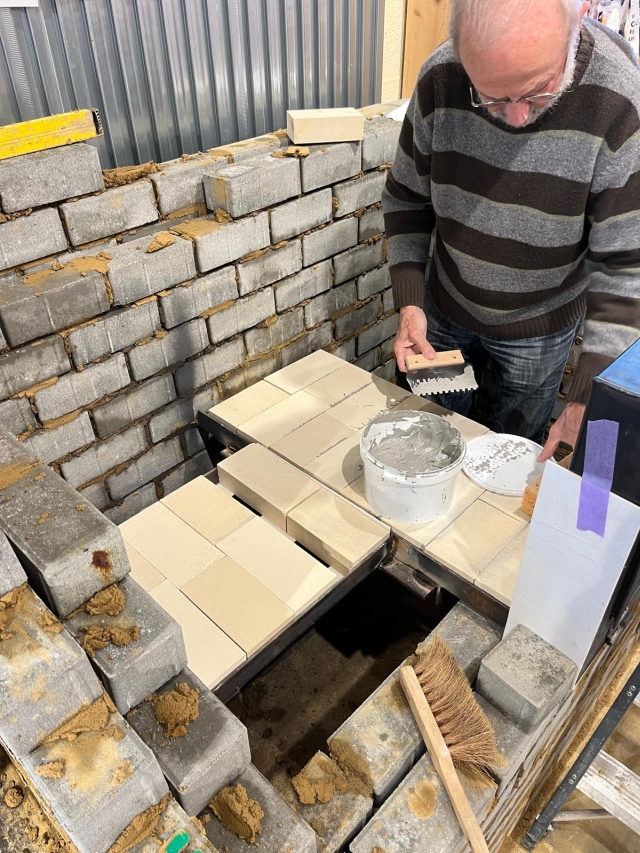
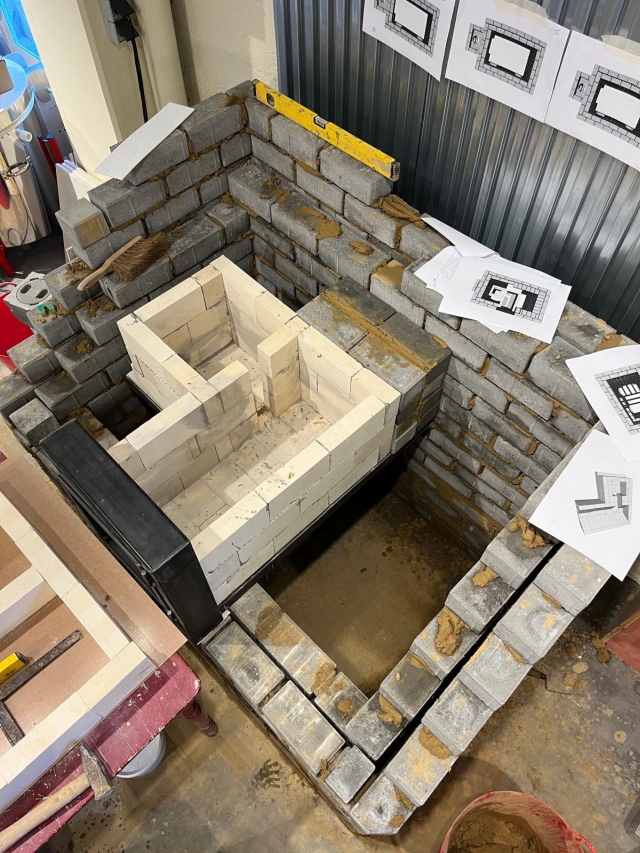
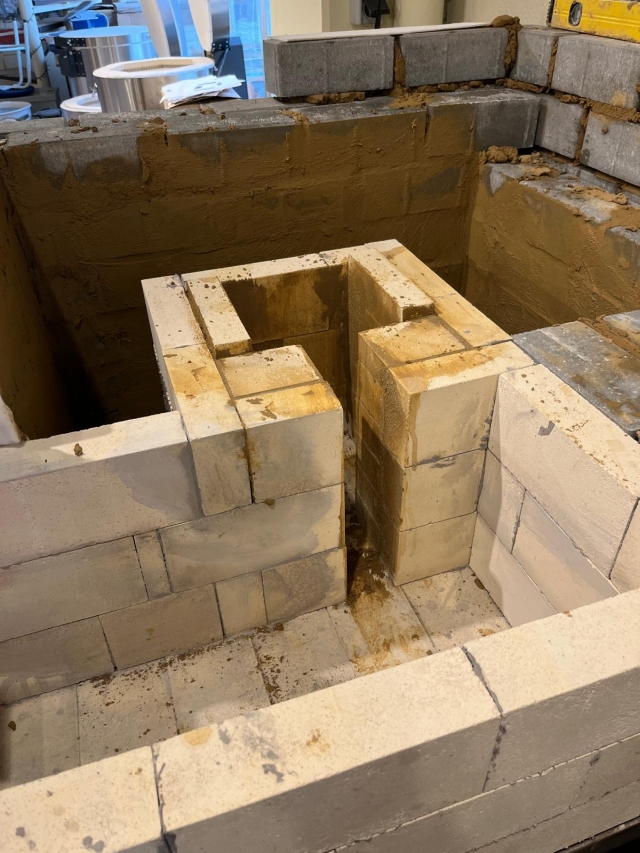
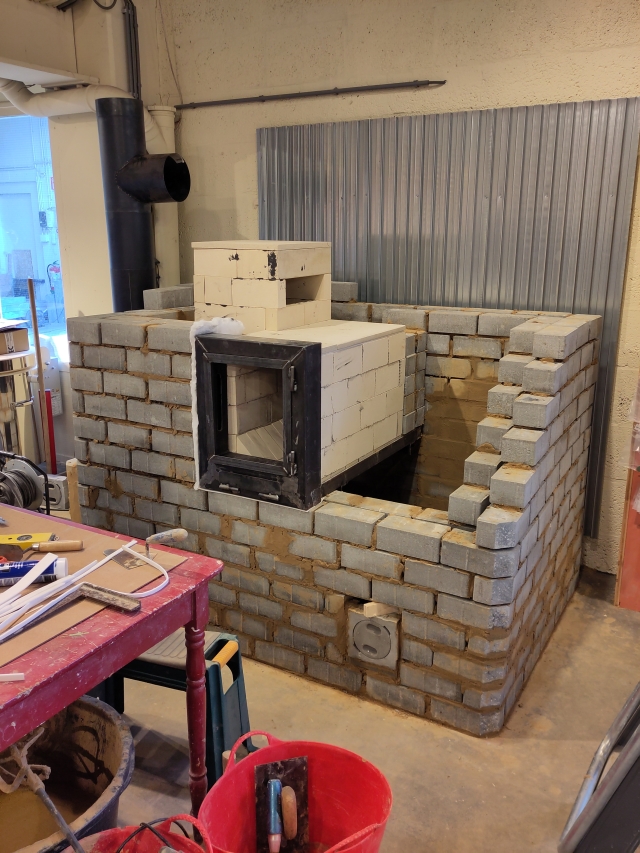
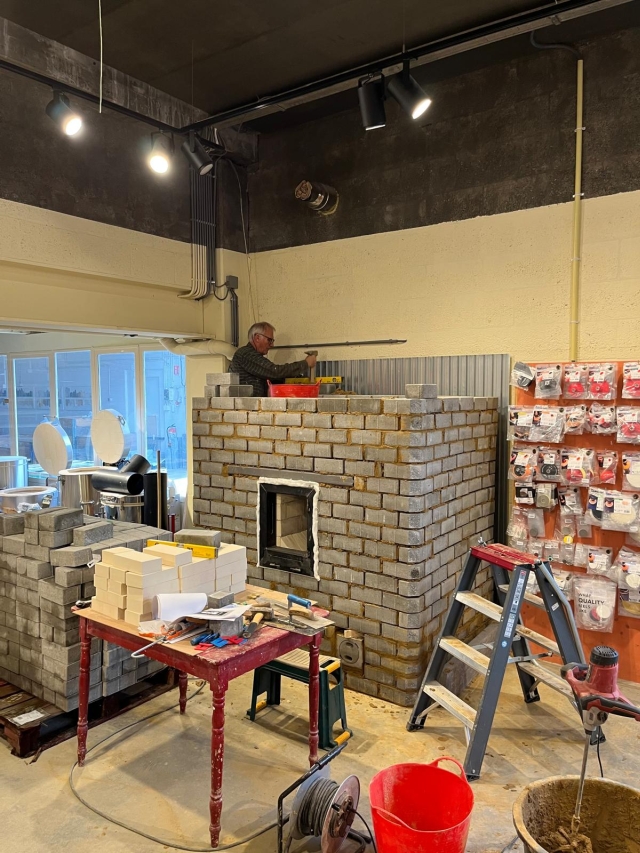
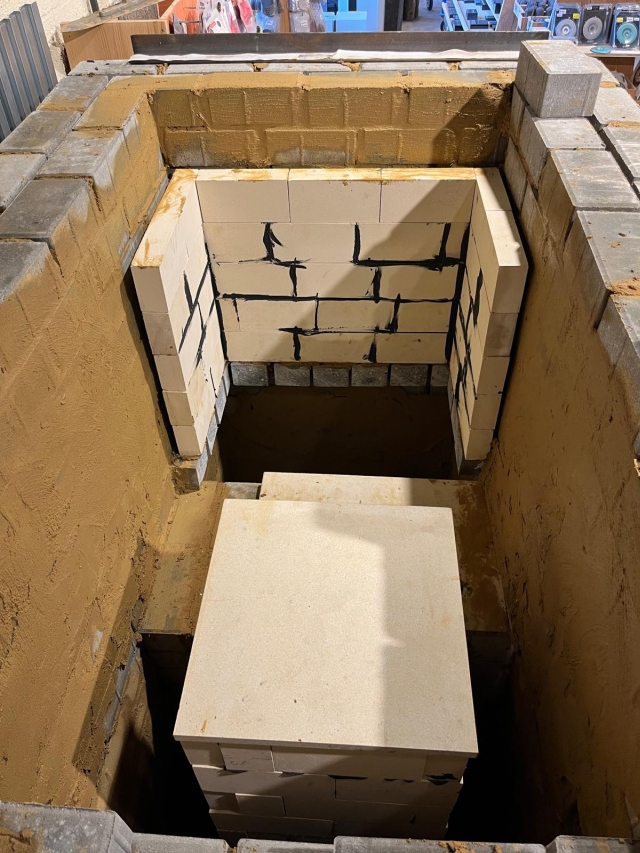
Cristobal Cristo wrote:1. It looks like the original riser dimension was 300x300 mm and you lined it to get 200x200 mm. I understand that the port depth was increased from standard 50-65 mm (brick thickness) to 110 mm (or more). The back side of the riser was not lined. Was it intentional? If the back was also lined than the port depth would be reduced by the thickness of the lining.
When Thomas built his shorty he did not line the riser and it looks like it retained its 230x230 mm interior dimension. Is the lining a new development/improvement?
Cristobal Cristo wrote:2. What bricks have you used for the firebox walls and for lining?
Cristobal Cristo wrote:3. What is the size of the room the heater is located in. Is it 30 m2 or 30x30 m?
regards, Peter
8
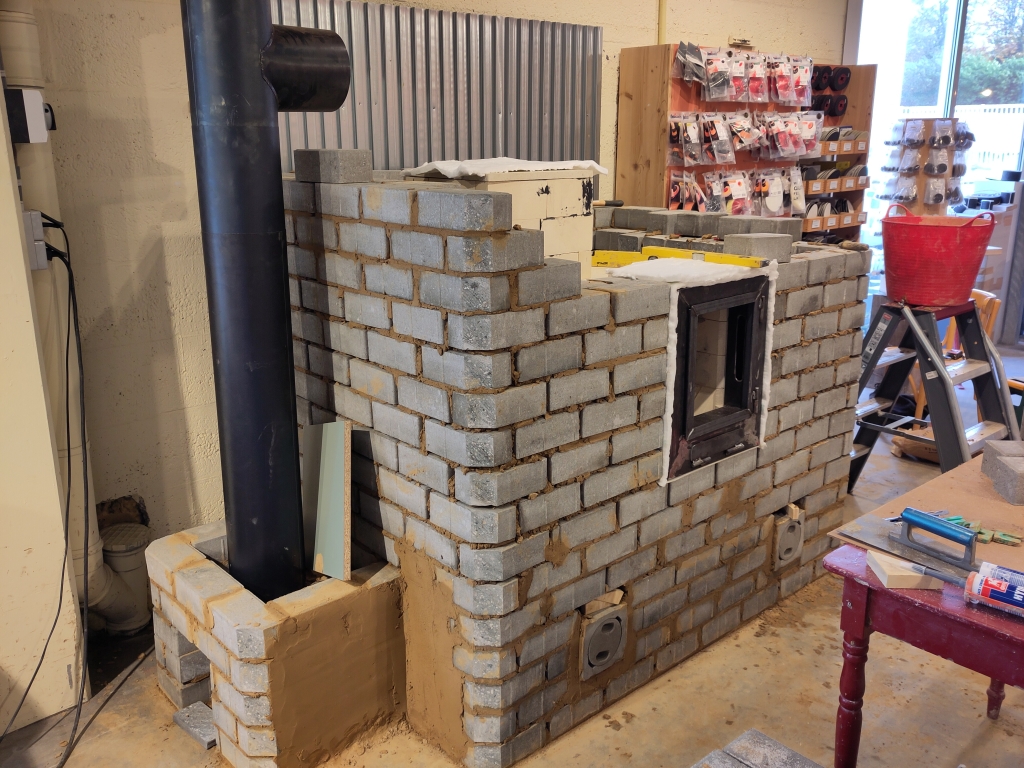
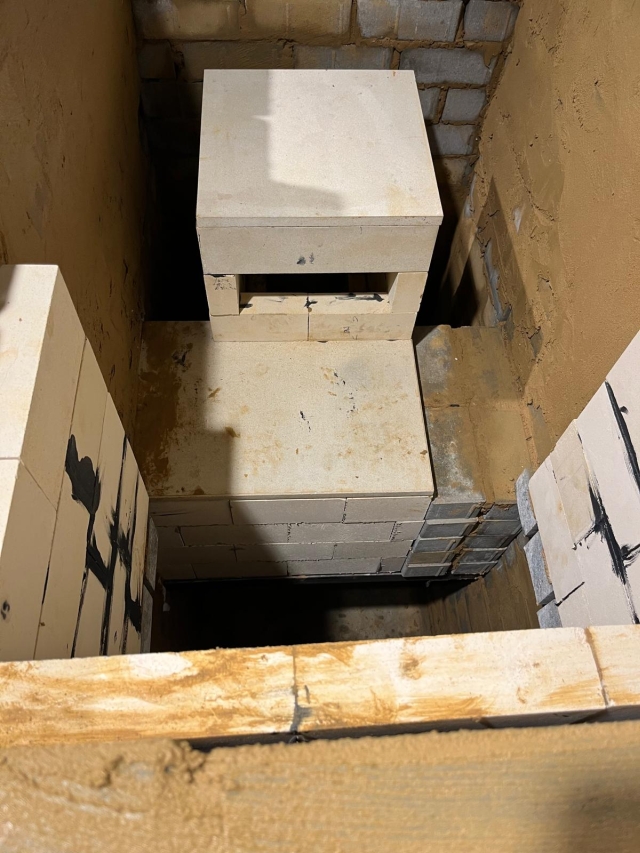
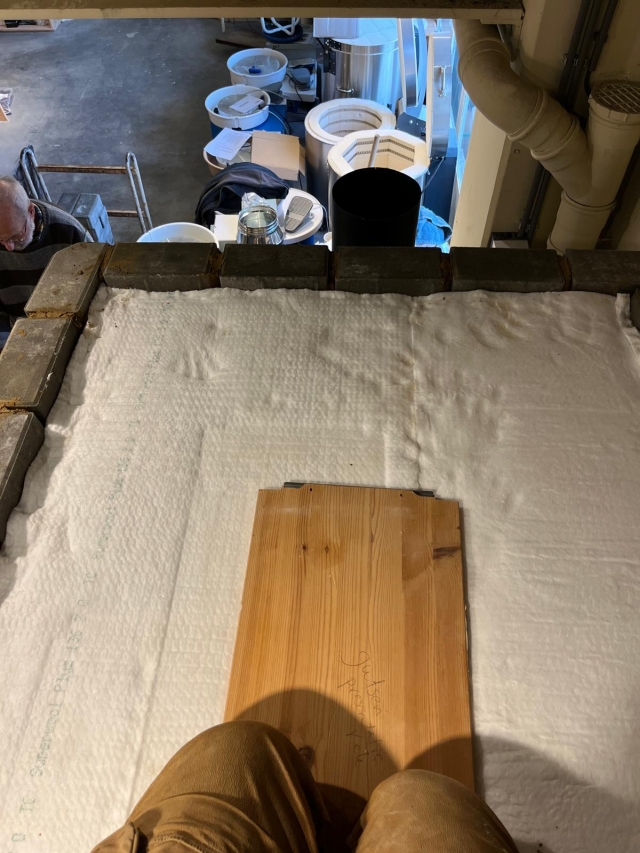
thomas rubino wrote:Good Day, Peter;
Gerry and I are wondering what material your core roof is made of.
regards, Peter
13
regards, Peter
6
For all your Montana Masonry Heater parts (also known as) Rocket Mass heater parts.
Visit me at
dragontechrmh.com Once you go brick you will never go back!
7
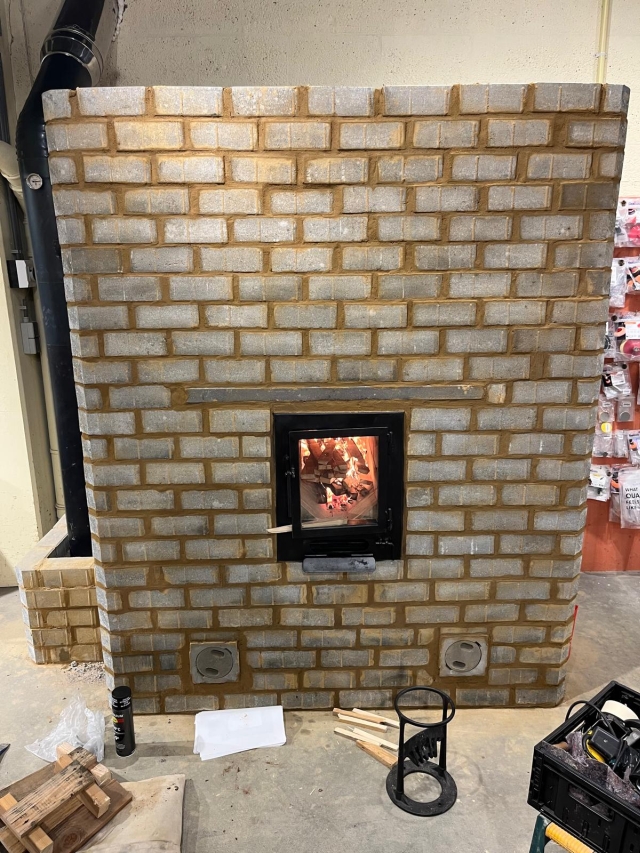
thomas rubino wrote:Wow, Peter!
Shorty Core is sure strutting her stuff as the new kid on the block!
Another outstanding build!
Built to specs and worked right out of the box!
Your living room wall will soon be covered in photos of your builds!
regards, Peter
6
6
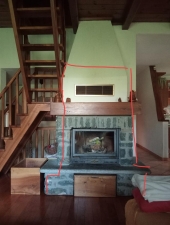
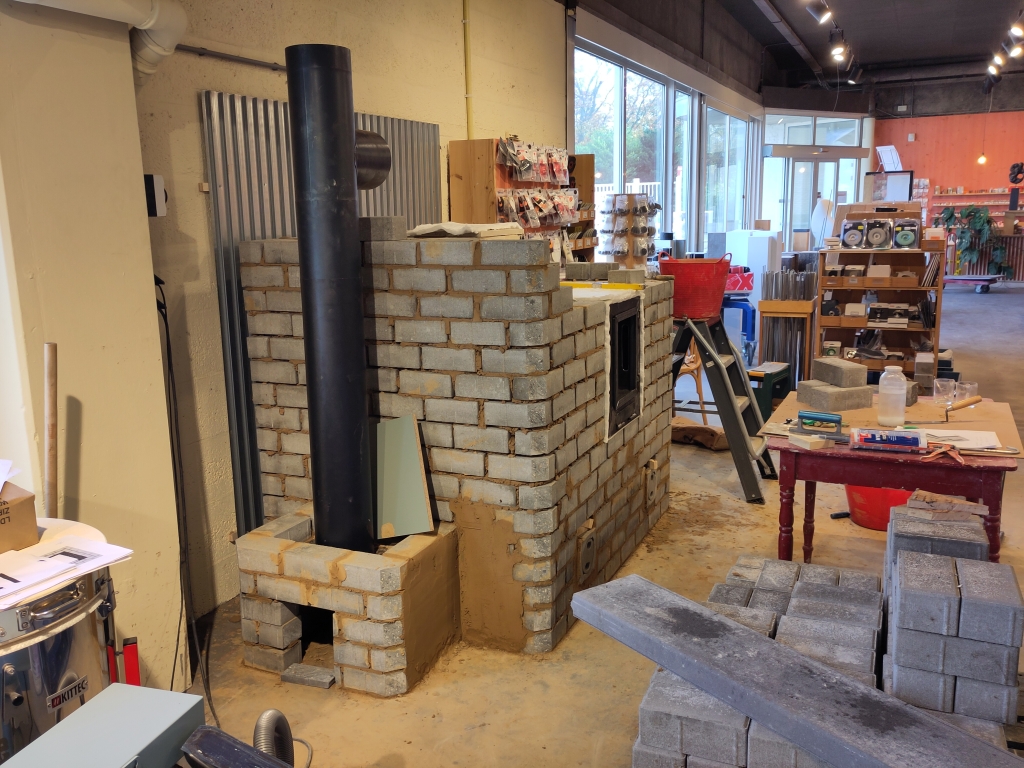
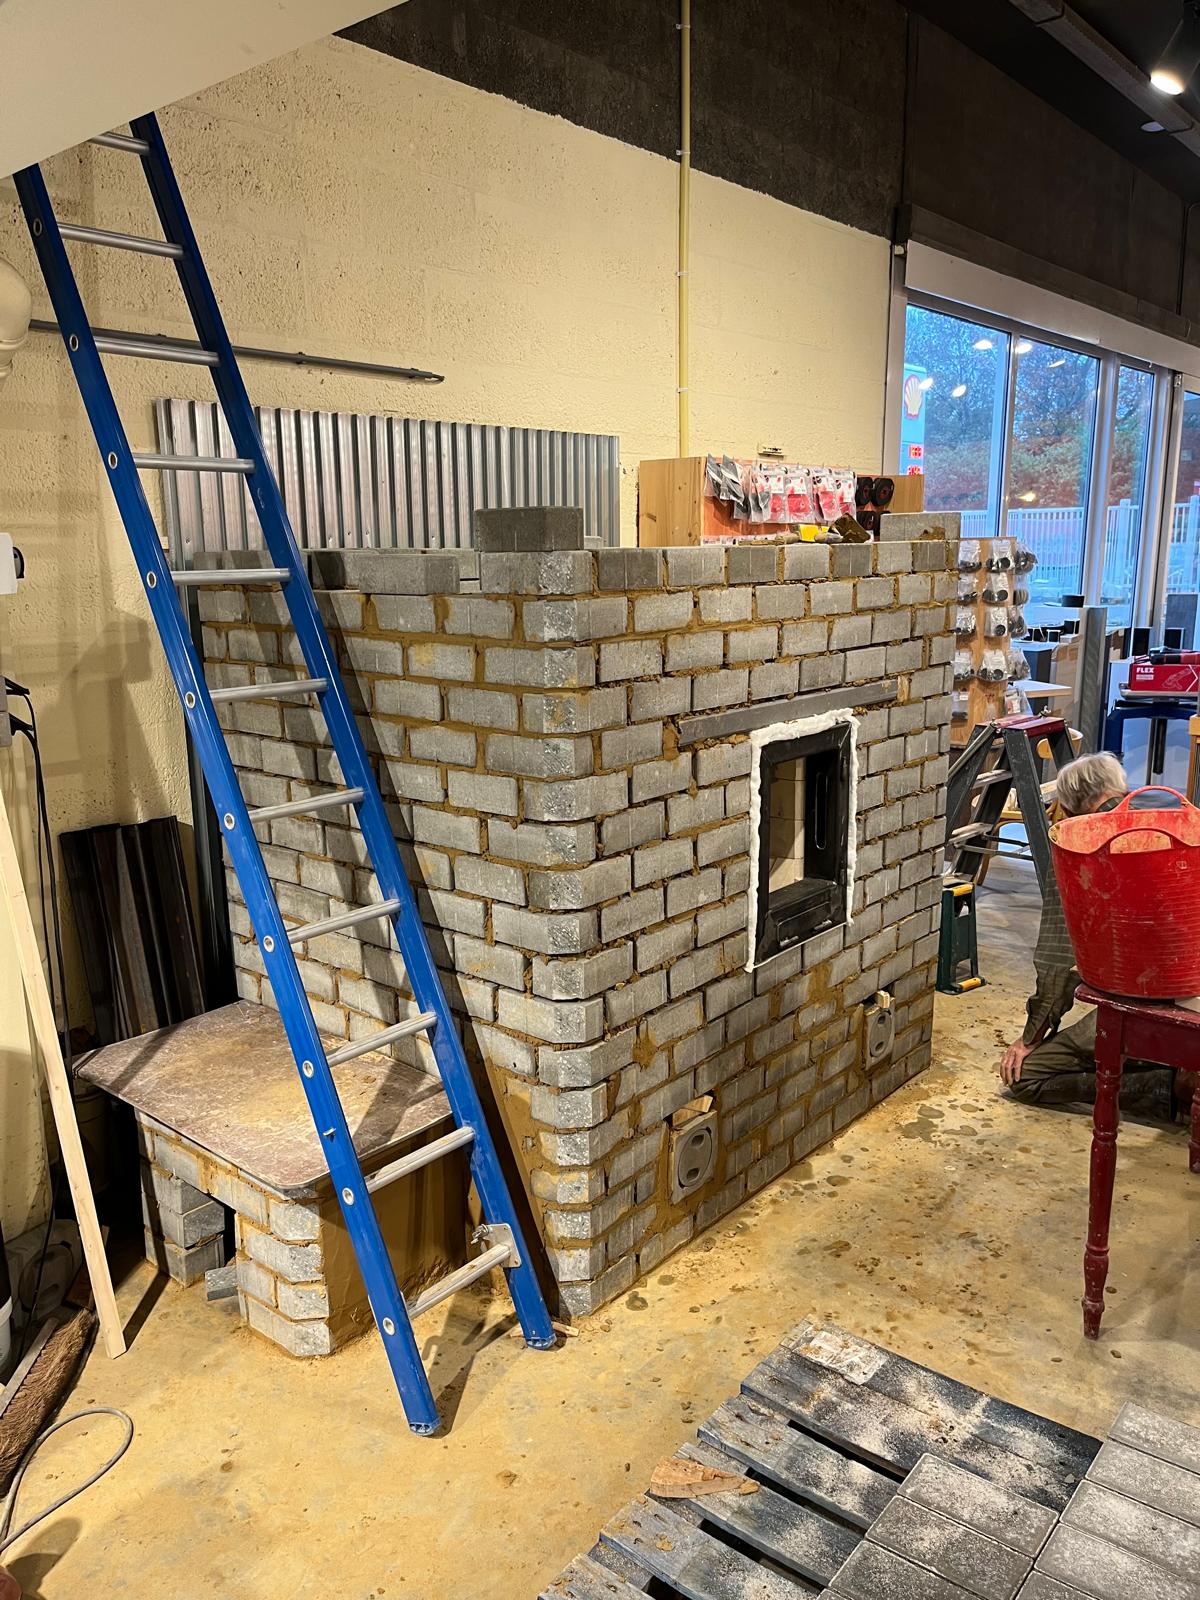
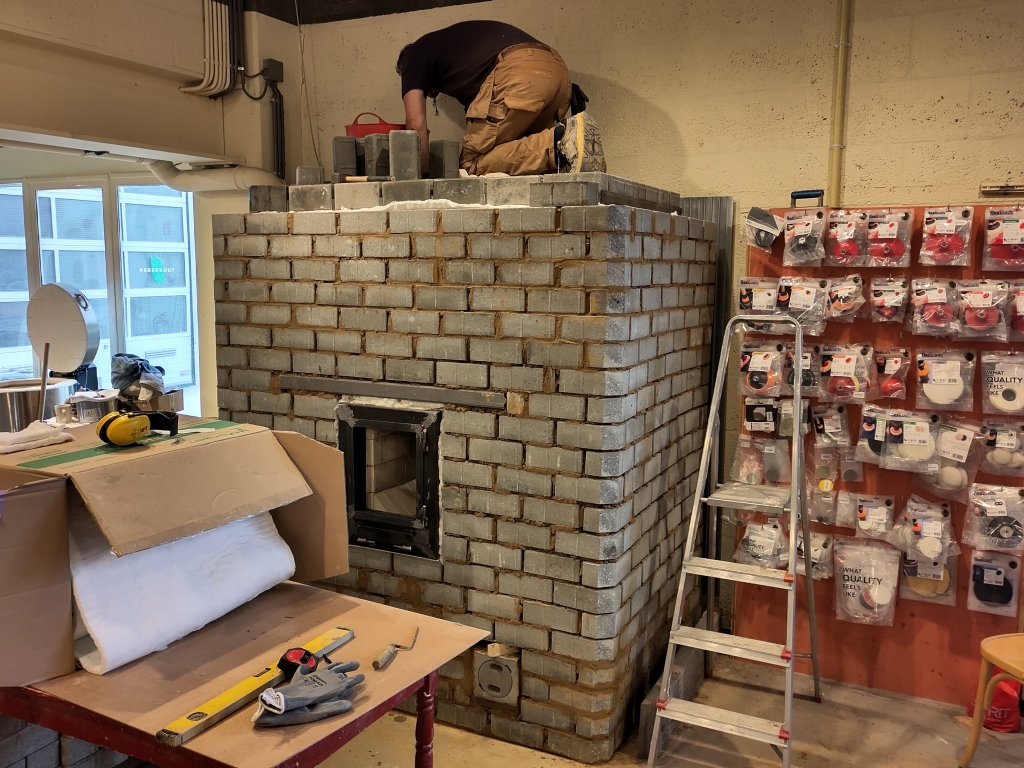
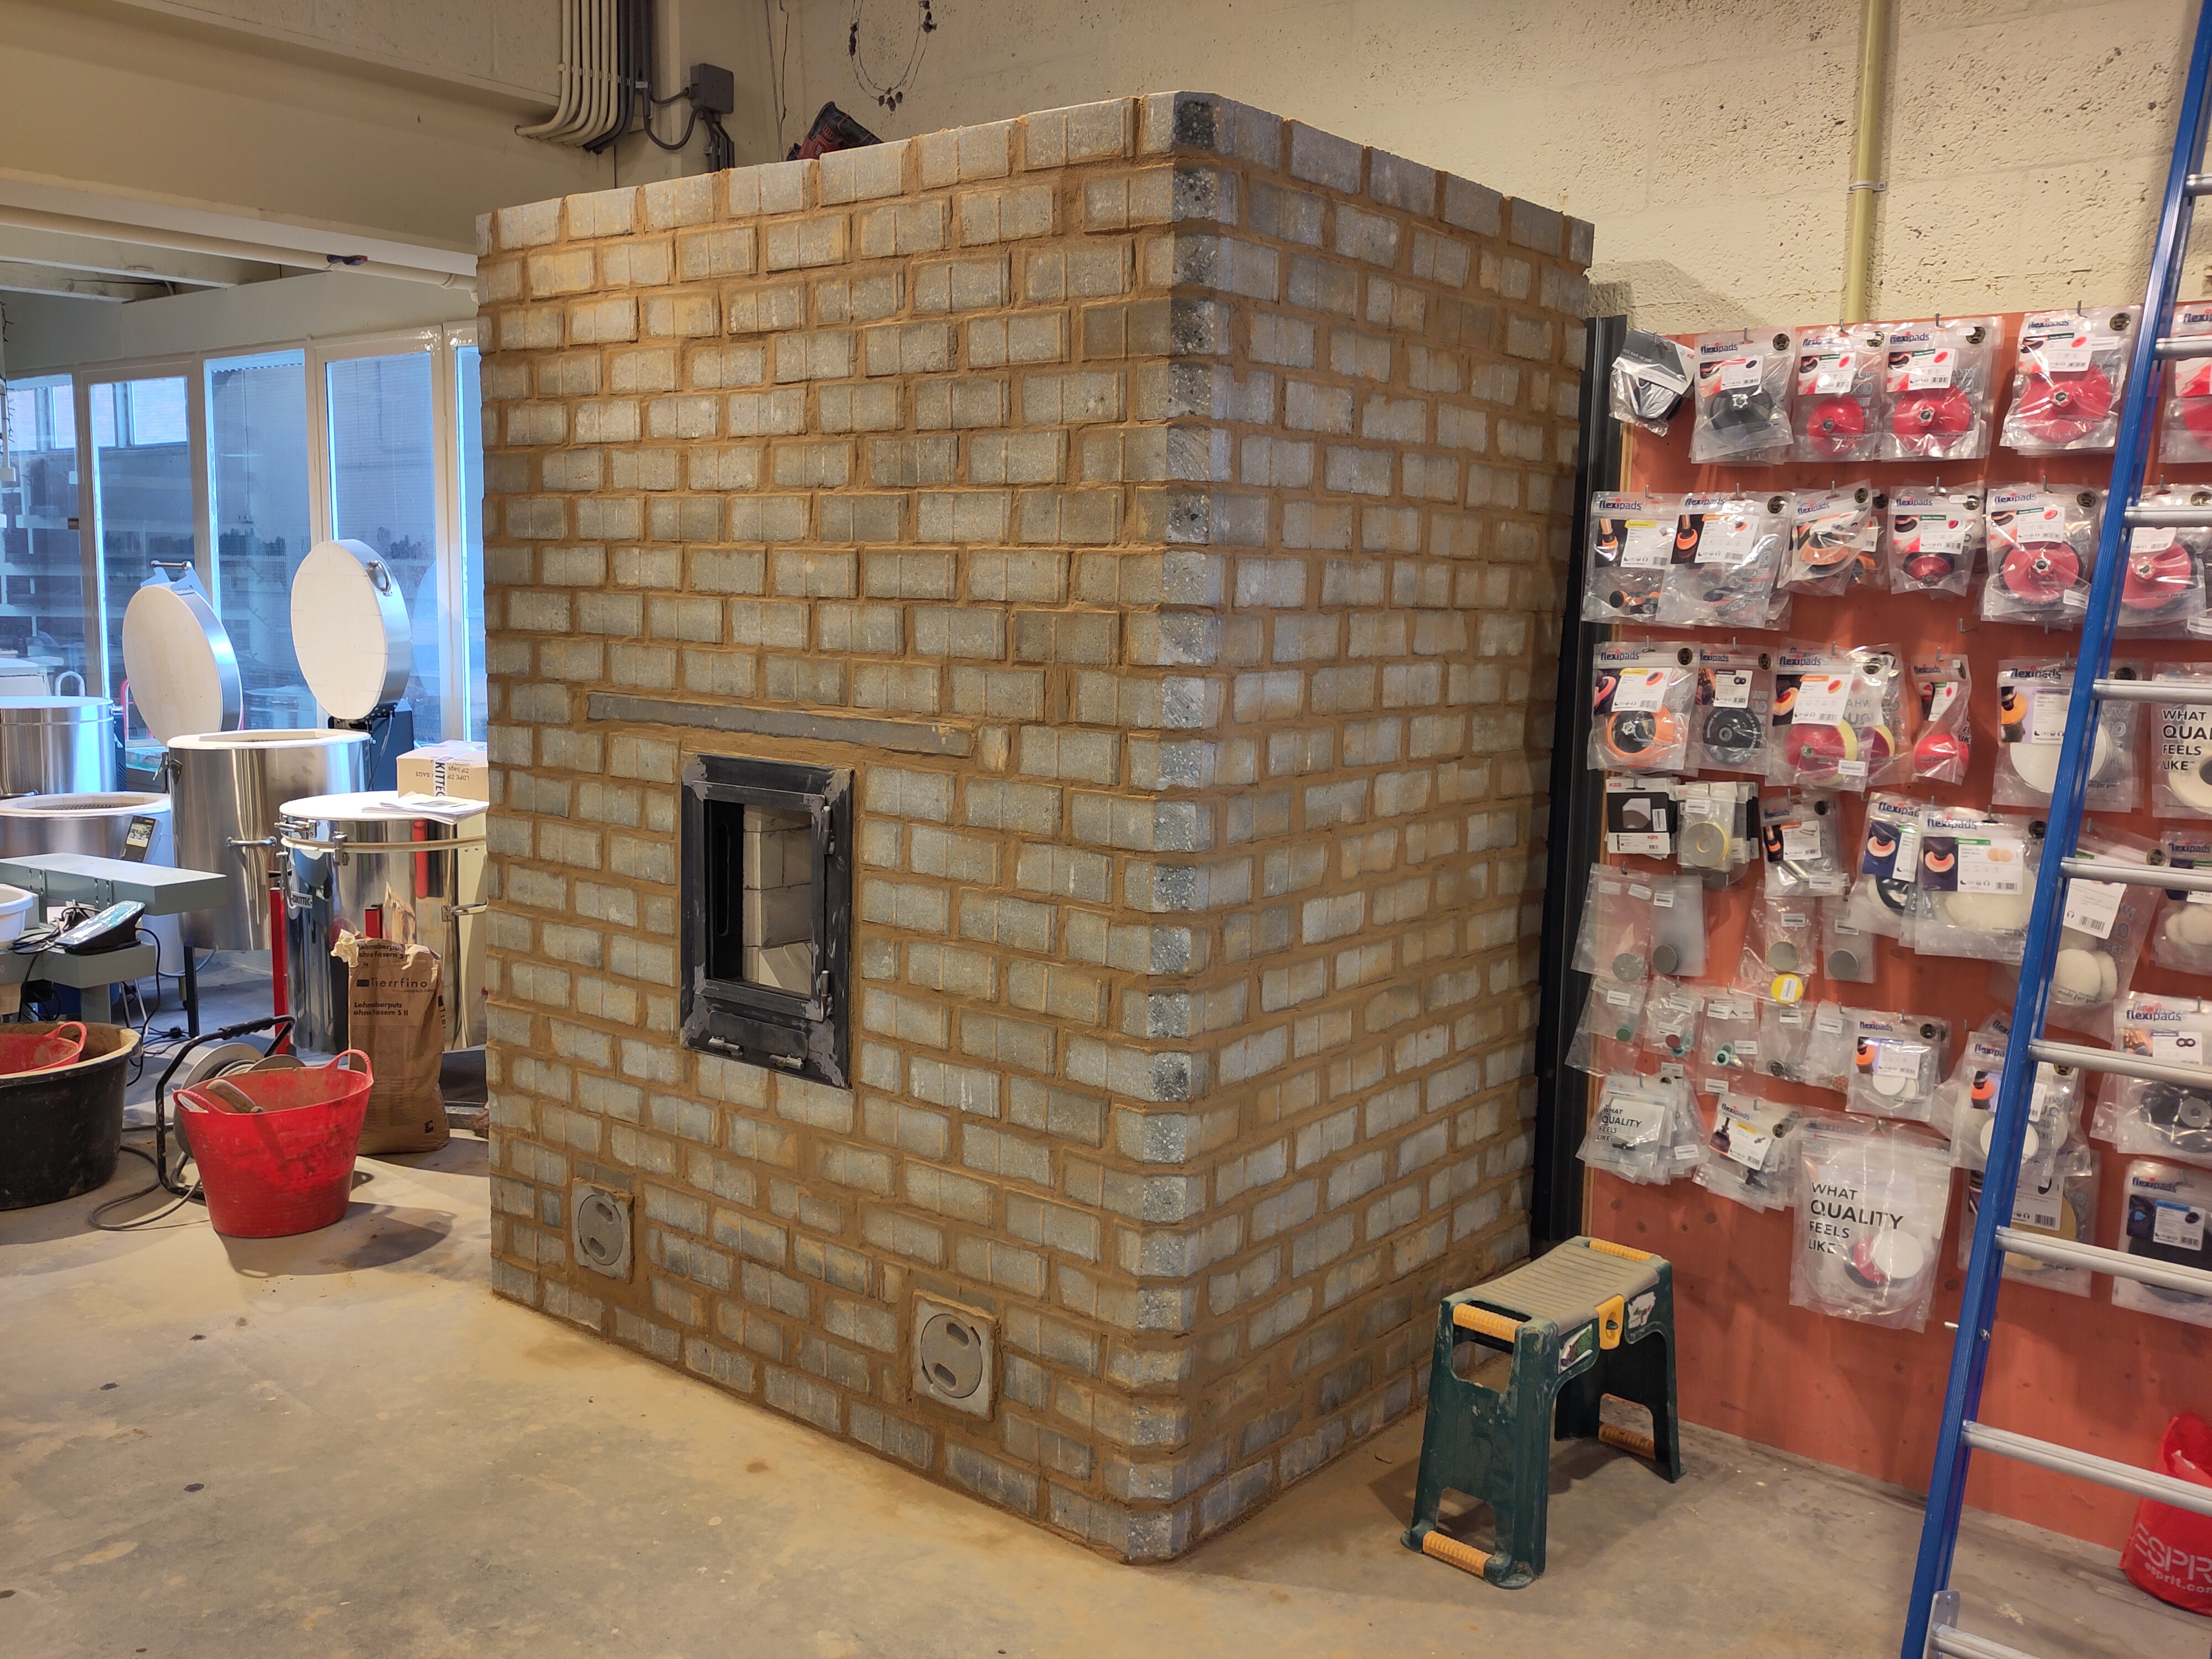
Julian Adam wrote:Incredible result, congratulations Peter & helpers! Are they topping it up all day long to have sufficient heat output? Almost a pity to cover it in clay plaster!
regards, Peter
5
Peter van den Berg wrote:I agree about he plaster, there's a possibility they'll skip that eventually.
6
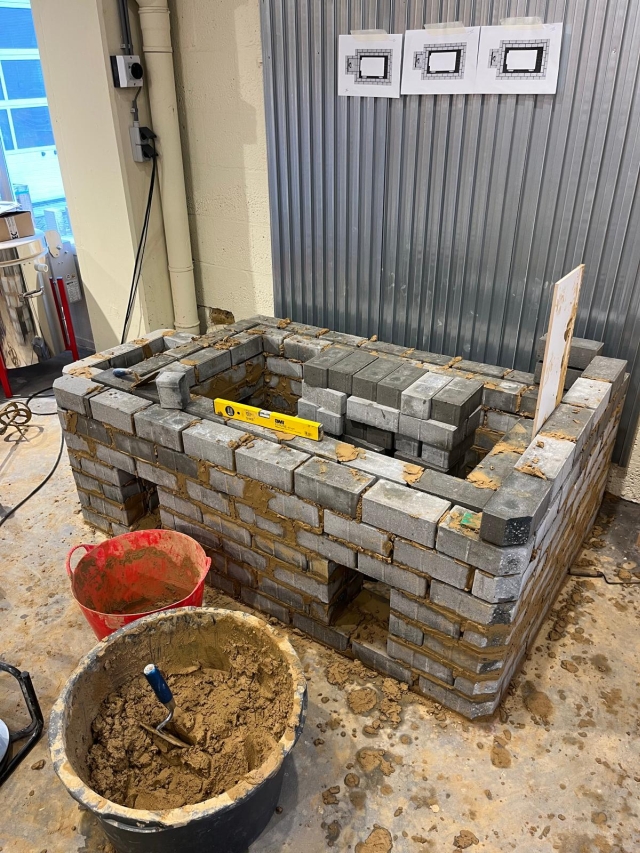
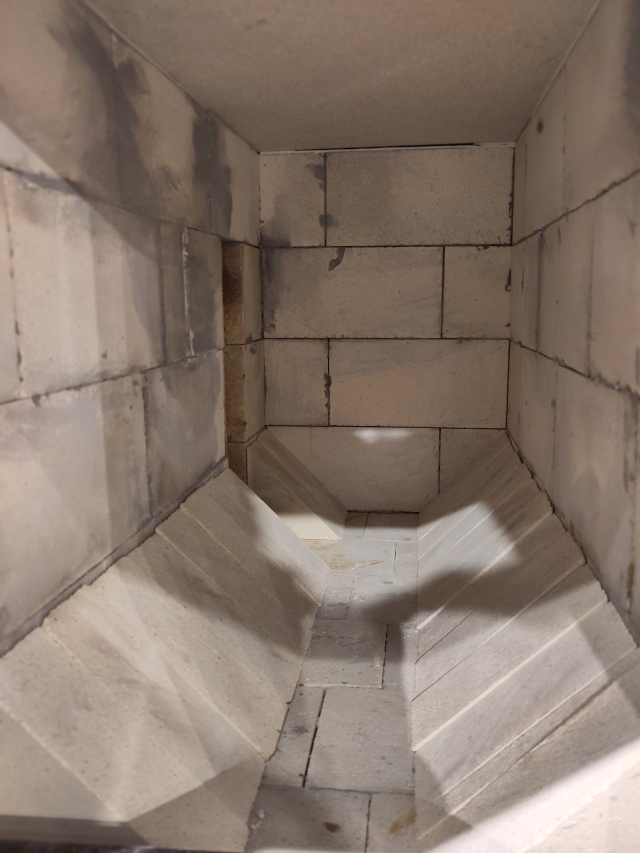
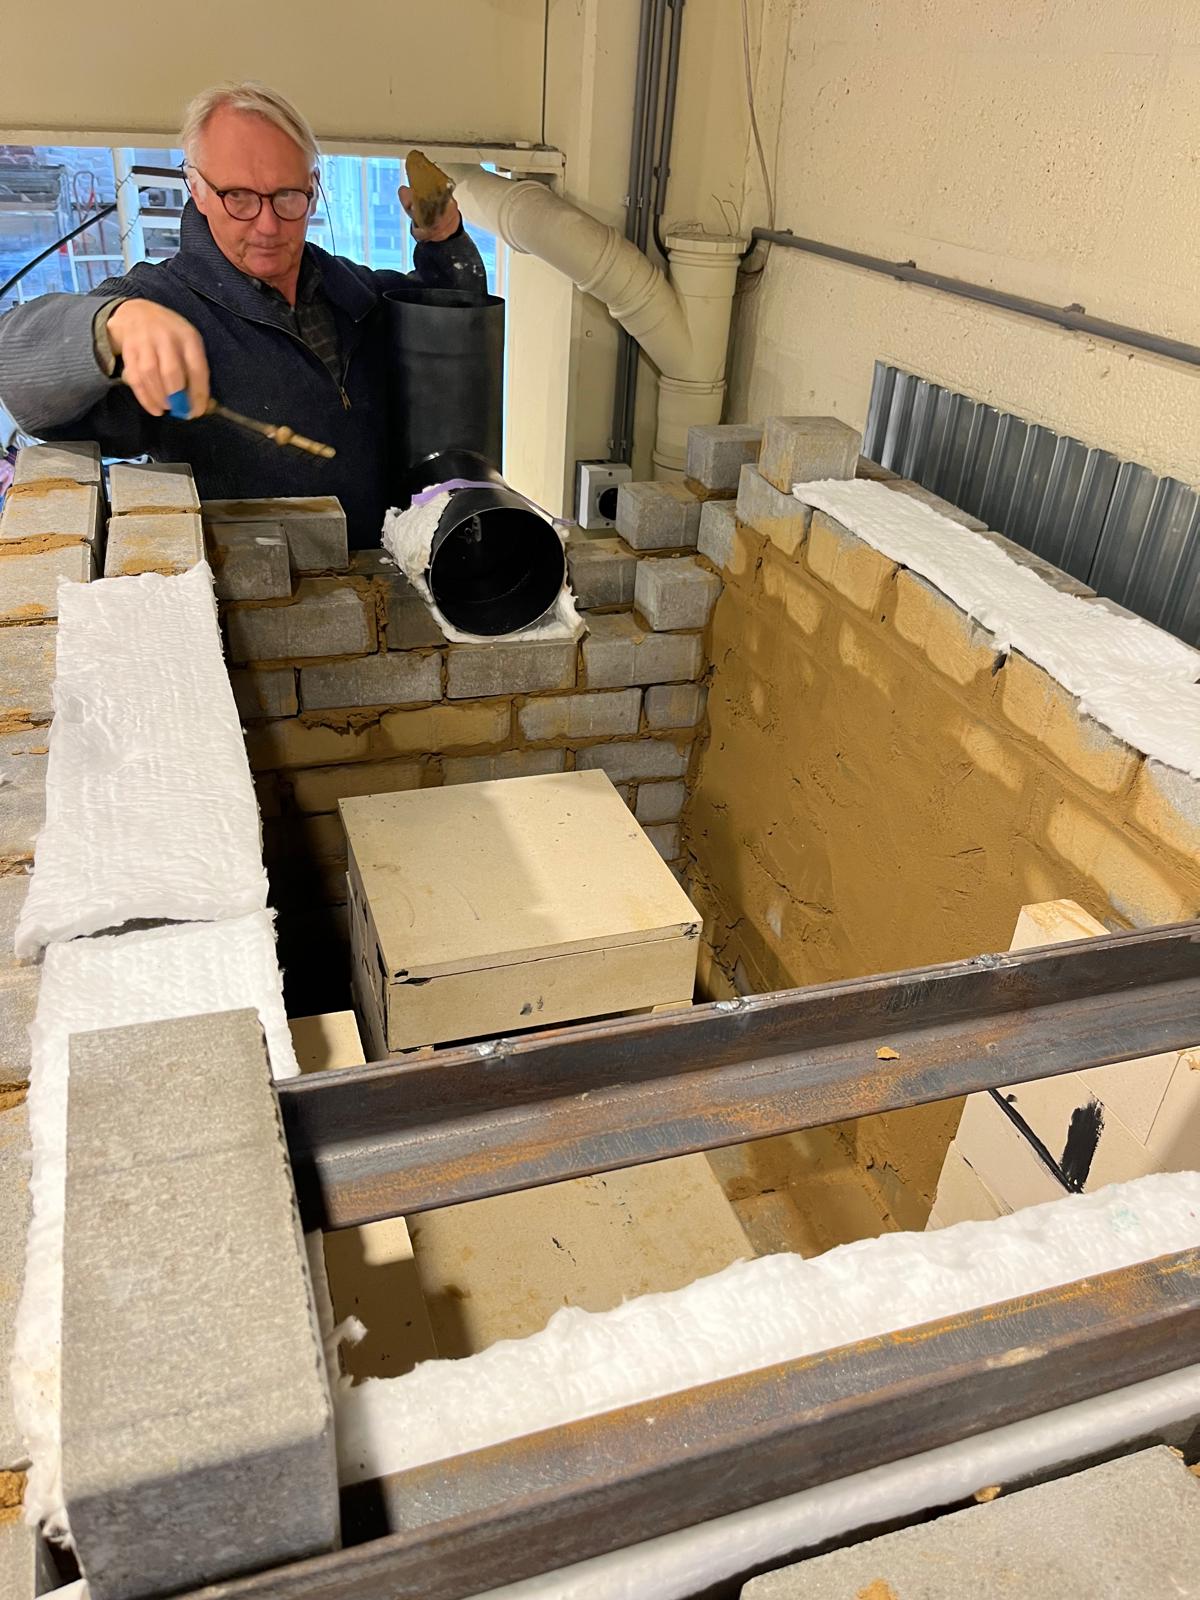
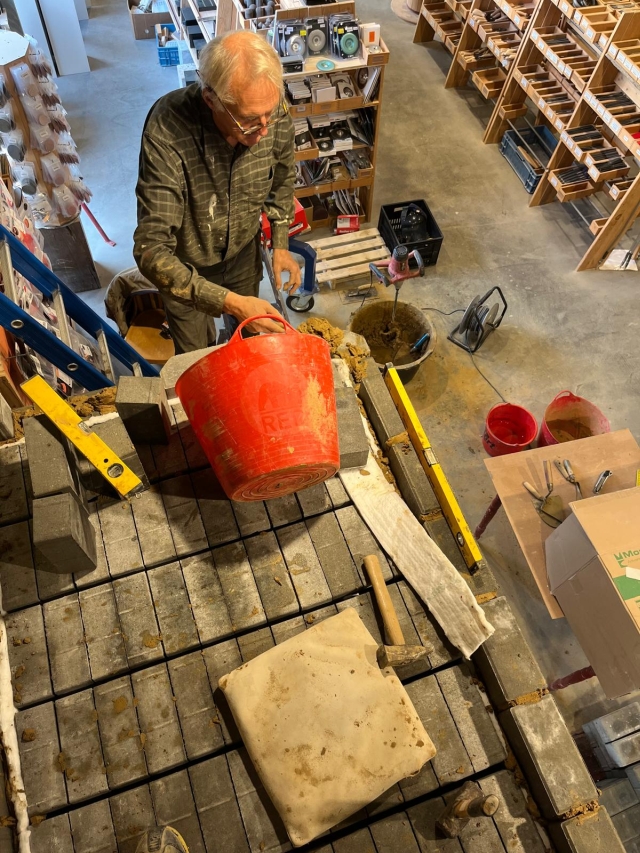
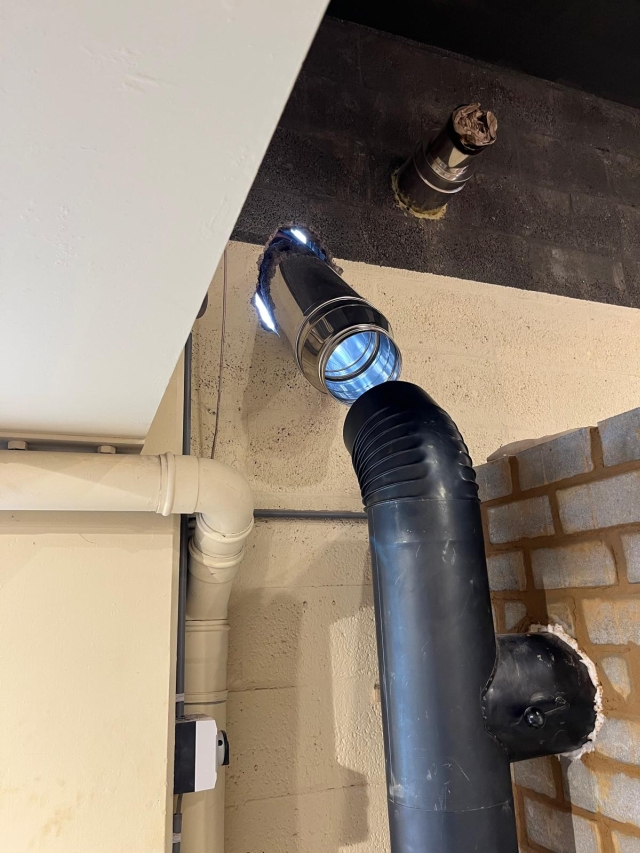
Peter van den Berg wrote:This is the lining on the inside of the bell. This is where the greatest thermal load is expected in the bell, hence the extra protection. As a hindsight, it could have been one brick higher....
Silence is Golden
For all your RMH needs:
dragontechrmh.com
6
Rocket surgeon and soil builder... healthy plants are all about the soil.
- My 6" Batch Rocket specs and materials list: https://permies.com/t/248275/Batch-Rocket-Double-Skin-Bell
- Batch Rocket detailed build thread with Q&A: https://permies.com/t/238503/Batch-Rocket-Build
8
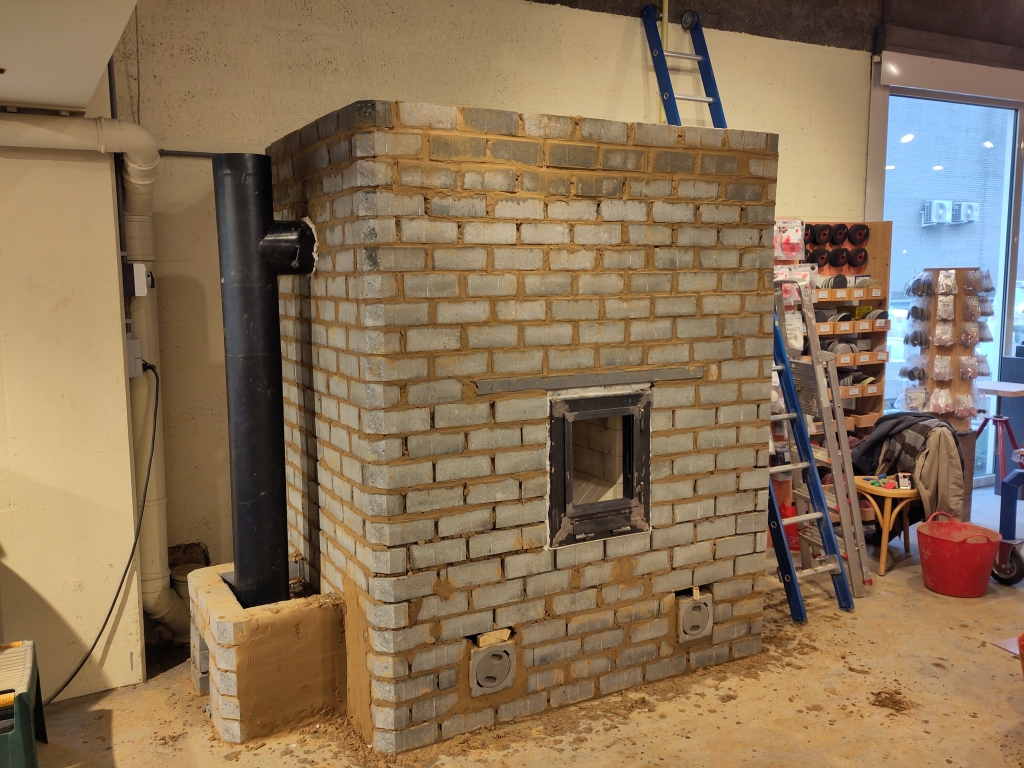
Cristobal Cristo wrote:Also the dark color of the bell helps with faster heat radiating.
regards, Peter
7
Gerry Parent wrote:Question: Curious why the ceiling of the bell had regular bricks instead of firebricks, especially right above the riser exhaust port?
Gerry Parent wrote:Also, I noticed a latch on the door which appears to do something for the air inlet flapper. Is it to lock the flapper closed when the fire is out?
regards, Peter
7
Glenn Littman wrote:Magnificent Peter! Congrats on your efforts and creating another masterpiece. Has it been named yet? I'll toss out a few thoughts that come to mind... Godzilla or perhaps Gargantua.
Glenn Littman wrote:I didn't see any mention in your build commentary... did you embed any thermocouples in the mass? It would be quite interesting to see what the inside skin temps are running. I actually find that monitoring my inside skin temps helps me to manage the external skin temps better as it will give an advanced idea of system temperature profile.
Glenn Littman wrote:Once the system is fully dry it will be interesting to know the firing cycles to get it up to temperature and maintain it considering the enormous mass. It will also be interesting to see how it retains the heat over the 35-40 hours that the store is closed and the external temperature when they reopen on Monday.
regards, Peter
4
6
tony uljee wrote:so i can only hope that this will be noticed by other interested companies/customers----who can get Peter to build another stove ---or at least under his guidance-----thankyou Peter.
regards, Peter
5
Glenn Littman wrote:Once the system is fully dry it will be interesting to know the firing cycles to get it up to temperature and maintain it considering the enormous mass. It will also be interesting to see how it retains the heat over the 35-40 hours that the store is closed and the external temperature when they reopen on Monday.
7
Scott Weinberg wrote:Please read- This is only my experince, I am not suggesting or implying your results will be the same. But without gages, recording, and study, it would only be a great working warm stove. now it is a on going experiment daily.

regards, Peter

|
And that's when I woke up screaming. What does it mean tiny ad?
permaculture bootcamp - gardening gardeners; grow the food you eat and build your own home
https://permies.com/wiki/bootcamp
|