• Post Reply Bookmark Topic Watch Topic
  • New Topic
permaculture forums growies critters building homesteading energy monies kitchen purity ungarbage community wilderness fiber arts art permaculture artisans regional education skip experiences global resources cider press projects digital market permies.com pie forums private forums all forums
this forum made possible by our volunteer staff, including ...
master stewards:
  • Nancy Reading
  • Carla Burke
  • r ranson
  • John F Dean
  • paul wheaton
  • Pearl Sutton
stewards:
  • Jay Angler
  • Liv Smith
  • Leigh Tate
master gardeners:
  • Christopher Weeks
  • Timothy Norton
gardeners:
  • thomas rubino
  • Jeremy VanGelder
  • Maieshe Ljin

Batch Rocket 7" single bell build.

 
Posts: 284
Location: North East Iowa, USA
71
  • Likes 8
  • Mark post as helpful
  • send pies
    Number of slices to send:
    Optional 'thank-you' note:
  • Quote
  • Report post to moderator
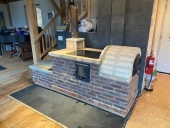
After watching  this thread https://permies.com/t/238503/Batch-Rocket-Build#2250590   on a excellent build, I have decided to share mine.  I have perhaps a lot more exterior design experimentation, but this certainly doesn't effect how it works.  And well it does.  Almost too good on the draft side of things.

I have also included a few things, that "could allow" some changes if wanted.  Stay tuned for these as we go along. I will try to do 4-6 photos per day until it is complete, and reply to comments as needed.

I don't mind critiques, but won't get to excited on comments telling me it won't work, because it has well proved it does work nicely..

I got some great advice from Thomas Rubino @ Drangon Tech dragontechrmh.com and will let him comment, thus you will see his link directly.
Matt Walker too. https://walkerstoves.com

And lastly, the base measurements from https://permies.com/u/152487/Peter-van-den-Berg were certainly the core to my dimensions. As do many, I had to stray a bit here and there but always within the proven range of what works.

I will just start with the base and proceed from there.   Please note this is complete, so suggestions for me to stop and make changes to this build won't have much effect.
 
Scott Weinberg
Posts: 284
Location: North East Iowa, USA
71
  • Likes 5
  • Mark post as helpful
  • send pies
    Number of slices to send:
    Optional 'thank-you' note:
  • Quote
  • Report post to moderator

Scott Weinberg wrote:

I will just start with the base and proceed from there.   Please note this is complete, so suggestions for me to stop and make changes to this build won't have much effect.

6-frams-or-one-unit.jpg
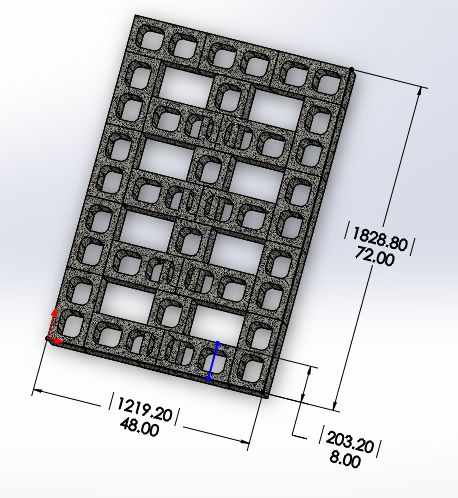
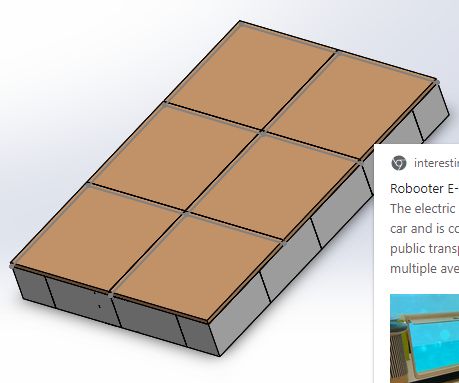
Standard cinder blocks to raise base 8"
base-with-tile-top.jpg
I had these tiles, but a concrete base could have been used
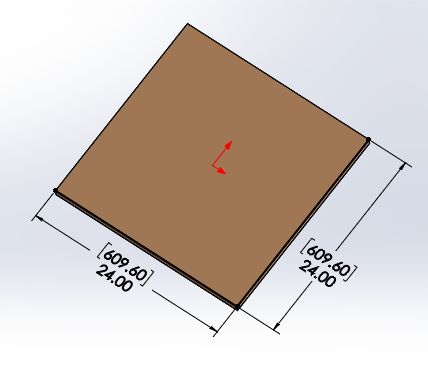
24-x24-inch-porcelian-tile.jpg
size of tile used. This made for a very level base. (important)
Scott-s-1-Rbell.jpg
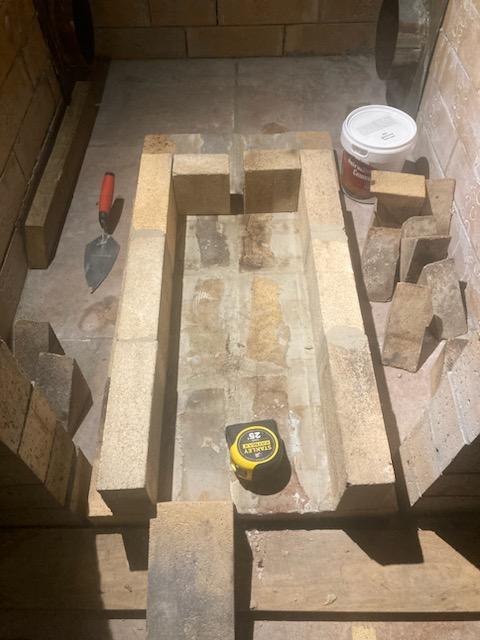
With all known dimensions in hand, my batch portion was started
Scott-s-2-Rbell.jpg
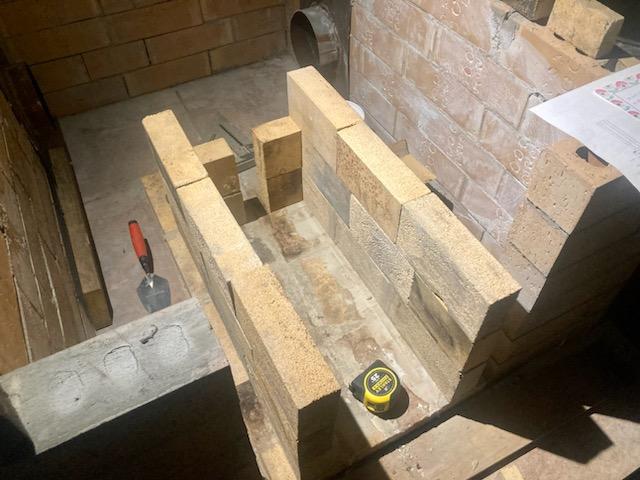
I chose to build both the batch and bell simultaneously. (debatable)
 
Scott Weinberg
Posts: 284
Location: North East Iowa, USA
71
  • Likes 4
  • Mark post as helpful
  • send pies
    Number of slices to send:
    Optional 'thank-you' note:
  • Quote
  • Report post to moderator
My bell bricks I found somewhat odd, at 3" x 3" by 11" with core holes, these were filled solid, which used a great deal of mortar, they also require cutting for every course level.  Good brick layout management was followed as much as possible.  

Scrounging can produce some excellent finds.  In this case brand new ones, at $0.10 each works out well. And I will put up with the odd dimensions.
 
Scott Weinberg
Posts: 284
Location: North East Iowa, USA
71
  • Likes 7
  • Mark post as helpful
  • send pies
    Number of slices to send:
    Optional 'thank-you' note:
  • Quote
  • Report post to moderator
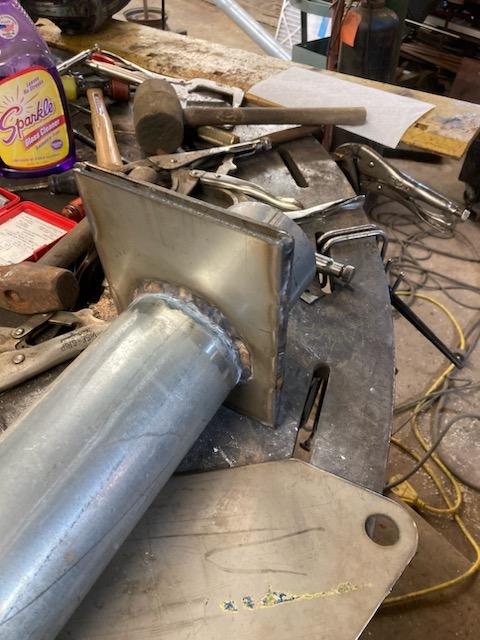
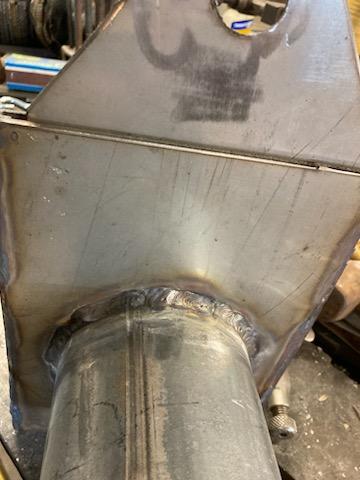
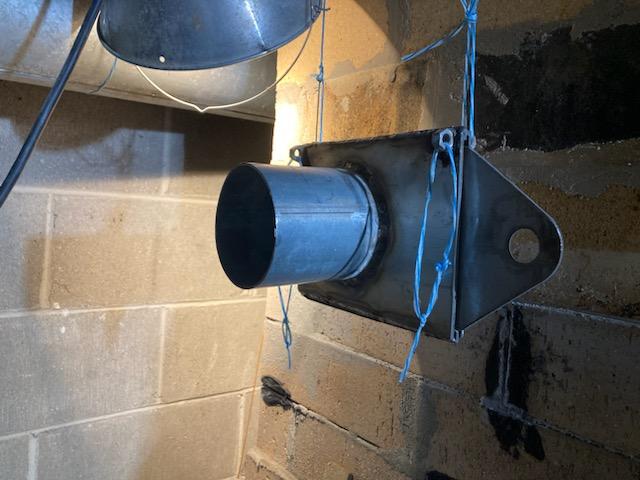
It can be seen in the last photo, one exit flue and one inspections hole.  These were made with standard 8" auger flighting tube, one slit to slightly reduce size, and then rewelded.  With square plate to stabilize inside the bell  These two tubes were single wrapped with 1/8" super wool for the seal and expansion capabilities.  Several ways to do this, but a little water glass on the tube and then wrapped with 3" band of super wool works very well.  This method is expected to work for many years due to its heavy nature.   Sized to perfectly let a 8" cap cover the inspection hole.  or 8" flue pipe for the exit flue. Both readily available.

More build details on the following photos.
IMG950533.jpg
Not having access to fire brick large enough to span, did it this way.
IMG950549-with-shelf-line.jpg
Note 1.5" gap beside the batch box, this will be explained later.
Core-assembly-for-7-inch-stove-ready-riser-rear.JPG
Every brick here is fire brick and NO insulated ones yet.
IMG950553.jpg
Rear of batch box, getting ready for riser build. (yes it could be different)
IMG950554.jpg
End view before riser build. Applying math to make sure it will work.
 
Scott Weinberg
Posts: 284
Location: North East Iowa, USA
71
  • Likes 5
  • Mark post as helpful
  • send pies
    Number of slices to send:
    Optional 'thank-you' note:
  • Quote
  • Report post to moderator
Continuing on, much of this build, was concentrated on when I had time, thus, I did 8-10 brick per day. all carried in by hand.  With a full plan in hand, each day was simply working toward the goal of the next step.    From the very beginning, I knew that I only intended to experiment with the second layer of the bell (outside layer) and this will become apparent as I go along with the build.  Internally I tried to stay as close as possible to those that have gone before with excellent working bells.  To this goal, I think it worked well.

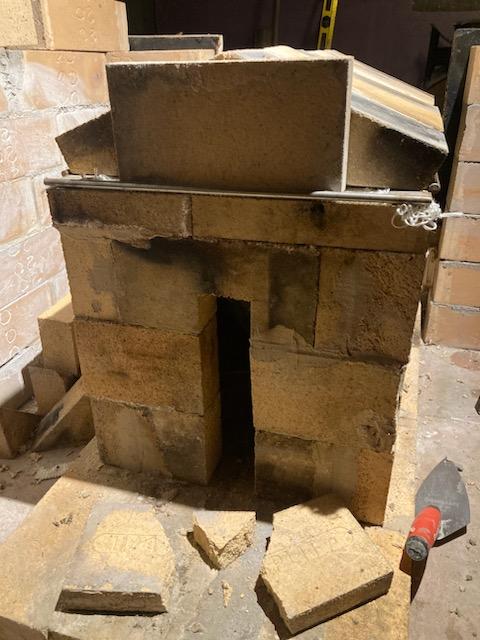
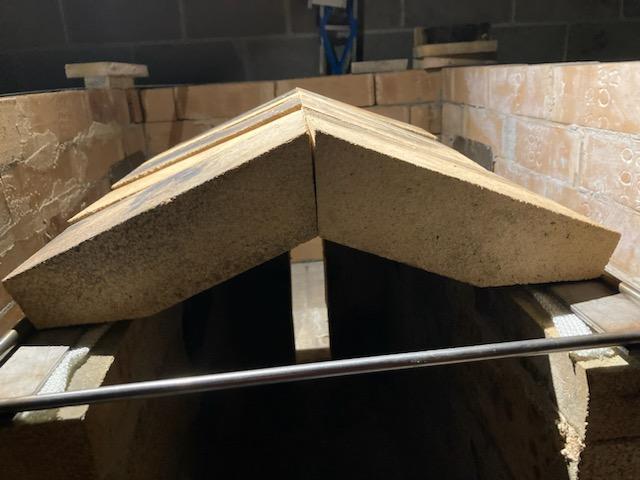
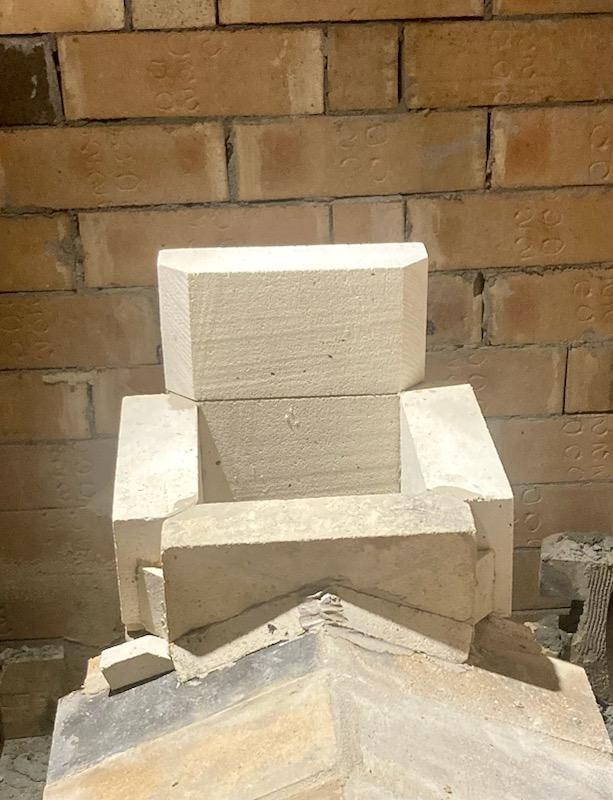
I should point out, that though not required, a diamond wet saw was of great help and very often let me do creative cuts that if done by hand might be a bit harder but still doable  The angled top to my fire box is one of those areas. It allowed common fire brick to span my 7" sized batch box, without the need for special castings or large one piece tops.  Could they be used?  Absolutely!  

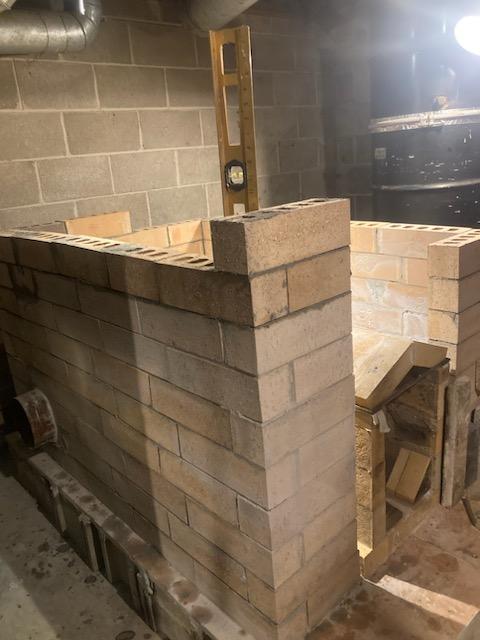
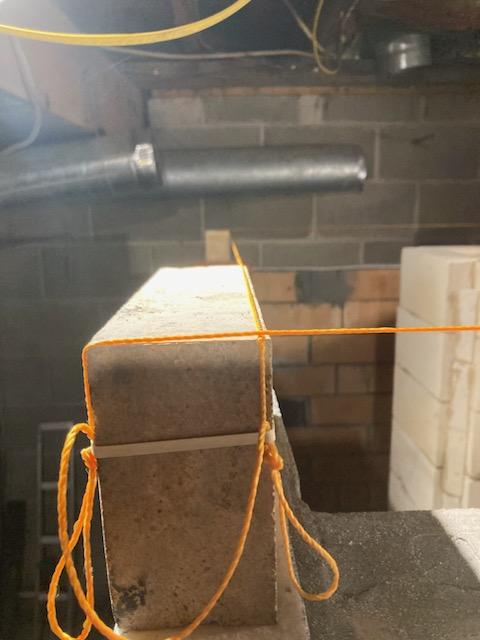
Another plus for tools that are super cheap for the job, are the small pointed trowels, this is of course up to you as the layer, but putting a little mortar right where you want it, vs a lot all over is pretty nice. due to the nature of my bricks, I stayed on the lean side of mortar gaps. This makes using string lines all the more required (just my opinion)  This becomes most apparent when you install your top and or facade of exterior layers.

I will mention many times, in ALL THE AREAS where suspected differences of expansions would happen, a layer of 1/8" super wool was used. this material is readily available from Dragon Tech, (see the first posting)  and is super easy to cut.  If you need to "stick" it somewhere, waterglass painting does a excellent job. but most often good old gravity does the trick to hold in place.  Mind you, once placed and covered with brick, you will never see it again, its job is simply- Letting two different material expand and contract countless times, and seal between these two layers. That's it.  Examples- from common brick to fire brick, on top of a steel T bar that is laid upon with fire brick, Entry door seals, gaps around your by-pass.  You get the idea. I always used 1/8" but I think across the pond, 1/4" is most common, I would think that would work just as well if not better.
IMG950537.jpg
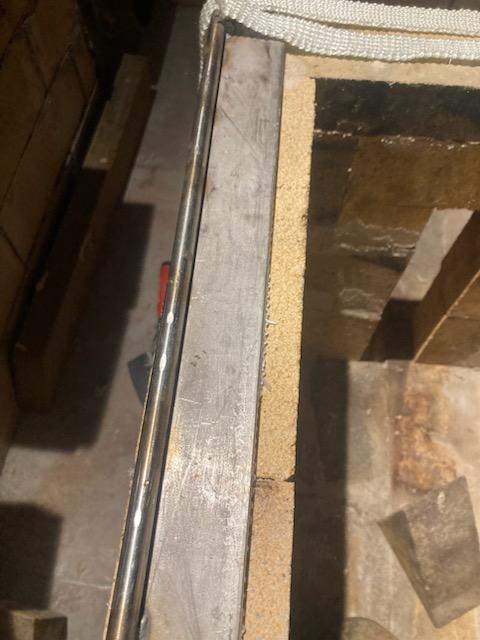
I did experiment a bit here, as I wanted a contained "stop" for roof/batch
IMG950536-(1).jpg
Gasket material was used, though I think super wool would work well.
IMG950541.jpg
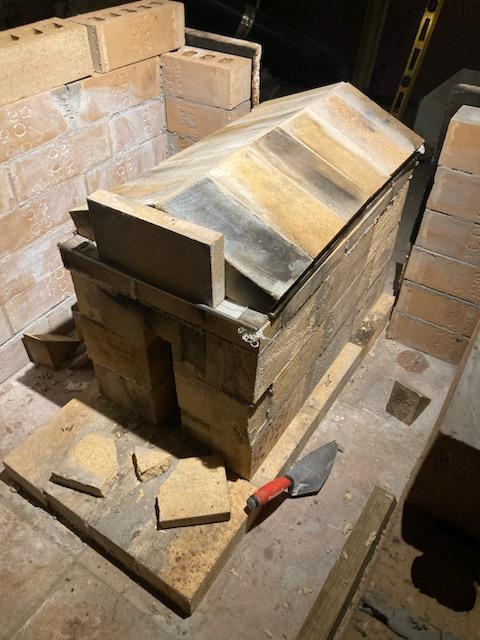
End result, was a two brick span down the length of the fire box.
IMG950543.jpg
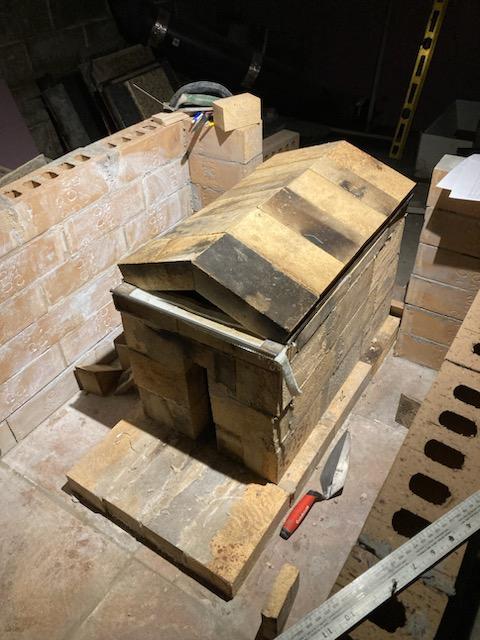
completed top, (note-dark bricks are used fire bricks)
 
Scott Weinberg
Posts: 284
Location: North East Iowa, USA
71
  • Likes 5
  • Mark post as helpful
  • send pies
    Number of slices to send:
    Optional 'thank-you' note:
  • Quote
  • Report post to moderator
In the last photo before, it can be noted the size of the holes of the fire brick and they appear to be open,  I found that if I fill these holes and add the next tier of bricks at the same time, I would get a much better bond between tiers.  Thus I only filled as I went up.  The pointed trowel also in the same picture made this process work well, without much waste of dropped mortar.  

I can't say anything pro or con of any of the fireclay mortars, as I simply have never been around them, but I did add fire clay to every batch of standard mason brick mortar, to really smooth the mix. though only at about 5%  This of course was only used on bricks subject to 500 degrees or less.  Which in the case would be up to 2" below the top of the riser, and only on the bell.

I have had many discussions on dry stacking fire bricks vs fire clay mortar only vs fire brick mortar. All I think would work, but in the end I went with what I was familiar with and had a known working ability.  (the fire brick mortar) if you have never used, it goes on super thin, dries within a day (actually hours) holds like crazy, but of course comes with a cost.   I tended to use the premixed type, which let me do as little as 3-4 bricks, and then seal back up.  Worked well.
IMG950549-with-shelf-line.jpg
Just experimenting with a lintel and dry stacking here. -I changed-
IMG950989.jpg
The change- Thoughts were, access door #2 above! it worked well.
IMG950988.jpg
Access panel L bolts, details forth coming, but they work well. (oven?)
IMG950720.jpg
Once decided, up goes the tiers, mission to the riser top, in hand.
 
Rocket Scientist
Posts: 791
Location: Guernsey a small island near France.
299
  • Likes 6
  • Mark post as helpful
  • send pies
    Number of slices to send:
    Optional 'thank-you' note:
  • Quote
  • Report post to moderator
It looks like you are doing a great job, standard pizza oven cement mix is called home brew, 1 portland cement, 1 fire clay, 1 hydrated lime 3 sand. That is good for 500c  and has been successfully in use for many years on thousands of wood ovens.
 
Scott Weinberg
Posts: 284
Location: North East Iowa, USA
71
  • Likes 3
  • Mark post as helpful
  • send pies
    Number of slices to send:
    Optional 'thank-you' note:
  • Quote
  • Report post to moderator

Fox James wrote:It looks like you are doing a great job, standard pizza oven cement mix is called home brew, 1 portland cement, 1 fire clay, 1 hydrated lime 3 sand. That is good for 500c  and has been successfully in use for many years on thousands of wood ovens.


Thanks Fox James,  when and if I have time, I should sit down and calculate the difference in cost.  I bet it will surprise me on how much less.  Everything is readily available, So the only thing holding me back is the lack of trying and doing.  Spoiled I am for just buying a mix.

cheers
 
rocket scientist
Posts: 175
Location: Sangre de Cristo Mountains, CO - Lat 38°14' - Zone 5b
130
hunting earthworks solar wood heat rocket stoves homestead
  • Likes 8
  • Mark post as helpful
  • send pies
    Number of slices to send:
    Optional 'thank-you' note:
  • Quote
  • Report post to moderator
Hey Scott, great build so far. I'm enjoying following along with your posts. Thanks for following along with my build. This has been a really fun project and reviewing how others have approached their batchbox builds is really interesting.

I was going to ask last night how you managed to retain the batchbox roof bricks but you answered the question with the most recent posts. It appears like some bar stock welded to flat stock to act as a stop. What brand firebrick mortar are you using? I see where you are going with your outer bell skin with the granite and stone and really like it. I don't want to get too far ahead of your commentary but I'm really curious to hear more about the thermal performance. How often you fire it a day, external bell temperature profile over time, size of space you are heating?

I like your comments about brick layout management and scrounging materials. I took my time in my initial bell layout and it has paid off. Now that I am above the top of the firebox I'm just building a rectangle with each course and no cutting is required. I was also very blessed in acquiring my brick. I kept looking at Craigslist, FB Marketplace, calling suppliers, etc. I had no interest in spending upwards of $1/brick so I was asking anyone that I thought might have information on getting brick at a good price. I'm fortunate to have an industrial refractory supplier 2 hours from me. When I was there getting my firebrick I asked the owner if he knew any places to get clay brick at a reasonable price. He said "follow me" and took me out to his bone-pile yard and showed me 3 full pallets of brick that a former foreman had left there from a home project he was doing. He said if I want them they're mine for the taking. So just over 1,000 bricks came to my project with just a smile and a handshake.
 
Scott Weinberg
Posts: 284
Location: North East Iowa, USA
71
  • Likes 6
  • Mark post as helpful
  • send pies
    Number of slices to send:
    Optional 'thank-you' note:
  • Quote
  • Report post to moderator

Glenn Littman wrote:Hey Scott, great build so far. I'm enjoying following along with your posts. Thanks for following along with my build. This has been a really fun project and reviewing how others have approached their batch
box builds is really interesting.

Scott says--I should figure out how Peter answers with broken quotes to make  this look better, but presently I will just do in bold and you'll figure it out.

I was going to ask last night how you managed to retain the batch box roof bricks but you answered the question with the most recent posts. It appears like some bar stock welded to flat stock to act as a stop. What brand firebrick mortar are you using? I see where you are going with your outer bell skin with the granite and stone and really like it. I don't want to get too far ahead of your commentary but I'm really curious to hear more about the thermal performance. How often you fire it a day, external bell temperature profile over time, size of space you are heating?

yes, exactly on the welded bar stock on flat for the stop. this is all stainless, my trade has included tig welding over the years, so this was not hard. Might be better way, but this certainly works.
Mecco's Red Devil Refractory cement, 1/2 gal containers, rated to 3000F very often found in big box stores, Creamy peanut butter consistency.
I have a huge supply of granite, and the diamond wet saw, and I love to experiment with facades, thus this has 3 different ways, which I will cover as I come to it.  I don't mind the questions at all and it almost works better to address I go along and then people are not scrolling back and forth to relate question to a photo.
As far as firing, this is a two pronged question, I can and often burn all day, but can never get ahead of the heat requirements of the house, as the house is simply to big for that. But the other side of this, is when I get the entire mass to about 175 degrees, my flue temp starts getting to the same. Which is still very low, but if I were to go to 200 it also follows, just the dynamics. So I back off and hold or do what I need to to keep 150 all day.  If I was not going to be around, I do 2 firings in the morning and 2 in the evening, just getting to 150 again at night.
3000+ sq feet, so this was never expected to heat all, 100% of the time, but was expected to give me the most heat, consistent heat, and efficient heat for every burn, to this end it has done so.

I like your comments about brick layout management and scrounging materials. I took my time in my initial bell layout and it has paid off. Now that I am above the top of the firebox I'm just building a rectangle with each course and no cutting is required. I was also very blessed in acquiring my brick. I kept looking at Craigslist, FB Marketplace, calling suppliers, etc. I had no interest in spending upwards of $1/brick so I was asking anyone that I thought might have information on getting brick at a good price. I'm fortunate to have an industrial refractory supplier 2 hours from me. When I was there getting my firebrick I asked the owner if he knew any places to get clay brick at a reasonable price. He said "follow me" and took me out to his bone-pile yard and showed me 3 full pallets of brick that a former foreman had left there from a home project he was doing. He said if I want them they're mine for the taking. So just over 1,000 bricks came to my project with just a smile and a handshake.


Excellent on the brick find.  For those following, almost any growing town has some kind of brick supplier, if you can't find, just ask a local construction company.  In these years, there are almost always  tipped over pallets, or broken ones that they just have not got around to pick up. The price is generally right.  If your doing a facade ( I  recommend because this is EASY mass to add and doesn't effect burn performance)  then color of bricks don't matter, as they will be covered up.

As for the granite, I personally find it excellent, but I don't know how you would go about without a diamond saw, so I would never pay anything for it. A 1-1/8" thick by 24 x 24" is about my max for lifting.  But often you have to take these to get the smaller ones.   Absolutely positively DO NOT take man made quartz or anything with resin.  While it may never start on fire, it will surely smell when it gets much above 200 degrees.  I will detail far more when I get to that part of the build.
 
Scott Weinberg
Posts: 284
Location: North East Iowa, USA
71
  • Likes 5
  • Mark post as helpful
  • send pies
    Number of slices to send:
    Optional 'thank-you' note:
  • Quote
  • Report post to moderator
With batch box basically built, less the riser, and by the way the front face of the batch box was perfectly flush with the front face of the bell, you will see why it was done this way coming up..   But you can accomplish this easily with your string line or squaring board.  I had approximately a 1.5" gap between front edge of the batch box and the bell, you could reduce this just a bit (1/2") but I would not go any wider.

So now was the time for me to establish exactly the height of my riser, knowing I wanted to get at least as close to double the gap between the top of the riser and  bell ceiling so in this case, 14"  This worked out to be compromise as I was getting closer to the ceiling,  when doing the math.  With this knowledge in hand, the riser was built.  

I used Insulated Fire Brick,  (IFB) of the Simond brand, and full size. These are of the best quality I have ever found. I certainly could have done the 5 minute riser often described so well by Dragon Tech, and it would have been cheaper.  But again my background was is solid brick laying and calculations. I got this my "forever" riser.    So please note that ALL of the batch box including the riser base was with full hard fire bricks. to have the toughest chamber I could build, and then when the fire turns the corner up the riser, it finds a unrestricted and insulated path to the top of the riser.  

One regret was at this point, it could have been so easy to install a few thermocouples at base, midpoint and top of the riser, just for curiosity, having little to do with performance changes.   The same type of sensors would have been nice in the bell.  So presently I just go by infrared sensor heat gun, not perfect, but certainly consistent in readings.

So on with the riser,  note the clipped corners, that were then used to strengthen the corners. (yes an overkill, but there was no other use for them and took but a few moments.
7-inch-riser-with-4-sides-drawing-only.JPG
In a perfect world, but there is NO 2" wide IFB's
In a perfect world, but there is NO 2
Core-assembly-for-7-inch-stove-ready-riser-rear.JPG
Shown before, this was my base for the IFB to go up.
IMG950784.jpg
The start, required one special cut brick to get back to a level playing field.
IMG950802.jpg
And up it goes, don't accidently build in a leaning tower!
IMG950792.jpg
The mitered corners work well for this application, (and they are free)
IMG950803.jpg
Side view, exactly 7" inside, and perhaps the strongest way,
Side view, exactly 7
IMG950804.jpg
With the riser height complete, it was back to work on the brick bell.
IMG950817.jpg
Hard to show, but the brick stopped about 2
Hard to show, but the brick bell stopped about 2" below riser top
IMG950819.jpg
A lot showing here, but note- stringline, fire wool, fire brick starting tier.
 
Glenn Littman
rocket scientist
Posts: 175
Location: Sangre de Cristo Mountains, CO - Lat 38°14' - Zone 5b
130
hunting earthworks solar wood heat rocket stoves homestead
  • Likes 5
  • Mark post as helpful
  • send pies
    Number of slices to send:
    Optional 'thank-you' note:
  • Quote
  • Report post to moderator
Scott, it's pretty easy to parse quotes and comments into separate items the way that Peter does. Start by clicking the quote button as you have previously done. This will copy the entire post into a composing window and automatically add the HTML code to quote that post. You'll see that it starts with the "quote=name of person posted" with brackets where I have the "". You'll also see at the very end "/quote" with brackets around it. This is the HTML code to begin and end a quote section. If you want to parse a response to just a portion of the post do a copy paste or just type the brackets with "/quote" to end that section and then you can type your response. Then copy/paste the HTML code that includes the brackets and "quote=name of the person" at the beginning of the next text portion that you want to quote, end it with the "/quote" and add your comments. You can delete any of the quoted text that you do not want to appear. Probably obvious but don't use the "" that I used above. This is just to show the HTML code, if I had the brackets around the code you would not see what I was explaining. I hope this makes sense.  

Scott Weinberg wrote:With batch box basically built, less the riser, and by the way the front face of the batch box was perfectly flush with the front face of the bell, you will see why it was done this way coming up..   But you can accomplish this easily with your string line or squaring board.  I had approximately a 1.5" gap between front edge of the batch box and the bell, you could reduce this just a bit (1/2") but I would not go any wider.


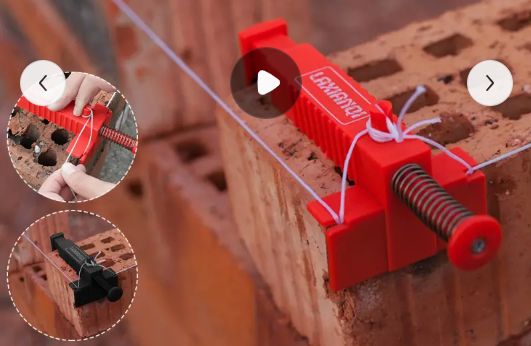
I like the way you run your string lines. I have some string blocks but they only work if you build up your corners a few corses. I've just been using my 4' and 6' levels to try to keep level, straight and plumb.

Scott Weinberg wrote:I used Insulated Fire Brick,  (IFB) of the Simond brand, and full size. These are of the best quality I have ever found. I certainly could have done the 5 minute riser often described so well by Dragon Tech, and it would have been cheaper.  But again my background was is solid brick laying and calculations. I got this my "forever" riser.    So please note that ALL of the batch box including the riser base was with full hard fire bricks. to have the toughest chamber I could build, and then when the fire turns the corner up the riser, it finds a unrestricted and insulated path to the top of the riser.


I'm in agreement with you on the "forever" riser... this is one of my hopeful goals with my build. Given the full brick bell design we both have, the last thing either of us wants to do is tear down the bell to replace the riser or rebuild the core. Rebuilds, on the other hand, are much more reasonable when using a steel barrel over the riser.
 
Scott Weinberg
Posts: 284
Location: North East Iowa, USA
71
  • Likes 6
  • Mark post as helpful
  • send pies
    Number of slices to send:
    Optional 'thank-you' note:
  • Quote
  • Report post to moderator

Glenn Littman wrote:

 Given the full brick bell design we both have, the last thing either of us wants to do is tear down the bell to replace the riser or rebuild the core. Rebuilds, on the other hand, are much more reasonable when using a steel barrel over the riser.


I am excited in due time to show how I WILL NOT have to tear down my bell to do any work on internal parts,  if you go back through the photos, both my bottom face plate and my top plate are removable, And I made sure I could crawl in there before I completed the job.   Not a "big man" spot, nor stiff legged, but do-able.


I will have to work on the photos for the dual string holder for the corners, but it is slick.
 
Glenn Littman
rocket scientist
Posts: 175
Location: Sangre de Cristo Mountains, CO - Lat 38°14' - Zone 5b
130
hunting earthworks solar wood heat rocket stoves homestead
  • Likes 2
  • Mark post as helpful
  • send pies
    Number of slices to send:
    Optional 'thank-you' note:
  • Quote
  • Report post to moderator

Scott Weinberg wrote:...I get the entire mass to about 175 degrees, my flue temp starts getting to the same. Which is still very low, but if I were to go to 200 it also follows, just the dynamics. So I back off and hold or do what I need to to keep 150 all day.


Are you saying that your outside skin temps are in the 175 deg range when up to temp? That is hotter than I would have expected but you have a single wall skin, correct?
 
Scott Weinberg
Posts: 284
Location: North East Iowa, USA
71
  • Likes 6
  • Mark post as helpful
  • send pies
    Number of slices to send:
    Optional 'thank-you' note:
  • Quote
  • Report post to moderator

Glenn Littman wrote:

Scott Weinberg wrote:...I get the entire mass to about 175 degrees, my flue temp starts getting to the same. Which is still very low, but if I were to go to 200 it also follows, just the dynamics. So I back off and hold or do what I need to to keep 150 all day.


Are you saying that your outside skin temps are in the 175 deg range when up to temp? That is hotter than I would have expected but you have a single wall skin, correct?


Yes, when I get to 150, I start considering when I am going to not be around, to close it down.  If I have time and temps outside are really cold (below 20 F) I add one more fire, and go to 175.  

This is the outside temp of the double wall ( granite)  measured at about 2 foot down from top.  Each foot down, is about 15 degrees cooler.  I have discussed in detail about slowing the path down or perhaps working to get the entire bell more even.  But my exit temps are good at 125-150  so not a big concern.  Anything I might do will wait for fall of 2024 heating  season This thinking will simply be a redirection of gas flow in the bell.  Would not be considered if I had any draft problems, which I don't have.
 
Scott Weinberg
Posts: 284
Location: North East Iowa, USA
71
  • Likes 7
  • Mark post as helpful
  • send pies
    Number of slices to send:
    Optional 'thank-you' note:
  • Quote
  • Report post to moderator
If your bricks have holes in the right spots, this will work great, If you have solid bricks or bricks with holes that won't let you reach the sides, then you will have to attach on the long side of a run and make do, but a pretty handy unit.
Final-size-and-look.jpg
Note, two directions, one string dog, but you have to start out square. YES!
 
Glenn Littman
rocket scientist
Posts: 175
Location: Sangre de Cristo Mountains, CO - Lat 38°14' - Zone 5b
130
hunting earthworks solar wood heat rocket stoves homestead
  • Likes 6
  • Mark post as helpful
  • send pies
    Number of slices to send:
    Optional 'thank-you' note:
  • Quote
  • Report post to moderator

Scott Weinberg wrote:If your bricks have holes in the right spots, this will work great, If you have solid bricks or bricks with holes that won't let you reach the sides, then you will have to attach on the long side of a run and make do, but a pretty handy unit.


Thanks for the info on the string jig. I've gotten pretty good at maintaining level, plumb & square and only have about 8 or so more courses to set so I'll stick with my manual method. I don't expect an invite to join the local Mason's Lodge but my masonry skills have graduated beyond beginner.
 
Scott Weinberg
Posts: 284
Location: North East Iowa, USA
71
  • Likes 7
  • Mark post as helpful
  • send pies
    Number of slices to send:
    Optional 'thank-you' note:
  • Quote
  • Report post to moderator
By pass time- now is the time.

In reading what Thomas R of https://dragontechrmh.com did by cutting in a by-pass to a existing stove, and at his great suggestion during my building, I thought would be a very worth while addition to the stove. When the work was considered if I ever had to add it later, it became a must for me to build it in now.

Some notes-
I built mine of all stainless (because I had all of it)
4" in size with simple slide gate, perhaps a butterfly gate would have worked but I was thinking my slide gate would be a more complete shut off, and that has proven true.
This was considered for two reasons, 1) it allowed me to add just a bit more ISA (internal surface area) without worries. 2) for those days when mother nature thinks, us humans love smoke in the house.  I call these heavy air days. This is where the air outside is super still, perhaps warmer than usual, and barometric pressures are working against you.  Often the fire is just lagging when starting,  It might be drawing for a moment, then two moments later, slowly seeping a few wisps of smoke out the door area. if you have ever run a wood stove of any type, you will know what I am talking about. With my old stoves (standard type)  there was times, when it was easier NOT to light.

What it does:  my by-pass is right at the height of the top of the riser, this super heated air can go right from the top of the bell, through the bypass and enter the chimney well above the 200-400 degree range.  This only takes moments, and once established, I have not had it reverse.  In total, maybe 2 minutes worth.
This is epically nice if you have a really cold stove, in my case, 55 degrees for the entire mass.

The good news-  I have only had to use twice, as I have tremendous draw, even on still days. But oh so nice when it was needed.  I love seeing it there, ready to go and waiting, even though I seldom use it.

It was built like this. (note, I guess you can buy them, but expensive)  though-still worth it!
IMG950832.jpg
Not really detailed, but you can see the details here of the gate
IMG950834.jpg
The gate openiin is close but NO tightness, think kitchen drawer fit.
IMG950833.jpg
Long end IN, and short end is about 5" long and 4" dia OD
IMG950873.jpg
Super wool for a gasket and expansion joint Worked well
IMG950871.jpg
You can see that this was done right at the brick to fire brick transition spot
IMG950958.jpg
Another way of holding until brick work is done. It could be removed.
IMG951015.jpg
Discovered I don't have a complete hooked up photo, but this will do.
 
Glenn Littman
rocket scientist
Posts: 175
Location: Sangre de Cristo Mountains, CO - Lat 38°14' - Zone 5b
130
hunting earthworks solar wood heat rocket stoves homestead
  • Likes 3
  • Mark post as helpful
  • send pies
    Number of slices to send:
    Optional 'thank-you' note:
  • Quote
  • Report post to moderator
Great timing on posting your bypass Scott, and great job fabricating yours from scratch.

I'm 3 courses of brick away from my firebrick transition and the installation of my bypass. I see the Superwool gasket. How did you fill the voids between the square opening and the gasket? Just mortar or some cut bricks and mortar? What is the height of your chimney?
 
Scott Weinberg
Posts: 284
Location: North East Iowa, USA
71
  • Likes 4
  • Mark post as helpful
  • send pies
    Number of slices to send:
    Optional 'thank-you' note:
  • Quote
  • Report post to moderator

Glenn Littman wrote:Great timing on posting your bypass Scott, and great job fabricating yours from scratch.

I'm 3 courses of brick away from my firebrick transition and the installation of my bypass. I see the Superwool gasket. How did you fill the voids between the square opening and the gasket? Just mortar or some cut bricks and mortar? What is the height of your chimney?


If you cut a corner off a fire brick at a 45, you can have as little or large of a corner wedge.  So depending how tight of tolerance of  your hole. (mine was snug against the super wool. that leaves some pretty small 45's   i.e. 1/2"-3/4"  on the bottom of by-pass and depending on the bricks size-- on the top.  

I did stuff some Mineral wool in these gaps as well, followed by some mortar.  Must  have been good enough as nothing leaks.  So in essence, I treated it like a sewer pipe going out a basement wall.  + the super wool.  Expansion here is a "for sure" occurrence if you need to use it. And even if you don't.

In this part of the Midwest, there was many large houses built square with a central chimney from basement floor through 1st and 2nd floors, and then a high pitched attic of another 12 foot.  Add all that up plus the 4' above the roof,  8+8+8+12+4 and I guess you get 40'  and I enter this at 5' on bottom.
 
Scott Weinberg
Posts: 284
Location: North East Iowa, USA
71
  • Likes 5
  • Mark post as helpful
  • send pies
    Number of slices to send:
    Optional 'thank-you' note:
  • Quote
  • Report post to moderator
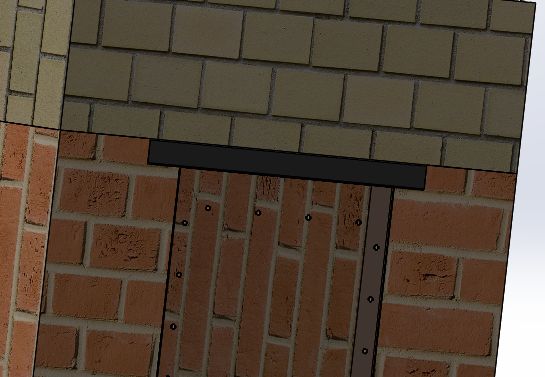
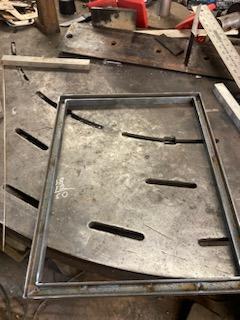
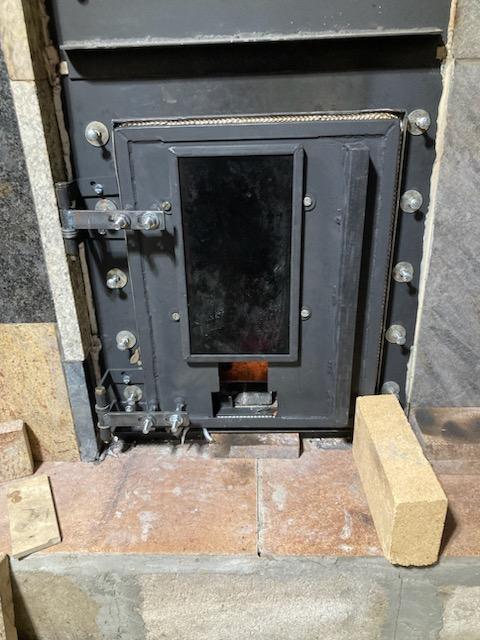
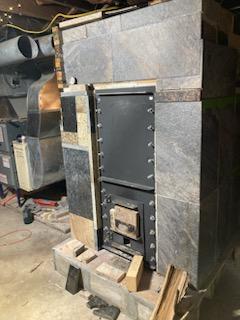
If you have been following along, no doubt you have seen that I had a two panel front. This was done for two reasons

1) The bottom one contains my door, and rather that forcing me to build/change or modify in place, it can easily be removed from the stove and be worked on in the shop. Far easier to take to the welder, vs bringing the welder to the stove.

2) The top panel, is from the batch box panel up to the Fire brick starting tier. this is large enough so that I could get into the bell and work on most anything if I choose. ( yes, I tried this out , and it works)   Or, I could add a black oven, (back to the shop thing-above)  or white oven, for bread only.  I have not monitored internal temps, but I can easily get the front panel on the outside to 200+ degrees and maintain it for hours. But I do not know, internally what these temps are.

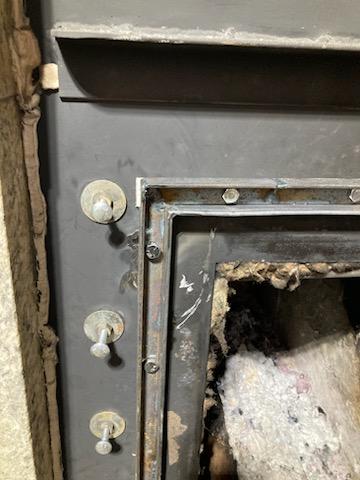
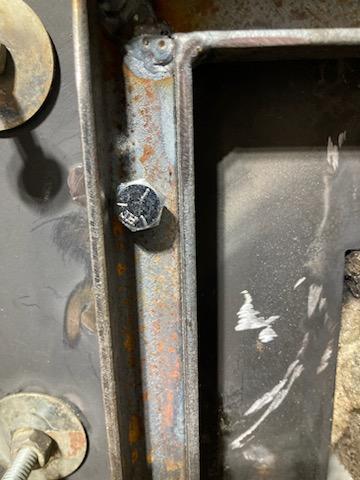
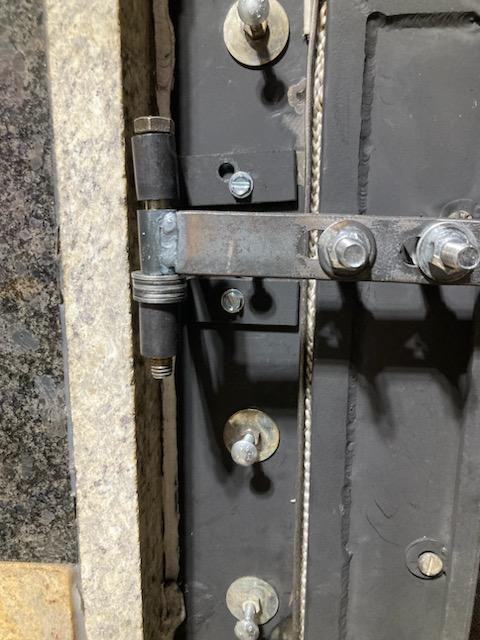
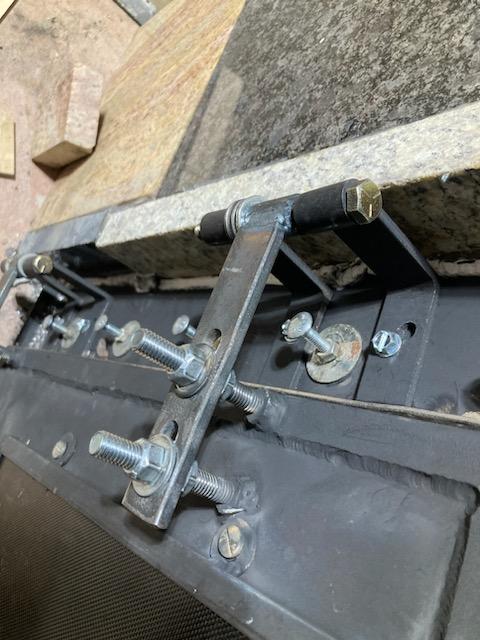
How to hold-  Simply, in reality,  As noted in past photos, you will see a carriage bolt.  These are almost always threaded all the way to the head.  With a welder you can take a nut, weld a round 1/4" bar/bolt about 2-3" long (this is your hook)   Take your plate with holes, thread a nut almost all the way to the head, then a washer, through the hole and then place the nut with cross bolt (you could double nut this to super secure it)   So all of these will naturally  hang with cross bolt down.

Line your brick opening face with super wool of 1/8 to 1/4" thickness ( I hold on with waterglass as a adhesive)

Put panel in place and each bolt will turn 1/4 turn left or right, depending on side, but you will feel the cross bolt grab onto the back side of the brick, hold the carriage bolt with one hand and tighten the outside nut.  You can see this in the photos.  it is really very simple and secure.  if you ever want to take the panel off, just a reverse.  I have been asked, about rust or corrosion, there really isn't any as the adjusting nut is on the outside, and will only move toward you to loosen.   But you could always cut off if you had to.

I used 5/16 Carriage bolts in 3/8's holes for loose fit. You could go smaller. no need for larger.  You want them to wiggle a bit when your feeling for the grab behind the brick.  Just picture your finger in a hole, searching for the back side of the brick. this creates the sandwich and really not much pressure on the brick, and yes the super wool covers the sealing and expansion questions.
IMG950956.jpg
Ready panel fitting.-overlap can be generous, hole location matters.
IMG950988.jpg
example of carriage bolt, with a cross bolt on the inside.
IMG950989.jpg
t/b in place, this is out of order as I had the entire stove to finnish
IMG950955.jpg
bottom panel done first, making sure it fits.
IMG951037.jpg
Just a teaser, tomorrow will be the T bars and roof of bell, installation
IMG950965-(1).jpg
another teaser- super wool wrapped T bars
 
Scott Weinberg
Posts: 284
Location: North East Iowa, USA
71
  • Likes 5
  • Mark post as helpful
  • send pies
    Number of slices to send:
    Optional 'thank-you' note:
  • Quote
  • Report post to moderator
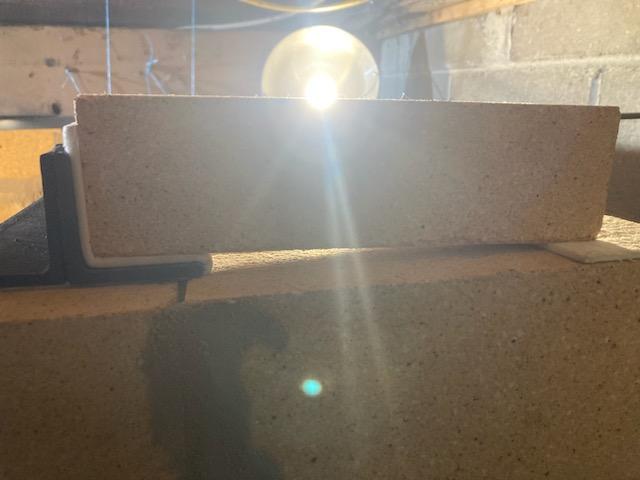
The top of the bell is something I personally have read very little about, and have seen even less.  So I went out on a limb here and did what I thought was best.  A few things I did know, was that there was no limit above the riser that this could be, so I used  the two restraints I had,  

1) I had only so much ceiling height and wanted to be able to reach anywhere across the top of the bell if required
2) my ISA  (interior surface area) was getting just a bit on the strong side, (thus the by-pass, if needed)

With those choices in hand, I stopped when I had to.  No more room.

T-bars of course can be angle iron welded on the flat and top.  I did a full weld on the bottom and stitch weld on top.  1/4" by 1-1/2 angle. And correct length as will be shown.  

There probably is 1/2 dozen different ways to do this, and I just chose one. It worked fine, but I might try a different way, if I was to do again. I did try a few tricks that also worked well and I hope they show up.

 
Scott Weinberg
Posts: 284
Location: North East Iowa, USA
71
  • Likes 4
  • Mark post as helpful
  • send pies
    Number of slices to send:
    Optional 'thank-you' note:
  • Quote
  • Report post to moderator
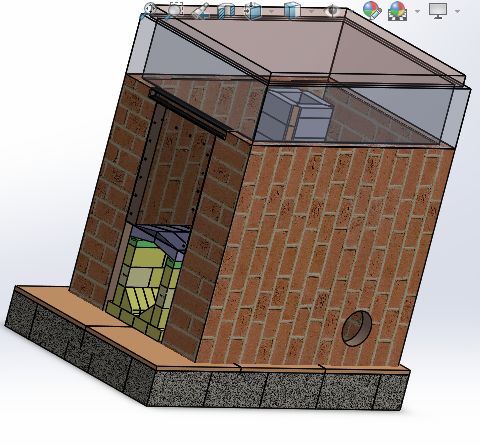
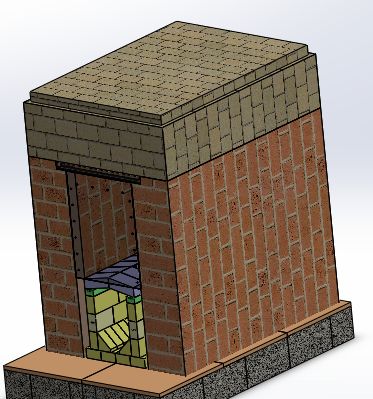
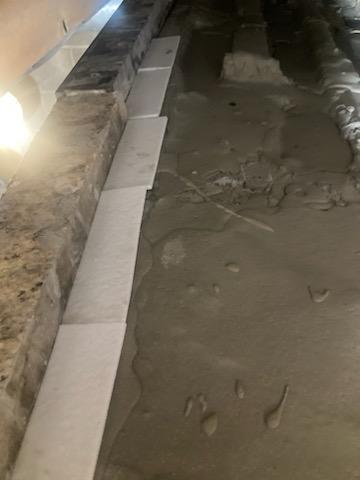
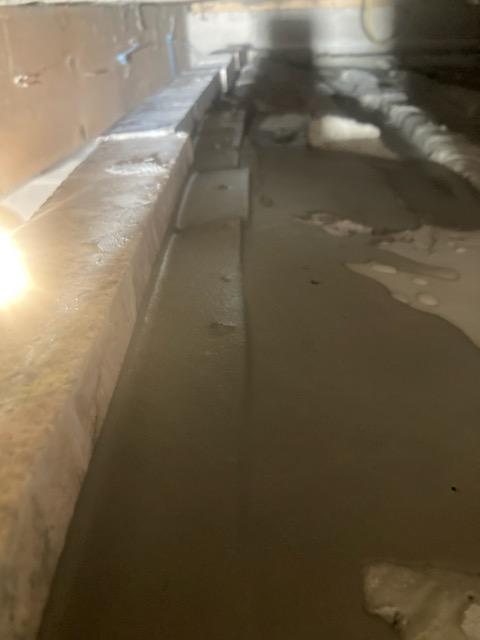
The photos following are a combo of my CAD work (that will show better than photos) of the intended results.  And then a few of the actual in place photos.  I am in no way, saying this is the only way, just how I did it.

Note on the floor sealing mix at bottom of photos

I have not seen anyone use
Absolutely need small batches as it sets in 10 minutes
A pouring cup works well, pour from mixing container into cup, don't dip cup into container (ask me how I know this)
This stuff is creamy smooth and flows into nearly every crack,

I have no idea if it will last or start to crack, but presently looks and works the same as day one.  My try with fire clay or fire clay and sand, was when it dried, it would crack, thick enough, perhaps not.  So I went with 1/8" of the leveling mix

Only time will tell, but if tiny cracks appear, I will just cover and add a bit more mix (frosting)

Bottom-of-bell-made-of-bricks.jpg
This was my inteded plan.
fire-brick-top.jpg
the height and size I had to work with. (on a super wool strip)
Steel-bridge-for-top-fire-brick.jpg
bridge (lentel) was also wrapped and put in place, size bricks accordingly.
IMG950886-(1).jpg
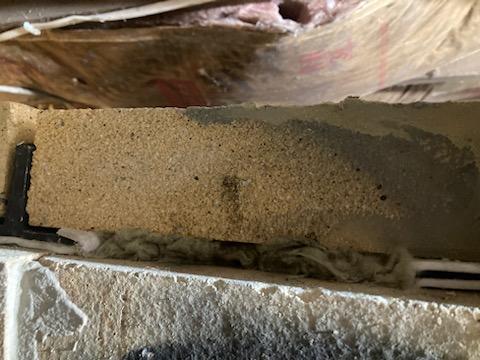
bricks over bridge with super wool wrap
IMG950959.jpg
at the top I had this dilemma, a gap and step down from T-bar to brick.
IMG950967-(1).jpg
My t bars across the top wrapped in Super wool set in 1.25" F-outside edge
IMG950961-(1).jpg
the top bricks were dry placed (with solution in mind)
IMG950970.jpg
Part 1 of gap solution, stuffing cracks with mineral wool
IMG950969.jpg
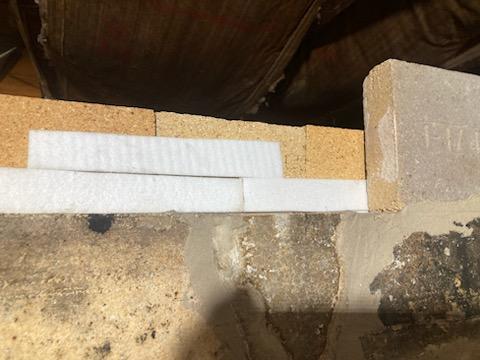
Part 2 setting splits on edge with super wool "gasket" complete surround
IMG950974.jpg
last area across the front ,now have formed a 2" deep bathtub inside top
IMG951059.jpg
This might be a bust in time, but covered the outside edge with narrow SW
IMG951060.jpg
This doesn't show it well, but poured in, Floor leveling mix. SEALED
 
Glenn Littman
rocket scientist
Posts: 175
Location: Sangre de Cristo Mountains, CO - Lat 38°14' - Zone 5b
130
hunting earthworks solar wood heat rocket stoves homestead
  • Likes 3
  • Mark post as helpful
  • send pies
    Number of slices to send:
    Optional 'thank-you' note:
  • Quote
  • Report post to moderator
Another case of good timing of your post Scott since I'm about a week away from beginning my roof. I have 3/16" x 1 1/2" angle iron but I'm questioning if I should use 1/4" thick so I don't have to be concerned about sagging over time due to the heat and weight. My open span is 22". From your pictures it looks like yours is a similar span.
 
Scott Weinberg
Posts: 284
Location: North East Iowa, USA
71
  • Likes 4
  • Mark post as helpful
  • send pies
    Number of slices to send:
    Optional 'thank-you' note:
  • Quote
  • Report post to moderator

Glenn Littman wrote:Another case of good timing of your post Scott since I'm about a week away from beginning my roof. I have 3/16" x 1 1/2" angle iron but I'm questioning if I should use 1/4" thick so I don't have to be concerned about sagging over time due to the heat and weight. My open span is 22". From your pictures it looks like yours is a similar span.


Actually am spanning almost 42"  With 1/4" I have not had any sags but have really covered with super wool, again I sure wish I knew just how hot it is right above riser.  
I am hoping others chime in and describe how they did roofs,  if you can see the top of the roof, mine would not be as nice looking, but your sure can't see mine at just under the ceiling.
 
Fox James
Rocket Scientist
Posts: 791
Location: Guernsey a small island near France.
299
  • Likes 4
  • Mark post as helpful
  • send pies
    Number of slices to send:
    Optional 'thank-you' note:
  • Quote
  • Report post to moderator
I would guess the temperature directly leaving the top of the riser would be 8-900c but it soon disperses and cools down, so it would depend on how high above the riser the ceiling is?
 
Glenn Littman
rocket scientist
Posts: 175
Location: Sangre de Cristo Mountains, CO - Lat 38°14' - Zone 5b
130
hunting earthworks solar wood heat rocket stoves homestead
  • Likes 4
  • Mark post as helpful
  • send pies
    Number of slices to send:
    Optional 'thank-you' note:
  • Quote
  • Report post to moderator

Scott Weinberg wrote:Actually am spanning almost 42".  I sure wish I knew just how hot it is right above riser.


OK, so you ran your T bars the length of the bell. I'm going to span the width to minimize the T bar length but I'll obviously need more.

When I dry stacked my core outside and fired it up with a thermocouple in the upper section of the riser I was seeing 1,500F. This was with a makeshift door of dry stacked bricks and riser just open to the air. I'm expecting to see higher temps of the gases exiting the riser but time will tell. As you probably saw in my build post, I retained the thermocouple in the riser albeit a bit higher than my test burn location, so I'll be reporting both riser temp and a 2nd thermocouple that will be embedded in the top row of refractory brick of the bell.
 
Scott Weinberg
Posts: 284
Location: North East Iowa, USA
71
  • Likes 3
  • Mark post as helpful
  • send pies
    Number of slices to send:
    Optional 'thank-you' note:
  • Quote
  • Report post to moderator

Glenn Littman wrote:

Scott Weinberg wrote:Actually am spanning almost 42".  I sure wish I knew just how hot it is right above riser.


OK, so you ran your T bars the length of the bell. I'm going to span the width to minimize the T bar length but I'll obviously need more.

When I dry stacked my core outside and fired it up with a thermocouple in the upper section of the riser I was seeing 1,500F. This was with a makeshift door of dry stacked bricks and riser just open to the air. I'm expecting to see higher temps of the gases exiting the riser but time will tell. As you probably saw in my build post, I retained the thermocouple in the riser albeit a bit higher than my test burn location, so I'll be reporting both riser temp and a 2nd thermocouple that will be embedded in the top row of refractory brick of the bell.


Hi Glen,  
   Some further details, if you go to the very 2nd photo it will show my base size was 48" x 72"  upon which the narrow side is the front of my stove, like yours.  But my "system size" is 7"  thus my bell is a fair bit larger.   so indeed, I run across the short width.  of about 42"

Excellent on the thermocouples and I may try to add these next summer, but strictly to see what is going on, not to really make any changes. (I think)  Having my access door will allow me to do this any time in the off season.

your build is looking great.

Best of success.
 
Scott Weinberg
Posts: 284
Location: North East Iowa, USA
71
  • Likes 5
  • Mark post as helpful
  • send pies
    Number of slices to send:
    Optional 'thank-you' note:
  • Quote
  • Report post to moderator
While I do not intend to detail the exact   dimensions of this particular build, I hope I have shown a few things so that others can also build their project that will work well the first time.

Though I have not seen, I presume that the door build booklet from Dragon Tech, https://dragontechrmh.com  would be worth it.   While mine certainly works, there are a few things that if done slightly wrong, might not work out for all.

I do have some ideas on the window that simply has worked excellent. And I hope I can show them here.

Thoughts on the window.
    There was a thread not long ago, asking to some extent "What would rather have, a efficient stove or a fireplace for gazing"  I will be the first to suggest you can have both.  And easily to boot.   More viewing equals a bigger window, but at a increase cost for the window, not more cost for making it fit.

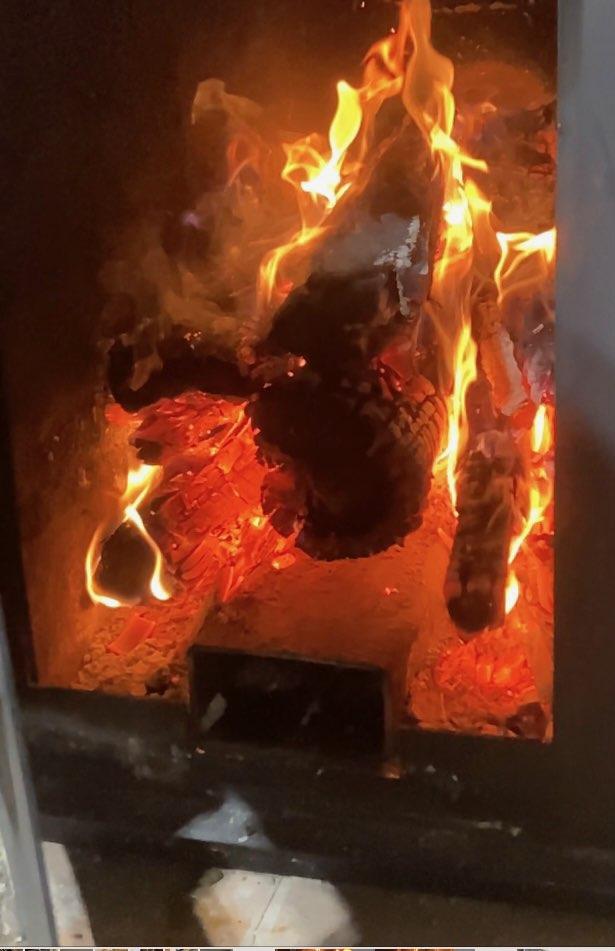
Everything inside your stove moves away from the window due to the draft carrying heat and fumes up the riser.  Oven cleaner can be effectively clean your window in minutes (when cold)   While I could easily go a month, if I want to show someone exactly what is happening, I can take a couple of minutes and clean the glass.  (not really glass but a ceramic clear)

Is it required to make your stove work well? no   Would I build without the glass, no.  

Highest temp on my glass and door I have recorded is 465 and that is with a scary fire that is simply roaring at its max.  This is easily sealed with a old stove gasket that can handle 700 degrees for sure.   I have dozens of them, all for free, just drop buy your appliance store or appliance recycling depot and you can remove this silver door seal in 15 seconds or less.  I haven't seen a stove without one.

Follow along and perhaps an idea will work for you, and please share your good ideas as well.
IMG951083.jpg
This is showing the main sheet that finger bolts hold onto the main brick.
IMG951074.jpg
Once your main sheet is fit to the stove, you can build all of this in your shop
IMG951082.jpg
1/2" angle laid flat and bolted on lower sheet with 1/2' strap to form. channel
IMG951080.jpg
Back side had a super wool gasket, Note: I would build with 3/4" instead
IMG951086.jpg
Finished size of the window, would I build this big again, yes
IMG951088.jpg
You want your pivot point if possible, out from the stove.
IMG951087.jpg
I built this, with lots of adjustability, perhaps not required.
IMG951255-(1).jpg
Again 1/2" but no inner channels made, just 1/2" angle with 4 tabs
IMG951311.jpg
tabs circled in yellow, this frame is at least 1/2" larger than window hole
 
Scott Weinberg
Posts: 284
Location: North East Iowa, USA
71
  • Likes 4
  • Mark post as helpful
  • send pies
    Number of slices to send:
    Optional 'thank-you' note:
  • Quote
  • Report post to moderator
This last photo got away from me.

But in explanation,

On your door,
You have your opening smaller than the glass by a little bit.  say 1/2"
You have your 1/2" frame with 4 tabs
Place your glass over the door hole, and your frame has to be larger than the glass by a little bit.
Push your glass then out towards the room and poke/slide/stuff your FREE stove gasket to hold the glass somewhat snuggly in place.
Plenty of expansion- edge of glass should not touch the frame edge.
This silver/gray gasket material works better than super wool for this purpose. And better than door gaskets as it feels like a hollow plastic snake, ready to be tucked into place, it handles corners well. Cuts easily.
I used a plastic comb to tuck it in.
IMG951312.jpg
door opening at least 1/2" smaller than glass, install, and poke in gasket.
 
Fox James
Rocket Scientist
Posts: 791
Location: Guernsey a small island near France.
299
  • Likes 3
  • Mark post as helpful
  • send pies
    Number of slices to send:
    Optional 'thank-you' note:
  • Quote
  • Report post to moderator
That is an impressive door!
I normally buy a cast door with window for about $200 -300 depending on size but the ones I build are either frameless ceramic glass or just a 10mm  steel sheet with a cut out done on a water jet cutter.
I would most certainly not recommend using  super wool on anything that will be regularly used or exposed to the air you breathe!!
I get lots and lots of free ceramic glass off cuts from my local stove supplier, some are cracked used pieces and some are just new offcuts but all are usable and useful.
 
Glenn Littman
rocket scientist
Posts: 175
Location: Sangre de Cristo Mountains, CO - Lat 38°14' - Zone 5b
130
hunting earthworks solar wood heat rocket stoves homestead
  • Likes 5
  • Mark post as helpful
  • send pies
    Number of slices to send:
    Optional 'thank-you' note:
  • Quote
  • Report post to moderator

Scott Weinberg wrote: ...my base size was 48" x 72"  upon which the narrow side is the front of my stove, like yours.  But my "system size" is 7"  thus my bell is a fair bit larger.   so indeed, I run across the short width.  of about 42"


Ah yes, I forgot yours is a 7" system, so significantly larger ISA than a 6" system. My build was limited by reusing an existing 6" chimney pipe.

Thanks for sharing all of your information and pictures. Your timing was perfect to help me think through details as I'm in the later phase of my build. Great job on your build as well.
 
Scott Weinberg
Posts: 284
Location: North East Iowa, USA
71
  • Likes 7
  • Mark post as helpful
  • send pies
    Number of slices to send:
    Optional 'thank-you' note:
  • Quote
  • Report post to moderator
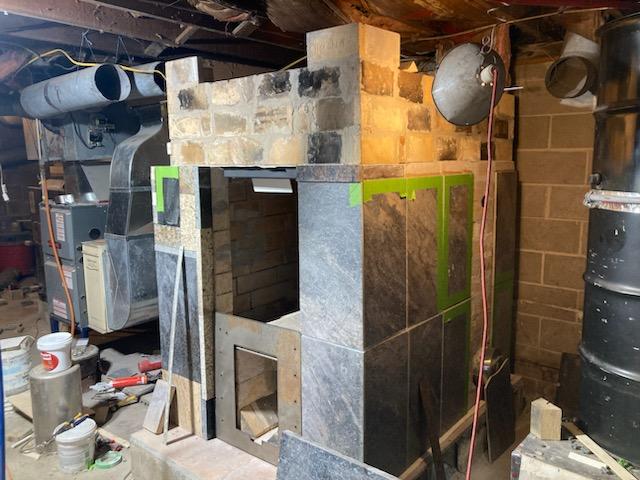
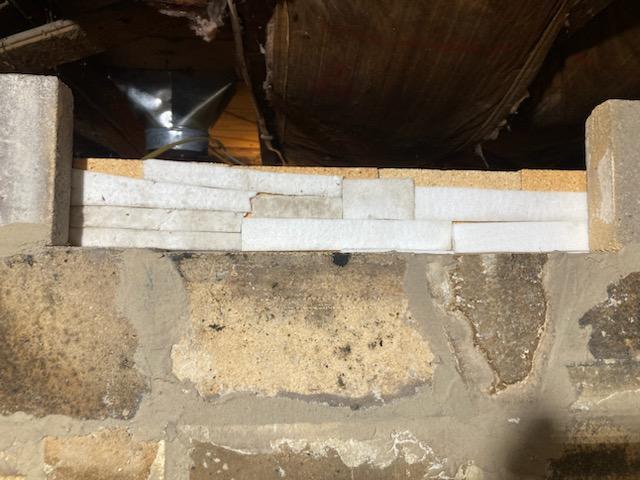
This is getting wrapped up, with only the facade test methods left.

With this not really being seen by many, I decided that I would test various methods for additional mass that had good properties for just about anyone in the world.  To that extent, I think i have achieved that.

Methods:
With the 2nd layer of the bell, we don't have to worry about the extreme temps of internal bell, and I have never run my exterior over 200, almost always stopping at 150 F.   So just for the sake of argument, the exterior of the inside bell, does not exceed 300 F  (if you disagree, please inform me of your probe readings)

So this opens a fantastic method of handling expansion as well as bonding, coupled with a extremely easy method of application.  The calking gun.

100% silicon specs often say that it is good for 400 F  I have found no difference in $4.59 vs $12.99 tube  both reading 100% silicon. And the label almost identical.

I suppose this is a "time will tell" process. But so far, so good.

So with your bell complete, including doors, exit flue, time to start your fire.  You can the exterior mass facade, at any rate you want.  And it requires a base support, just like any attaching methods.

I did not use any expansion material as the silicon takes care of that. Depending which method I laid the granite, or tile, I often used silicon as a spacer  for expansion lengthwise as well.  it is simple, a little dab will do it, we are talking less than 1/16"  but many many joints for a much larger total expansion.
by the way- I tested for granite expansion, with a cold measurement of 48" to a hot 200 degree and did not get to 1/16" inch.  VERY LOW  none-the-less I still treated it like it could expand and crack if restrained (which it is not)

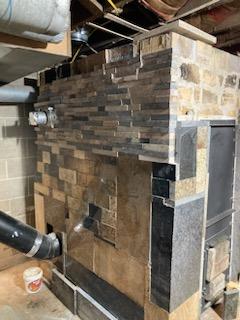
Photos are as I tried various ways.  The large flat tile is by far the easiest, but I have all kinds of granite, so used that as well.

I would say, if using granite on edge, I would make sure you have enough of one height, to span one side, mixing and matching heights leads you into a rabbit hole of cutting and trying to maintain one height.  (ask me how I know-but that is what testing is for)

When tiles are used, you can set just like floor tile (only with silicon on back side) and then use the silicon for grout lines. These tiles of course feel the hottest the quickest, due to far less mass.
IMG951038.jpg
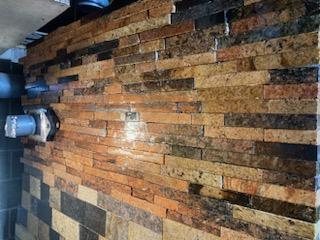
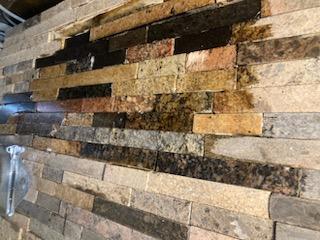
The upper layers are laid flat, 2.5" wide, fairly easy to lay, lots of cutting
IMG951025-(1).jpg
below, laid flat, with all kinds of experimentation for layouts.
IMG950549.jpg
If you have large pieces, they could be done like this. But heavy!
IMG951042.jpg
Right side are tile of larger size.
stove-5.jpg
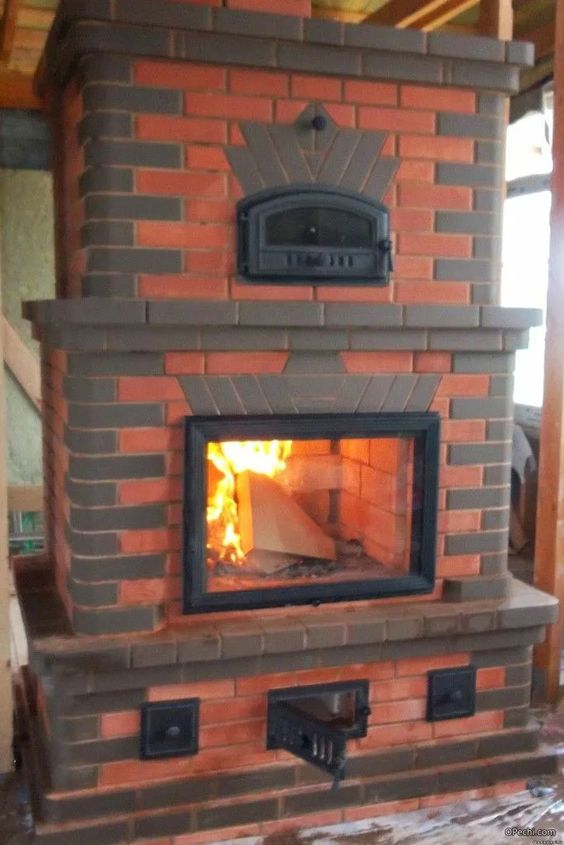
Not mine- you could achieve this "look" and the associated cost.
uncontrolled-expansion.jpg
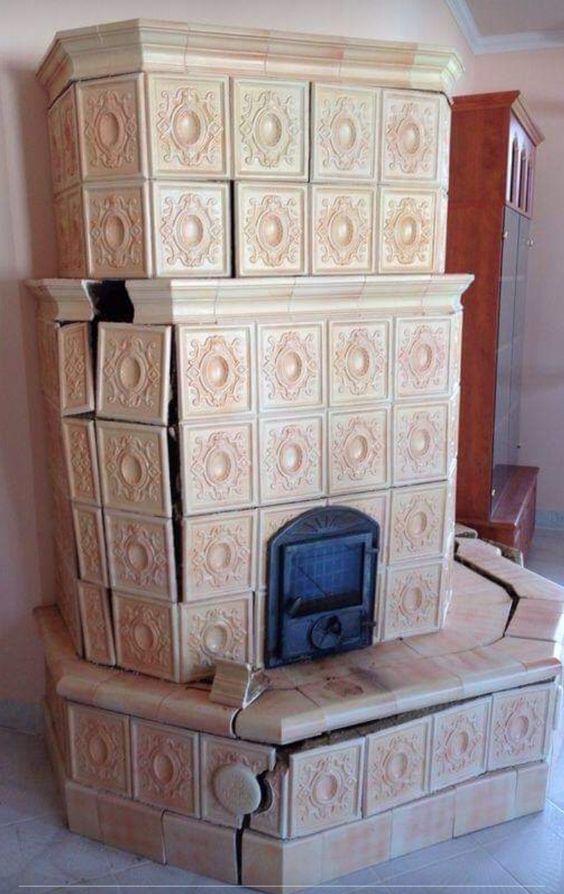
There is a reason for expansion ways. (Not mine)
IMG951022.jpg
Dull or shiny the choice is yours.
IMG950796.jpg
Last, my helper, guided me all the way..
 
Rocket Scientist
Posts: 4526
Location: Upstate NY, zone 5
574
5
  • Likes 5
  • Mark post as helpful
  • send pies
    Number of slices to send:
    Optional 'thank-you' note:
  • Quote
  • Report post to moderator
The surface temperature of the inner bell when exposed to air, before adding the outer skin, is not really indicative of the temperature at the interface after the outer skin is on. The outer skin will add another layer to the heat travel, so if the air face is 200 and the inner face is 600, you might get an interface temperature of 400. You may be fine if the silicone is rated to 400, but upper areas where the internal temperature is highest may have issues. Actual measurement at relevant points would clear this up one way or the other. And of course the relative thickness and conductivity of the layers would make a big difference.

There is high-temperature silicone gasketing material that is good to 700 F, though it comes in a relatively small tube in the automotive section and would be very expensive on the scale of a heater bell.
 
Scott Weinberg
Posts: 284
Location: North East Iowa, USA
71
  • Likes 5
  • Mark post as helpful
  • send pies
    Number of slices to send:
    Optional 'thank-you' note:
  • Quote
  • Report post to moderator

Glenn Herbert wrote:The surface temperature of the inner bell when exposed to air, before adding the outer skin, is not really indicative of the temperature at the interface after the outer skin is on. The outer skin will add another layer to the heat travel, so if the air face is 200 and the inner face is 600, you might get an interface temperature of 400. You may be fine if the silicone is rated to 400, but upper areas where the internal temperature is highest may have issues. Actual measurement at relevant points would clear this up one way or the other. And of course the relative thickness and conductivity of the layers would make a big difference.

There is high-temperature silicone gasketing material that is good to 700 F, though it comes in a relatively small tube in the automotive section and would be very expensive on the scale of a heater bell.


I may have stated that wrong,  

My inner brick is done with conventional mortar on the bottom, and fire brick mortar/cement where the fire bricks are.   I have a few of these exposed just for checking. the outside temp of the fire brick at the top.  (I also fired many times, before placing any exterior shell, to check temps)

Having never got to over 400 degrees on the exterior, was the reason I went the way I did.  I do understand the inner temp of the bell will be much higher.

But have never heard if the outer of the inner bell skin, will go up greatly when granite is added to?  When I read this, I see it is very confusing. Ha!

So like I say, it has been an experiment.  None of which effects the inner workings of the whole stove.  By the way, again, another experiment, I placed a seam of silicon along the steel face plate, clearly the hottest part of the stove..  All good so farm

Lastly, the rear of the stove I also tried from bottom to top a dry stack layer of granite 4" wide.. I don't have a photo for this. While I would not call this tight to the stove, I can assure you this area is holding the most heat. (highest mass) If it tips, no harm done, nothing for it to fall on.

 
Posts: 340
Location: Brendansport, Sagitta IV
44
  • Likes 3
  • Mark post as helpful
  • send pies
    Number of slices to send:
    Optional 'thank-you' note:
  • Quote
  • Report post to moderator
I keep thinking how much this build looks like a Greek temple -- maybe dedicate it to Hephaestus!
 
Glenn Littman
rocket scientist
Posts: 175
Location: Sangre de Cristo Mountains, CO - Lat 38°14' - Zone 5b
130
hunting earthworks solar wood heat rocket stoves homestead
  • Likes 3
  • Mark post as helpful
  • send pies
    Number of slices to send:
    Optional 'thank-you' note:
  • Quote
  • Report post to moderator
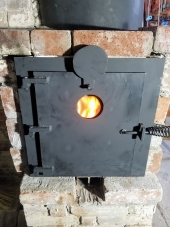
Scott, can you elaborate on your door air intake and the method for closing off? I don't see an air damper control on your door pictures. Or do you simply place a brick in front of the intakes to close them off?
 
Scott Weinberg
Posts: 284
Location: North East Iowa, USA
71
  • Likes 4
  • Mark post as helpful
  • send pies
    Number of slices to send:
    Optional 'thank-you' note:
  • Quote
  • Report post to moderator

Glenn Littman wrote:Scott, can you elaborate on your door air intake and the method for closing off? I don't see an air damper control on your door pictures. Or do you simply place a brick in front of the intakes to close them off?


I will take a photo of this and post a bit later, but for now the explanation would be best said.  

I have my opening for both Primary and Secondary air  together with the secondary air tube right flush with the opening.  Thus I have a plate (this can be metal or tile) that I have two rows of the free gasket material applied with waterglass.  I don't feel that any form of Super Wool would suffice here as the twice a day placement would rub it off.

This plate is easily held in place with a brick. placed against it.  The same brick is used a few inches back to stop any embers that may tumble out.   All of this is possible due to the shelf that is directly in front of the fire box.  (see the very beginning of the build photos)  

The shelf does many things for me.  
Gets the fire box up off the floor
provides a level for the above mentioned brick to hold the air inlet seal
Looks nice
Holds things for when starting your batch fire.

Enjoy the burn!
 
Scott Weinberg
Posts: 284
Location: North East Iowa, USA
71
  • Likes 2
  • Mark post as helpful
  • send pies
    Number of slices to send:
    Optional 'thank-you' note:
  • Quote
  • Report post to moderator
Addition to the primary and secondary air seal.

Stove  #4  (yes I learn slow)  would have on my door, a exactly opposite of the door a flange all around the opening of the inlet. protruding 1/2 to 3/4"  

This would allow  your primary air sealing door to be built with gasket in the door, and then when placed against the flange would seal nicely and simply. Again held with a brick or I guess  you could hinge this as well, but certainly not required.  Only on when not burning.

I see many have used simple plates, blocks and the like, but my draft would suck your T-shirt off if to close, So I prefer to seal with a gasket of free nature.
 
Glenn Littman
rocket scientist
Posts: 175
Location: Sangre de Cristo Mountains, CO - Lat 38°14' - Zone 5b
130
hunting earthworks solar wood heat rocket stoves homestead
  • Likes 1
  • Mark post as helpful
  • send pies
    Number of slices to send:
    Optional 'thank-you' note:
  • Quote
  • Report post to moderator

Scott Weinberg wrote:The shelf does many things for me.  
Gets the fire box up off the floor
provides a level for the above mentioned brick to hold the air inlet seal
Looks nice
Holds things for when starting your batch fire.


Thanks for the explanation. It makes sense and provides a tight seal.

I like your shelf idea. It has me thinking that I could add a bracket at the bottom of my door frame where it hides the full size ref brick base that the firebox is built on. This would give me 2+" of space below the secondary air intake for a narrow shelf, maybe a scrap cut-off of soapstone. I was planning to research stone suppliers in Colorado Springs or Denver to see if anyone has reasonable prices on soapstone cut-offs for my next build.
 
But why do you wear your googles indoors? While holding this tiny ad?
Rocket Mass Heater Jamboree And Updates
https://permies.com/t/170234/Rocket-Mass-Heater-Jamboree-Updates
reply
    Bookmark Topic Watch Topic
  • New Topic