• Post Reply Bookmark Topic Watch Topic
  • New Topic
permaculture forums growies critters building homesteading energy monies kitchen purity ungarbage community wilderness fiber arts art permaculture artisans regional education skip experiences global resources cider press projects digital market permies.com pie forums private forums all forums
this forum made possible by our volunteer staff, including ...
master stewards:
  • Nancy Reading
  • Carla Burke
  • r ranson
  • John F Dean
  • paul wheaton
  • Pearl Sutton
stewards:
  • Jay Angler
  • Liv Smith
  • Leigh Tate
master gardeners:
  • Christopher Weeks
  • Timothy Norton
gardeners:
  • thomas rubino
  • Jeremy VanGelder
  • Maieshe Ljin
  • Likes 3
  • Mark post as helpful
  • send pies
    Number of slices to send:
    Optional 'thank-you' note:
  • Quote
  • Report post to moderator
This is a badge bit (BB) that is part of the PEP curriculum.  Completing this BB is part of getting the sand badge in earthworks.

A dry stack wall is simply stacked rocks that form a wall without using mortar or other type of cement.

They are very useful simply as walls or for retaining soil, letting water drain freely through the rocks. Here is a cool use for one! Interesting keyhole hugelkulter design

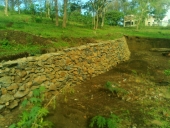
Here is a dry stack retaining wall that meets the criteria:


More about dry stack retaining walls.

Here Paul discusses a dry stack wall that he and Jocelyn put up in just a few hours that will probably last for decades! The dry stack part starts at 2:10.


To get certified for this BB, the minimum requirements are:
  - Your wall should be at least 2 feet tall and 4 feet long
  - Primarily built using 2 rocks over 1 and 1 rock over 2 technique
  - Gravel foundation with good drainage to prevent puddling of icy water
  - Wall is much thicker at the bottom than at the top
       - This will give the wall the appearance, in the end, that it is leaning into the dirt
  - There is a sharp gravel fill between the wall and dirt
       - Not rounded gravel or sand
       - The gravel is compacted and some of the rocks might rest on some of the gravel

To show you've completed this Badge Bit, provide proof of the following as pics or video (less than two minutes):
  - Your area before starting
  - Your gravel foundation with drainage
  - Progress about half way through, showing some of the rocks stacked and with the gravel behind the wall
  - Finished project showing the size of the wall

COMMENTS:
 
steward
Posts: 15505
Location: Northern WI (zone 4)
4846
7
hunting trees books food preservation solar woodworking
  • Likes 5
  • Mark post as helpful
  • send pies
    Number of slices to send:
    Optional 'thank-you' note:
  • Quote
  • Report post to moderator
Approved submission
I built a dry stack retaining wall today at the PEP1 event!  Well, I built something crappy first and Paul gave me some training and then I rebuilt it better.  It's holding soil back from behind a fruit tree.  It would be better at holding back the hill if it was curved against the side of the hill better (C shape as you look down from above) but in this case I didn't want to undermine the berm by digging out too much.  

The crappy things I did wrong the first time were:
  • I had dirt touching the backside of the rocks instead of rubble and gravel
  • I had vertical lines.  It should be one rock straddling two as much as possible
  • DSC05098.JPG
    Boring berm side
    Boring berm side
    DSC05101.JPG
    Dry stack wall going up
    Dry stack wall going up
    DSC05102.JPG
    Ain't she pretty
    Ain't she pretty
    Staff note (Nicole Alderman) :

    I certify that this BB is complete!

     
    gardener
    Posts: 1958
    Location: British Columbia
    1113
    3
    monies home care forest garden foraging chicken wood heat homestead ungarbage
    • Likes 10
    • Mark post as helpful
    • send pies
      Number of slices to send:
      Optional 'thank-you' note:
    • Quote
    • Report post to moderator
    Approved submission
    So far this is the work that I'm the most proud of. There is an apple tree outside of Allerton Abbey that was in danger of being smooshed! Here is my journey to get a BB, my artsy, and make a beautiful home for the apple.

    DSC_0067.JPG
    The start!
    The start!
    DSC_0071.JPG
    Digging and tamping area
    Digging and tamping area
    DSC_0072.JPG
    Inital ring design; later revised
    Inital ring design; later revised
    DSC_0074.JPG
    Height of wall is 2ft
    Height of wall is 2ft
    DSC_0087.JPG
    Height measurement from second angle
    Height measurement from second angle
    DSC_0082.JPG
    Showing the width of less than 4ft but as a half circle it was more than 4ft.
    Showing the width of less than 4ft but as a half circle it was more than 4ft.
    DSC_0083.JPG
    Final wall for BB
    Final wall for BB
    71009410_507081586753740_8069395804244148224_n.jpg
    Final project: I took down some of the rocks on the South side for more sun for the apple and added some mulchy goodness!
    Final project: I took down some of the rocks on the South side for more sun for the apple and added some mulchy goodness!
    Staff note (Steve Thorn) :

    I certify this BB is complete!

     
    steward
    Posts: 2878
    Location: Zone 7b/8a Southeast US
    1106
    4
    forest garden fish trees foraging earthworks food preservation cooking bee woodworking homestead ungarbage
    • Likes 1
    • Mark post as helpful
    • send pies
      Number of slices to send:
      Optional 'thank-you' note:
    • Quote
    • Report post to moderator
    That looks awesome Ashley, looks like that apple tree has a nice new home!
     
    Posts: 63
    Location: La Bretagne
    13
    homeschooling solar rocket stoves
    • Likes 2
    • Mark post as helpful
    • send pies
      Number of slices to send:
      Optional 'thank-you' note:
    • Quote
    • Report post to moderator
    I don't know what a badge is and I will not be able to get before photos until after the Imbolc, as we only have solar power and I will not have access to my computer, where before photos are stored, and the internet for lack of power until then. But I took some photos with my phone this morning and will share them.
    IMG_20191115_110251561.jpg
    [Thumbnail for IMG_20191115_110251561.jpg]
    IMG_20191115_110234920.jpg
    [Thumbnail for IMG_20191115_110234920.jpg]
    IMG_20191115_110223532.jpg
    [Thumbnail for IMG_20191115_110223532.jpg]
    IMG_20191115_110120987.jpg
    [Thumbnail for IMG_20191115_110120987.jpg]
    IMG_20191115_110113895.jpg
    [Thumbnail for IMG_20191115_110113895.jpg]
     
    Mike Haasl
    steward
    Posts: 15505
    Location: Northern WI (zone 4)
    4846
    7
    hunting trees books food preservation solar woodworking
    • Mark post as helpful
    • send pies
      Number of slices to send:
      Optional 'thank-you' note:
    • Quote
    • Report post to moderator
    That's a pretty wall Tiffaney!  Do you have a picture of it before you started and one of it partially constructed?
     
    Tiffaney Dex
    Posts: 63
    Location: La Bretagne
    13
    homeschooling solar rocket stoves
    • Likes 1
    • Mark post as helpful
    • send pies
      Number of slices to send:
      Optional 'thank-you' note:
    • Quote
    • Report post to moderator
    Thank you, Mike!

    The wall isn't actually finished still. It is supposed to get up to the level of the black plastic livestock watering containers behind it and cover the black plastic edges. This is our used water treatment system. We started working on it in 2015 and I know I posted pictures of the beginnings on Facebook. I probably have them somewhere, but it will take power that we don't have at this time of the year to find them. I think it is about two years now that our used water goes into the system and all of the work around it is not a big priority. My husband sometimes adds a couple of stones when he sees one that he thinks looks right. I haven't added anything  besides soil and plants during the past year, so he is the one needs to be credited for the work.

    The black plastic containers (drinking troughs?) are our vertical plant filters. The water pipes go out the bottom of them, through the wall, and into the horizontal filter that is below the wall. The wood bark hides the pipes.
     
    Tiffaney Dex
    Posts: 63
    Location: La Bretagne
    13
    homeschooling solar rocket stoves
    • Mark post as helpful
    • send pies
      Number of slices to send:
      Optional 'thank-you' note:
    • Quote
    • Report post to moderator
    Approved submission
    I'm at the library right now and have found the photos on facebook.
    The-rock-in-the-middle-is-the-menhir-(the-standing-rock)-at-the-end-of-the-wall..jpg
    The rock in the middle is the menhir (the standing rock) at the end of the wall.
    The rock in the middle is the menhir (the standing rock) at the end of the wall.
    This-is-around-the-entire-length-of-the-wall-as-we-were-digging-out-the-horizontal-filter.-The-vertical-filters-did-not-involve-as-much-digging..jpg
    This is around the entire length of the wall, as we were digging out the horizontal filter. The vertical filters did not involve as much digging.
    This is around the entire length of the wall, as we were digging out the horizontal filter. The vertical filters did not involve as much digging.
    Staff note (Mike Haasl) :

    I certify this BB complete (for Tiffaney's husband).  If he or you are going to do more BBs you'd need to get different accounts so we can keep the certifications straight.  Thanks!

     
    pollinator
    Posts: 172
    Location: Midwest Montana
    256
    • Mark post as helpful
    • send pies
      Number of slices to send:
      Optional 'thank-you' note:
    • Quote
    • Report post to moderator
    Built a wall in Arrakis on the end of the berm shed. It will protect a willow tree (who's going to enjoy the runoff from the berm shed)
    My wall is 2' x 4' plus the curve/tail. Unfortunately I was on boot time and didn't realize I needed a picture of the rocks half stacked, but I did get one with the dugout and foundation put in. I understand I have not fully met the bb requirements, so do with me as you will
    IMG_20200525_142407151.jpg
    Spot before
    Spot before
    IMG_20200525_145857467.jpg
    During
    During
    IMG_20200526_150810985.jpg
    After
    After
    Staff note (paul wheaton) :

    Not enough "two over one and one over two".  Should be a quick fix?

     
    Mike Haasl
    steward
    Posts: 15505
    Location: Northern WI (zone 4)
    4846
    7
    hunting trees books food preservation solar woodworking
    • Likes 1
    • Mark post as helpful
    • send pies
      Number of slices to send:
      Optional 'thank-you' note:
    • Quote
    • Report post to moderator
    I just adjusted the requirements for the badge to require the 2 over 1 and 1 over 2 detail.
     
    It's never done THAT before. Explain it to me tiny ad:
    the permaculture bootcamp in winter (plus half-assed holidays)
    https://permies.com/t/149839/permaculture-projects/permaculture-bootcamp-winter-assed-holidays
    reply
      Bookmark Topic Watch Topic
    • New Topic