• Post Reply Bookmark Topic Watch Topic
  • New Topic
permaculture forums growies critters building homesteading energy monies kitchen purity ungarbage community wilderness fiber arts art permaculture artisans regional education skip experiences global resources cider press projects digital market permies.com pie forums private forums all forums
this forum made possible by our volunteer staff, including ...
master stewards:
  • Nancy Reading
  • Carla Burke
  • r ranson
  • John F Dean
  • paul wheaton
  • Pearl Sutton
stewards:
  • Jay Angler
  • Liv Smith
  • Leigh Tate
master gardeners:
  • Christopher Weeks
  • Timothy Norton
gardeners:
  • thomas rubino
  • Jeremy VanGelder
  • Maieshe Ljin

My first RMH plans - basement masonry batch box with oven

 
pollinator
Posts: 1495
855
2
trees bike woodworking
  • Likes 10
  • Mark post as helpful
  • send pies
    Number of slices to send:
    Optional 'thank-you' note:
  • Quote
  • Report post to moderator
Hummingbird House Masonry RMH No.1

The house I’m working on is an unloved 1850’s colonial in Lower Hudson, NY. Before we moved in it had remained unoccupied for three years. It has lots of potential, especially the room I intend to build my first RMH

The house has a large basement and the room under the kitchen once had a functioning fireplace and bread oven. When we first looked at the house, I had no idea this wonderful asset even existed, the room was full of rubbish, massive cobwebs and the windows blocked with insulation, mouldy cardboard and bits of polystyrene. The light didn’t work so I didn’t do much investigation.

On the next visit, I discovered the bread oven and my mind started to fill with possibilities. After we moved in I cleared out all the rubbish and let the light in. Although the room is a basement room, it has three windows with sills at ground level, so four foot of the walls is above ground and four foot below.


Basement room after I cleared out the rubbish. The plan is to mirror the bread oven and build a RMH on the righthand side of the fireplace

It had been partially finished by the previous owner, an poor attempt to finish the walls. This consisted of filling holes in the brickwork and stone with chunks of polystyrene, then using sheets of the flimsiest polythene, random selection of insulation between studs and then dry wall. Unfortunately, they hadn’t fixed the outside guttering so every time it rained, water flowed through the field stone walls. The studs rotten, the dry wall crumbled and the polythene was next to useless. The rot spread and damaged the floor boards, the stairs, existing original plasterwork and all the benches and storage units placed against the external wall. I have now ripped it all out and discovered a massive rodent infestation who clearly thrived, nesting in the insulation and having a handy water source when it rained.


The rodent infested “finished” wall

I also removed a broken and very rusty stove which had been used to burn coal. I can now see the bones of the room and they look good.

My plans for this room are ambitious. It will be my second / back kitchen, somewhere I can play. It will be a place to grind grains, bake loaves, bulk process garden produce, brew and be creative. It will also be a social space with a RMH and heated bench, a Japanese style izakaya bar and stools, a hot plate for fast cooking bar food. This might sound a little bizarre but from my many trips to Japan it makes sense in my head. It’s our family “Frock up Friday” party room.

The gutter is now fixed. I’m installing a drain below the floor leading to a sump pump. The walls will be made good with a vapour barrier, studs, insulation and then wooden boards. The windows will be repaired / replaced with new sills. I’ve already built wells outside so there’s no longer dirt up against the wood work.


The new wall in the room next door - a proper solution
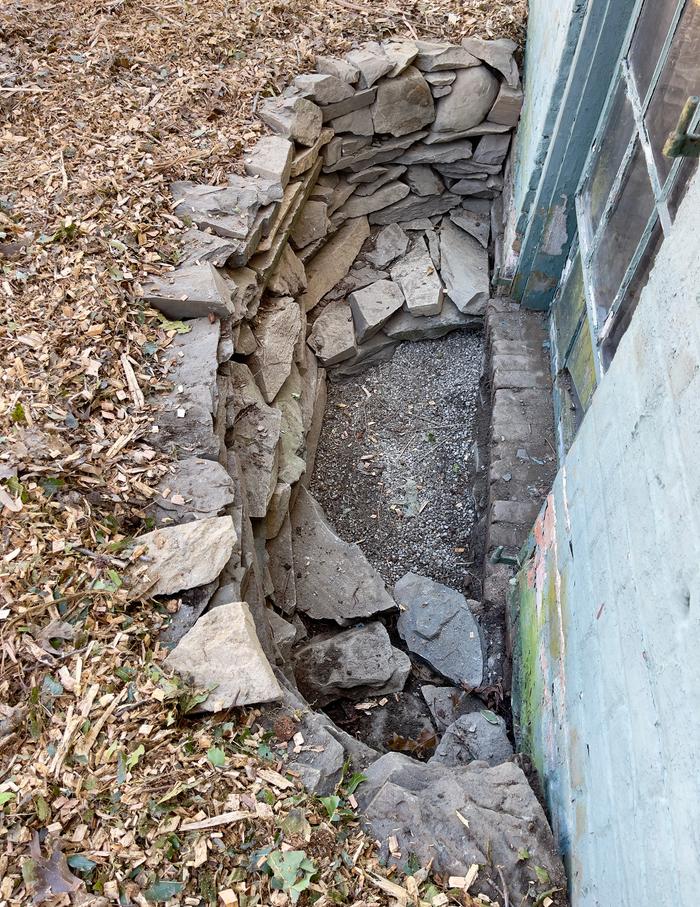

Window well

The chimney has a six inch metal flu inside which was used by the coal burner. I don’t know what condition it is. I will investigate and see if it can be cleaned and repurposed.

The bread oven looks in good shape. There’s a hole in the roof near the door which I assume leads to the chimney but probably not the metal flu. The door frame is broken but I have the parts. It’s cast iron and there’s a possibility it can be restored. The brickwork is sound, just needs repointing.


Left hand side with bread oven


Right hand side spot for RMH with bench under the window

I don’t intend to use the fireplace. I will clean it up, repoint and have it as a decorative feature.

The RMH is to go on the right hand side on an existing concrete pad. It will be masonry and mirror the bread oven, in dimensions and appearance with an oven in the same position as the bread oven. Therefore, it will be built with brick, regular and ceramic. The hot air will travel through a bench on the righthand wall before looping back and up through the whole above the fireplace. Ideally, I’d like there to be a hot plate on the roof for casseroles.


RMH goes here

So what do you think?

Here’s my first sketch of elevation - one big square is a foot, small squares three inches. (This image you can click on for full size version)
AE768A9F-A7BE-420F-B688-85A903F0B811.jpeg
[Thumbnail for AE768A9F-A7BE-420F-B688-85A903F0B811.jpeg]
 
rocket scientist
Posts: 6343
Location: latitude 47 N.W. montana zone 6A
3205
cat pig rocket stoves
  • Likes 5
  • Mark post as helpful
  • send pies
    Number of slices to send:
    Optional 'thank-you' note:
  • Quote
  • Report post to moderator
AWESOME ED!    That looks great!  
You are going to have a super fun space for your family when you're done!
Consider using a clay mortar on your RMH,  Dry powdered clay is available somewhere near you.  Fireclay should be nearby as well.
But any powdered clay will work for brick mortar.
 
thomas rubino
rocket scientist
Posts: 6343
Location: latitude 47 N.W. montana zone 6A
3205
cat pig rocket stoves
  • Likes 6
  • Mark post as helpful
  • send pies
    Number of slices to send:
    Optional 'thank-you' note:
  • Quote
  • Report post to moderator
Hi Ed;
I have been looking at your sketch.
I see a minor problem spot.  
You show apx. 9' of horizontal pipe from your RMH to the chimney.
You will want to use a single pipe if possible.  HVAC pipe is commonly sold in 5' lengths maybe it is available custom-made in longer pieces yet.
There will be condensation when you fire this stove up for the first month or so. It will drip from every pipe joint (ask me how I know this...) metal duct tape helps but having as few pipe joints as possible is a better idea.
First fires of the season and wood that is not dry enough are all causes for some condensation.
It looks really bad and smells!

Just a tip to keep things spiffy looking!
We want nothing but smiles from the boss!

 
Rocket Scientist
Posts: 4529
Location: Upstate NY, zone 5
575
5
  • Likes 4
  • Mark post as helpful
  • send pies
    Number of slices to send:
    Optional 'thank-you' note:
  • Quote
  • Report post to moderator
One thing you could do to reduce the length of horizontal stovepipe to the chimney would be to switch from a ducted bench to a hollow brick box open to the main mass cavity. That would allow hot air to circulate freely, then you could run an exhaust plunger tube from the bottom of the cavity nearest the fireplace up and over just a few feet. If you want to force more circulation through the bench cavity, you could run the exhaust tube along the floor to the mouth of the bench.
 
thomas rubino
rocket scientist
Posts: 6343
Location: latitude 47 N.W. montana zone 6A
3205
cat pig rocket stoves
  • Likes 2
  • Mark post as helpful
  • send pies
    Number of slices to send:
    Optional 'thank-you' note:
  • Quote
  • Report post to moderator
Hi Ed;
Here's a different thought for you to consider.
What if your batch box was over by the window?
Your bench could be hollow (no pipes). Walker style 1/2 barrels in a brick enclosure.
Your large bell could then exit at the bottom (below where your drawing says batch box) and go almost vertical up to the chimney entrance.
 
Edward Norton
pollinator
Posts: 1495
855
2
trees bike woodworking
  • Mark post as helpful
  • send pies
    Number of slices to send:
    Optional 'thank-you' note:
  • Quote
  • Report post to moderator

Glenn Herbert wrote:One thing you could do to reduce the length of horizontal stovepipe to the chimney would be to switch from a ducted bench to a hollow brick box open to the main mass cavity. That would allow hot air to circulate freely, then you could run an exhaust plunger tube from the bottom of the cavity nearest the fireplace up and over just a few feet. If you want to force more circulation through the bench cavity, you could run the exhaust tube along the floor to the mouth of the bench.


Great suggestion. I’m still reading and watching lots of stuff and building a glossary of terms. This is all totally new to me.
 
Edward Norton
pollinator
Posts: 1495
855
2
trees bike woodworking
  • Likes 1
  • Mark post as helpful
  • send pies
    Number of slices to send:
    Optional 'thank-you' note:
  • Quote
  • Report post to moderator
Thanks Thomas for all your encouragement so far. I’m a total greenhorn so need all the help I can get. Yesterday I went down the Walker rabbit hole. There are so many terms I’m unfamiliar with, so it’s great that this forum has a great wealth of information. I really like the Walker style “range”. It doesn’t fit with my plan of mirroring the bread oven, which was my wife’s idea. An L shaped bench in the corner would be more cozy though, so I could sell that idea. However, I’m guessing that means, I can’t shut of the bench section in the summer when I wouldn’t want to heat it?

Thanks also for the information on chimney section. I hadn’t factored that in. I’ll have to do some more research on the whole syphoning bit. I was going to ask about how to stick the bricks together and grateful that you’ve already answered with a solution I’m happy to work with. Cheers.
 
Glenn Herbert
Rocket Scientist
Posts: 4529
Location: Upstate NY, zone 5
575
5
  • Likes 2
  • Mark post as helpful
  • send pies
    Number of slices to send:
    Optional 'thank-you' note:
  • Quote
  • Report post to moderator
With thoughtful arrangement, you can make a bypass so that the exhaust can go straight to the chimney after the oven instead of through the whole mass, when you don't want the mass heated. I do suspect that except on the hotter summer days you would want to warm the mass a bit. A masonry mass in the basement in New York is going to be uncomfortably cool to sit on at any time unless you need relief from hot weather.
 
Edward Norton
pollinator
Posts: 1495
855
2
trees bike woodworking
  • Likes 1
  • Mark post as helpful
  • send pies
    Number of slices to send:
    Optional 'thank-you' note:
  • Quote
  • Report post to moderator
Thanks Glen and Thomas.

I spent most of the day watching videos, most were part of the last kickstarter. I now realise the little knowledge I had already picked up is already out of date. I hadn’t appreciated that bells are now the current thinking rather than pipes for most situations. I’m yoyoing between going full rocket scientist or buying a walker plan. I have a dozen other projects on the go that need to be finished before it gets really cold and hundreds over the next few years. Maybe I should start with a tried and test plan . . . The jury is still out.
 
gardener
Posts: 1213
Location: Proebstel, Washington, USDA Zone 6B
696
2
wheelbarrows and trailers kids trees earthworks woodworking
  • Likes 2
  • Mark post as helpful
  • send pies
    Number of slices to send:
    Optional 'thank-you' note:
  • Quote
  • Report post to moderator
Edward, the way that you are knocking out projects one after the other allows you to stack functions in a beautiful way. The fact that you can expect to get a cherry slab from your chip drops is wonderful. And your internal and external projects will make your walls last for many years to come.
 
Edward Norton
pollinator
Posts: 1495
855
2
trees bike woodworking
  • Mark post as helpful
  • send pies
    Number of slices to send:
    Optional 'thank-you' note:
  • Quote
  • Report post to moderator

Jeremy VanGelder wrote:Edward, the way that you are knocking out projects one after the other allows you to stack functions in a beautiful way. The fact that you can expect to get a cherry slab from your chip drops is wonderful. And your internal and external projects will make your walls last for many years to come.


Thank you Jeremy, such lovely words! I still have a bit more thinking, researching and questioning before I finalise and get started. I’ve also already blown my monthly budget, so will keep it simple and look for recycled materials. Cheers.
 
Destiny's powerful hand has made the bed of my future. And this tiny ad:
GAMCOD 2025: 200 square feet; Zero degrees F or colder; calories cheap and easy
https://permies.com/wiki/270034/GAMCOD-square-feet-degrees-colder
reply
    Bookmark Topic Watch Topic
  • New Topic