Raven - I saw you are still having difficulties the Amazon seller of the walking skirt pattern. That's really frustrating!!! I am going to be optimistic and hope you will eventually get to do this project. I had a lot of fun with my version

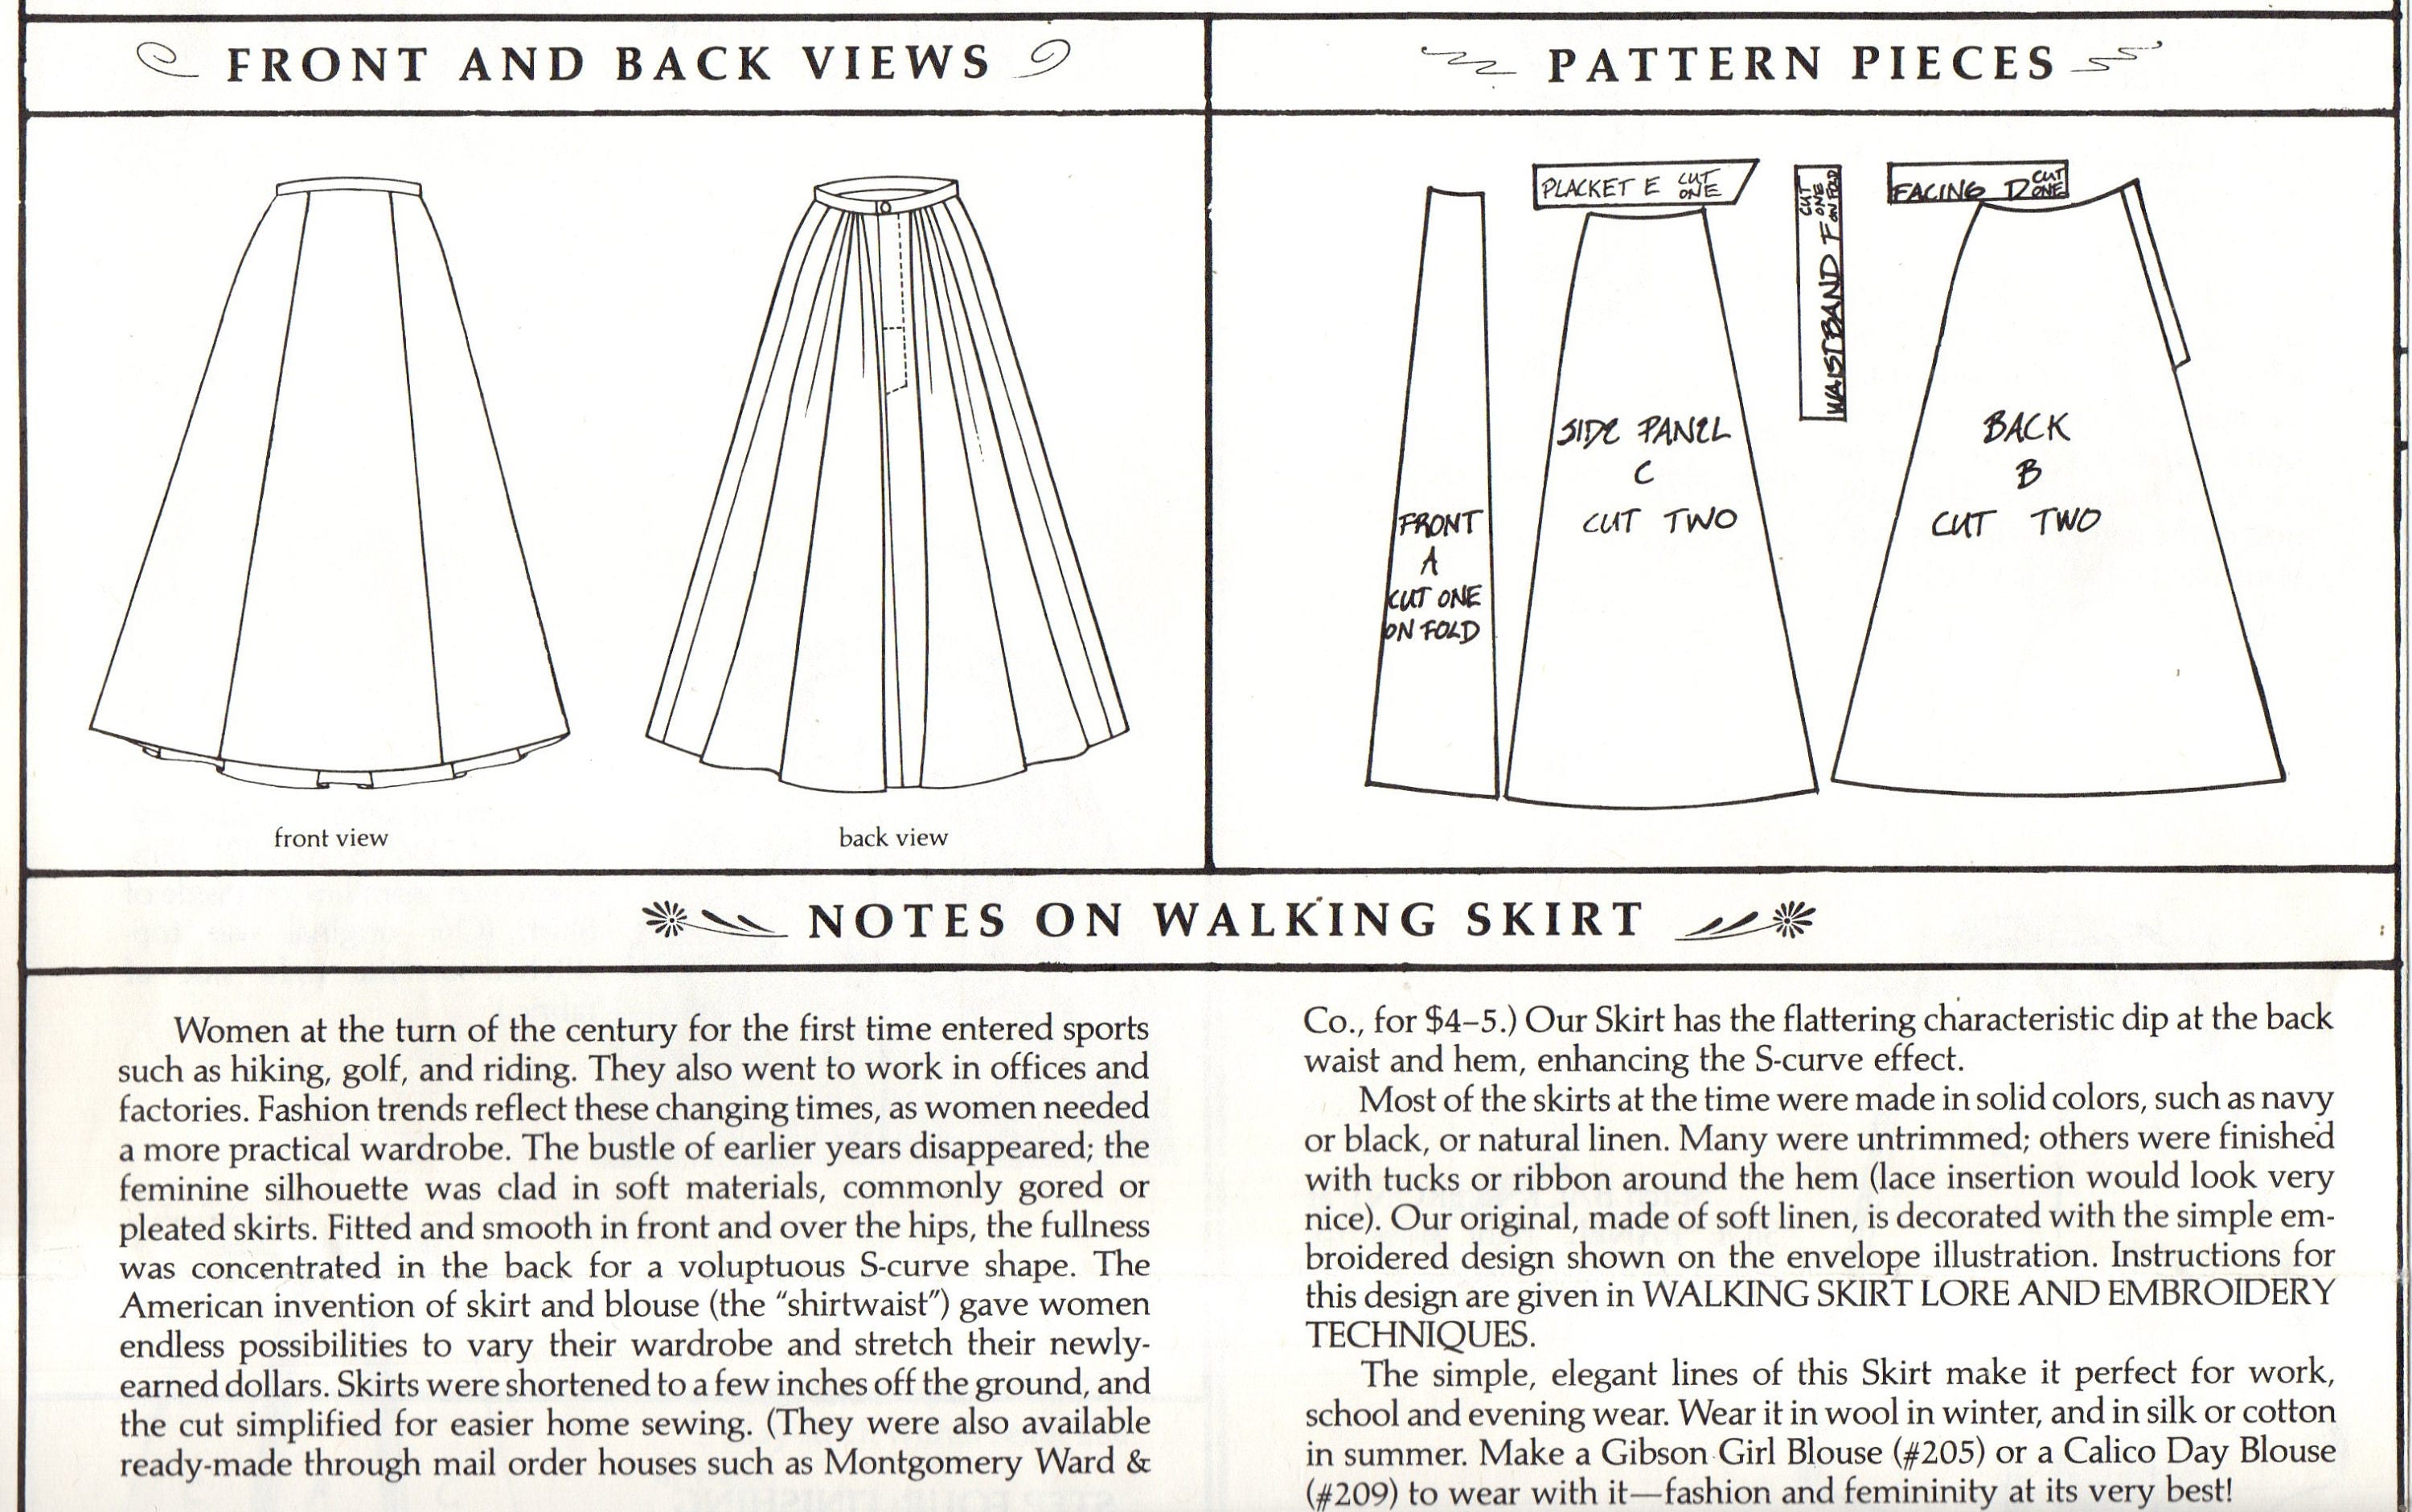
If you ever get your money back, I'm still really pleased with the pattern I linked to. The woman who made it is a historical costumer/works in a museum, so it's based on a bunch of period skirts made with the same era of sewing machine you have. The instructions are very detailed and have diagrams/sketches of what to do, and the size range is good, with a clear sizing chart. I am not small, and there were still a few sizes above me. I like it enough that I am thinking of trying to figure out how to make this skirt into a dress pattern to wear to an event!
I saw that you were worried about fabric choices and wishing for a sewing-grandmother for advice. I'm not a grandmother, or a great sewer, but I'll pass on the advice I got from my mother while making this! My mother sewed most of her clothing in her teens and twenties, did formal lessons, and is a perfectionist with sewing. She helped me with my skirt, and showed me some techniques to get a nicer product.
For fabric choices - anything without an obvious plaid/check/large scale pattern/directionality will be easier and cheaper for this pattern. If you start having to match fabric/patterns it will take even more fabric. I'd suggest making a muslin of the skirt before shelling out for 4+ m of expensive nice fabric. I used a thrift store bedsheet because I liked the fabric (a bit heavier than most sheets) and it was cheap. It required pretty much the entire king sized flat sheet to make it. A nice
linen, heavier cotton, or woven wool would work well, esp. if you line the wool (pretty much any medium to heavy weight woven fabric, except thick denim). This pattern wouldn't be great for stretchy fabrics, knit fabrics, fabrics which are really loosely woven, or fabrics without body. I used a sateen cotton, and don't like the sheen of it. You may be able to piece the fabric and significantly reduce how much fabric this uses.
Some construction tips:
- In general, ironing is key. You should spend far more time ironing than sewing.
- Use the best quality thread you can. I used Coats, because it was on half price and I am cheap, but Gutermann sews much more nicely.
- Make sure you prewash fabric to remove any starch/sizing before cutting it.
- While laying out the pattern pieces, rough cut them (bigger than the size you want) before pinning them onto the fabric. Make any pattern adjustments at this stage (for example I was a different waist and hip size, so graded between them - basically a straight line for this pattern). I like using a highlighter to mark the pattern I do want to cut to. You may, if you are short like me, take some length off the skirt if necessary at this stage (or can forget like i did, and do it when hemming).
- Lay fabric all flat when cutting out, and line up the grain line markings to be parallel (or perpendicular) to the selvedge edges. I had to do this on the floor. Measure (repeatedly) to make sure that they are perfectly in line. Pin in one place, then rotate around the pin until in line, then pin down the pattern piece completely, smoothing it/the fabric out as you go. Repeat for all pieces.
- Tailor tack/mark all pattern markings onto the pattern. For my fabric, I had to mark front/back as it was directional with a slight sheen, but really hard to tell.
- Cut out the fabric pieces roughly around the pattern pieces, if desired, to separate them before doing the detailed cutting.
- Make sure you iron EVERY seam OPEN before moving on to the next step (even if the seam is eventually folded over, this will look better.
- For the skirt - make sure you chose one direction to sew from and stick with it (don't sew top to bottom on one piece, and bottom to top on another).
- I top stitched my waist band, and used fusible cotton interfacing in the waistband + placket. This makes it stiffer, especially if you are using a loosely woven or lightweight fabric, and makes it look crisper. You could use a non fusible interfacing (or some fabric) for the same purpose, but my mother is very much of the opinion that fusible interfacing is the BEST THING EVER.
- When doing the pleats - make sure you mark the pattern with both bottom and top, and really well iron them. The top of the waistband should look like a straight line if the pleats are folded correctly. Pin these in multiple places to make sure they don't shift while you are sewing, then baste with the largest stitch length on your sewing machine to keep them in place before you attach the waistband.
I am not sure what you have for tools, but all of the following were really helpful:
- Seam ripper
- sewing gauge (ruler with a slider)
- Sewing measuring tape
-Tailor's chalk
-Lots of straight pins
Potential things i would do if I were to do this again
- Figure out pockets - there is a tutorial on the site I bought my pattern from on how to alter for pockets
- Don't accidentally use a tiny stitch length, then realize that I made a mistake and need to spend half an hour with a seam ripper because the stitches are so small...
- Get someone else to measure me so I don't measure wrong and have to adjust sizing halfway through sewing (changing the size of angled pleats is a pain!).
I hope some of this is helpful!


 9
9


Skill verified by gir bot")

Skill verified by Nicole Alderman")

Skill verified by Mike Haasl")

Skill verified by Ash Jackson")


![[Thumbnail for 20190222_101859.jpg]](/t/99121/a/72464/20190222_101859.jpg "Filename: 20190222_101859.jpg
Description: not an artist.....")
![[Thumbnail for natalie-s-wedding.jpg]](/t/99121/a/72465/natalie-s-wedding.jpg "Filename: natalie-s-wedding.jpg
Description:")
![[Thumbnail for suedette.jpg]](/t/99121/a/72466/suedette.jpg "Filename: suedette.jpg
Description:")


