• Post Reply Bookmark Topic Watch Topic
  • New Topic
permaculture forums growies critters building homesteading energy monies kitchen purity ungarbage community wilderness fiber arts art permaculture artisans regional education skip experiences global resources cider press projects digital market permies.com pie forums private forums all forums
this forum made possible by our volunteer staff, including ...
master stewards:
  • Nancy Reading
  • Carla Burke
  • r ranson
  • John F Dean
  • paul wheaton
  • Pearl Sutton
stewards:
  • Jay Angler
  • Liv Smith
  • Leigh Tate
master gardeners:
  • Christopher Weeks
  • Timothy Norton
gardeners:
  • thomas rubino
  • Jeremy VanGelder
  • Maieshe Ljin

Advice on a RMH build in Hokkaido Japan

 
pollinator
Posts: 464
Location: Toyoura Hokkaido
163
  • Likes 1
  • Mark post as helpful
  • send pies
    Number of slices to send:
    Optional 'thank-you' note:
  • Quote
  • Report post to moderator
Noted on the mold. Thank you for that. Will keep moving for sure. Should we spray a bit of lime white wash on the layer before adding to the cob? And maybe mix a bit of lime putty and charcoal dust into subsequent layers?

🦠🦠🦠🦠
✌️Peter✌️
🦠🦠🦠🦠

P.S. did you get a good look through your binoculars?đź”­
BD0C003D-E8BC-4489-B5E5-438E5B846E79.jpeg
[Thumbnail for BD0C003D-E8BC-4489-B5E5-438E5B846E79.jpeg]
Welded half barrel corner.
9A8CE97C-DB97-4405-9877-DDA9CDDD2D8F.jpeg
[Thumbnail for 9A8CE97C-DB97-4405-9877-DDA9CDDD2D8F.jpeg]
Where we’re at...🤔
Me-getting-my-visa-renewed-two-days-ago...-.jpeg
Me getting my visa renewed two days ago...������
 
Peter Sedgwick
pollinator
Posts: 464
Location: Toyoura Hokkaido
163
  • Mark post as helpful
  • send pies
    Number of slices to send:
    Optional 'thank-you' note:
  • Quote
  • Report post to moderator
Morning motivation...🥴
C62C22C7-6F55-4AA3-BA5C-6A1E2C426895.jpeg
[Thumbnail for C62C22C7-6F55-4AA3-BA5C-6A1E2C426895.jpeg]
 
Rocket Scientist
Posts: 1809
Location: Kaslo, BC
525
building solar woodworking rocket stoves wood heat greening the desert
  • Likes 4
  • Mark post as helpful
  • send pies
    Number of slices to send:
    Optional 'thank-you' note:
  • Quote
  • Report post to moderator

thomas rubino wrote:Your chimney cap is a style I've never seen before. Is it a common cap in your area ?


I think I remember hearing Ernie Wisner saying something about that style being used on boats as its a good way to keep splashing water from entering the pipe.
I also did some of my own research. Like a lot of things, you first have to know the name of what your searching otherwise Google can take you down a long windy road....Don't ask me how I know that.
Picture is taken from Smart Chimney.com
H-cowl.png
[Thumbnail for H-cowl.png]
 
Gerry Parent
Rocket Scientist
Posts: 1809
Location: Kaslo, BC
525
building solar woodworking rocket stoves wood heat greening the desert
  • Mark post as helpful
  • send pies
    Number of slices to send:
    Optional 'thank-you' note:
  • Quote
  • Report post to moderator

Peter Sedgwick wrote:Noted on the mold. Thank you for that. Will keep moving for sure. Should we spray a bit of lime white wash on the layer before adding to the cob? And maybe mix a bit of lime putty and charcoal dust into subsequent layers? P.S. did you get a good look through your binoculars?đź”­


Are you thinking that the lime will help raise the pH and control the mold or is it for strength? I don't have much experience with lime other than we used to put it down our outhouse holes to control the smell (which we've now switched over to wood ash). As for the charcoal dust, it would help with insulation if that's what your looking for.
Speaking of which, I just did my first ever test patch coat of charcoal plaster on my dragon today. The charcoal was 50% of the mix so it was pretty black when wet and dried a weird dark grey/bluish colour. I then added some terra cotta cement colorant to the rest of the mix which amazingly overpowered the black and turned out quite nice. Just a baby at using it but looking at incorporating it more for its many uses.  
A word about your transition pipe you drew in your picture that takes the gasses from the manifold to the bell bench: Just make sure its big enough as this is a bottleneck area that can restrict your gas flow. It was discussed a bit here: RMH
As for the blast off, here's a picture I took of the Permies gang watching the show:


gettyimages-88878192.jpg
[Thumbnail for gettyimages-88878192.jpg]
 
Peter Sedgwick
pollinator
Posts: 464
Location: Toyoura Hokkaido
163
  • Mark post as helpful
  • send pies
    Number of slices to send:
    Optional 'thank-you' note:
  • Quote
  • Report post to moderator

Gerry Parent wrote:

thomas rubino wrote:Your chimney cap is a style I've never seen before. Is it a common cap in your area ?


I think I remember hearing Ernie Wisner saying something about that style being used on boats as its a good way to keep splashing water from entering the pipe.
I also did some of my own research. Like a lot of things, you first have to know the name of what your searching otherwise Google can take you down a long windy road....Don't ask me how I know that.
Picture is taken from Smart Chimney.com


Wow learned something with that. Thanks
 
Peter Sedgwick
pollinator
Posts: 464
Location: Toyoura Hokkaido
163
  • Mark post as helpful
  • send pies
    Number of slices to send:
    Optional 'thank-you' note:
  • Quote
  • Report post to moderator
Awesome shot from ground zero Gerry.

Yeah the “lime putty” would just be a bit mixed in with water and some charcoal then added to clay, sand and straw to act as an anti fungi solution more or less. Think it’s worth a try and can’t see how it could make the situation worse.

So cool to hear about your charcoal and lime experiments. Plan to make lots more charcoal in the spring and as much lime putty as humanly possible. It’s like liquid rock basically.

I’m planning to put the half barrel as close to the manifold as I can and just using a short piece of 20cm pipe to transition into the barrel. Here’s an image of what I’m thinking. Not a ton of space to work with on the side of the half barrels. Plan to put a small pony wall just inside the first barrel to help keep the hot gases from going out the exit pipe before going through the bench. Matt also told me to make the transition as big as possible and not to think of it as a transition in a duct bench system. Is 20cm still too small?

Also can’t have a vertical drop exit chimney as it would put the chimney in the middle of the bench and could not run it out the roof. Cooler exit gases will go through a 15cm horizon piece of pipe and the turn 90 up and go out of the ceiling from behind the fire box and main barrel.

First part of the exit chimney will remain uninsulated as it passes by the main barrel and picks up heat. Once the chimney leaves the room it will be insulated with a 20cm pipe cover and perlite infill, as previously mentioned.

Can you let me know if you feel there are potential issues with this layout?

Reference drawing/photo for clarification

Peter
B23CF980-DEAE-42B9-9EC0-FFDC6F3A5A1F.jpeg
[Thumbnail for B23CF980-DEAE-42B9-9EC0-FFDC6F3A5A1F.jpeg]
 
pollinator
Posts: 683
Location: Ohio River Valley, Zone 6b
181
purity forest garden foraging food preservation building homestead
  • Likes 1
  • Mark post as helpful
  • send pies
    Number of slices to send:
    Optional 'thank-you' note:
  • Quote
  • Report post to moderator
Wow, this thread is so cool! Coincidentally, I could really use a Kotatsu... Been trying to come up with a way to make one. I don't really have the room for one, but I still want one LOL.
 
Peter Sedgwick
pollinator
Posts: 464
Location: Toyoura Hokkaido
163
  • Likes 1
  • Mark post as helpful
  • send pies
    Number of slices to send:
    Optional 'thank-you' note:
  • Quote
  • Report post to moderator
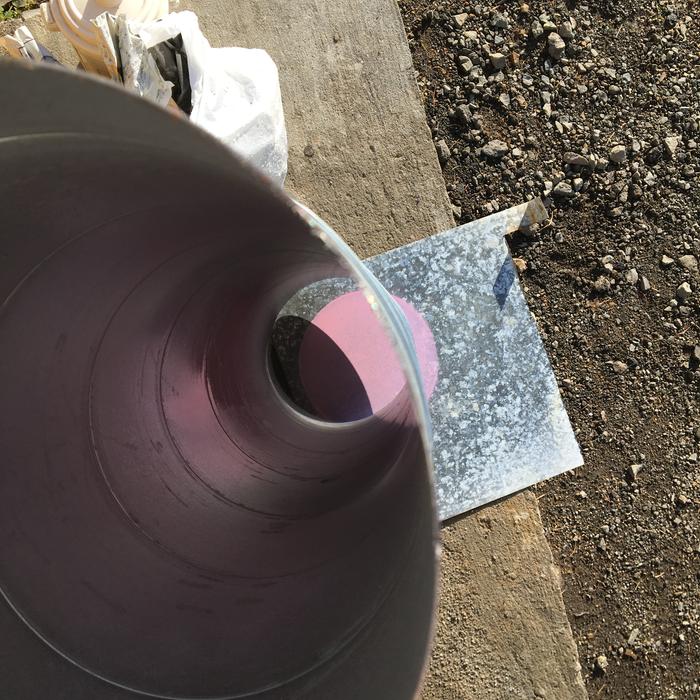
This is a brake down of how I made an oversized washer/stopper for the bottom of our insulated pipe cover. Basically just to keep the perlite infill from falling out. Will probably spot weld or bolt to 20cm pipe. Made with salvaged metal scrap from the neighbor’s barn.
Spray-Painted-to-get-ID-outer-insulation-pipe-cover..jpeg
Spray Painted to get ID outer insulation pipe cover.
74A4D09D-A686-4CB7-BF0A-2BFC960E7C00.jpeg
[Thumbnail for 74A4D09D-A686-4CB7-BF0A-2BFC960E7C00.jpeg]
Rough cut with angle grinder with tab to use while working. Ping Pong
Internal-chimney-pipe-hole-traced-with-marker-and-cut..jpeg
Internal chimney pipe hole traced with marker and cut.
Check-size.jpeg
Check size
Check size
Fit-inside-20cm-pipe.jpeg
Fit inside 20cm pipe
Connect-and-test.jpeg
Connect and test
Connect and test
More-small-details.jpeg
More small details
More small details
 
Peter Sedgwick
pollinator
Posts: 464
Location: Toyoura Hokkaido
163
  • Likes 1
  • Mark post as helpful
  • send pies
    Number of slices to send:
    Optional 'thank-you' note:
  • Quote
  • Report post to moderator

Ryan Hobbs wrote:Wow, this thread is so cool! Coincidentally, I could really use a Kotatsu... Been trying to come up with a way to make one. I don't really have the room for one, but I still want one LOL.


Hey Ryan,

Yeah, we have one. Using it now as a work bench. Might have to plug it in if we don’t get the rocket launch happening soon. Race against time.

Glad you like the thread. Trying my best to document clearly our work flow and thought process so others can maybe gain something and veterans can spot issues quickly.

Pictures speak a thousand words and pictures with words speak volumes....

Cheers Peter
268509A9-C649-410C-B7E4-D19C8CA00137.jpeg
[Thumbnail for 268509A9-C649-410C-B7E4-D19C8CA00137.jpeg]
 
Gerry Parent
Rocket Scientist
Posts: 1809
Location: Kaslo, BC
525
building solar woodworking rocket stoves wood heat greening the desert
  • Likes 2
  • Mark post as helpful
  • send pies
    Number of slices to send:
    Optional 'thank-you' note:
  • Quote
  • Report post to moderator

Peter Sedgwick wrote:I’m planning to put the half barrel as close to the manifold as I can and just using a short piece of 20cm pipe to transition into the barrel. Here’s an image of what I’m thinking. Not a ton of space to work with on the side of the half barrels. Plan to put a small pony wall just inside the first barrel to help keep the hot gases from going out the exit pipe before going through the bench. Matt also told me to make the transition as big as possible and not to think of it as a transition in a duct bench system. Is 20cm still too small?

I can see its all a tight fit. The transition area is recommended at minimum to be around 1.5x larger than system size which means 15cm x 1.5 = 22.5cm.
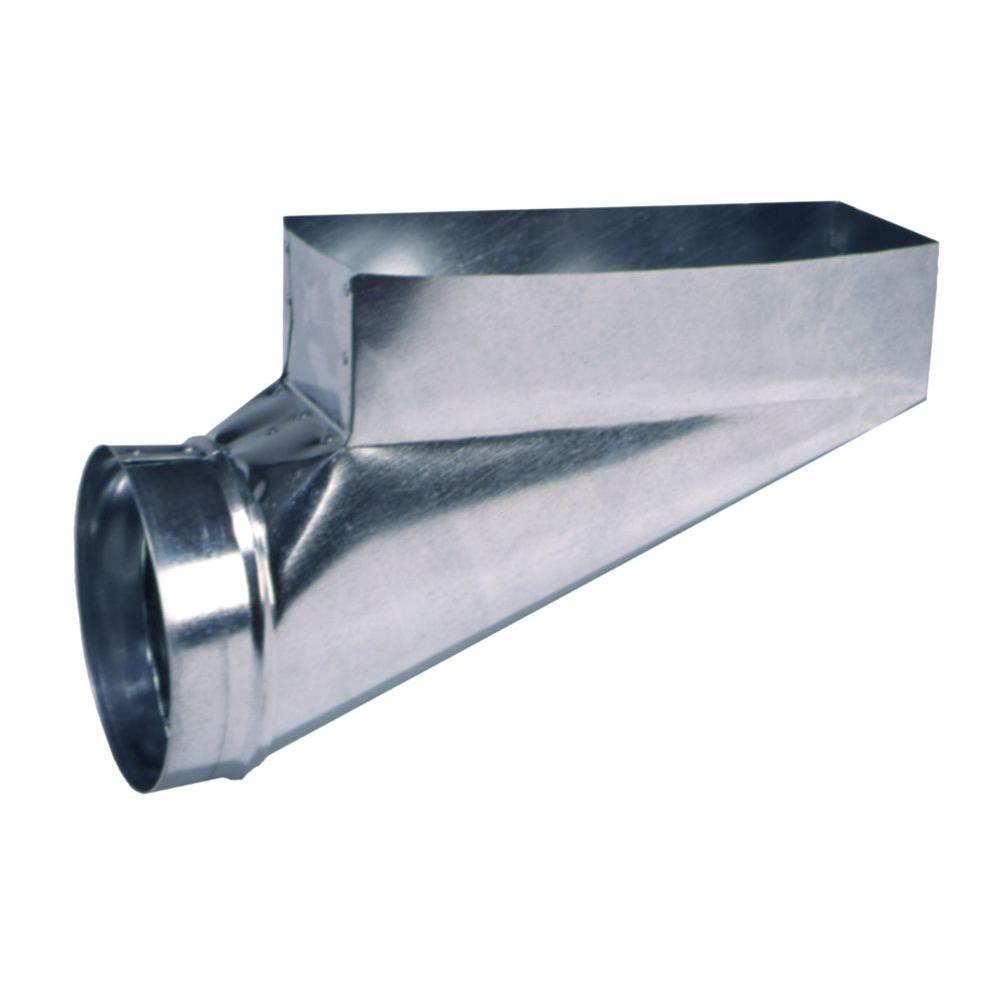
Your going with a 20cm so theoretically its small. I don't know how forgiving this recommendation is but just letting you know. Is there a way to make the transition with cob instead of a pipe? Form it with hardware cloth or adobe bricks or something? On my transition, I kept it all open (in your case, no end wall on the barrel) so you get the maximum size opening possible. For the exit opening, you could also use one of those heat register transition ducts that keep the same ISA but makes it short and squat closer to the floor. Something similar to this:
EDIT: And for heavens sake, tell Mimi she has her drawing upside down!

 
Peter Sedgwick
pollinator
Posts: 464
Location: Toyoura Hokkaido
163
  • Mark post as helpful
  • send pies
    Number of slices to send:
    Optional 'thank-you' note:
  • Quote
  • Report post to moderator
Thanks Gerry

When you say “keep same ISA” you’re referring to making the exit ISA the same as the transition ISA correct? 22.5cm or higher
At what point is it ok to use my 15cm chimney exit pipe. I’m not sure I understand this transition.

Peter

 
gardener
Posts: 3471
Location: Southern alps, on the French side of the french /italian border 5000ft elevation
194
  • Likes 1
  • Mark post as helpful
  • send pies
    Number of slices to send:
    Optional 'thank-you' note:
  • Quote
  • Report post to moderator

Peter Sedgwick wrote:Thanks Gerry

When you say “keep same ISA” you’re referring to making the exit ISA the same as the transition ISA correct? 22.5cm or higher
At what point is it ok to use my 15cm chimney exit pipe. I’m not sure I understand this transition.

Peter


Well, ISA rocketwise, stands for Internal surface area, for bells, and can be extrapolated to pipes too.


What you seem to talk about, is CSA

Cross sectional area, which should be kept the same more or less throughout the burn "engine"  except at the heat riser to barrel (or bell or whatever) gap. Which is good at 3 times the CSA, and at the transition area, which is also good at that 3 times CSA.  
 
Peter Sedgwick
pollinator
Posts: 464
Location: Toyoura Hokkaido
163
  • Mark post as helpful
  • send pies
    Number of slices to send:
    Optional 'thank-you' note:
  • Quote
  • Report post to moderator
I’ll admit, I’m totally confused. I’ll try to set up something now with the parts that I have and take a photo to see if you guys think it will work. Move the exit chimney closer to the half barrel and lose the 15cm horizontal pipe.

Probably easier to understand with an image. Will get back soon.

Thanks for your patience.

Peter

P.S. advice to anyone thinking of building a RMH. Carefully calculate how long you think it will take to build, start to finish and then add two months...:)
 
rocket scientist
Posts: 6320
Location: latitude 47 N.W. montana zone 6A
3191
cat pig rocket stoves
  • Likes 1
  • Mark post as helpful
  • send pies
    Number of slices to send:
    Optional 'thank-you' note:
  • Quote
  • Report post to moderator
Not always Peter, not always... my original RMH took 3 weeks , start to finish. cost was about $200
 
Peter Sedgwick
pollinator
Posts: 464
Location: Toyoura Hokkaido
163
  • Likes 1
  • Mark post as helpful
  • send pies
    Number of slices to send:
    Optional 'thank-you' note:
  • Quote
  • Report post to moderator

thomas rubino wrote:Not always Peter, not always... my original RMH took 3 weeks , start to finish. cost was about $200


Thanks for the reality check Thomas. Think it’s digging up the floor and everything that’s taking so long for us for sure. Guess better advice would be to start sooner in the summer than you think. Probably just a bit of panic talking here.

Working on a mock-up now.

Cheers Pete
 
Peter Sedgwick
pollinator
Posts: 464
Location: Toyoura Hokkaido
163
  • Mark post as helpful
  • send pies
    Number of slices to send:
    Optional 'thank-you' note:
  • Quote
  • Report post to moderator
Here’s a visual of what I’m thinking.
Push everything closer to the burn barrel with big hole opening. Fill gaps with cob. Cut end of exit chimney at 45 or like last photo.

Thoughts?

Peter
72FACF7B-B4C1-4361-81BE-DA8F7055BA84.jpeg
[Thumbnail for 72FACF7B-B4C1-4361-81BE-DA8F7055BA84.jpeg]
90EDAF07-9D03-4896-9791-8B79F38E43E4.jpeg
[Thumbnail for 90EDAF07-9D03-4896-9791-8B79F38E43E4.jpeg]
4DD21D64-ECF9-46BD-AA58-C8619DA30AE1.jpeg
[Thumbnail for 4DD21D64-ECF9-46BD-AA58-C8619DA30AE1.jpeg]
983B9A65-2EF5-4BE9-91D2-DD10A69DE59D.jpeg
[Thumbnail for 983B9A65-2EF5-4BE9-91D2-DD10A69DE59D.jpeg]
8B95B536-E45E-4B44-9FFD-EB5D00FC6B10.jpeg
[Thumbnail for 8B95B536-E45E-4B44-9FFD-EB5D00FC6B10.jpeg]
799667AC-31DA-4E75-8B62-7DC0AF7084E6.jpeg
[Thumbnail for 799667AC-31DA-4E75-8B62-7DC0AF7084E6.jpeg]
23B8B582-6243-4934-A25E-01213795C59A.jpeg
[Thumbnail for 23B8B582-6243-4934-A25E-01213795C59A.jpeg]
A11074F0-FC5B-4C57-9E7C-5007E413E09A.jpeg
[Thumbnail for A11074F0-FC5B-4C57-9E7C-5007E413E09A.jpeg]
2BDC0B9F-0B89-47AC-9F41-7F0920414E91.jpeg
[Thumbnail for 2BDC0B9F-0B89-47AC-9F41-7F0920414E91.jpeg]
4B3F0B92-E1FF-440B-B73F-FF1C16202015.jpeg
[Thumbnail for 4B3F0B92-E1FF-440B-B73F-FF1C16202015.jpeg]
 
Gerry Parent
Rocket Scientist
Posts: 1809
Location: Kaslo, BC
525
building solar woodworking rocket stoves wood heat greening the desert
  • Likes 2
  • Mark post as helpful
  • send pies
    Number of slices to send:
    Optional 'thank-you' note:
  • Quote
  • Report post to moderator

Peter Sedgwick wrote:When you say “keep same ISA” you’re referring to making the exit ISA the same as the transition ISA correct? 22.5cm or higher
At what point is it ok to use my 15cm chimney exit pipe. I’m not sure I understand this transition.


Sorry for the confusion, I meant CSA not ISA which Satamax corrected for me.... Thanks!

thomas rubino wrote:Not always Peter, not always... my original RMH took 3 weeks , start to finish. cost was about $200


Yes but you didn't take time to draw these awesome pictures like Peter did! Maybe a blessing for all of us if you failed art class! :)

Peter Sedgwick wrote:Here’s a visual of what I’m thinking. Push everything closer to the burn barrel with big hole opening. Fill gaps with cob. Cut end of exit chimney at 45 or like last photo.
Thoughts? Peter


That certainly would work. I think I remember Matt saying that the exhaust gasses won't shortcut to the exit but you know, it just seems like good measure to put a 'little pony' in there just for good measure to keep things going in the right direction.
Not sure which design you decided on for the exit pipe end? A 45 degree or a rectangle cut? Both of which will work but another option could be to just keep it straight (parallel with floor) and then all the gasses are forced to leave the bell all on the same plane. Think of all these shapes as an upside down drain: How would the water leave each one? Raising or lowering the pipe can also be done to find the right distance to leave the end of the pipe up from the floor. I think I mentioned about insulating the pipe in an earlier post to Glenn (he must have been sleeping as he didn't answer me :) with a picture "Plunger tube idea" if you want to extract more heat from the bell.
PS. You know Peter, if you just put in a few more hours with that tin can stove, you could probably fire it up and start heating your home before lunch time!
 
Peter Sedgwick
pollinator
Posts: 464
Location: Toyoura Hokkaido
163
  • Likes 1
  • Mark post as helpful
  • send pies
    Number of slices to send:
    Optional 'thank-you' note:
  • Quote
  • Report post to moderator
Gerry you put a smile on my face.
Thanks so much for all the positive vibes.

Pony wall is an idea I got from a Sundog bell rebuild video I saw a while back. https://youtu.be/jN3v3N4QcE8

Reason for the cut end on the 15cm exit chimney on the end is to give it something to rest on. Other wise kind of hanging in space inside the insulated 20cm pipe on the other side of the ceiling.

Laying in some perlite/clay for the floor of the half barrel bench. Also sealing up the roof top chimney box. Will try to get a bare bones rocket up and testing inside in the next day or so. Lunch time is a bit too soon and I’m hungry. (Which is better than cold)

Cheers and beers...Peter
5299404B-96FB-4BFE-8CFA-0299D3A6928D.jpeg
[Thumbnail for 5299404B-96FB-4BFE-8CFA-0299D3A6928D.jpeg]
20AB3F08-A95E-48EF-8967-0E7D73D7D836.jpeg
[Thumbnail for 20AB3F08-A95E-48EF-8967-0E7D73D7D836.jpeg]
576CACF7-9F5F-4478-87B4-A10389E1719A.jpeg
[Thumbnail for 576CACF7-9F5F-4478-87B4-A10389E1719A.jpeg]
 
Satamax Antone
gardener
Posts: 3471
Location: Southern alps, on the French side of the french /italian border 5000ft elevation
194
  • Likes 1
  • Mark post as helpful
  • send pies
    Number of slices to send:
    Optional 'thank-you' note:
  • Quote
  • Report post to moderator
Peter, if you have proper draft, you don't need to have your vertical chimney so close to the barrel. And even if you don't have draft.

I have a friend who tried, with a stubborn bench, to no avail.


I should admit i'm not too keen on the entrance and exit of the dead end bench  being so close together.

One trick which might work, to get better stratification, is to raise slightly the barrels, progressively, towards the end of the dead end. Just an idea.
 
Peter Sedgwick
pollinator
Posts: 464
Location: Toyoura Hokkaido
163
  • Mark post as helpful
  • send pies
    Number of slices to send:
    Optional 'thank-you' note:
  • Quote
  • Report post to moderator

Satamax Antone wrote:Peter, if you have proper draft, you don't need to have your vertical chimney so close to the barrel. And even if you don't have draft.

I have a friend who tried, with a stubborn bench, to no avail.


I should admit i'm not too keen on the entrance and exit of the dead end bench  being so close together.

One trick which might work, to get better stratification, is to raise slightly the barrels, progressively, towards the end of the dead end. Just an idea.


Thanks for the info.
It’s a half barrel so limited side surface area to work with. Sundog does entrance and exit closer than this with his no problem. Can’t really change the location of the main parts at this point. But more than up for trying to raise the end of the bench. So basically the barrel at the end of the close out angles up a bit correct? Just drop a few rocks under the end and shim the gaps with sand/clay/rock cob I assume.

Peter

75B7E088-DB8F-4121-95DE-0197B483F46B.jpeg
[Thumbnail for 75B7E088-DB8F-4121-95DE-0197B483F46B.jpeg]
BURNIN PAINT OFF HALF BARRELS
F35C8A29-2C90-4B3C-B84E-7DB801565DD7.jpeg
[Thumbnail for F35C8A29-2C90-4B3C-B84E-7DB801565DD7.jpeg]
F24BB223-C1BF-43D7-ADFC-B1DC2E90D120.jpeg
[Thumbnail for F24BB223-C1BF-43D7-ADFC-B1DC2E90D120.jpeg]
 
Satamax Antone
gardener
Posts: 3471
Location: Southern alps, on the French side of the french /italian border 5000ft elevation
194
  • Likes 1
  • Mark post as helpful
  • send pies
    Number of slices to send:
    Optional 'thank-you' note:
  • Quote
  • Report post to moderator
Well, you'll see, i might be completely mistaken.


One thing thought, get yourself a flue thermometer, for your vertical chimney.

Best temps at around 150/170cm,  is around 60, after 20/30 minutes burn. 120 after 2 hours burn, i would say. But i never followed my J tubes as well as i watch my batch. Anything bellow 60C°  10/20 minutes into the burn, is usually asking for trouble without a bypass.

Something with a range of 0 to 200 or 300 should be enough.

And a probe, so you measure in the flue.

https://www.ebay.fr/itm/50-500-centigrade-Stainless-Steel-Barbecue-Smoker-Grill-Thermometer-I/153592899353?ssPageName=STRK%3AMEBIDX%3AIT&_trksid=p2057872.m2749.l2649

I'm using something like this for my oven above the batch. And i'm looking for a longer one for the chimney, with a lower range of temps.
 
Peter Sedgwick
pollinator
Posts: 464
Location: Toyoura Hokkaido
163
  • Mark post as helpful
  • send pies
    Number of slices to send:
    Optional 'thank-you' note:
  • Quote
  • Report post to moderator
Thanks

I have one of the prob thermometers Sotome where. Also have the point and shoot gun thermometer. I’ll try those and check temperature.

The temperature bench mark of 60 is really helpful.

Cheers, Peter
 
Peter Sedgwick
pollinator
Posts: 464
Location: Toyoura Hokkaido
163
  • Mark post as helpful
  • send pies
    Number of slices to send:
    Optional 'thank-you' note:
  • Quote
  • Report post to moderator
I could insulate next to the bottom of my exit tube with an off cut of CFB and as the “cooler” gases rise in the exit pipe they will heat up, as the exit chimney is so close to the burn barrel. Once these gases are in the exit chimney and warming up they will naturally fallow the path of heat rising and exit thought the chimney I feel.
Does this idea follow the principles of the system? Or am I missing something?

Peter
 
Satamax Antone
gardener
Posts: 3471
Location: Southern alps, on the French side of the french /italian border 5000ft elevation
194
  • Likes 1
  • Mark post as helpful
  • send pies
    Number of slices to send:
    Optional 'thank-you' note:
  • Quote
  • Report post to moderator

Peter Sedgwick wrote: gases rise in the exit pipe they will heat up, as the exit chimney is so close to the burn barre Or am I missing something?

Peter


Yep, you're missing something T an T

Time and temperature

Let say the barrel is at 350C° the surrounding air is at 80, two inches away, and there is the metal of the chimney, which is shiny and reflects heat.  Gases inside the chimney are at 25/30 Celsius.

How long do you think it would take to the gases to rise 10C° ?

How fast do you think gases travel in the chimney. Even if it's 10 cm per second, It takes about 8 seconds to rise the height of the barrel. Not much time hey!

To put it bluntly, it doesn't work. This is pure urban legend.

And about the stack effect, hot gases don't rise, they are pushed up by denser colder gases.

https://en.wikipedia.org/wiki/Stack_effect

 
Peter Sedgwick
pollinator
Posts: 464
Location: Toyoura Hokkaido
163
  • Mark post as helpful
  • send pies
    Number of slices to send:
    Optional 'thank-you' note:
  • Quote
  • Report post to moderator
Thanks Satamax,

That is information I did not know. There is so much about this art/science that’s shrouded in mystery for me still. Trying to get my head around all of it.

Urban legend and popular myths have lead me to make many assumptions.

Think at this point the best thing to do finish the frame work and test. If the layout is really giving massive trouble I’ll just make a direct connection on the manifold to exit chimney and use the system as a suped up wood stove till spring.

Peter
 
Satamax Antone
gardener
Posts: 3471
Location: Southern alps, on the French side of the french /italian border 5000ft elevation
194
  • Likes 1
  • Mark post as helpful
  • send pies
    Number of slices to send:
    Optional 'thank-you' note:
  • Quote
  • Report post to moderator
Well, you don't risk much in terms of draft, as long as your flue transition and top gap are OK! Only thing which could happen, bypass of the bench. Which can be sorted easilly; by making a partition wall welded in the middle of your half barrels.

The trick could be to do it now, with a sliding piece (in place of your pony cock wall)  which would let you use it as a flue, or a bell. Just an idea.
 
Peter Sedgwick
pollinator
Posts: 464
Location: Toyoura Hokkaido
163
  • Mark post as helpful
  • send pies
    Number of slices to send:
    Optional 'thank-you' note:
  • Quote
  • Report post to moderator

Satamax Antone wrote:Well, you don't risk much in terms of draft, as long as your flue transition and top gap are OK! Only thing which could happen, bypass of the bench. Which can be sorted easilly; by making a partition wall welded in the middle of your half barrels.

The trick could be to do it now, with a sliding piece (in place of your pony cock wall)  which would let you use it as a flue, or a bell. Just an idea.


Sounds great but to be honest I would need a drawing of what you are proposing. Can’t afford any misinterpretations at this point. It’s really starting to get cold and the small space heater is not going to be enough soon.

Peter
 
Peter Sedgwick
pollinator
Posts: 464
Location: Toyoura Hokkaido
163
  • Likes 1
  • Mark post as helpful
  • send pies
    Number of slices to send:
    Optional 'thank-you' note:
  • Quote
  • Report post to moderator
Lime white wash on the cob between layers, to hopefully control the mold on rice straw and cob. Think it should work. Using a space heater in the room now to start the drying process before we get the RMH going...👻👨🏻‍🚀👻

PS That’s white wash in the picture, not white mold spores.

8382E9B9-2401-4F1A-BDBE-DB06D507AF22.jpeg
[Thumbnail for 8382E9B9-2401-4F1A-BDBE-DB06D507AF22.jpeg]
BB67D767-97E3-47E6-8F30-6BA0970D0B67.jpeg
[Thumbnail for BB67D767-97E3-47E6-8F30-6BA0970D0B67.jpeg]
63152CB9-89D7-45C7-A128-042744FE5795.jpeg
[Thumbnail for 63152CB9-89D7-45C7-A128-042744FE5795.jpeg]
 
Peter Sedgwick
pollinator
Posts: 464
Location: Toyoura Hokkaido
163
  • Mark post as helpful
  • send pies
    Number of slices to send:
    Optional 'thank-you' note:
  • Quote
  • Report post to moderator

Fox James wrote:You should really of done a few curing fires if you did not want any cracks in the cast slabs.
There will be moister trapped in the refectory cement and if that is turned into steam it will force its way out one way  or another.


Hey James,

Sorry
Missed this post until now.
Lesson learned. The brand said they don't need fire curing, but I probably pushed the limit on the first burn.
Should I put them in a campfire for a bit each day to get them to let out some of the trapped moisture? Maybe an hour or so?
They have been sitting and drying for the past few days as well.

Was also thinking of recasting a few spare bricks. If I did, could it be a good idea to crush up a bit of off cut CFB and add it to the refractory cement mix?

Peter
 
Rocket Scientist
Posts: 790
Location: Guernsey a small island near France.
299
  • Likes 2
  • Mark post as helpful
  • send pies
    Number of slices to send:
    Optional 'thank-you' note:
  • Quote
  • Report post to moderator
Well most of my experience is based on pizza ovens but i would guess it is that same principle.
The idea is to heat up the cement with progressively longer and hotter fires making  sure the cement has time to cool down in between the fires.
Using a thermometer is the safest way, increasing the temperature by 10% on every fire, starting with 100c.
However as your bricks have more ability and room to expand I think you can simply get away with being careful and use 5-6 small fires.

I have a purpose vibrating table and I add burn out fibres to my mix (dog hair works)  but I still start very small and build up the temperature.

Everything looks fantastic ... good luck with the finishing bits....
 
Peter Sedgwick
pollinator
Posts: 464
Location: Toyoura Hokkaido
163
  • Likes 2
  • Mark post as helpful
  • send pies
    Number of slices to send:
    Optional 'thank-you' note:
  • Quote
  • Report post to moderator
EDIT: And for heavens sake, tell Mimi she has her drawing upside down!


Told her:)
EAE84092-2033-41BC-A769-53402F0DF6DB.jpeg
[Thumbnail for EAE84092-2033-41BC-A769-53402F0DF6DB.jpeg]
 
Gerry Parent
Rocket Scientist
Posts: 1809
Location: Kaslo, BC
525
building solar woodworking rocket stoves wood heat greening the desert
  • Likes 2
  • Mark post as helpful
  • send pies
    Number of slices to send:
    Optional 'thank-you' note:
  • Quote
  • Report post to moderator
AHHHH....much better!     And without a doubt, you both have officially become Mad Rocket Scientists!  Congratulations!  đź¤Ş
 
Gerry Parent
Rocket Scientist
Posts: 1809
Location: Kaslo, BC
525
building solar woodworking rocket stoves wood heat greening the desert
  • Likes 1
  • Mark post as helpful
  • send pies
    Number of slices to send:
    Optional 'thank-you' note:
  • Quote
  • Report post to moderator

Satamax Antone wrote:Well, you don't risk much in terms of draft, as long as your flue transition and top gap are OK! Only thing which could happen, bypass of the bench. Which can be sorted easilly; by making a partition wall welded in the middle of your half barrels.
The trick could be to do it now, with a sliding piece (in place of your pony cock wall)  which would let you use it as a flue, or a bell. Just an idea.


So here's what I think Satamax is saying Peter: Create a little bell and a big bell. The little bell is right next to manifold. Separate them with a wall. In that wall create a hole (the bigger the better) that can be opened or closed with a piece of metal that can either slide or pivot on a hinge open or closed. When open, it would allow gasses to go into the big bell and eventually make their way to the exhaust opening. When closed, the hot gasses would stay in the little bell and go straight up the chimney for a super boost in draft if needed for startup.
bypass-to-bell.jpg
[Thumbnail for bypass-to-bell.jpg]
 
Satamax Antone
gardener
Posts: 3471
Location: Southern alps, on the French side of the french /italian border 5000ft elevation
194
  • Mark post as helpful
  • send pies
    Number of slices to send:
    Optional 'thank-you' note:
  • Quote
  • Report post to moderator
Gerry, not at all.


The partition would run lengthwise down the barrels, till the end, where the dead end is.  where i would leave let say 50 cm free there. And where you have drawn your partition wall, a vertical sliding gate, which can be inserted in case of bypassing of the bell, so the bell becomes a  forward and return flue path.
 
Peter Sedgwick
pollinator
Posts: 464
Location: Toyoura Hokkaido
163
  • Likes 2
  • Mark post as helpful
  • send pies
    Number of slices to send:
    Optional 'thank-you' note:
  • Quote
  • Report post to moderator

Satamax Antone wrote:Gerry, not at all.


The partition would run lengthwise down the barrels, till the end, where the dead end is.  where i would leave let say 50 cm free there. And where you have drawn your partition wall, a vertical sliding gate, which can be inserted in case of bypassing of the bell, so the bell becomes a  forward and return flue path.


Thanks for all the input.

Here is Matt's suggestion.

"I think your plan looks perfect, although I suspect the pony wall is counterproductive. I'd leave it all as open as possible for best flow. As long as your chimney is low you will have no issues with shortcutting.

The bench will heat from end to end, but it will take a while for the far end to heat as the gasses are cooling on the way there. You can even out the heat distribution by putting an elbow on the bottom of your flue pipe and running an extension down the bench so that the chimney inlet is at the far end of the bench. I've found that effective in speeding up heating the far end of a bell."

Peter
 
Gerry Parent
Rocket Scientist
Posts: 1809
Location: Kaslo, BC
525
building solar woodworking rocket stoves wood heat greening the desert
  • Likes 1
  • Mark post as helpful
  • send pies
    Number of slices to send:
    Optional 'thank-you' note:
  • Quote
  • Report post to moderator
Satamax,  So the gate then completes the partition wall making the bell act more like a pipe system and when up removed allows the exhaust gasses flow on either side of the partition simultaneously making it act like a bell.
You say to have the gate slide vertically. Seems like it would be better to have the gate rotate on a center pivot rather than up and down to allow more of an opening?
bell-bypass-2.jpg
[Thumbnail for bell-bypass-2.jpg]
 
Gerry Parent
Rocket Scientist
Posts: 1809
Location: Kaslo, BC
525
building solar woodworking rocket stoves wood heat greening the desert
  • Likes 1
  • Mark post as helpful
  • send pies
    Number of slices to send:
    Optional 'thank-you' note:
  • Quote
  • Report post to moderator
Thank you for sharing that Peter. I like the extension idea of Matt's for evening out the heat across the entire bench. So many ways to tweak a system and nice to know that there are options for different needs.  
 
Satamax Antone
gardener
Posts: 3471
Location: Southern alps, on the French side of the french /italian border 5000ft elevation
194
  • Likes 1
  • Mark post as helpful
  • send pies
    Number of slices to send:
    Optional 'thank-you' note:
  • Quote
  • Report post to moderator
Yes Gerry, that's it.

But you don't rotate the gate, because it will act as a stop, and raise the chances of bypassing!
 
Peter Sedgwick
pollinator
Posts: 464
Location: Toyoura Hokkaido
163
  • Likes 2
  • Mark post as helpful
  • send pies
    Number of slices to send:
    Optional 'thank-you' note:
  • Quote
  • Report post to moderator

Gerry Parent wrote:Thank you for sharing that Peter. I like the extension idea of Matt's for evening out the heat across the entire bench. So many ways to tweak a system and nice to know that there are options for different needs.  


Cheers Gerry,

There seem to be many options for many need. As it is snowing outside right now while Mimi and I are trying to separate clay and rocks, I feel the best option is the fastest option that will put heat inside the house.
Get it up and testing with Matt's elbow flue pipe idea and take it from there. May not be the most rockety and efficient stove on the planet, but it's better than frozen family members.

Here are some photos from yesterday...

Thanks agin for all the input, Peter and crew
72758378_700768287098773_7767530947037102080_n.jpg
[Thumbnail for 72758378_700768287098773_7767530947037102080_n.jpg]
Mimi working out the puzzle of backfilling the chimney with perlite
73341410_521980188651476_6495339854182744064_n.jpg
[Thumbnail for 73341410_521980188651476_6495339854182744064_n.jpg]
Bolting and taping outer pipe
74615415_1382401775216776_5478469646359199744_n.jpg
[Thumbnail for 74615415_1382401775216776_5478469646359199744_n.jpg]
Re squaring the inside of chimney box
74216727_542279329905624_4742661741903609856_n.jpg
[Thumbnail for 74216727_542279329905624_4742661741903609856_n.jpg]
Drying cob with space heater
73498081_2380104775587468_3117798046717444096_n.jpg
[Thumbnail for 73498081_2380104775587468_3117798046717444096_n.jpg]
View of double chimney pipe setup from the top with side pressure anchors
75282184_441948386462410_101185692872212480_n.jpg
[Thumbnail for 75282184_441948386462410_101185692872212480_n.jpg]
Chimney through roof and on 2nd floor
RMH1.jpg
[Thumbnail for RMH1.jpg]
Quick mock-up of Matt's suggestion
75361024_587700995102553_5290119572194590720_n.jpg
[Thumbnail for 75361024_587700995102553_5290119572194590720_n.jpg]
Chimy inspecting the work site
 
Peter Sedgwick
pollinator
Posts: 464
Location: Toyoura Hokkaido
163
  • Mark post as helpful
  • send pies
    Number of slices to send:
    Optional 'thank-you' note:
  • Quote
  • Report post to moderator

Satamax Antone wrote:
One thing thought, get yourself a flue thermometer, for your vertical chimney.

Something with a range of 0 to 200 or 300


Hey Satamax

This is what I have.
You suggest that I drill a hole in my 15cm vertical flue, behind my burn barrel, and screw this thing in and then epoxy around the seam?

Peter
9001F469-2310-4856-8DBD-B079D580D180.jpeg
[Thumbnail for 9001F469-2310-4856-8DBD-B079D580D180.jpeg]
4497987F-AEA6-4435-83D1-475B9079CB62.jpeg
[Thumbnail for 4497987F-AEA6-4435-83D1-475B9079CB62.jpeg]
 
Are we home yet? Wait, did we forget the tiny ad?
2024 Permaculture Adventure Bundle
https://permies.com/w/bundle
reply
    Bookmark Topic Watch Topic
  • New Topic