• Post Reply Bookmark Topic Watch Topic
  • New Topic
permaculture forums growies critters building homesteading energy monies kitchen purity ungarbage community wilderness fiber arts art permaculture artisans regional education skip experiences global resources cider press projects digital market permies.com pie forums private forums all forums
this forum made possible by our volunteer staff, including ...
master stewards:
  • Carla Burke
  • John F Dean
  • Timothy Norton
  • Nancy Reading
  • r ranson
  • Jay Angler
  • Pearl Sutton
stewards:
  • paul wheaton
  • Tereza Okava
  • Andrés Bernal
master gardeners:
  • Christopher Weeks
gardeners:
  • Jeremy VanGelder
  • M Ljin
  • Matt McSpadden

!! SEPP to Boot: Stephen's Experience (BEL)

 
pollinator
Posts: 1441
Location: Wheaton Labs, Montana, USA
2845
10
home care trees books wofati food preservation bike bee building writing seed
  • Likes 7
  • Mark post as helpful
  • send pies
    Number of slices to send:
    Optional 'thank-you' note:
  • Quote
  • Report post to moderator
BEL #747

After a second session working with the shelf unit I started last weekend, I completed a prototype that I'm pleased with. The photos here will also serve as notes and reminders for me when I build my next one. I also think this variety of mortise-and-tenon joinery (?) is a worthwhile method to attempt with other small construction. I intend to use it a lot this year.

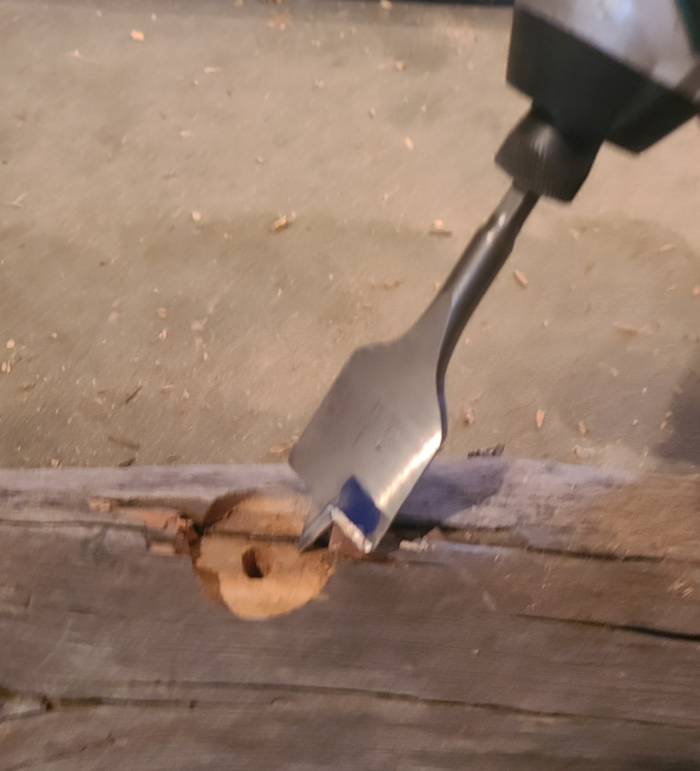
I had bought myself a 3/8" diameter dowel rod (for those familiar with Metric, this is close to 1cm) and wanted to use that as a support method for the shelf components. I clamped down all the supports and drilled wherever needed with a matching 3/8" drill bit. It was kind of tricky for the drill bit to "take a bite," so take your time and start off slow.


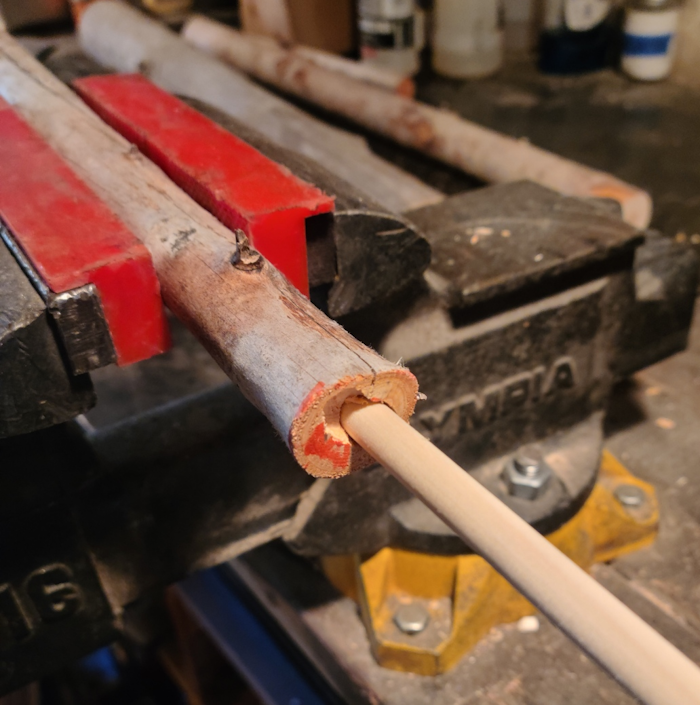
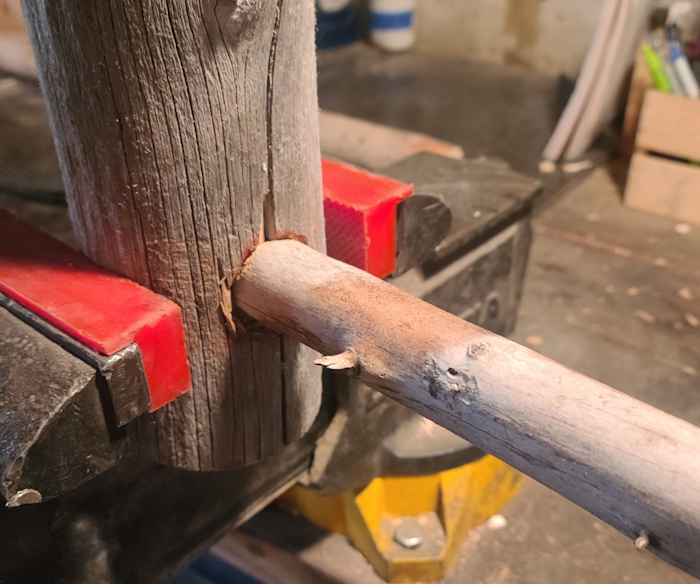
Because of the recesses I'd chiseled-out previously, the resulting joints were nice and snug.

Do your best to not force anything, as you don't want a dowel rod to break off in an inaccessible place.


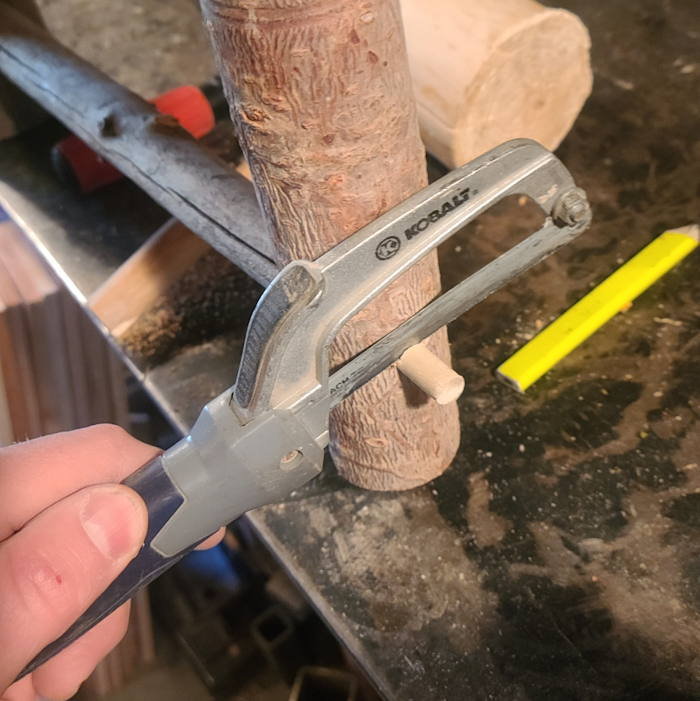
On some of the joints, I simply drilled all the way through the vertical support, tapped the dowel all the way through, then sawed it off with an itty-bitty hacksaw.


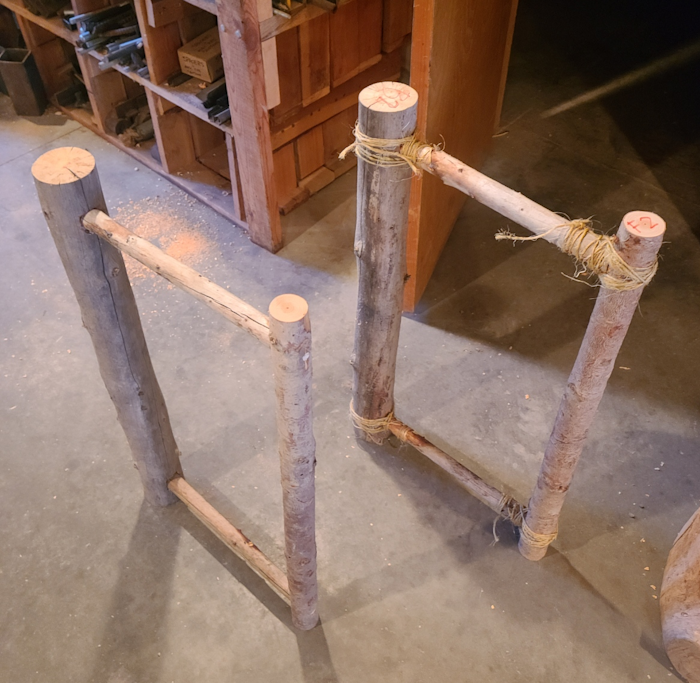
I set the two halves I'd completed side by side. It was kind of a no-brainer as to which method I wanted to go forward with, though in fairness to the sisal twine I'd like to say it's not so much weakness of that material as it is my skills not being ready for prime-time. The more I work at it, the better I'll become.

For now, I felt the best course of action was to replicate the dowel method on the twine half.


I also learned that if you use a paddle bit to start your holes, not only do you recess the wood to accommodate the diameter of your supports, but you also have a nice pilot hole started for your 3/8" drill bit.


I added two horizontal supports in the front and back, so that the shelf unit keeps its shape. The one at the front is kinda janky, but it'll do good enough.

The position of the horizontal support at the back makes me think this is a natural fit/size for a three-level shelf instead of just two.


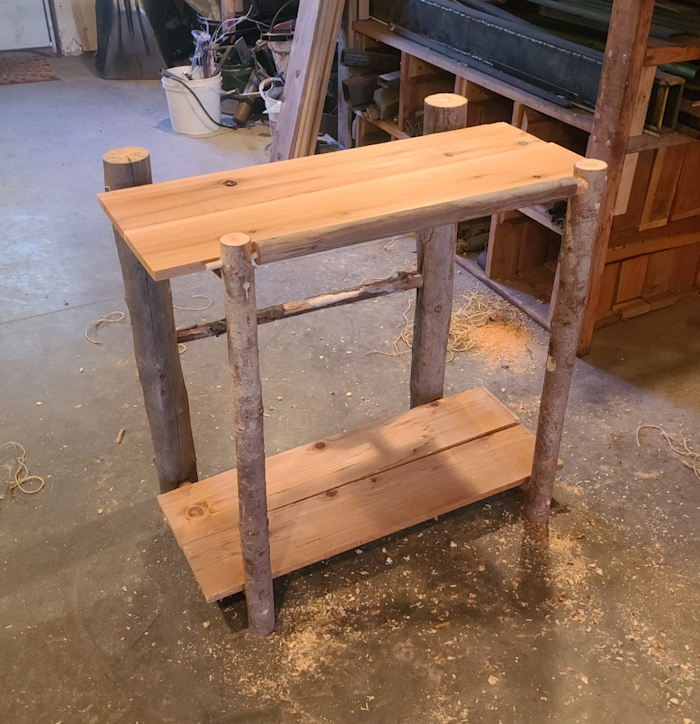
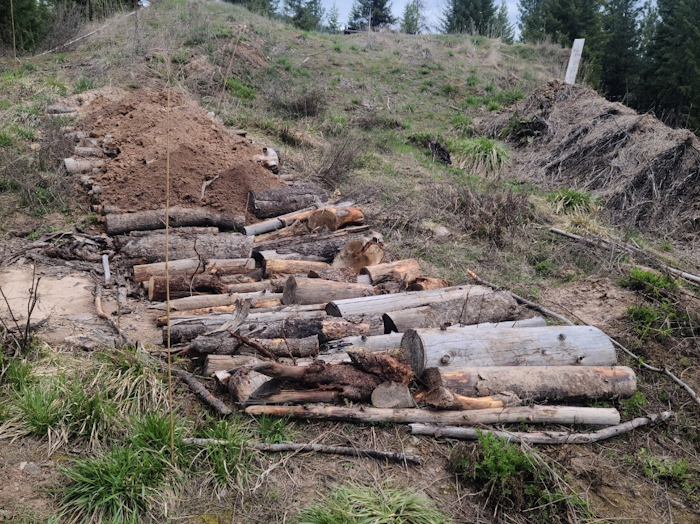
This shelf unit lives in my tent now. The next one I build ought to have three shelves in it, and likely more supports. The total material cost of this shelf unit is maybe $12, as I bought the fence pickets and dowel rod, while the support frame parts were all harvested from junkpole-sized trees.

That's all for now. Thanks for reading, and enjoy your day...!
 
gardener
Posts: 788
Location: 5,000' 35.24N zone 7b Albuquerque, NM
551
hugelkultur forest garden fungi foraging trees cooking food preservation building solar greening the desert homestead
  • Likes 9
  • Mark post as helpful
  • send pies
    Number of slices to send:
    Optional 'thank-you' note:
  • Quote
  • Report post to moderator
Your junk pole and dowel designs are fascinating to me, Stephen. They remind me of the rustic furniture here in New Mexico that use latillas, which are like junk poles. Word-of-mouth says that the furniture joints in what is sometimes called "Santa Fe style" were modeled after actual dwelling ladders used to enter earth buildings designed by First Peoples in our region. From local sources I learned that the holes in the vertical rails were made by taking embers from a fire, burning the holes to a shallow depth and carving out the resultant char with a knife. Repeat the burning and scraping until the hole is complete. By hand peeling the ends or short latilla pieces with a knife, the horizontal rungs were made to fit into the burnt holes. Once assembled into the ladder shape, the rungs were wrapped and tied with gut or rawhide strips that dry and shrink thus making the ladder one structurally sound unit. Furniture designers riff off this simple joint.
As I look at the dowel joints that you made, I can't help but wonder if the dowels are really necessary. Would it be desirable to save the few dollars and the effort required to add the dowel to your horizontal cross pieces by simply extending the length of the horizontal members to incorporate a hand-carved or peeled dowel-like taper to the "rungs" of your designs? If you have the time, I'd love to hear your thoughts about revealing the dowel already inside the junk pole!
 
Stephen B. Thomas
pollinator
Posts: 1441
Location: Wheaton Labs, Montana, USA
2845
10
home care trees books wofati food preservation bike bee building writing seed
  • Likes 10
  • Mark post as helpful
  • send pies
    Number of slices to send:
    Optional 'thank-you' note:
  • Quote
  • Report post to moderator
BEL #748

Happy Monday...!

I went to the Lab today first thing in the morning, so I could focus on completing as much of the new hugel berm that I could manage. It's coming along, and mmmmmmmaybe I will have it finished and ready to plant by next week, when new Boots are scheduled to arrive.


Back at Basecamp, I wanted to try some more experiments without metal fasteners. To make a more snug fit of the dowel rods in this outdoor sign, I decided to drill a tiny hole and then stuff a toothpick in there. We've done a similar thing with our roundwood kitchen chairs.


The sign is now placed in the berm closest to the front porch. We'll see how long it holds up.


In the afternoon, I jumped into the second phase of the Berm Shed repairs. Another support beam needs some attention. For this, Paul suggested a vertical post, with a sister log segment bolted to it and contoured to fit the angle of the beam. In this photo, the vertical post is on the left, while the green shows the position of the sister log support, and the pink-ish shows where the all-thread bolts will be inserted.


I cut the all-thread to length and ground off the ends, and also cut the vertical post and sister log to length. Tomorrow I ought to have time to connect everything together and put it all in place.


That's all for now. Thanks for reading, and enjoy your day...!
 
Stephen B. Thomas
pollinator
Posts: 1441
Location: Wheaton Labs, Montana, USA
2845
10
home care trees books wofati food preservation bike bee building writing seed
  • Likes 12
  • Mark post as helpful
  • send pies
    Number of slices to send:
    Optional 'thank-you' note:
  • Quote
  • Report post to moderator
BEL #749

Happy Taco Tuesday to you...!!!


The Berm Shed repairs are completed...! This is kind of a big deal. Major thanks to SEPPer Alex, plus the stand-in High Commanders while I was out of town: Clay, Eliot, Matt, and of course Paul.

To start off today's work on this task, I fit the post to it's "little sister log" at a backyard work station I'd cobbled together behind the Classroom.


I drilled two channels, and then ran all-thread through them, using the same process I'd done for the other posts I'd worked with.

Using a paddle/spade bit and drilling a long distance downward/vertically is not recommended unless you really have to do it that way. I found it challenging to excise the wood shavings - which were gumming-up the drill's progress - and lifting the spinning drill bit out of the wood was also jamming up because of compacted wood pulp. So if you have an auger bit, I'd suggest you go with that instead. Either that, or if you're able, then drill only horizontally and/or shorter distances with a paddle bit.


As advised, I backed-out the all-thread on the "knee brace," then cut out a wedge so that the large washers would sit flush between the wood surface and the square nut.


Once everything was in place to my satisfaction (note the bits of wood wedged into the various nooks and crannies), then I went through the nerve-wracking process of releasing all the bottle jacks, one at a time, to remove the floor jacks. I strained my ears for any odd creaks, grinding, splintering wood, etc. that would cue me to bolt as quickly as possible out from under the Berm Shed's roof.


Fortunately, everything went according to plan. No weird settling, no falling Berm Shed, no cats harmed (although Black Spark kept wandering in where she really shouldn't have, at the most inconvenient of times...). I'll wait a day, or maybe until Monday, before I do anything else down there just to see if anything settles or shifts without the supports there. Probably the only thing I'll do down there between now and then is tidy the Woodshop, and admire this work.


That's all for now. Thanks for reading, and enjoy your day...!
 
steward
Posts: 15822
Location: Northern WI (zone 4)
5011
8
hunting trees books food preservation solar woodworking
  • Likes 1
  • Mark post as helpful
  • send pies
    Number of slices to send:
    Optional 'thank-you' note:
  • Quote
  • Report post to moderator
Congratulations on getting that job done and not having any comedy occur!
 
What's brown and sticky? ... a stick. Or a tiny ad.
Learn Permaculture through a little hard work
https://wheaton-labs.com/bootcamp
reply