• Post Reply Bookmark Topic Watch Topic
  • New Topic
permaculture forums growies critters building homesteading energy monies kitchen purity ungarbage community wilderness fiber arts art permaculture artisans regional education skip experiences global resources cider press projects digital market permies.com pie forums private forums all forums
this forum made possible by our volunteer staff, including ...
master stewards:
  • Nancy Reading
  • Carla Burke
  • r ranson
  • John F Dean
  • paul wheaton
  • Pearl Sutton
stewards:
  • Jay Angler
  • Liv Smith
  • Leigh Tate
master gardeners:
  • Christopher Weeks
  • Timothy Norton
gardeners:
  • thomas rubino
  • Jeremy VanGelder
  • Maieshe Ljin

Matt Walker tiny cookstove build in Portugal

 
Apprentice Rocket Scientist
Posts: 238
Location: Province of Granada, Andalucía, Spain
83
5
gear fungi cooking composting toilet building rocket stoves woodworking wood heat
  • Likes 8
  • Mark post as helpful
  • send pies
    Number of slices to send:
    Optional 'thank-you' note:
  • Quote
  • Report post to moderator
Amazing progress Austin and Burra!

Burra Maluca wrote:
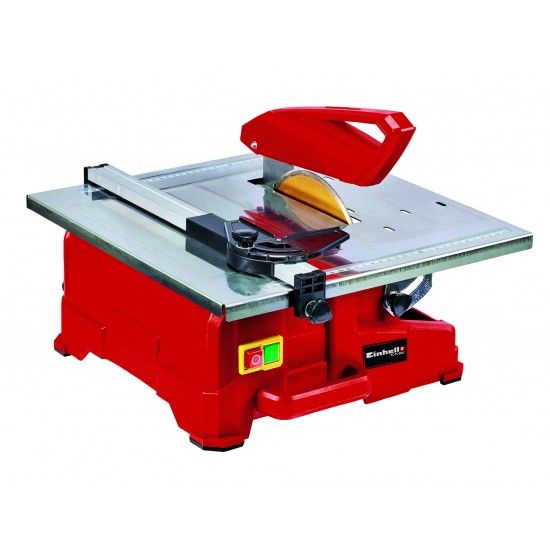
He treated  himself to a wet-saw for cutting the top bricks as they seem to be made of harder stuff than the others. The corners have come out rather well I think!


The corners do look very good. What saw did he get? I'm looking into buying one myself and chances are Portugal has a similar supply as Spain.
 
out to pasture
Posts: 12486
Location: Portugal
3355
goat dog duck forest garden books wofati bee solar rocket stoves greening the desert
  • Likes 9
  • Mark post as helpful
  • send pies
    Number of slices to send:
    Optional 'thank-you' note:
  • Quote
  • Report post to moderator
It's an Einhell TC-TC 800 tile cutter


The blurb says something like

Tiltable stainless steel table with angle scale (0 - 45°)
Integrated water container for blade cooling
Non-slip feet
Parallel with angle scale for exact straight cuts
Adjustable angle parallel (-45° - 45°) for angle cuts
Handle for easy transport


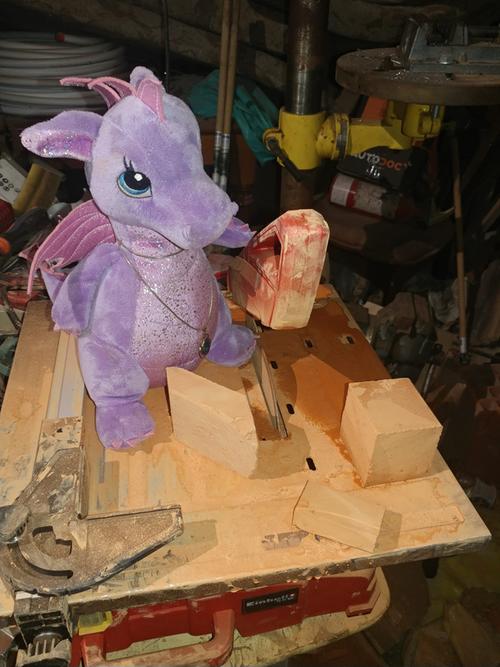
We've banned Roxa from playing with it, when it's running at least...


I refer to it as the Sludge Making Machine as the water combines with the clay dust to make the most awesome sludge which then gets sprayed all over Austin's clean clothes. He refused to let me take a photo, but it's like that meme of the little girl saying 'The Chickens are Fed".
 
steward
Posts: 12433
Location: Pacific Wet Coast
6996
duck books chicken cooking food preservation ungarbage
  • Likes 7
  • Mark post as helpful
  • send pies
    Number of slices to send:
    Optional 'thank-you' note:
  • Quote
  • Report post to moderator

Burra Maluca wrote:...I refer to it as the Sludge Making Machine as the water combines with the clay dust to make the most awesome sludge ...

So the obvious question is then... What is the sludge good for? (Other than your dragon that likes to bake, making mud-pies out of?) There must be something creative or permi-ish that could be done with it?
 
Burra Maluca
out to pasture
Posts: 12486
Location: Portugal
3355
goat dog duck forest garden books wofati bee solar rocket stoves greening the desert
  • Likes 8
  • Mark post as helpful
  • send pies
    Number of slices to send:
    Optional 'thank-you' note:
  • Quote
  • Report post to moderator

Jay Angler wrote: So the obvious question is then... What is the sludge good for? (Other than your dragon that likes to bake, making mud-pies out of?)
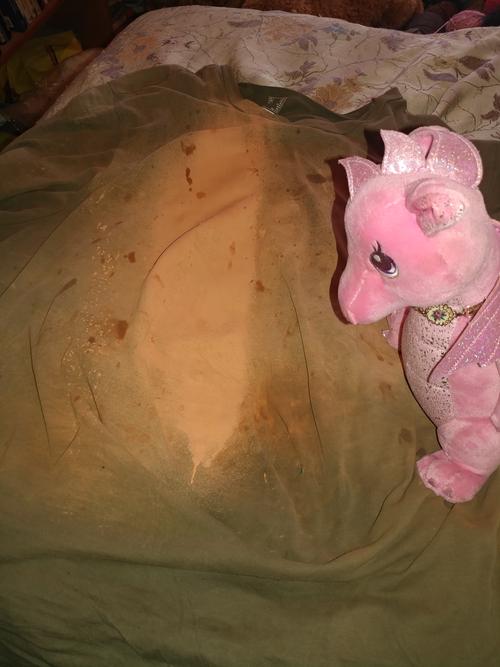


Hmm, well there isn't really that much of it. And most of it seems to end up on his clothes, which then gets into the rinse water of the washing machine (yeah - real washing machine! I've moved on from all that hand washing!!) so then it ends up in the grey water and makes its way back to the garden.

Rosa thinks I should probably put it, and the trousers he was wearing this morning, in a bucket to soak somewhere. She's a bit overly domesticated that pink one is...

 
Rusticator
Posts: 8576
Location: Missouri Ozarks
4545
6
personal care gear foraging hunting rabbit chicken cooking food preservation fiber arts medical herbs homestead
  • Likes 3
  • Mark post as helpful
  • send pies
    Number of slices to send:
    Optional 'thank-you' note:
  • Quote
  • Report post to moderator
Would it work to help seal a pond, I wonder...
 
Burra Maluca
out to pasture
Posts: 12486
Location: Portugal
3355
goat dog duck forest garden books wofati bee solar rocket stoves greening the desert
  • Likes 8
  • Mark post as helpful
  • send pies
    Number of slices to send:
    Optional 'thank-you' note:
  • Quote
  • Report post to moderator

Carla Burke wrote:Would it work to help seal a pond, I wonder...


It would have to be an exceptionally small pond. The clay in it is just from the width of the sawblade from the bricks he's cutting to make the top layer of the stove.

Having said that, pond building is on the agenda. Two years ago we studied the water flows down the terraces, hired a digger, and created a little water meadow and a pond. It worked really well the first winter, but then after the fire last year we had floods which washed tons and tons of silt down the mountain and completely filled the pond in. Which is apparently very typical on mountains after fire, and did serve to demonstrate how perfectly we had designed the system to catch the entire surplus flow down the mountain. It's just that we wanted the flow of water, not of silt...

Anyway, now we need to hire the little digger again and remove all the silt. I was all set to do a photo shoot of how well it had worked and the process of designing it, but watching it all fill with silt rather spoiled the story. I'll try again when we manage to arrange the digger hire!

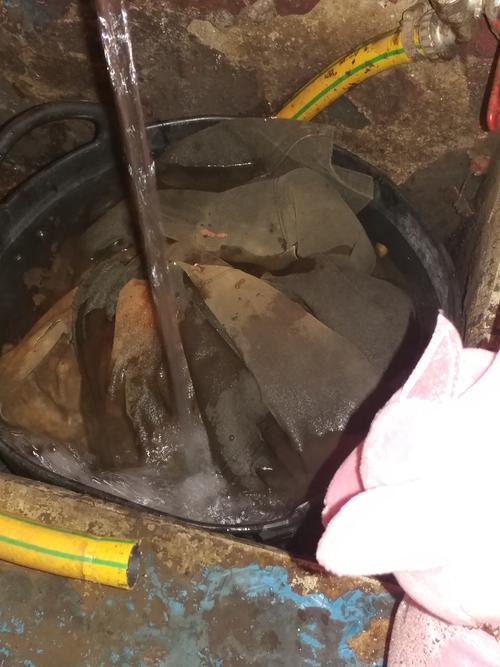
Meanwhile, Rosa has run off with the sludgey clothes, put them in the old donkey-feeding bucket, and is running water over them. I think I'm supposed to wash them tomorrow. She is far more organised than I am when it comes to this house-keeping and domestic stuff...


Burra Maluca
out to pasture
Posts: 12486
Location: Portugal
3355
goat dog duck forest garden books wofati bee solar rocket stoves greening the desert
  • Likes 12
  • Mark post as helpful
  • send pies
    Number of slices to send:
    Optional 'thank-you' note:
  • Quote
  • Report post to moderator
The metal we used for the flange and support for the stove pipe proved to be a bit too feeble, so we tried again using the same steel we used to support the core, which was *much* more satisfactory.

Then Austin used all the bricks he'd cut to shape yesterday to build it into place, without the fancy corners he'd put on the front of the stove because it isn't really necessary at the back of the stove.

The clay mortar is still wet so we haven't cleaned it up yet, but you get the picture.

flange-set-in-bricks.jpg
[Thumbnail for flange-set-in-bricks.jpg]
 
Apprentice Rocket Scientist
Posts: 149
Location: Portugal
100
2
transportation gear earthworks solar rocket stoves
  • Likes 13
  • Mark post as helpful
  • send pies
    Number of slices to send:
    Optional 'thank-you' note:
  • Quote
  • Report post to moderator
Well, it's not exactly done as such.  But it's nearly done.  Functionally, need to add the chimney, which means making a hole in the wall.   Also some means of getting the bypass slider brick out of it's slot once it's in there.

Then there's a strat bench to make.  But I can run the stove without that initially.  
 
Burra Maluca
out to pasture
Posts: 12486
Location: Portugal
3355
goat dog duck forest garden books wofati bee solar rocket stoves greening the desert
  • Likes 14
  • Mark post as helpful
  • send pies
    Number of slices to send:
    Optional 'thank-you' note:
  • Quote
  • Report post to moderator
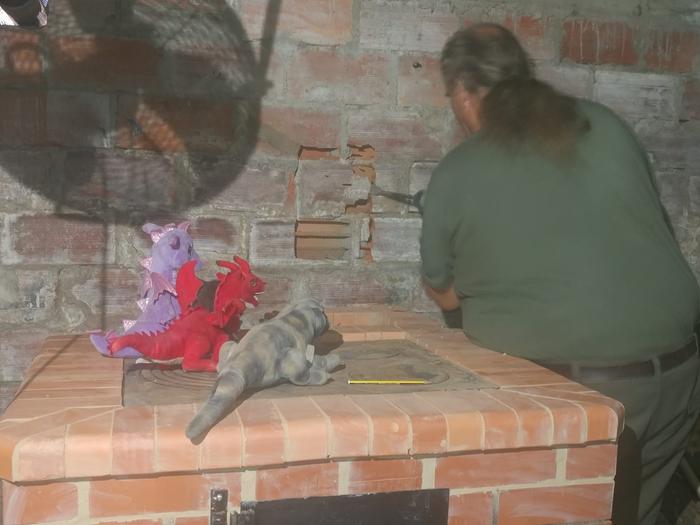
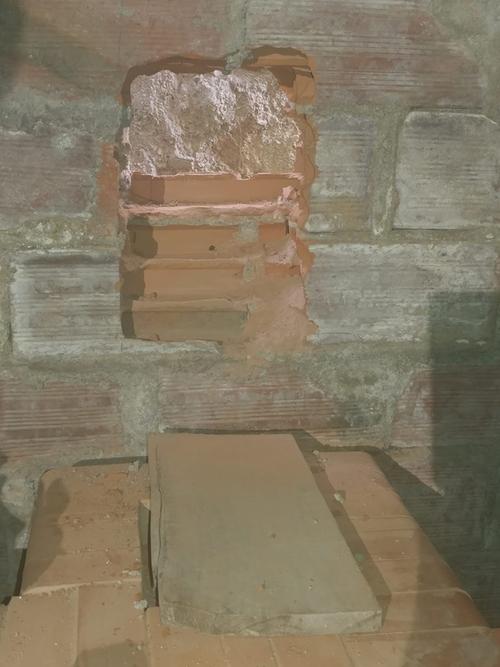
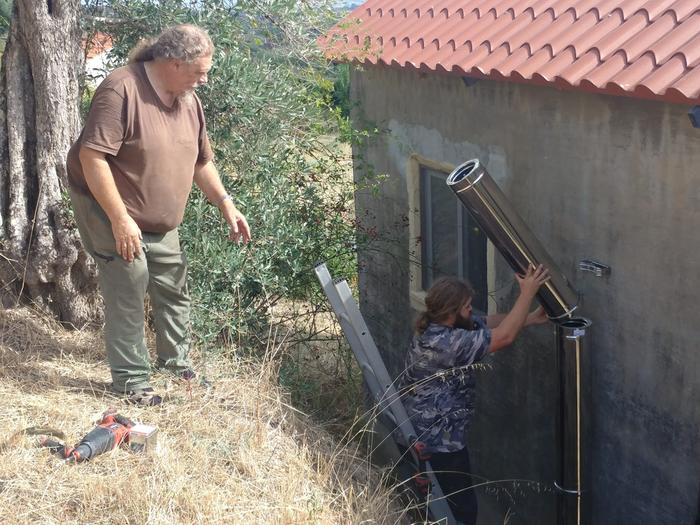
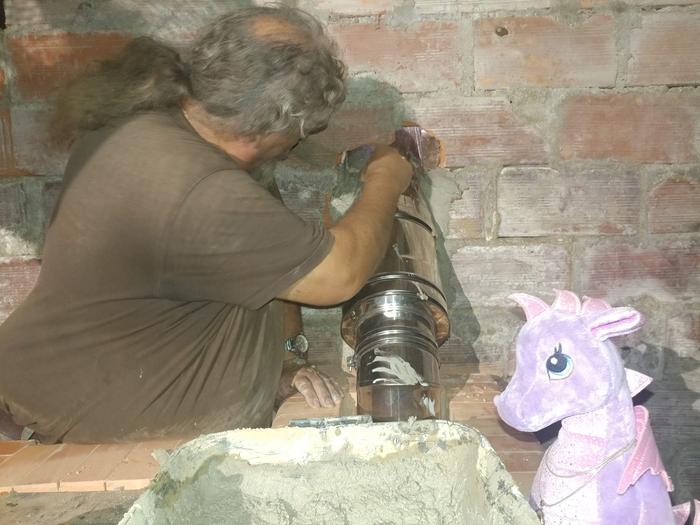
Time to bash a great big hole through the wall and put the chimney pipe up!


Oooops, that bit fell straight down into the inner workings of the stove, so we fished it out and put an offcut of wood over the hole to stop it happening again...

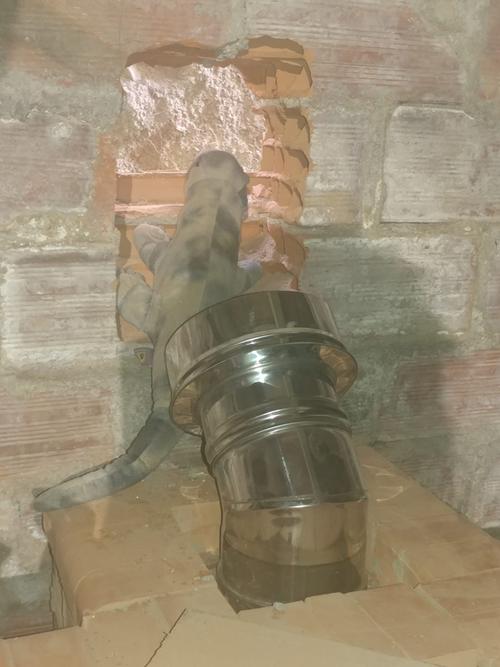
The bricks aren't solid, and make a convenient 45 degree slope if you chisel the right bits out. Which is very handy!


Extending the angle of the pipe to see if he's cut enough wall out.


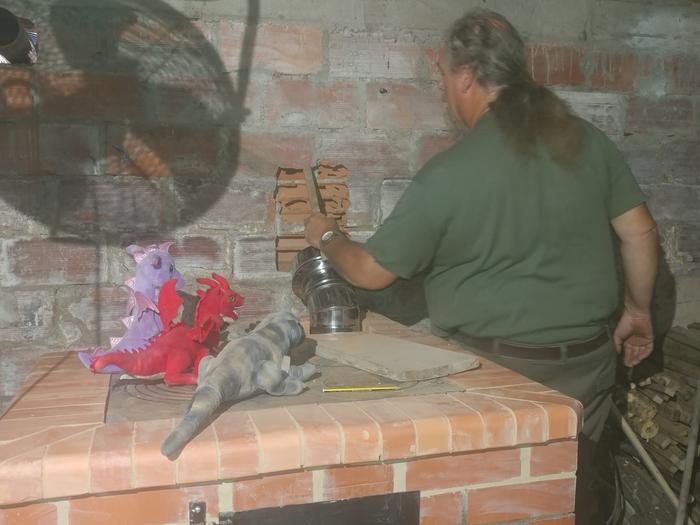
Breaking through to the other side...


Hole neatly cut all the way through, with the 'steps' clearly visible.  

We'll also need to go and cut some more from the other side to allow for the way the pipe angles up through the wall.


Iggy is checking the angle to see if it really does match the pipe...


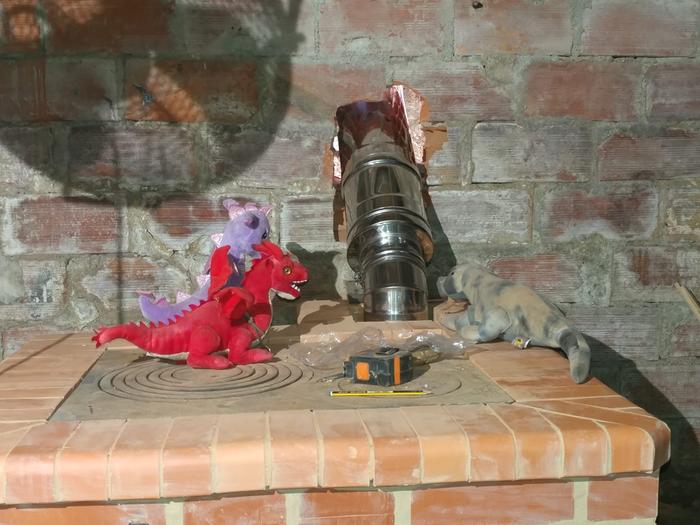
The hole is now the right size and angle all the way through the wall and the pipe can be fitted.  We borrowed my son, Alan, to help with this bit.


It really is one of the huge blessings in my life to see these two working together so well...


The bench isn't built yet, but I suspect we can block that bit off and do a couple of test burns very soon. Rain is forecast for the coming week, which seems like a perfect excuse...
 
master pollinator
Posts: 4964
Location: Due to winter mortality, I stubbornly state, zone 7a Tennessee
2120
6
forest garden foraging books food preservation cooking fiber arts bee medical herbs
  • Likes 5
  • Mark post as helpful
  • send pies
    Number of slices to send:
    Optional 'thank-you' note:
  • Quote
  • Report post to moderator
Beautiful, Austin! Great job. I want one of these so bad. Been saying that for years though...
 
pollinator
Posts: 417
124
2
dog trees books bee medical herbs
  • Likes 8
  • Mark post as helpful
  • send pies
    Number of slices to send:
    Optional 'thank-you' note:
  • Quote
  • Report post to moderator
Wow, it looks amazing! And I love the arched door! Good thing you had the dragon family help inspect everything along the way. I quite enjoyed their company in the pictures, too! Please thank them, along with yourselves! Not only has this thread been educational, but quite entertaining as well. It certainly caused lots of smiles in between the oohs and ahhs of the build!
 
Austin Shackles
Apprentice Rocket Scientist
Posts: 149
Location: Portugal
100
2
transportation gear earthworks solar rocket stoves
  • Likes 6
  • Mark post as helpful
  • send pies
    Number of slices to send:
    Optional 'thank-you' note:
  • Quote
  • Report post to moderator
We may need another length of chimney if it doesn't behave.  But that insulated pipe don't grow on trees, so gonna test it first.  It can be added fairly easily if needed.
 
Austin Shackles
Apprentice Rocket Scientist
Posts: 149
Location: Portugal
100
2
transportation gear earthworks solar rocket stoves
  • Likes 6
  • Mark post as helpful
  • send pies
    Number of slices to send:
    Optional 'thank-you' note:
  • Quote
  • Report post to moderator
furtling on the forums I see this chap is building our stove's big brother:
Matt Walker continental build

Makes me realise why Matt calls the one I've built "Tiny", that thing is mahoosive!  He's also incorporating a water heater in it, which I would have been thinking about if I'd had space to build a bigger one.

 
Burra Maluca
out to pasture
Posts: 12486
Location: Portugal
3355
goat dog duck forest garden books wofati bee solar rocket stoves greening the desert
  • Likes 12
  • Mark post as helpful
  • send pies
    Number of slices to send:
    Optional 'thank-you' note:
  • Quote
  • Report post to moderator
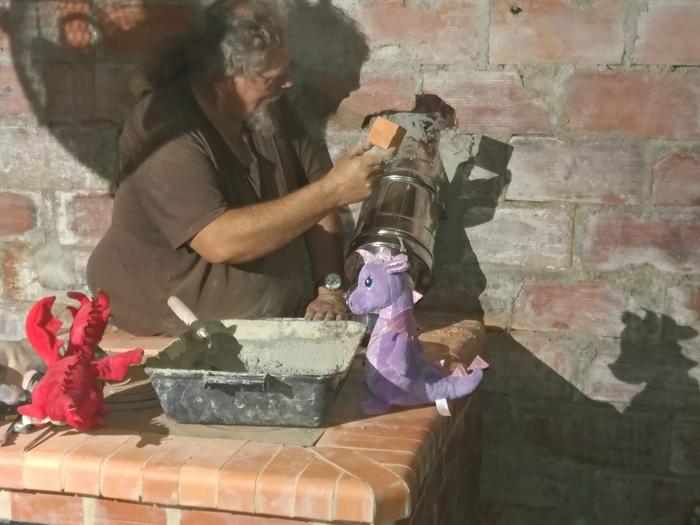
Well the rains have arrived, and all the local mini-critters are looking for somewhere nice and dry to hang out, which means we really need to get that hole in the wall sealed off again as soon as we can.

They're working on it, while I'm attempting to tackle the washing up mountain and the general state of the kitchen...


We're using offcuts of brick to fill up the bigger gaps, to reduce the amount of cement needed.

We're also only doing the inside bit to seal it off. Then when it's not pouring with rain we can tackle the cavity that's still left on the outside.  For now, wind, rain and critter proof is quite good enough!


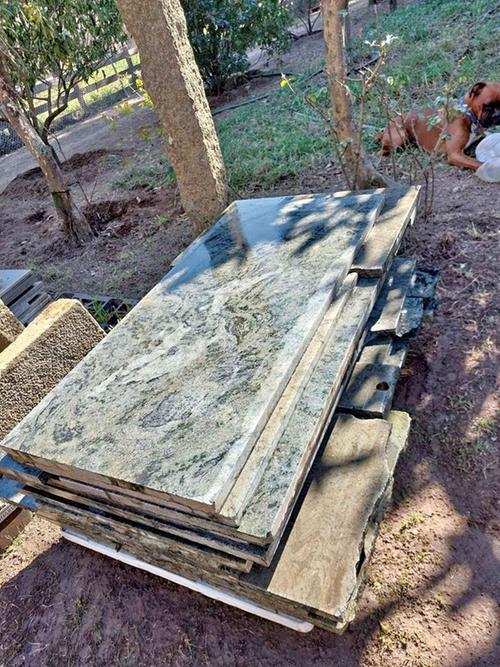
We also need to think about designing the bench. For which we need to backtrack a little and think about what materials we already have. Especially for the stonework for the bench top.  

My son bought a load of salvaged gneiss last year for when he gets around to doing his kitchen. It's beautiful, but realistically there won't be enough big bits left over for me to scrounge for the bench by the time he's done an awesome job of his kitchen, which is a shame. I can make lots of pretty shelves and things though.


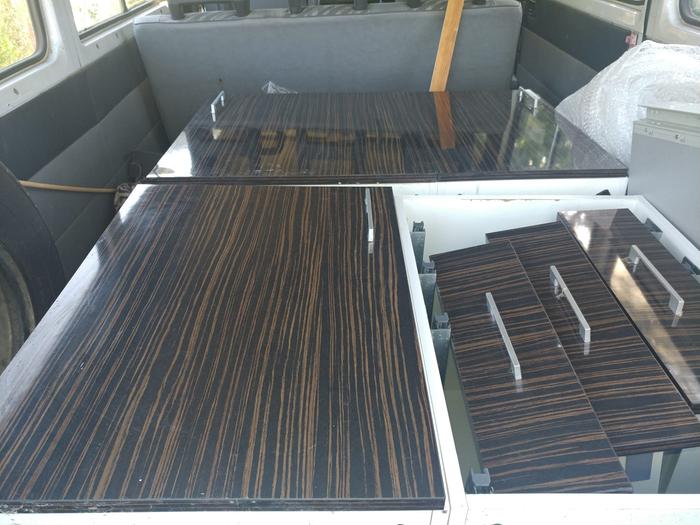
But then one of his workmates, who he'd been helping out with something, gave him his old kitchen cabinets as a thankyou.


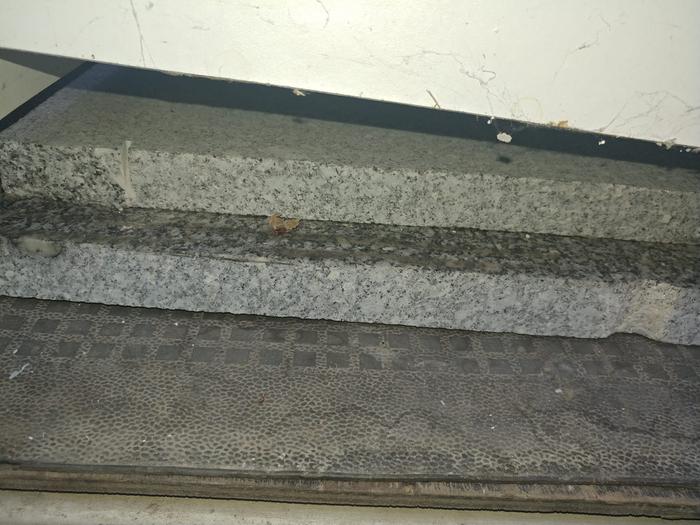
They are complete in themselves, but they'd had granite cut to size and laid on top, which had also turned up as part of the thankyou gift.

There it is, on the floor of the bus underneath the cabinets!

What a lucky boy - I'd always wanted to be given free great big slabs of granite...


Austin helped him unload.

The first one measures 63 cm by 155 cm, which is roughly 25" by 61", or a bit over 2 ft by 5 ft.

It's kinda heavy, so it took two of them to unload.

And they're making silly comments on it being nice and free, even though it's granite, not gneiss...


The second bit was smaller, measuring 63 cm by 108 cm, ie the same width but shorter. Roughly 25" by 42", or 2 ft by 3 ft 6"


I kept thinking about those slabs, and in my mind's eye I could envision cutting the big one in half, trimming the smaller one to match, and ending up with three slabs 63 cm by 77 cm, or 25" by 30".

Which would be kinda nice laid side by side creating a heated bench 189 cm by 77 cm, or 74" by 30", or a bit over 6 ft by 2 ft 6".

Which is a bit small for sleeping on, but we could make the bench itself a bit wider than the actual heated area, with big bricks against the wall to support it all well and then level off the 'gap' with cement, or something.

So I took a deep breath and asked my son if he was intending to use the new granite for his kitchen or to stick to his original plan of using the gneiss. He was adamant that the gneiss was what he wanted and he didn't actually have any use for the granite, it was just that he wasn't going to turn down free stone.  So I asked him about the possibility of using it for the bench, and he very graciously said I could have it!

I reminded him that he was thinking of putting in a rocket mass heater of his own at his place, but he said that due to the layout of the house he was going to have a completely different design that wasn't going to include a heated bench and that the offer stood.

So now we have to start thinking about where on earth we can clear out all the stuff in that corner and how to design the bench so that it fits the available stone and also makes an appropriate sized bench for anyone Austin-sized to sleep on if necessary.


Apprentice Rocket Scientist
Posts: 264
76
  • Likes 7
  • Mark post as helpful
  • send pies
    Number of slices to send:
    Optional 'thank-you' note:
  • Quote
  • Report post to moderator
Nice granite score there , i went to a fireplace surround and mantle making place , local enough to me , i had heard that they bin the off cuts and odds every now and then ---and i asked about and offered to buy a piece of granite approx 24 x 24 "   ----165.00 euro---it never made it into my van , looking at the insulated chimney sections , thats my next plan of action ---not cheap stuff either---but i have seen some insulating sleeves that fit over standard steel section pipe---must check out prices. Happy stoving.
 
Austin Shackles
Apprentice Rocket Scientist
Posts: 149
Location: Portugal
100
2
transportation gear earthworks solar rocket stoves
  • Likes 9
  • Mark post as helpful
  • send pies
    Number of slices to send:
    Optional 'thank-you' note:
  • Quote
  • Report post to moderator
Well it's a damp and uninspiring day, and having at least partly filled the hole in the wall around the chimney I took the door off and drilled air holes, and lit a small trial fire with the bypass open.  I didn't prime the chimney as I wanted to see if it would work without.

It started off a bit smoky but after a bit the bottom part of the chimney was warm to the touch and then it seemed to be burning OK although not as fast as I kind of expected.  However I'm not real sure how fast it's supposed to burn.

Would value input from others here on the following:

1) The chimney is a bit short vs the house roof.  That might be affecting the draft?  This is a known potential issue, but chimney pipe is expensive and I figured nothing ventured nothing gained from trying it out before investing in another length to make it taller.  It's also not a massive job to add another section.

2) Primary air:  I made 23 x 10mm holes.  That adds up to an area of about 18 cm² but I suspect they may not flow as much air as a single 6x3cm hole (2.36" x 1.18", so 2.78in²).  That  said it doesn't appear to burn much faster with the door open, which I'd kinda expect if the primary air was lacking.  But I'd like to hear what size others have made their primary air intake.  I can get a bigger drill and enlarge the holes easy enough.

3) I didn't put much fuel in, probably only about 1/3 of the firebox.  Maybe batch boxes in general don't burn so well with only a part load?  

That said, I'm very happy with the results so far.  Once it was burning I shut the bypass and heat started to go across the hotplate to the cool side, and the fire continued to burn.  Considering the small amount of fuel and the possibly-too-short chimney, I'd say it was a definite success.
 
Rocket Scientist
Posts: 791
Location: Guernsey a small island near France.
299
  • Likes 13
  • Mark post as helpful
  • send pies
    Number of slices to send:
    Optional 'thank-you' note:
  • Quote
  • Report post to moderator
Well if it is of any encouragement, I would say that 99% of build threads about Rocket mass heaters have a similar post to yours at the same stage!
Wet and damp refractory are the main issue, it can take several days of mutable same size fires before the stove starts to work as expected, in some cases where there are lots of damp bricks, it can take weeks to dry out.
There may be other issues to be deal with but, number one is to lite a series of small short fires, let the stove cool down and lite another.
After 4-5 small fire, start to build bigger ones…….
Once the stove is dry we can look at any other issues that might arise…..
 
Burra Maluca
out to pasture
Posts: 12486
Location: Portugal
3355
goat dog duck forest garden books wofati bee solar rocket stoves greening the desert
  • Likes 8
  • Mark post as helpful
  • send pies
    Number of slices to send:
    Optional 'thank-you' note:
  • Quote
  • Report post to moderator

tony uljee wrote:i went to a fireplace surround and mantle making place , local enough to me , i had heard that they bin the off cuts and odds every now and then ---and i asked about and offered to buy a piece of granite approx 24 x 24 "   ----165.00 euro---it never made it into my van .


Ouch. That is the price per square metre here, cut to the size you want.

And that huge heap of gneiss, which is about 14 square metres but in all sorts of odd shapes, including some nice big bits, was €170. It showed up on facebook marketplace as a job lot that someone had pulled out of a shower room or bathroom or something. I loved it and showed it to my son, who also fell in love with it. Austin drove him rather a long way to fetch it, I paid for the fuel, he gets to use whatever he wants for his kitchen and I get first pick of any left overs, of which there should be plenty.

We saw another awesome bit a few weeks ago - a bit of marble something like 2.7 m long by 75 cm wide and 4 cm thick, for €20. But when I worked out how heavy it was I realised it would take four men to move it, and it was two hours drive away, and we didn't actually have an immediate use for it. So I reluctantly decided against it.

Just found the link, sold now... huge bit of marble

I would strongly recommend keeping an eye on places like facebook marketplace though. Some people think their old coffee-table tops are worth a fortune, while other people realise that their entire cut-to-measure kitchen worktop collection is exceedingly heavy and that most people can't lift it, can't transport it and can't cut it to the size they need and price it much more sensibly. So if you can transport it and manoeuvre it and cut it, it's very much worth checking what is available every few days.
 
Austin Shackles
Apprentice Rocket Scientist
Posts: 149
Location: Portugal
100
2
transportation gear earthworks solar rocket stoves
  • Likes 8
  • Mark post as helpful
  • send pies
    Number of slices to send:
    Optional 'thank-you' note:
  • Quote
  • Report post to moderator

Fox James wrote:Well if it is of any encouragement, I would say that 99% of build threads about Rocket mass heaters have a similar post to yours at the same stage!


That's good to know.  We'll persevere for a bit before deciding on the chimney.  The former woodstove had a 4" flue, uninsulated, which is not much taller than the new one and still well below the ridge of the roof.  It could be a bit balky to start on a cold day but once burning the main issue was getting to burn slow enough, very rarely lacked draft unless it needed sweeping.  

Next time I'll put about half a load of wood in it, and see how it goes.  I'll also give some thought to a chimney preheating device in case I end up needing it.  A long handled thingy to put something combustible on which can slide in through the oven and into the base of the chimney might be a plan.

 
master pollinator
Posts: 1745
Location: Ashhurst New Zealand (Cfb - oceanic temperate)
533
duck trees chicken cooking wood heat woodworking homestead
  • Likes 6
  • Mark post as helpful
  • send pies
    Number of slices to send:
    Optional 'thank-you' note:
  • Quote
  • Report post to moderator

Austin Shackles wrote:

Next time I'll put about half a load of wood in it, and see how it goes.  I'll also give some thought to a chimney preheating device in case I end up needing it.  A long handled thingy to put something combustible on which can slide in through the oven and into the base of the chimney might be a plan.


On still, damp days in the shoulder season when our fire is difficult to light (I put a downdraft flue extension in earlier this year) I've discovered that pointing a hair dryer at the flue and heating it up for about a minute works wonders. As soon as everything is moving the right direction it's fine.
 
Austin Shackles
Apprentice Rocket Scientist
Posts: 149
Location: Portugal
100
2
transportation gear earthworks solar rocket stoves
  • Likes 8
  • Mark post as helpful
  • send pies
    Number of slices to send:
    Optional 'thank-you' note:
  • Quote
  • Report post to moderator
I have a gas* blowlamp  Used to use that when the previous woodstove wasn't lighting, to pre-heat the air in the top of the stove.  For the Walker stove I'm thinking of a small flat shovel on a long handle, on which we can put some oily paper or other readily combustible stuff and slide it in the oven door all the way to the back corner into the base of the chimney.  From there the heat will go straight up into the flue pipe.

Second test burn this morning with a bit more fuel.  It was balky getting going (but without preheating the chimney) and still not burning as fast or clean as I'd hope even with full bypass.

The received wisdom is that the conditions are poor for operating any rocket though: it was about 21°C (70°F) inside and not that much colder outside, with no wind to speak of.  I wouldn't normally be looking to burn the stove in these conditions, except that it's part of testing/commissioning/learning it.  If I can get it to go in these conditions I'm confident of it working better when it's actually cold.

I drilled another row of primary air holes in the door, making 30 x 10mm for a total area of about 23.5 cm² or 3.65 in².  I figure that's probably enough, but if it looks like the primary air is lacking I can drill 'em out a bit bigger.  No doubt 30 small holes don't flow as much air as, for example, a single 3.65" x 1" slot would.  However I like the look and it reduces the (already small) possibility of embers managing to fall out.  As yet the door has no actual seal, just fits fairly close to the brickwork.  I have the option of putting a rope seal on the door around the firebox opening.  That would prevent smoke sneaking out the top of the door when lighting but apart from that I don't see a lot of advantage, a small crack around the door is only going to let a little extra air in when it's working right.

*butane/propane mix, not gasoline
 
tony uljee
Apprentice Rocket Scientist
Posts: 264
76
  • Likes 6
  • Mark post as helpful
  • send pies
    Number of slices to send:
    Optional 'thank-you' note:
  • Quote
  • Report post to moderator
Standing at the front of my stove build ---i was thinking of how good you must have felt to complete the stove and see it start up with that first fire in something built by your hands  ---congratulations
 
Austin Shackles
Apprentice Rocket Scientist
Posts: 149
Location: Portugal
100
2
transportation gear earthworks solar rocket stoves
  • Likes 6
  • Mark post as helpful
  • send pies
    Number of slices to send:
    Optional 'thank-you' note:
  • Quote
  • Report post to moderator
Yes it's quite satisfying.  Although it's not quite there I'm confident it will be.
 
Austin Shackles
Apprentice Rocket Scientist
Posts: 149
Location: Portugal
100
2
transportation gear earthworks solar rocket stoves
  • Likes 14
  • Mark post as helpful
  • send pies
    Number of slices to send:
    Optional 'thank-you' note:
  • Quote
  • Report post to moderator
A couple more experiments today.  

First, this morning, Burra lit it for the first time! Apparently it made smoke, but got going after a bit.  

Second, after lunch when it'd gone out but was still warm I just lit it again.  It seemed to light a bit easier and cleaner, but it's still balky if I shut the bypass completely, I can shut it about half and get some heat going around the stove but shutting it fully starts to smoke, so I think it needs more draft.  Running door open doesn't make it take off, so the low draft is obviously on the output side.

I also need to seal around the hotplate better, maybe with some high temp silicon or such.  Although I fitted a rope seal on the top of the firebox/cooktop support, that doesn't actually seal all around it, since in some places there isn't any support for it to seal to.  

Anyhow, I'm becoming convinced we need the flue longer outside.  Since any rocket is trying to run the flue as cool as possible and still have it actually drawing, I don't need anything working against that.  So another length of pipe is on the shopping list.

 
Burra Maluca
out to pasture
Posts: 12486
Location: Portugal
3355
goat dog duck forest garden books wofati bee solar rocket stoves greening the desert
  • Likes 13
  • Mark post as helpful
  • send pies
    Number of slices to send:
    Optional 'thank-you' note:
  • Quote
  • Report post to moderator
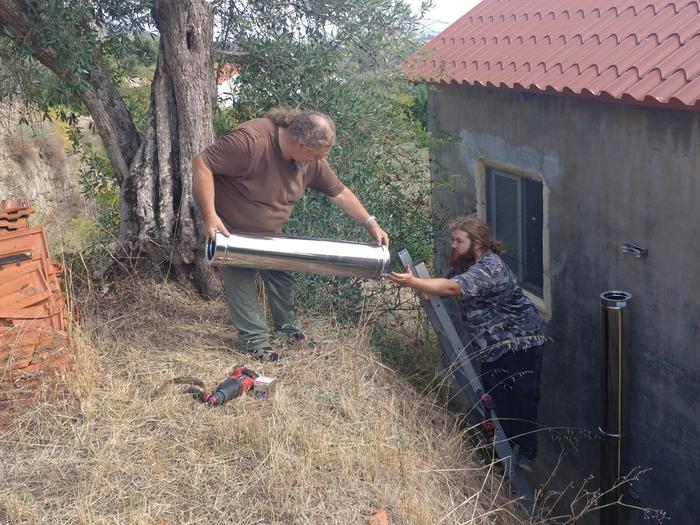
Another 1m length of pipe has been purchased.

The boys are outside now fitting it, to occasional shouts of "Don't fall off the roof - your mother would never forgive us!"

Further testing to commence shortly...
 
Austin Shackles
Apprentice Rocket Scientist
Posts: 149
Location: Portugal
100
2
transportation gear earthworks solar rocket stoves
  • Likes 11
  • Mark post as helpful
  • send pies
    Number of slices to send:
    Optional 'thank-you' note:
  • Quote
  • Report post to moderator
Got the extra metre of flue fitted.  It's now only a bit below the ridge of the roof, rather than quite a lot below as it was before.  However, it hasn't proved to be the magic bullet I was hoping for.  Did get the stove alight but it's still burning slow and smoky, even with open bypass.  The list below is where I'm at.

* The wood is nice and dry and not too big pieces.
* Running with the door open doesn't make much difference so I don't think lack of primary air is the issue.
* I still need to seal around the hotplate better, there are a few spots which let out smoke.  Also sealing around the door but if it would draw and burn right, no gases should be coming out of the door.
* flue is still below the roof ridge line, by something like about 2ft.  
* it's about 20°C (68°F) inside and not a lot colder outside.  Still, with the bypass open I'd expect better results.  But the received wisdom is that it going to be marginal for running any rocket stove.

[edit] After the fire had mostly burnt and had only a couple of embers left, the bottom of the flue was cold to the touch.  So I think there was clearly a down draft issue today, at least.

Although it's not cold it is damp and I'd kinda hope to be able to run the stove to keep things dry.

I've a feeling I'm going to end up getting yet another length of flue, to get the top up above the roof.  But would also appreciate any thoughts anyone cares to share.
 
Jay Angler
steward
Posts: 12433
Location: Pacific Wet Coast
6996
duck books chicken cooking food preservation ungarbage
  • Likes 8
  • Mark post as helpful
  • send pies
    Number of slices to send:
    Optional 'thank-you' note:
  • Quote
  • Report post to moderator
We get a lot of down-draft type weather, but we're using wood stoves, not RMH or Walker cookstoves.

One thing I would try to observe is where and how the wind blows on your land, and how you might be able to redirect it with various approaches.
Solid structures have a different effect than holey structures - think solid wall vs snow fence.
Height vs distance also makes a big difference.

Eg from the past: When I was a teen, my parents bought a house with a sunken driveway that sloped westward to the garage. All the snow would blow down the street and land in our driveway. My dad planted a row of shrubs on our north property line so that the wind would slow and drop the snow on our front lawn instead of in the driveway. It wasn't perfect, but it was a lot better.

So think along those terms - how can you get the prevailing wind to change its angle where you want it to? For our current house, we had to chop back a bunch of trees, but that happened this spring and we haven't lit any fires yet to actually test whether it has helped the draft or not.
 
Posts: 285
Location: North East Iowa, USA
71
  • Likes 8
  • Mark post as helpful
  • send pies
    Number of slices to send:
    Optional 'thank-you' note:
  • Quote
  • Report post to moderator
Austin, have been watching your progress, and I am not going to suggest "what or how to change anything"  but, I would like you to check this in a reversed segment order.   That being this.

You should be able to take the pipe off of your stove to the flue.
What you then have is Just the flue (chimney)  nothing else.
Wad up several (8-15) sheets of newspaper
if you need help holding or have a box available so that your can light one after the other these newspapers, never letting it go out or falling away from the chimney.  Get ready and be ready to act fast.

These papers should darn near suck out of your hand when lit.  if you can get 3-4 lit in quick succession, all the better. A well drafting flue, with no or narry of a restriction should just GO as if there is a suction hose on your roof.

Being very honest here, but if you don't have this, it will be hard to make your stove do the pushing of smoke/exhaust.  But here is the catch- if you do have excellent draw here, Then we get back up closer to  your stove.  Kind of like know what CAN COME OUT before we try to PUSH  INTO the flue.

As always, I don't mind being corrected, but I always like to know what can happen vs what should happen.

best of success.
 
Austin Shackles
Apprentice Rocket Scientist
Posts: 149
Location: Portugal
100
2
transportation gear earthworks solar rocket stoves
  • Likes 11
  • Mark post as helpful
  • send pies
    Number of slices to send:
    Optional 'thank-you' note:
  • Quote
  • Report post to moderator
That's a good thought although the way I built it it's kinda difficult getting the flue apart.

Thing is, the previous wood burner which was where the stove is now had a single-skin 4" flue which also terminated well below the ridge of the roof.  Most days that took a little effort to get going but once the smoke was going upwards it worked well and most of the time had to have a damper in the flue part way shut to prevent it from burning too fast.  The new 6" flue for the rocket stove is on the same side of the house about a yard or so away from the old one, so I can't see the climatic conditions overall being a lot different.

I'm about to try today's lighting.

The other thing is that the stove is still pretty new and may still not be fully dried out: Matt says that it won't burn well until it is and I gather that this applies to most masonry stoves. I have a couple of options for priming the flue.  Most likely, will shut the bypass and have some long handled shovel style thing which can slide into the back corner of the oven space and end up at the bottom of the chimney.  The outlets for the bench are currently mostly-shut (as in, not actually sealed) with bricks as the bench isn't there yet, so putting some suitably inflammable stuff down there it should have a straight run up the back of the stove and into the flue pipe.  

follow up:  I put some ripped up egg carton on a shovel and slid it under the base of the flue, where it burned rapidly and merrily with the bypass shut.  So the flue *does* draw, maybe still will have issues on some days.  Lit the stove after that and it was a bit easier and cleaner to get going but still not burning as fast or clean as I expect it to.  But there is some progress
 
tony uljee
Apprentice Rocket Scientist
Posts: 264
76
  • Likes 8
  • Mark post as helpful
  • send pies
    Number of slices to send:
    Optional 'thank-you' note:
  • Quote
  • Report post to moderator
Having my own flue adventures ahead of me, and will also have to cope with a steep roof higher than my chimney , i am drawing some ideas or plan of action from this sketch and combine it with a wind deflector , this one is by Volpert Grigorovich , has a site with free drawing/plan to use for making your own ----just the kind of stuff i like .hope this could be of some use or at least an option .
chimney-position-outside.jpg
[Thumbnail for chimney-position-outside.jpg]
novaya-papka1.jpg
[Thumbnail for novaya-papka1.jpg]
 
tony uljee
Apprentice Rocket Scientist
Posts: 264
76
  • Likes 6
  • Mark post as helpful
  • send pies
    Number of slices to send:
    Optional 'thank-you' note:
  • Quote
  • Report post to moderator
clicked on the wrong pic ,heres a better one
kak-sdelat-deflektor-volperta-grigorovicha6-1327650053.jpg
[Thumbnail for kak-sdelat-deflektor-volperta-grigorovicha6-1327650053.jpg]
 
Scott Weinberg
Posts: 285
Location: North East Iowa, USA
71
  • Likes 5
  • Mark post as helpful
  • send pies
    Number of slices to send:
    Optional 'thank-you' note:
  • Quote
  • Report post to moderator

Austin Shackles wrote:That's a good thought although the way I built it it's kinda difficult getting the flue apart.


Someday, sometime, I presume the flue will have to come apart.. So good for the new builders to know and understand.

Austin Shackles wrote:hing is, the previous wood burner which was where the stove is now had a single-skin 4" flue which also terminated well below the ridge of the roof.  Most days that took a little effort to get going but once the smoke was going upwards it worked well and most of the time had to have a damper in the flue part way shut to prevent it from burning too fast.  The new 6" flue for the rocket stove is on the same side of the house about a yard or so away from the old one, so I can't see the climatic conditions overall being a lot different.


The reason I suggested knowing about the fact a flue was capable of doing what it was suppose to, was my own personal event where I had a perfectly good working chimney, but during a new build, A bird managed to make it partially down the flue, and create some blockage, I did a lot of stove blaming, before we really found the problem, and found it by checking only the flue.  If yours is all new and clean this is most likely not a problem at all.


Austin Shackles wrote:The other thing is that the stove is still pretty new and may still not be fully dried out: Matt says that it won't burn well until it is and I gather that this applies to most masonry stoves.

I have a couple of options for priming the flue.  Most likely, will shut the bypass and have some long handled shovel style thing which can slide into the back corner of the oven space and end up at the bottom of the chimney.    


yes, as it has been expressed before, a damp or not fully dried stove certainly will not draw or develop your fire very nicely.

Correct me if I am wrong, we use to bypass to ASSIST in priming,  I am not sure how closing it, no matter where the fire is placed will make it draw better,  It should draw its easiest with the bypass open, allowing the most direct to the flue burns.  I may have misunderstood your layout, but the primary reason and placement for bypass is to provide a path  from your fire to the flue as easy as possible, thus warming the flue and letting things happen quickly and directly.

Austin Shackles wrote:follow up:  I put some ripped up egg carton on a shovel and slid it under the base of the flue, where it burned rapidly and merrily with the bypass shut.  So the flue *does* draw, maybe still will have issues on some days.  Lit the stove after that and it was a bit easier and cleaner to get going but still not burning as fast or clean as I expect it to.  But there is some progress


So with your bypass open, it will burn even quicker/hotter/better?  I believe it should.
 
Burra Maluca
out to pasture
Posts: 12486
Location: Portugal
3355
goat dog duck forest garden books wofati bee solar rocket stoves greening the desert
  • Likes 9
  • Mark post as helpful
  • send pies
    Number of slices to send:
    Optional 'thank-you' note:
  • Quote
  • Report post to moderator

Scott Weinberg wrote:

Austin Shackles wrote:I have a couple of options for priming the flue.  Most likely, will shut the bypass and have some long handled shovel style thing which can slide into the back corner of the oven space and end up at the bottom of the chimney.    


Correct me if I am wrong, we use to bypass to ASSIST in priming,  I am not sure how closing it, no matter where the fire is placed will make it draw better,  It should draw its easiest with the bypass open, allowing the most direct to the flue burns.  I may have misunderstood your layout, but the primary reason and placement for bypass is to provide a path  from your fire to the flue as easy as possible, thus warming the flue and letting things happen quickly and directly.


The back corner of the oven space opens directly to the very base of the flue, below the firebox and below the bypass.

Shutting the bypass allows all the exhaust from the oven straight up. The layout is kinda difficult to describe as it's so convoluted, but from that corner it's just straight up. Lighting a little experimental fire in that corner is literally lighting it directly under the flue.

Scott Weinberg wrote:

Austin Shackles wrote:follow up:  I put some ripped up egg carton on a shovel and slid it under the base of the flue, where it burned rapidly and merrily with the bypass shut.  So the flue *does* draw, maybe still will have issues on some days.  Lit the stove after that and it was a bit easier and cleaner to get going but still not burning as fast or clean as I expect it to.  But there is some progress


So with your bypass open, it will burn even quicker/hotter/better?  I believe it should.


I don't think so - it would just allow hot gases out under the hotplate, though they would likely prefer to just go straight up the flue. Lighting a little fire in the back corner of the oven space was just to test the draw of the flue, which appears to be at least adequate.

I think maybe in the morning one of us should attempt a diagram.

In the meantime, I feel a bit like this fella, feeding his baby dragon and attempting to get enough huff in him to get him roaring. I want a set of bellows now. Reminiscent of my childhood and probably very useful at this point while our new dragon is still finding his feet. And his breath...

feeding-the-dragon.jpg
[Thumbnail for feeding-the-dragon.jpg]
 
Austin Shackles
Apprentice Rocket Scientist
Posts: 149
Location: Portugal
100
2
transportation gear earthworks solar rocket stoves
  • Likes 11
  • Mark post as helpful
  • send pies
    Number of slices to send:
    Optional 'thank-you' note:
  • Quote
  • Report post to moderator
Probably wasn't clear enough, so here are a couple of thousand words pictures.  The top one is a section through the side of the stove.  The normal flue outlet is at the bottom rear of the oven, the gas having gone all around the stove.  The Bypass is at the top between the back of the firebox and the flue space right under where the metal chimney attaches and can be opened and closed.  Open bypass is to aid lighting the stove, closed to make the heat circulate as it should, except that so far it makes smoke come out places I don't want.   The bypass is designed so it can left partly open if desired for better draft at a cost in overall performance.

The second picture is an isometric (approximately) sketch of the stove showing the location of the brick flue and where the priming fire was at the bottom of the flue.  By shutting the bypass, as Burra already said, any smoke from that priming fire can only go up the chimney, not decide to feed back into the firebox.

The normal operation when it's working right has the heat path going across under the stove top to the left side, then down the side of the stove to the bottom where the oven space and the outlets to the bench are, and ending up at the base of the brick flue

Today I got high temperature silicon and sealed around the edge of the stove top.  It might not be high enough temperature, so I also got some really high temperature stuff in case I have to redo it.  The really high temperature stuff goes to 1500°C but it sets rigid, while the silicon stays a bit flexible.  With a rigid fit it might be the stove top can expand and crack the top brickwork.
 
Scott Weinberg
Posts: 285
Location: North East Iowa, USA
71
  • Likes 4
  • Mark post as helpful
  • send pies
    Number of slices to send:
    Optional 'thank-you' note:
  • Quote
  • Report post to moderator

Austin Shackles wrote:Probably wasn't clear enough, so here are a couple of thousand words pictures.  The top one is a section through the side of the stove.  The normal flue outlet is at the bottom rear of the oven, the gas having gone all around the stove.  The Bypass is at the top between the back of the firebox and the flue space right under where the metal chimney attaches and can be opened and closed.  Open bypass is to aid lighting the stove, closed to make the heat circulate as it should, except that so far it makes smoke come out places I don't want.   The bypass is designed so it can left partly open if desired for better draft at a cost in overall performance.

The second picture is an isometric (approximately) sketch of the stove showing the location of the brick flue and where the priming fire was at the bottom of the flue.  By shutting the bypass, as Burra already said, any smoke from that priming fire can only go up the chimney, not decide to feed back into the firebox.

The normal operation when it's working right has the heat path going across under the stove top to the left side, then down the side of the stove to the bottom where the oven space and the outlets to the bench are, and ending up at the base of the brick flue

Today I got high temperature silicon and sealed around the edge of the stove top.  It might not be high enough temperature, so I also got some really high temperature stuff in case I have to redo it.  The really high temperature stuff goes to 1500°C but it sets rigid, while the silicon stays a bit flexible.  With a rigid fit it might be the stove top can expand and crack the top brickwork.


Ok, now looking over your sketch's, I am not familiar with the oven below the fire box, but this may often be the case for something like this.

 But rather, in your sketch, I don't see any port location/expansion area, drawn in? maybe this type doesn't warrant this area?  I am just asking,   And is the port sized to the fire box (batch) size,  

And lastly is your batch box (if it is called  that)  sized to your flue size?

Am curious
 
Burra Maluca
out to pasture
Posts: 12486
Location: Portugal
3355
goat dog duck forest garden books wofati bee solar rocket stoves greening the desert
  • Likes 6
  • Mark post as helpful
  • send pies
    Number of slices to send:
    Optional 'thank-you' note:
  • Quote
  • Report post to moderator

Scott Weinberg wrote:But rather, in your sketch, I don't see any port location/expansion area, drawn in? maybe this type doesn't warrant this area?

 
It's in the bit labelled Here be Dragons.

The sketches are just to show the flue arrangement as it relates to the little experimental fire we put in the back corner of the oven to test the draw.

It's a licensed design by Matt Walker so obviously we can't share full details but there is plenty of info in the earlier pages of this thread, along with links and photos.

And is the port sized to the fire box (batch) size  


Yes.

And lastly is your batch box (if it is called  that)  sized to your flue size?


Yes. Everything built exactly as per the design, except for the door fitting flush rather than inset, which was discussed with Matt.

We didn't fire it up for any more testing yesterday as it was sufficiently warm that I didn't want extra heat in the house.

More rain is expected today so I guess I'll let him play later... ;)

 
Scott Weinberg
Posts: 285
Location: North East Iowa, USA
71
  • Likes 3
  • Mark post as helpful
  • send pies
    Number of slices to send:
    Optional 'thank-you' note:
  • Quote
  • Report post to moderator
All sounds good,  Best of success!
 
Burra Maluca
out to pasture
Posts: 12486
Location: Portugal
3355
goat dog duck forest garden books wofati bee solar rocket stoves greening the desert
  • Likes 14
  • Mark post as helpful
  • send pies
    Number of slices to send:
    Optional 'thank-you' note:
  • Quote
  • Report post to moderator
She roars!

Not sure if it was new seal around the hot-plate or if it's just that the fire-bricks have dried out a bit better, but today she roared for the first time!
she-roars.jpg
[Thumbnail for she-roars.jpg]
 
Austin Shackles
Apprentice Rocket Scientist
Posts: 149
Location: Portugal
100
2
transportation gear earthworks solar rocket stoves
  • Likes 14
  • Mark post as helpful
  • send pies
    Number of slices to send:
    Optional 'thank-you' note:
  • Quote
  • Report post to moderator
Bit more of a mutter than a real roar, but definite improvement on previous runs.

Today we have high temperature silicon around the edges of the hotplate to stop the smoke sneaking out and so far at least it's not melted, caught on fire or otherwise gone wrong despite being rated only to 300°C (about 570°F).

Probably decided on a flue-priming technique for when it's needed, if I put a longer handle on the small shovel I used last time it'll be easier to deploy.  

Fire lit easier and cleaner than it has so far and was able to burn it with the bypass partly shut, although shutting that fully still made it smoke.  I still need to check the chimney top position in light of the graphic that tony uljee posted.  I think it's pretty close to conforming, might need another half-length added to it but we'll see how it works.

Also today tried a warm re-start for the first time.  There were a few live embers left in the firebox, not *quite* enough to relight small sticks I put in.  However, lighting one tiny stick with a lighter set it going again and it's burning nicely with partial bypass.  Quite happy with today's tests considering it's still quite warm both inside and out.
 
Fox James
Rocket Scientist
Posts: 791
Location: Guernsey a small island near France.
299
  • Likes 10
  • Mark post as helpful
  • send pies
    Number of slices to send:
    Optional 'thank-you' note:
  • Quote
  • Report post to moderator
That sounds more promising, in order for the stove to get hot, all the moisture must be driven out and as I have already mentioned that can take weeks of fires.
The other factor is the chimney, all  stoves that operate without a tall riser (internal chimney) do require a strong drafting chimney.
Standard box stoves dont have to deal with down drafting or complex flame  paths.

 
Every noble work is at first impossible. - Thomas Carlyle / tiny ad
Rocket Mass Heater Jamboree And Updates
https://permies.com/t/170234/Rocket-Mass-Heater-Jamboree-Updates
reply
    Bookmark Topic Watch Topic
  • New Topic