• Post Reply Bookmark Topic Watch Topic
  • New Topic
permaculture forums growies critters building homesteading energy monies kitchen purity ungarbage community wilderness fiber arts art permaculture artisans regional education skip experiences global resources cider press projects digital market permies.com pie forums private forums all forums
this forum made possible by our volunteer staff, including ...
master stewards:
  • Nancy Reading
  • Carla Burke
  • r ranson
  • John F Dean
  • paul wheaton
  • Pearl Sutton
stewards:
  • Jay Angler
  • Liv Smith
  • Leigh Tate
master gardeners:
  • Christopher Weeks
  • Timothy Norton
gardeners:
  • thomas rubino
  • Jeremy VanGelder
  • Maieshe Ljin

Matt Walker tiny cookstove build in Portugal

 
Austin Shackles
Apprentice Rocket Scientist
Posts: 149
Location: Portugal
100
2
transportation gear earthworks solar rocket stoves
  • Likes 23
  • Mark post as helpful
  • send pies
    Number of slices to send:
    Optional 'thank-you' note:
  • Quote
  • Report post to moderator
About 5 years ago Burra contacted me on facebook, having lost her husband to cancer some time before, and more or less said "you and me babe, how about it?" like in the dire straits song "romeo and juliet".  (there's more to the story than this, of course, but that's not really the point of this thread).  Anyway, I ended up moving to Portugal and we as a couple ended up moving from the place she'd lived at for the last 15-ish years and buying the place we live in now half way up Cortiçada mountain, which is in the district of Fundão in central Portugal.

The house was pretty basic and needed significant work to make it liveable; the floor was rotten and the roof bendy (although still strong) and prone to let in drafts and out heat in the winter.  We replaced the floor just in time to move before the first really serious COVID lockdown, and for the next couple of years worked on installing a shower and washing machine and planning how to make the lower floor which had traditionally been animal housing into a kitchen, bathroom, sitting area etc.

We had a small  wood stove which we put in to heat the place, but with the lack of insulation it struggled to cope in winter.  Adding insulation in the first floor ceiling (2nd floor if you're reading this in American ) helped a bit as did replacing the old tile roof with "tile effect" insulated sandwich sheets.  Yeah, not all that permie but those things are sooo easy to put up.  
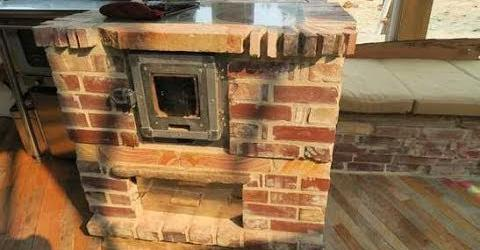
The other thing that came along with Burra was "building a rocket stove".  This had been something she'd wanted to do for about 7 years by the time we got together, and this year we finally got started on it.
Specifically, it's this one:  
 which is Matt Walker's tiny cook stove.
 
thomas rubino
rocket scientist
Posts: 6320
Location: latitude 47 N.W. montana zone 6A
3191
cat pig rocket stoves
  • Likes 11
  • Mark post as helpful
  • send pies
    Number of slices to send:
    Optional 'thank-you' note:
  • Quote
  • Report post to moderator
Austin & Burra;
Congratulations on your new home!
You will be very pleased with your new Walker stove!
Looking forward to seeing your build in progress!
Feel free to contact me if you have questions.
 
Austin Shackles
Apprentice Rocket Scientist
Posts: 149
Location: Portugal
100
2
transportation gear earthworks solar rocket stoves
  • Likes 16
  • Mark post as helpful
  • send pies
    Number of slices to send:
    Optional 'thank-you' note:
  • Quote
  • Report post to moderator
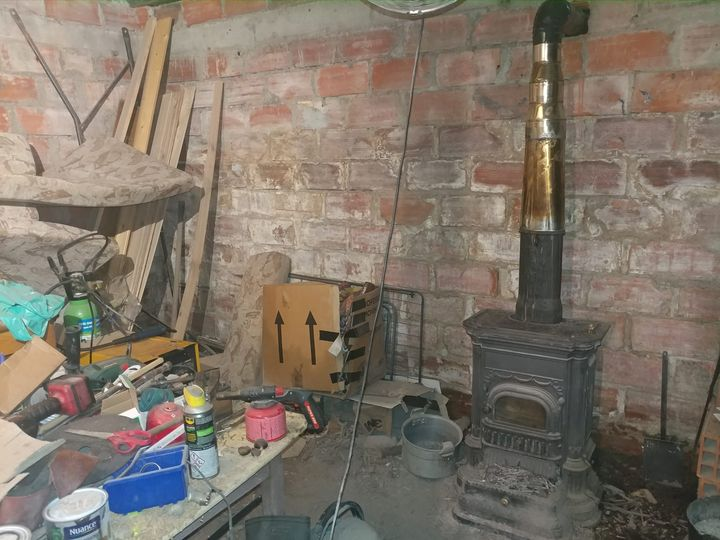
This is the back wall of "downstairs" at our house, with the wood burner which was only a temporary installation, as you can see:


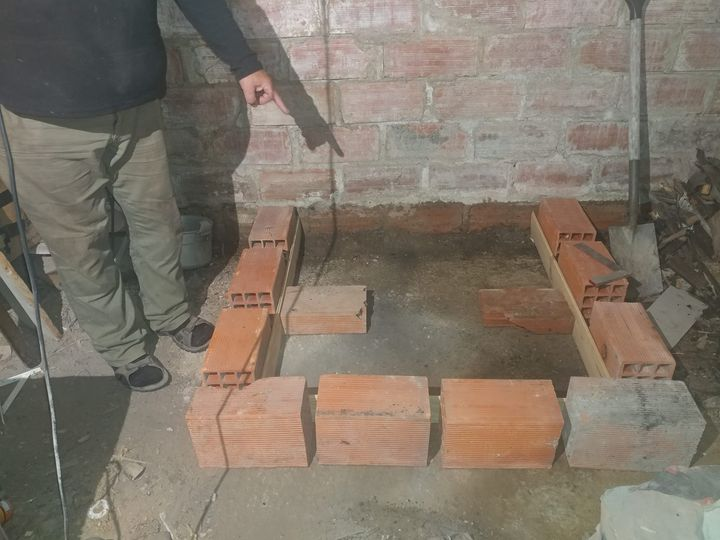
a couple of weeks ago we decided that it wasn't going to be cold for the next few months and hauled it out.  That left space to put a foundation for the Matt Walker stove, this is the shuttering...

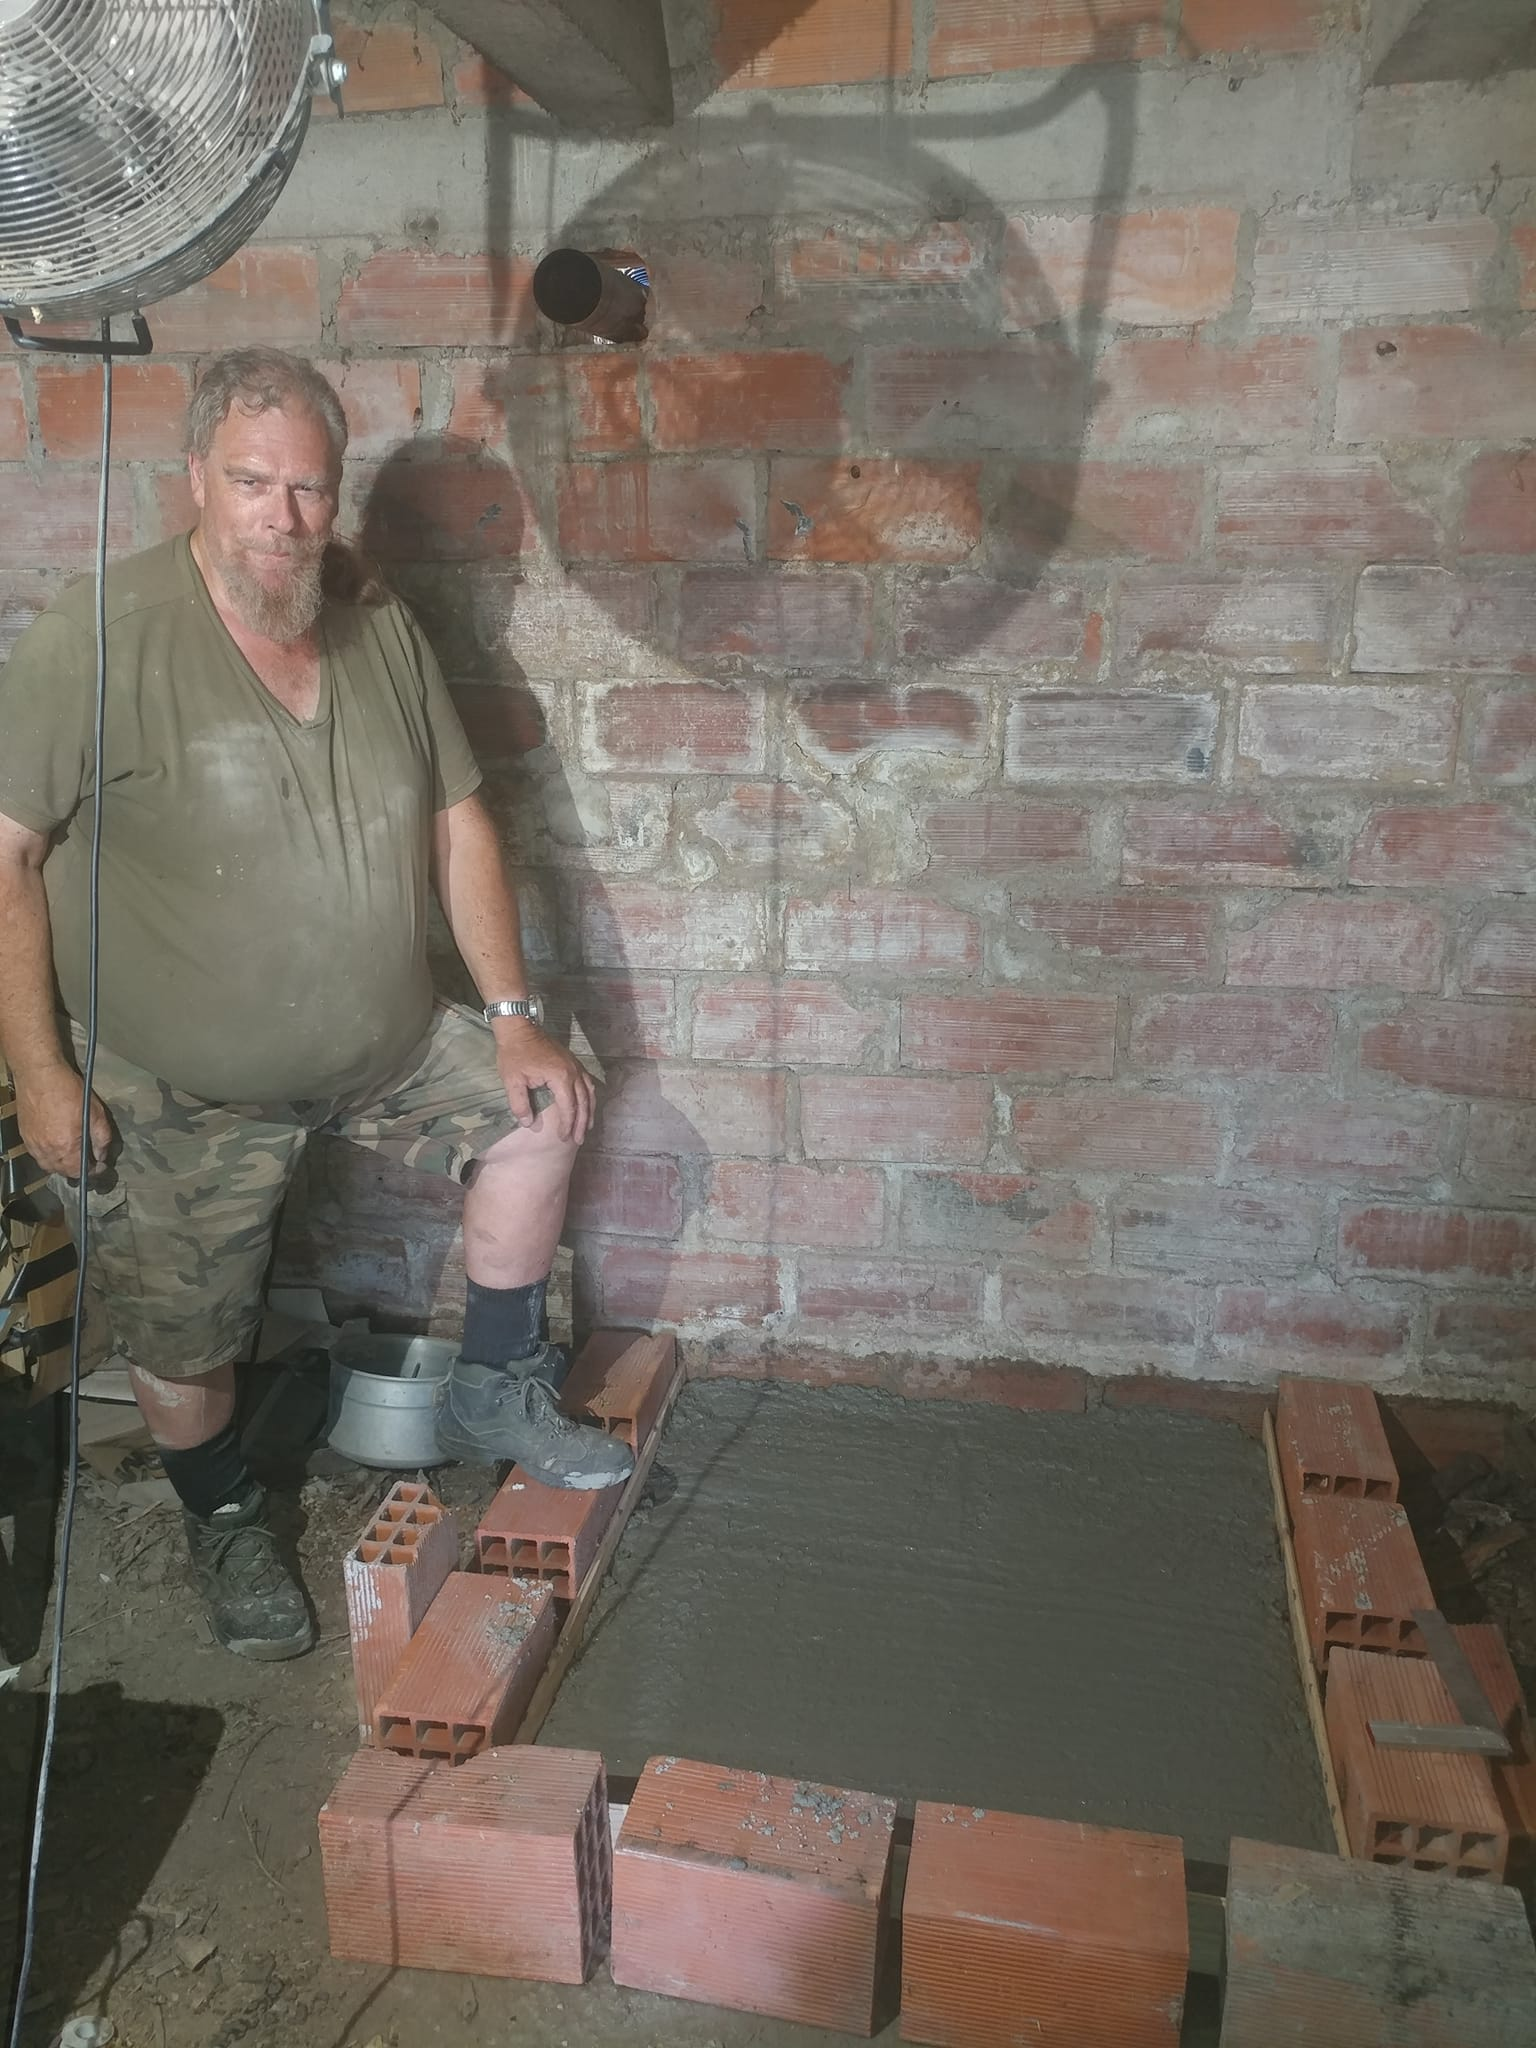
and this afternoon we mixed up some concrete and set it in place:


Just to add, the fan hanging from the ceiling (and making a giant shadow on the wall) was about distributing the heat from the woodburner around the house better.
 
Austin Shackles
Apprentice Rocket Scientist
Posts: 149
Location: Portugal
100
2
transportation gear earthworks solar rocket stoves
  • Likes 5
  • Mark post as helpful
  • send pies
    Number of slices to send:
    Optional 'thank-you' note:
  • Quote
  • Report post to moderator
Seem to have found red clay bricks, although of course they're a different size to those specified in the plans.  However I can work with that to get the internal sizes (especially the core) right.

Question for Matt if he's looking: how critical are the sizes of the spaces around the core?  I assume the hot gases come out of the core, under the top hotplate and then down the side.  I'm still not 100% clear on how the bench connects.  The lower layers look to have 2 openings for bench connection both at the same height?  I need to watch a build video

Also wondering about mortar for the shell.  I don't know if I can readily get fireclay in sensible amounts/for sensible money.  Is it viable to build the brick shell with normal sand-cement type mortar (I know that makes it hard to change it later) or does that mortar need some level of heat-proof-ness?
 
Burra Maluca
out to pasture
Posts: 12484
Location: Portugal
3346
goat dog duck forest garden books wofati bee solar rocket stoves greening the desert
  • Likes 11
  • Mark post as helpful
  • send pies
    Number of slices to send:
    Optional 'thank-you' note:
  • Quote
  • Report post to moderator
The boys are off to fetch the clay bricks!

I've waited twelve years for this...

Here's a video of Matt introducing the stove so you can all see why I fell in love with it.

 
thomas rubino
rocket scientist
Posts: 6320
Location: latitude 47 N.W. montana zone 6A
3191
cat pig rocket stoves
  • Likes 10
  • Mark post as helpful
  • send pies
    Number of slices to send:
    Optional 'thank-you' note:
  • Quote
  • Report post to moderator
Hi guys, you want to use a clay mortar.
Fire clay is the preferred medium but you can use other clay.
I prefer using a dry-bagged clay rather than fresh clay from outdoors.
Using clean dry clay and a graded medium sharp sand you will get smooth even joints.
Local clay or free sand will have rocks that must be filtered out.
Pottery shops generally carry or can get dry bagged clay.
Graded sand is sometimes called builders sand.
Three scoops of sand to one scoop of clay is the common mix.

Working with a clay-based mortar is easy on the hands, there is no limit to how much you mix or how fast you use it.
It can be easily removed and rehydrated to use again!  Try that with concrete!
A concrete mix is hard on your hands, has a limited time to be applied, and is stuck permanently to your bricks if you need to disassemble them sometime in the future.
 
Gerry Parent
Rocket Scientist
Posts: 1809
Location: Kaslo, BC
525
building solar woodworking rocket stoves wood heat greening the desert
  • Likes 5
  • Mark post as helpful
  • send pies
    Number of slices to send:
    Optional 'thank-you' note:
  • Quote
  • Report post to moderator

Austin Shackles wrote:
Question for Matt if he's looking: how critical are the sizes of the spaces around the core?  I assume the hot gases come out of the core, under the top hotplate and then down the side.  I'm still not 100% clear on how the bench connects.  The lower layers look to have 2 openings for bench connection both at the same height?  I need to watch a build video


Hi Austin,   Glad the dream to build a cool stove has finally come to fruition. I'm sure it will provide many years of delightful meals and keep you warm at the same time.
I haven't seen Matt on Permies for quite some time now but can be reached at matthewwalker@usa.com
which is listed on his website: https://walkerstoves.com/index.html

Keep us posted on your progress and any information Matt may share with you so that others can benefit from your build adventure too.

 
Austin Shackles
Apprentice Rocket Scientist
Posts: 149
Location: Portugal
100
2
transportation gear earthworks solar rocket stoves
  • Likes 5
  • Mark post as helpful
  • send pies
    Number of slices to send:
    Optional 'thank-you' note:
  • Quote
  • Report post to moderator
OK got around to finding the imperial tape measure, the clay bricks here are 9" x 4¼" x 2¾".  That's going to make life more interesting

On the subject of sizing, a quick question:  the base layer is a bit smaller than the first layer.  Is there a technical reason for that?  Mine will be sitting on a concrete slab.
 
Austin Shackles
Apprentice Rocket Scientist
Posts: 149
Location: Portugal
100
2
transportation gear earthworks solar rocket stoves
  • Likes 5
  • Mark post as helpful
  • send pies
    Number of slices to send:
    Optional 'thank-you' note:
  • Quote
  • Report post to moderator
Meant to comment about the mortar.  Using fireclay means I have to try to find a source for that (or other reliable clay), which I daresay is possible but it's extra hassle - I did have a look around the  store while getting the bricks and they don't have any, or not that I could see.  What is common here is outdoor wood-fired brick ovens, you can buy 'em ready-made or some folks build their own, which means the firebricks and refractory mortar are readily got: and the latter says it's good for 950°C (almost 1750°F) so I reckon that's going to work for the core.

I take the point about using cement based mortar being hard to undo, but assuming I don't make any silly errors in the build, I'm not planning on taking it apart.  I've no intention of moving from this house and if the stove works as well as we hope I have no intention of replacing it either.  So issues about the permanence of cement based mortar aren't so much an issue for me personally.  I'm also used to working with cement products and yes I agree they're not so nice to work with.

What I am looking at is making sure it's easy to get at the firebox etc for periodic cleaning.  One aspect of that will be using a fibreglass rope seal under the top, probably set in a groove in the brickwork.  I can get that easily to replace it and it avoids having to re-seal the top with mortar.  I don't imagine the top needs lifting all that often, but I'm aiming for minimal maintenance issues.

I'm yet to decide about the top itself, but it will probably be steel.
 
Rudyard Blake
Posts: 66
Location: Portugal
35
goat foraging hunting chicken homestead
  • Likes 6
  • Mark post as helpful
  • send pies
    Number of slices to send:
    Optional 'thank-you' note:
  • Quote
  • Report post to moderator
Hi Austin,
We are in Portugal too and are interested in building something similar.

Where are you planning to get the cast iron (or is it steel) fire box and doors and whatnot to go inside? I can see that sort of thing being really hard to find here unless you have them custom made?

We look forward to seeing your finished result and best of luck with it!

Regards, Rudyard
 
Austin Shackles
Apprentice Rocket Scientist
Posts: 149
Location: Portugal
100
2
transportation gear earthworks solar rocket stoves
  • Likes 7
  • Mark post as helpful
  • send pies
    Number of slices to send:
    Optional 'thank-you' note:
  • Quote
  • Report post to moderator
The plans for the stove come from Walker Stoves but do note the information on the home page about ordering from outside the US, which is apparently not working.  Also I hear that Matt has recently moved house so maybe it will take a while for him to get in touch.  Note that our build is the "tiny" cookstove, there's also a larger one if you want.

The stove has clay brick shell surrounding a high temperature core, the core can be made from ceramic fibreboard or from fire bricks, I am building with bricks because those are easily got and are quite close to the size specified in the plans.  The dimensions of the inside of the firebox are quite critical, considerable study has gone into making it work right.  As you very likely know, the aim is to burn the fuel fast and clean and to store the heat thus made in the mass.

The difference in brick size may be an issue, I expect to find that out before long!  The specified clay bricks, which are I assume common in the USA, are smaller than the ones you can readily buy here (tijolo maciço) but I think not enough to cause an issue provided that you build based on the internal size of the part where the core has to fit.  That needs to be accurate or you won't get the core in, or you'll end up changing the core and it might not work properly.  The clay bricks being larger will just result in the outside dimensions being a little bigger, at most.  That really isn't an issue and adds a small amount to the mass, thereby storing a small amount more heat.

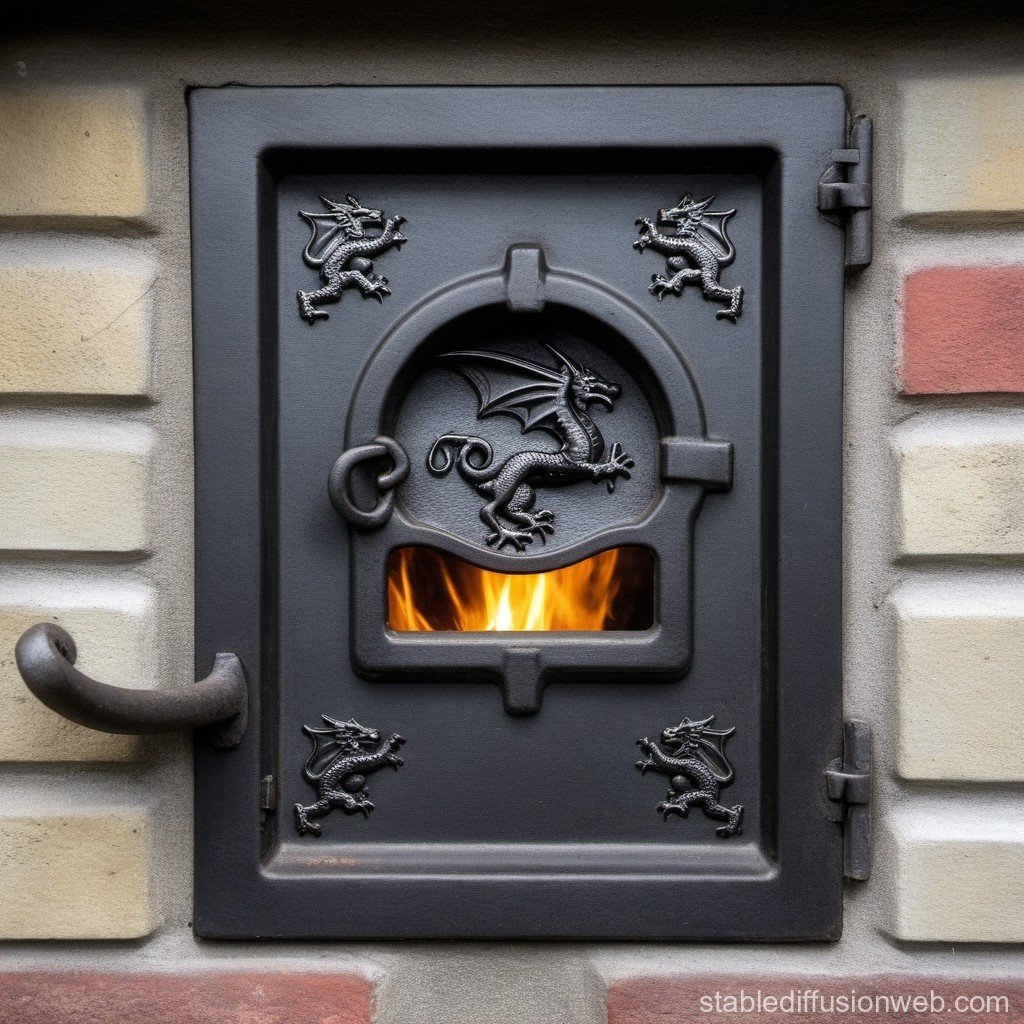
The plans include instructions for making a door without requirement for welding, although since I'm a fabricator welder by trade that part doesn't faze me.  There's also Thomas Rubino, who makes doors and hardware in the US, his website is Dragon Tech although there may be cost issues importing them to Europe.

There are options in the plans too for using "found" material for some parts, or if you prefer you can buy material in.
 
Rudyard Blake
Posts: 66
Location: Portugal
35
goat foraging hunting chicken homestead
  • Likes 3
  • Mark post as helpful
  • send pies
    Number of slices to send:
    Optional 'thank-you' note:
  • Quote
  • Report post to moderator

Austin Shackles wrote:The plans for the stove come from Walker Stoves but do note the information on the home page about ordering from outside the US, which is apparently not working.  Also I hear that Matt has recently moved house so maybe it will take a while for him to get in touch.  Note that our build is the "tiny" cookstove, there's also a larger one if you want.


Thanks for your explanation! So the basic design requires metal parts from the US unless you can fabricate them yourselves?

We've had such trouble ordering things from the US that I am very reluctant to do that again. I ordered something in January from a great company, it shipped immediately, but it took four months to get to Portugal. We had to pay over €300 extra to get it released from customs and then it was delivered to the wrong address three times, despite being correctly labelled, and almost sent back to the USA if we hadn't gone to claim it from the depot.

But there's loads of small stove building companies near us with welding workshops - I guess it would be possible to ask them to make something to custom fit the inside of the stove.

Welding is such a useful skill!!
 
Burra Maluca
out to pasture
Posts: 12484
Location: Portugal
3346
goat dog duck forest garden books wofati bee solar rocket stoves greening the desert
  • Likes 9
  • Mark post as helpful
  • send pies
    Number of slices to send:
    Optional 'thank-you' note:
  • Quote
  • Report post to moderator

Rudyard Blake wrote:! So the basic design requires metal parts from the US unless you can fabricate them yourselves?


The plans include instructions on making a door yourself without welding.

Matt made this video to show various options.


We did have vague ideas about making up two doors, one with a window and a simpler one without, and possibly offering to make them for people. But to be honest Portugal has plenty of little workshops around, as you noted, who could weld a nice door up for you.

Similarly the metal for the secondary air feed can be bolted rather than welded. Matt is aware of these issues and has worked hard to provide alternatives. And again, if you can't find anyone locally to make one for you or you don't want to tackle it yourself, I'm sure Austin will have it figured out pretty soon and be able to assist.
 
Burra Maluca
out to pasture
Posts: 12484
Location: Portugal
3346
goat dog duck forest garden books wofati bee solar rocket stoves greening the desert
  • Likes 5
  • Mark post as helpful
  • send pies
    Number of slices to send:
    Optional 'thank-you' note:
  • Quote
  • Report post to moderator
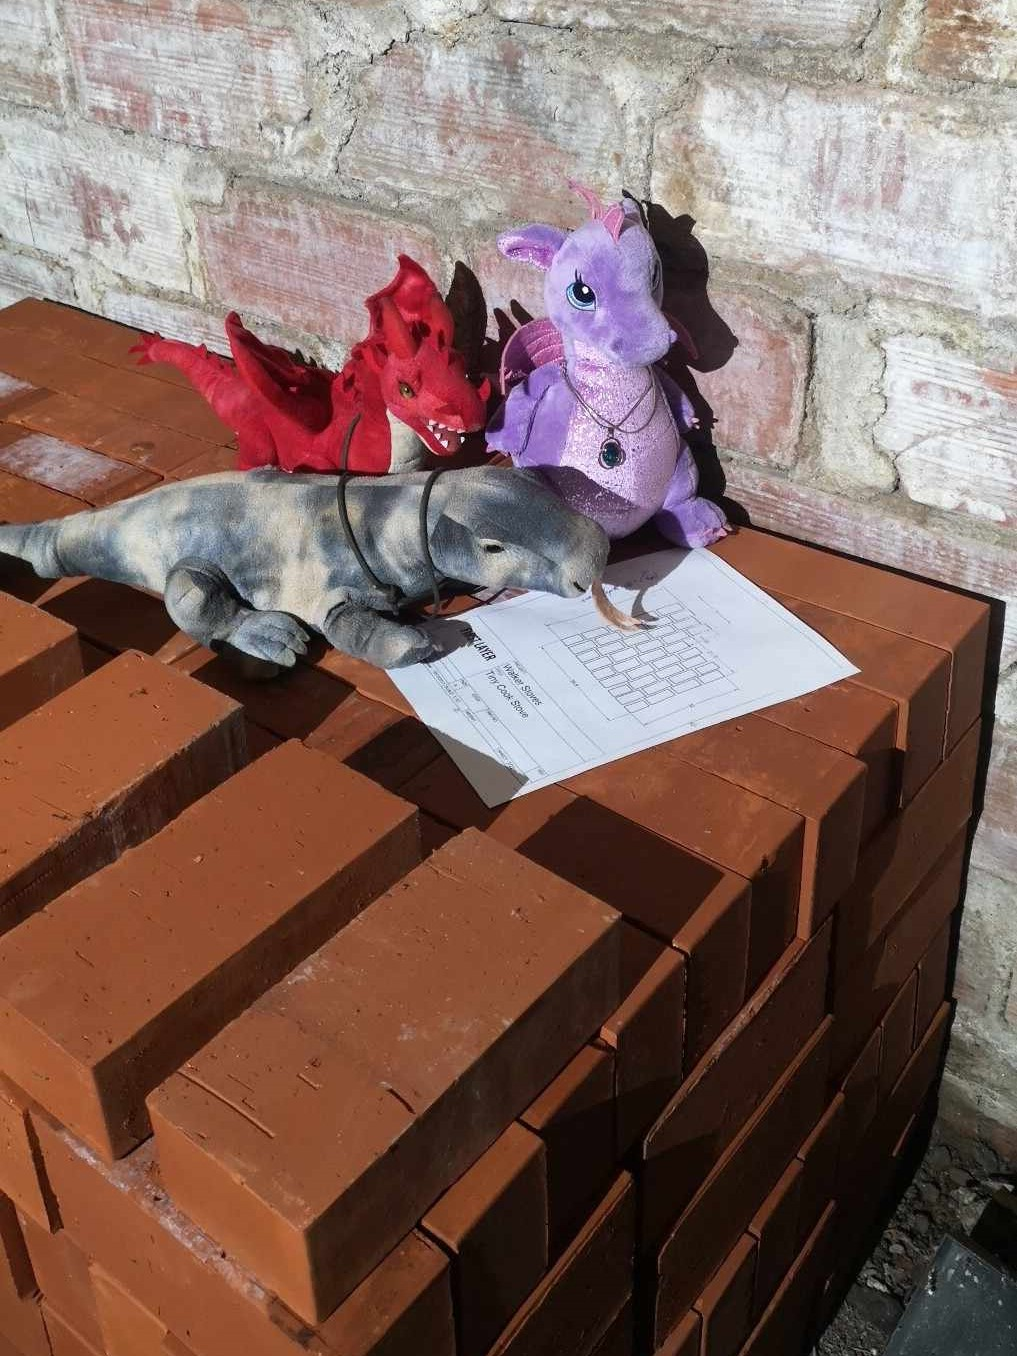
I would love to have the money to commission something like this and sell them...


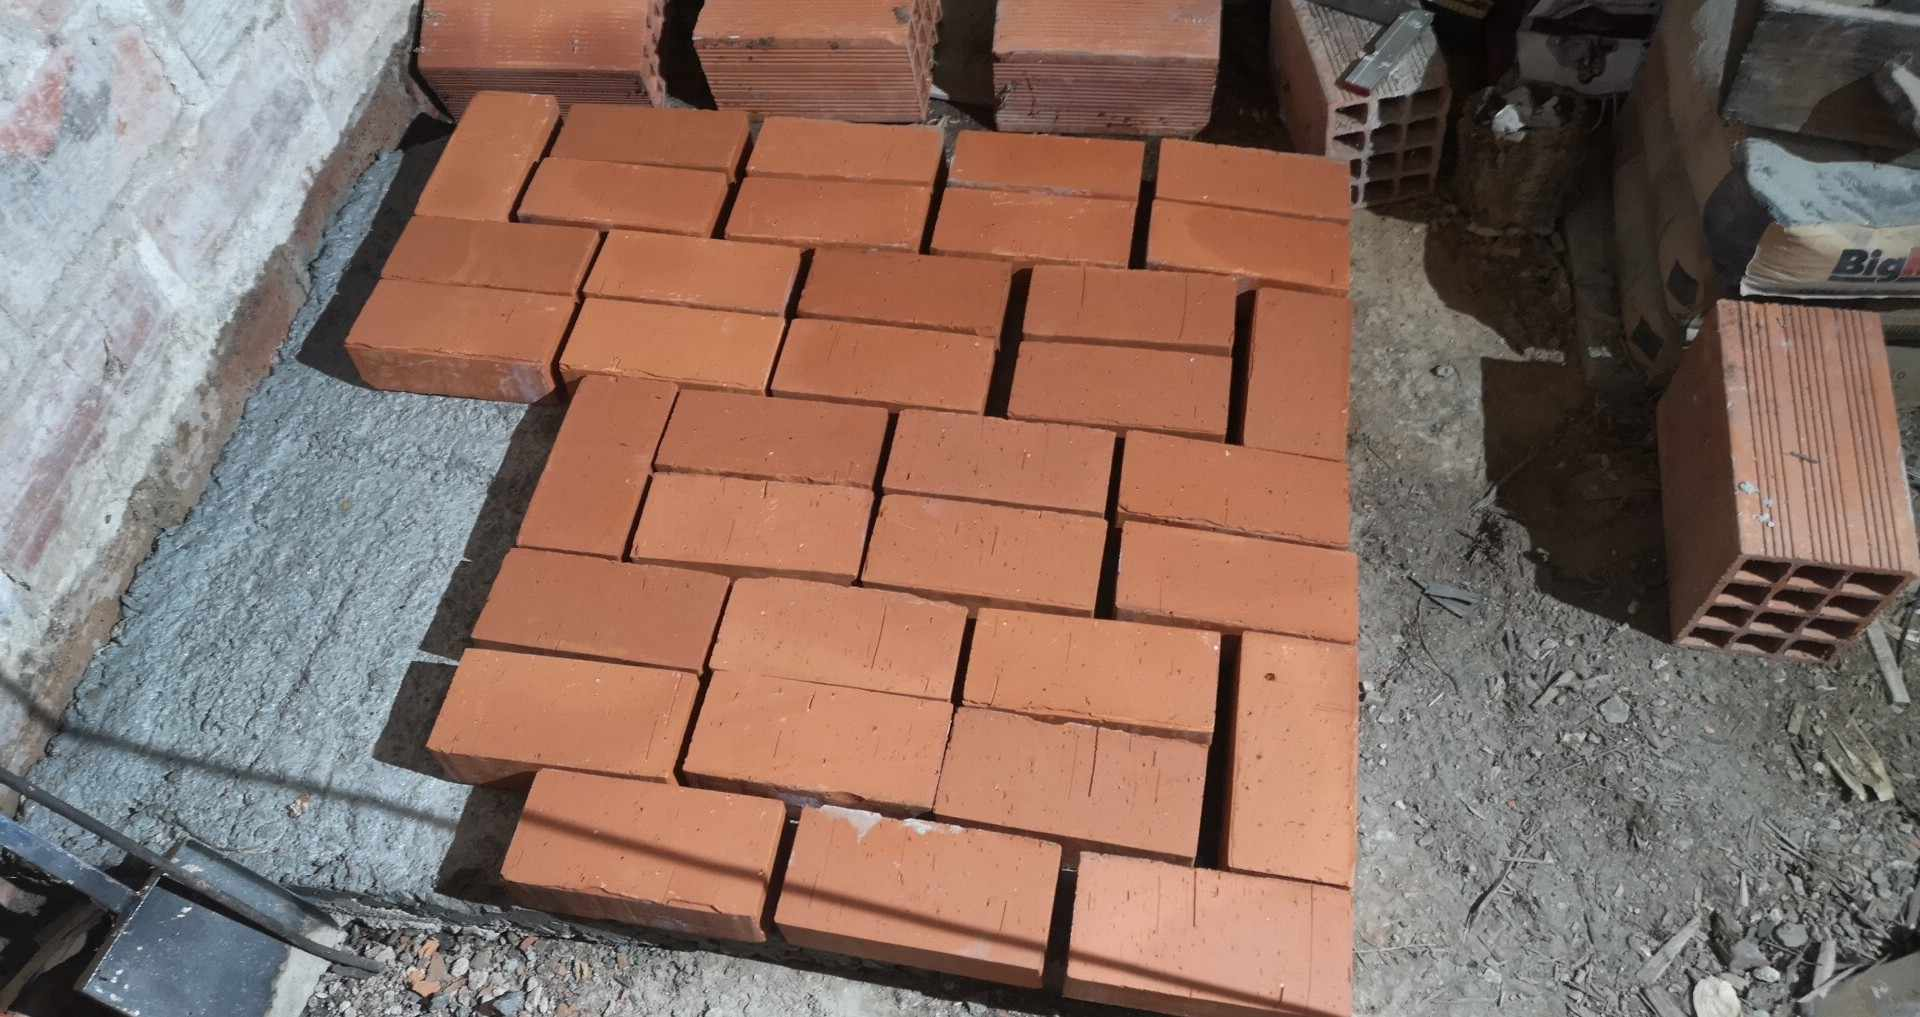
We've been studying the plans for the base layer of brick, and improvising the layout with the local sizes.

With dragons to help, of course...


Seems to work, even after flipping it around because we want the bench on the other side.  Just needs a half-brick in that corner. Plus we used fewer bricks!


Austin Shackles
Apprentice Rocket Scientist
Posts: 149
Location: Portugal
100
2
transportation gear earthworks solar rocket stoves
  • Likes 4
  • Mark post as helpful
  • send pies
    Number of slices to send:
    Optional 'thank-you' note:
  • Quote
  • Report post to moderator
As Burra mentioned, the plans include making a door without welding.  The vertical secondary air feed is regarded as a consumable.  I might get around to fabricating those later.

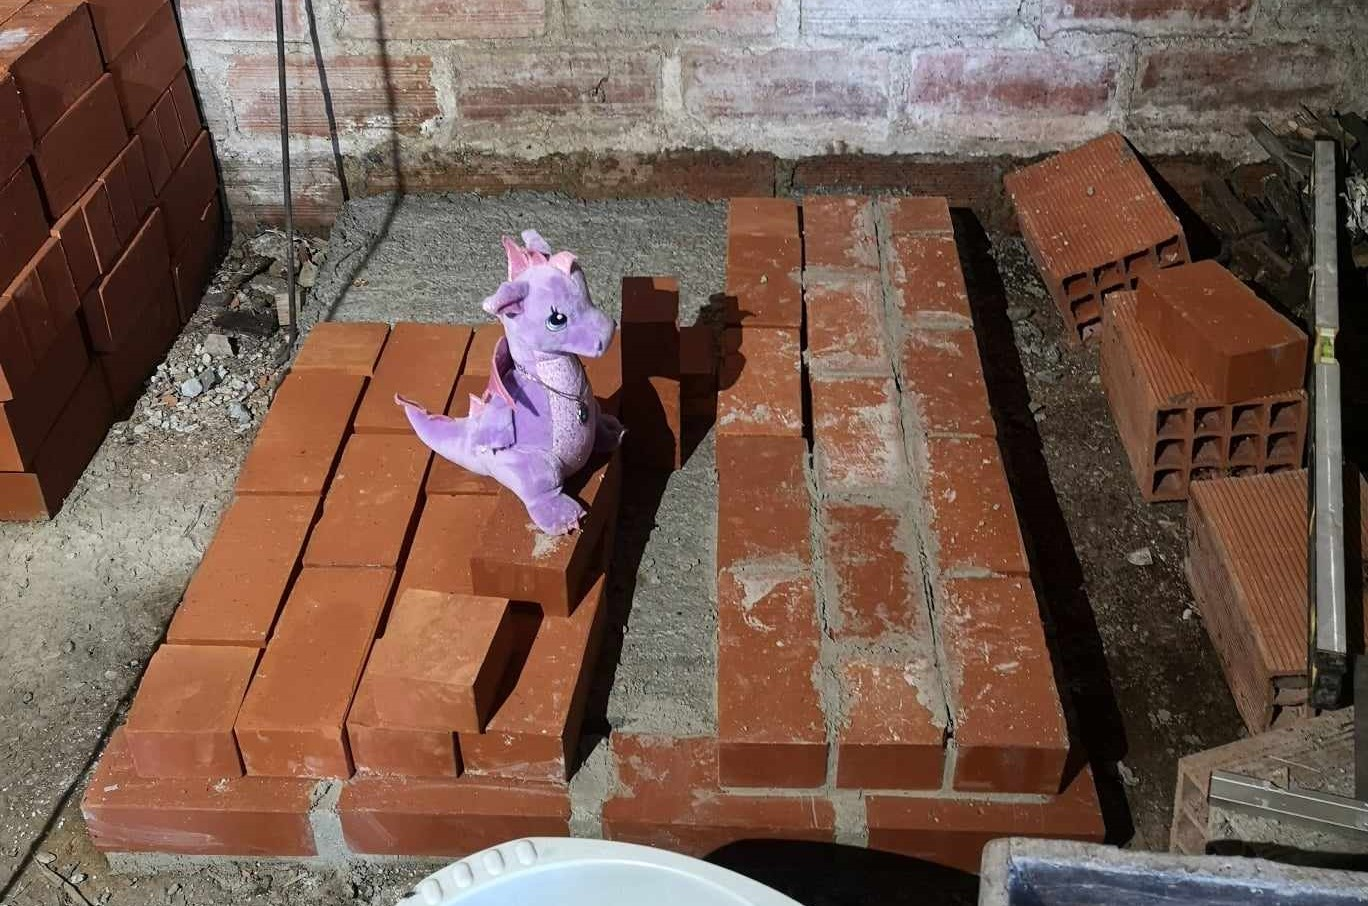
The brick pattern isn't critical provided the dimensions are correct.  With the bricks we have, the pattern shown will work.

Note that my plinth was actually not the right size:  I looked at the plans and noted 43" as the front to back measurement of the stove body.  However, I neglected to look at the top layer which is 46".  I don't especially want the back of the stove in contact with the wall, so I needed a row of bricks along the front of the plinth to make it about 4½" longer.  That's not too bad, and since that will be partly visible it makes it look nicer.  The top is also a little wider but that isn't a problem for me.
 
thomas rubino
rocket scientist
Posts: 6320
Location: latitude 47 N.W. montana zone 6A
3191
cat pig rocket stoves
  • Likes 8
  • Mark post as helpful
  • send pies
    Number of slices to send:
    Optional 'thank-you' note:
  • Quote
  • Report post to moderator
Hey Austin;
You might enjoy looking at my thread on building the Walker BBQ   https://permies.com/t/164923/rocket-ovens/Build-Black-White-Rocket-Oven
It uses the same core as the tiny cook stove.
As you will see, I dry-stacked the fire bricks in the core and used Superwool to insulate it.
The refractory cement will work fine for your build but will not hold up long-term in the core.
Although this sounds sketchy it works very well, and you avoid having mortar cracking out from the high heat.

Secondary air tube construction is easy if you have a welder.
Have a look at my website under quick change secondary's.
2.5" x 1.5" x 24" tubing is used.  Close off one end with a piece of 1/8" plate. The 24" length will be cut to size after completing your build.
Drill or cut a round 1.5" hole 1/2" from the closed end.
Weld a 2" tall piece of 2.5" ID schedule 40 pipe over the hole.
A 6" piece of 2" ID schedule 40 pipe sits inside the 2.5".
When the  6" pipe starts spalling simply remove it and slip in a new one.


Austin Shackles
Apprentice Rocket Scientist
Posts: 149
Location: Portugal
100
2
transportation gear earthworks solar rocket stoves
  • Likes 7
  • Mark post as helpful
  • send pies
    Number of slices to send:
    Optional 'thank-you' note:
  • Quote
  • Report post to moderator
That's great info about the core and the quick-change secondary air tube, I will need to check what sizes of tube I can readily get from the local steel supplier.  I did wonder if 950°C was going to cut it for the core, but dry stack will be easier in any case.  Luckily it looks like the firebricks I can get here are pretty close in size to the US ones specified in the plans.

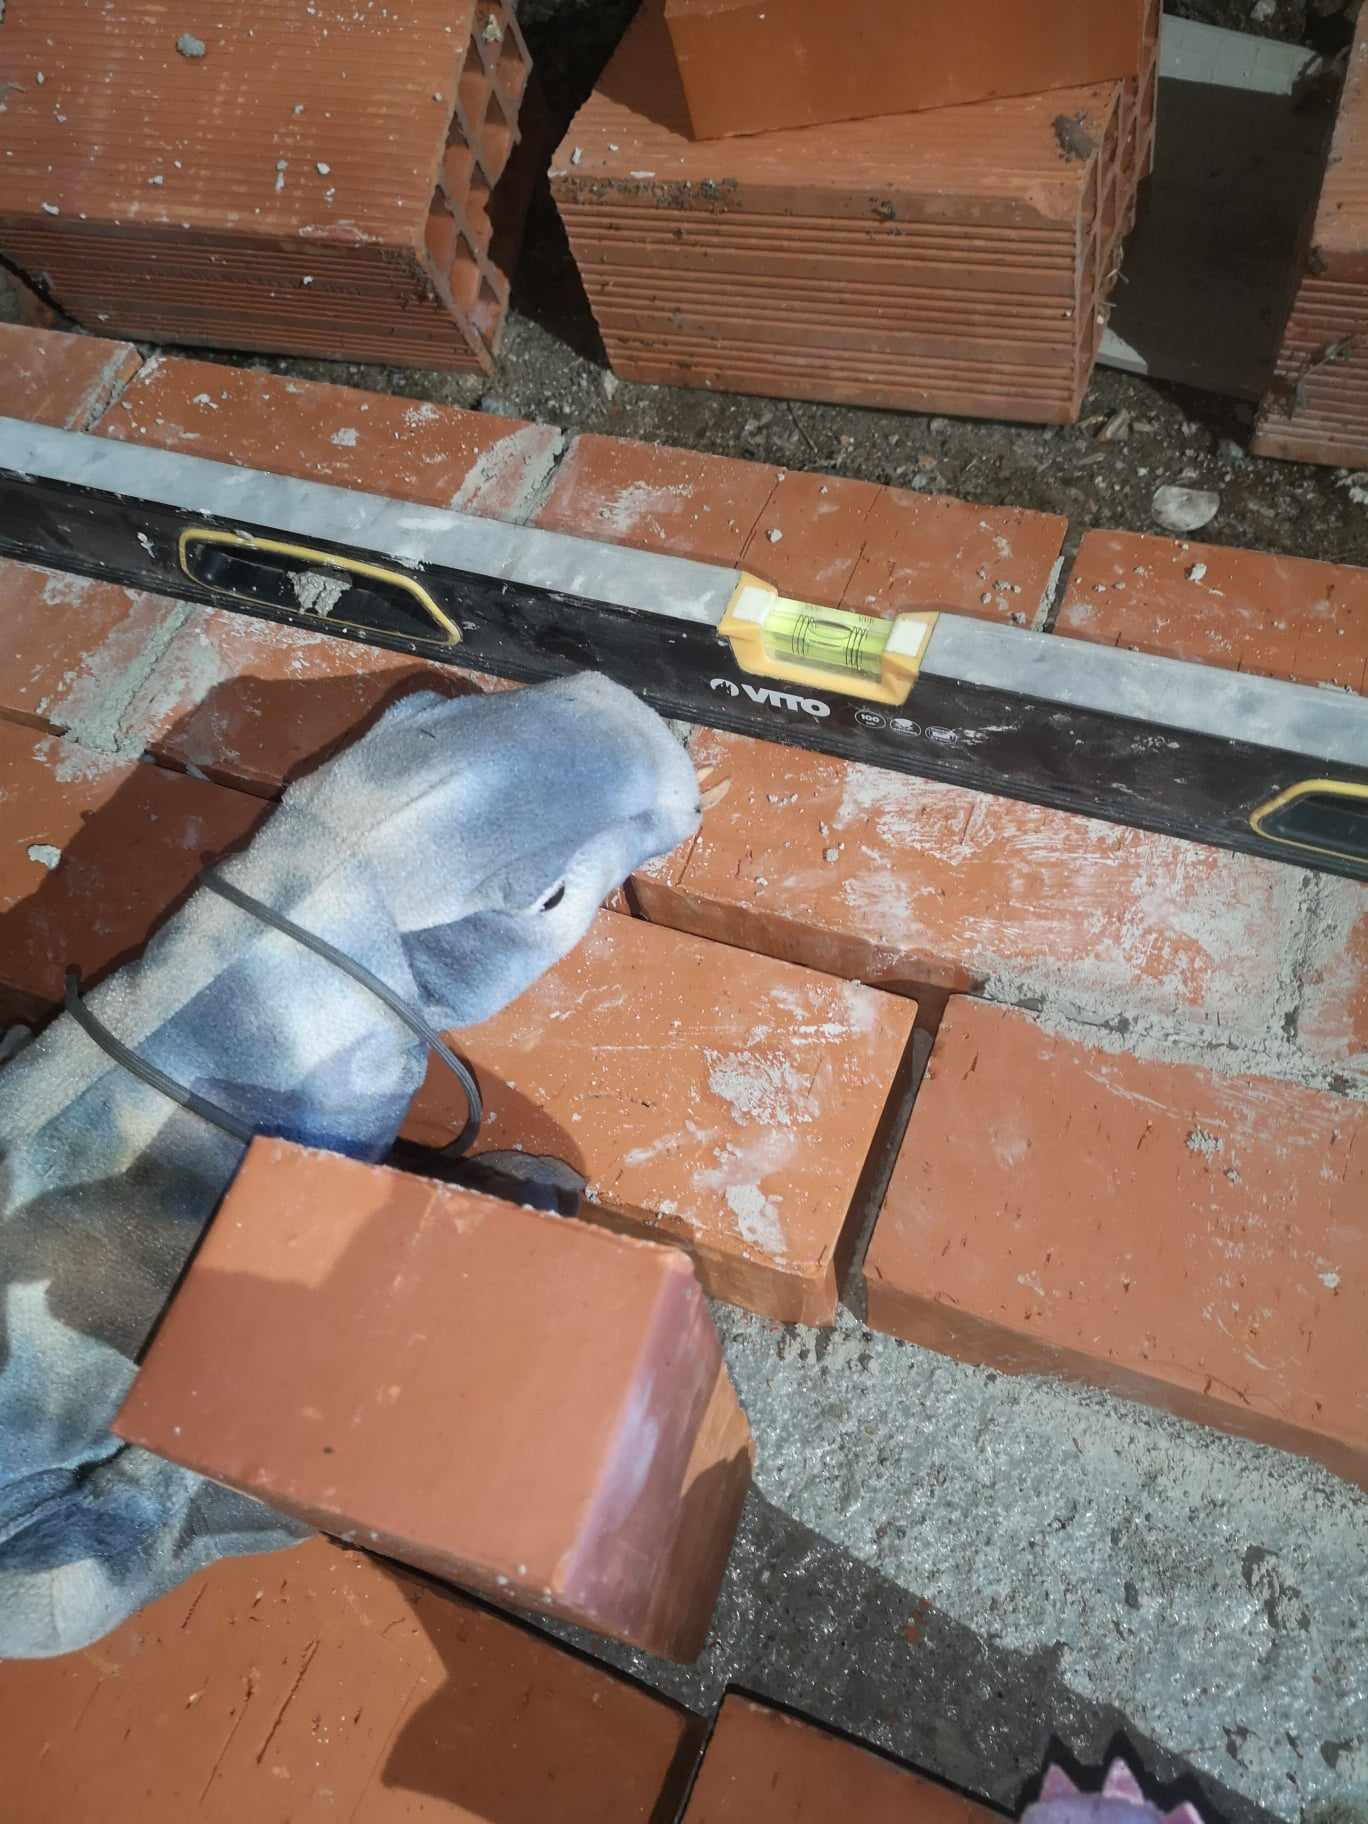
Is the superwool glass fiber or something else?  I'm not sure yet what we can get here that will do that job.  I just started setting the bricks in place for the base layer, using regular mortar cos I can't see the base layer getting all that hot.  I will switch to the refractory mortar for the other layers.  The dragons are keeping an eye on me that I'm doing it right!


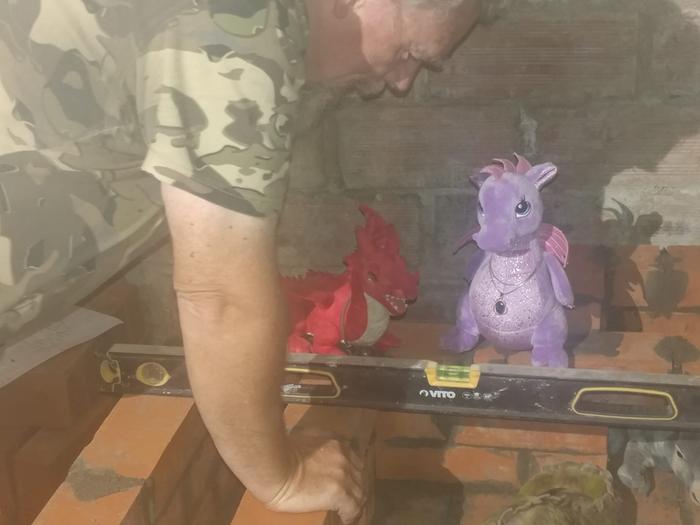
Iggy checking that it's level.


when we get further up the difference in brick sizes is, I think, going to make the outside dimensions of the whole thing about 1½" bigger...
 
thomas rubino
rocket scientist
Posts: 6320
Location: latitude 47 N.W. montana zone 6A
3191
cat pig rocket stoves
  • Likes 8
  • Mark post as helpful
  • send pies
    Number of slices to send:
    Optional 'thank-you' note:
  • Quote
  • Report post to moderator
Morgan Superwool is a non-ceramic insulating blanket.
It is easy and safe as well as non-itchy.
No doubt it is not readily available to you.
Regular ceramic insulating blanket is similar to fiberglass in that you want long sleeves and a dust mask while handling it.
 
Burra Maluca
out to pasture
Posts: 12484
Location: Portugal
3346
goat dog duck forest garden books wofati bee solar rocket stoves greening the desert
  • Likes 3
  • Mark post as helpful
  • send pies
    Number of slices to send:
    Optional 'thank-you' note:
  • Quote
  • Report post to moderator

thomas rubino wrote:
Regular ceramic insulating blanket is similar to fiberglass in that you want long sleeves and a dust mask while handling it.


I've managed to source ceramic insulating blanket, but I'd have to send off for it and wait a week or two for it to arrive.

Any idea how much I would need?

The biggest size I've found so far is 48" x 24", though smaller ones are also available and I'm wondering how many to order...
 
thomas rubino
rocket scientist
Posts: 6320
Location: latitude 47 N.W. montana zone 6A
3191
cat pig rocket stoves
  • Likes 7
  • Mark post as helpful
  • send pies
    Number of slices to send:
    Optional 'thank-you' note:
  • Quote
  • Report post to moderator
Your core is the most important thing to insulate, so look closely at my photos in the BBQ thread.
You should be able to estimate what it will take.
Is this 1" thick (25 mm) and do they offer different densities?
1/2" thick is not enough and you would want to double it up.
Morgan is offered in #6 or #8 density, both work but the #8 is better.
If it is not overly expensive I would purchase the 24 x 48 size piece.

Next Austin mentioned using a steel plate on top of your Walker cookstove.
Sorry to say but it will warp,  an old cast iron wood cook stovetop would be a much better low-budget choice if you cannot find a modern glass-top stove to salvage.
 
Burra Maluca
out to pasture
Posts: 12484
Location: Portugal
3346
goat dog duck forest garden books wofati bee solar rocket stoves greening the desert
  • Likes 5
  • Mark post as helpful
  • send pies
    Number of slices to send:
    Optional 'thank-you' note:
  • Quote
  • Report post to moderator

thomas rubino wrote:Your core is the most important thing to insulate, so look closely at my photos in the BBQ thread.
You should be able to estimate what it will take.


Will do. The conversions between metric and imperial are stretching my overloaded brain but I think if we order one now and then we'll have time to order another if it looks like it's not going to be enough.

Is this 1" thick (25 mm) and do they offer different densities?
1/2" thick is not enough and you would want to double it up.


It's 3cm thick, so more than an inch an inch thick. The advert was confusing, but I think one inch, not 3cm. Only one density offered, from this site at least.

Next Austin mentioned using a steel plate on top of your Walker cookstove.
Sorry to say but it will warp,  an old cast iron wood cook stovetop would be a much better low-budget choice if you cannot find a modern glass-top stove to salvage.


Glass stove tops in the right size seem to be unobtainable here. And it's important that we make something that other people can reproduce here in Portugal, and the rest of the world.  A one-off lucky-find solution would only solve the issue for us, not for everyone else.

Our thoughts were to use a thick enough plate with reinforcing welded onto the bottom, of an appropriate size and positioned to complement the air flow rather than impede it.
 
Austin Shackles
Apprentice Rocket Scientist
Posts: 149
Location: Portugal
100
2
transportation gear earthworks solar rocket stoves
  • Likes 7
  • Mark post as helpful
  • send pies
    Number of slices to send:
    Optional 'thank-you' note:
  • Quote
  • Report post to moderator
I haven't finally decided on the top.  I kinda feel that thick enough steel won't warp but I may be optimistic in that.  Alternatively, I could weld reinforcement under it, but that might interfere with the gas flow, which is something to avoid.  Or I might be able to find a suitable glass or iron stove top.  

The heat blanket stuff burra found claims 2500°F, and is 1" thick (or maybe 3cm, it says one thing in the text and one on the picture!).  Seems like that's going to be suitable.  I guess we only insulate the sides and top of the core, not underneath?
 
thomas rubino
rocket scientist
Posts: 6320
Location: latitude 47 N.W. montana zone 6A
3191
cat pig rocket stoves
  • Likes 8
  • Mark post as helpful
  • send pies
    Number of slices to send:
    Optional 'thank-you' note:
  • Quote
  • Report post to moderator
Not having built a tiny cook stove I cannot say for sure when a steel plate will warp, but I promise that on a Batchbox it would not last a week, or really even a day.
Working with steel as I do, I can say that 1/4" (.6cm) will warp quickly, 1/2" ( 1.27cm)  would last longer but the cost and the weight become an issue.
I believe even 1/2" would ultimately warp. Thicknesses larger become even more unmanageable and costly.
Have you been able to reach Matt and get his opinion on choices?
Perhaps using bricks sitting on insulated angle iron tee bars might be an option?

 
Fox James
Rocket Scientist
Posts: 790
Location: Guernsey a small island near France.
299
  • Likes 9
  • Mark post as helpful
  • send pies
    Number of slices to send:
    Optional 'thank-you' note:
  • Quote
  • Report post to moderator
I feel it is important  to explain a little more about   the use of super wool and ceramic fibre.

Although super wool sold in America is rated as safe in its raw form it will in fact sinter at a lower temperature than ceramic fiber and then in that sintered form, it could become a far more dangerous product.
Ceramic fibre sold in Europe,  will be body soluble and also safe to handle until it is super heated and then, in the same way as super wool, it will also take on a different chemistry.

In this sintered  state the fibers are believed to no ‘longer be body soluble’ and are now potentially dangerous, if breathed in the fibers could cause serious heath issues, either immediately  or in ten + years time!

So bear in mind that anywhere you use these product in a living space, in a direct flame path or very high heat area, the fibers could easily become a dangerous health hazard to you and your family.

However both these products are very efficient high temperature insulators and can indeed be used safely straight out of the bag.
So with this knowledge, you ‘can use them safely’ in certain areas away from direct flame or sealed behind bricks etc….

 
tony uljee
Apprentice Rocket Scientist
Posts: 263
75
  • Likes 6
  • Mark post as helpful
  • send pies
    Number of slices to send:
    Optional 'thank-you' note:
  • Quote
  • Report post to moderator
great to see another of matts stoves being built , i have also only recently started mine, its still just dry stacked for now as i am waiting for my 11/4 copper pipe to come in ,4 weeks wait so far, this will be for  connection to a back boiler and to thermo circulate to a hot water tank. Many of your questions would be answered by watching matts   --- bro audio---- youtube segments, its a long undertaking , i could only process so much info at a time ---so one or two  segments and then taking notes . But everything that is to explain and the reasons for --is contained within them , as to why he uses some materials over others and his  recommendations. I have built 8 metal fabricated stoves over the years, not counting all the little wood burners from old gas bottles i have done, so have made most of the mistakes and errors of judgement --some of which i was able/had to later correct and adjust out of the finished builds.The way matts stove is designed/built to achieve  complete combustion of the fuel ,creates a very high temperature gas /air to rise up directly under the ceramic glass ---this achieves temps that will warp any steel top plate. Even with welded on section s of flat strip , only extremely thick steel plate could minimize the flexing --but that would then be very costly ---damn heavy ---and almost cancel out the designs intentions and reason s why matt built this stove his way. It took me awhile to shift out of my thinking of how it should work . His way from fire start up rapidly throws out a lot of heat from the top and warms up the room and plus cooking can start straight away  , very little smoke making creosote  on a large cold piece of steel plate until it comes up to temp---and no warping to let out burnt hot gases. Yes you could use a piece of steel plate if you insulated underneath it with ceramic fiber board but then first two advantages wont be as good or lessened, anyway sermon over and anymore would be taking you away from build time, happy stoving.
 
Burra Maluca
out to pasture
Posts: 12484
Location: Portugal
3346
goat dog duck forest garden books wofati bee solar rocket stoves greening the desert
  • Likes 12
  • Mark post as helpful
  • send pies
    Number of slices to send:
    Optional 'thank-you' note:
  • Quote
  • Report post to moderator
OK, we have a solution for the stove-top!

I wanted something repeatable so I didn't want anything second hand or scavenged. I wanted to be able to show people ours and say 'You can have one just like it!'. There seems to be no proven way of making steel work, so there would be lots of experimenting (ie time, work, money...) in finding our own solution.

I watched Matt's video where he basically says to use glass or cast iron, and leaves me champing at the bit as he disses the idea of welding stuff onto steel because why bother, because I think there is a very valid reason to bother.

But then he suggests scouring amazon for giant cast iron skillets and grills.

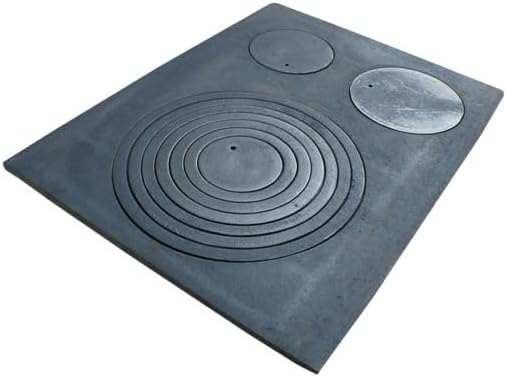
And look what showed up - SEZAM  cast iron stove plate with 3 holes, 68 x 52 cm


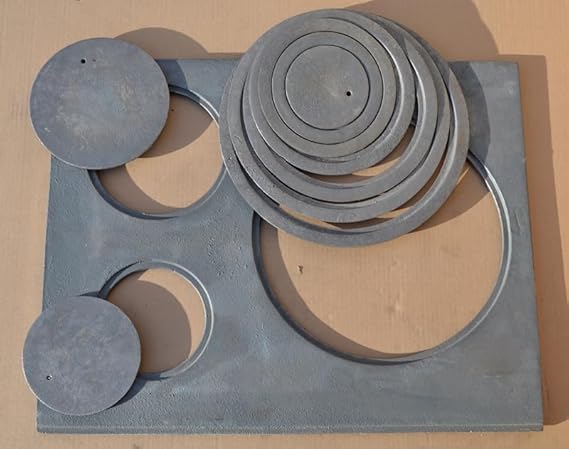
It even has removable 'holes' so you can open the thing up and people can peer inside to see how it works!


OK so I think the intended function of those holes is somewhat different, but I can see us pulling them off for any interested visitor.

Current price is €169, which is a bit ouchy. But for the wow factor to swing people to saying 'I want one of those!', I think it's worth every cent. Anyone on a tighter budget can say 'Wow, I want one, but I'm gonna go scour scrapyards for stuff' can still do that. But my aim is to bridge the gap so that all the tinkering types can have something amazing while their more house-proud spouses can have something that ticks all their boxes too.

Here's Matt's video on cook-top options for anyone interested.


I think my credit card is about to get itself dusted off and put to work...

 
thomas rubino
rocket scientist
Posts: 6320
Location: latitude 47 N.W. montana zone 6A
3191
cat pig rocket stoves
  • Likes 7
  • Mark post as helpful
  • send pies
    Number of slices to send:
    Optional 'thank-you' note:
  • Quote
  • Report post to moderator
Wow, Burra;
Great find!
That looks like it is almost perfectly sized!
Cast iron is next best when you can not find stove glass.
 
Fox James
Rocket Scientist
Posts: 790
Location: Guernsey a small island near France.
299
  • Likes 8
  • Mark post as helpful
  • send pies
    Number of slices to send:
    Optional 'thank-you' note:
  • Quote
  • Report post to moderator
The cast cooktop you have found looks great and very good value, my only concern would be how well the plates seal, you dont want them to leak out the gasses too much.
If I could find the same where I live I would buy one to try….
Ceramic glass is easy to cut with a standard glass cutter (i have a video on my channel) the issue I have with the glass revolves around its ability to spot heat and not hold any heat!
What that means for me, is when cooking the only really hot spot is above the heat source and very little heat around the perimeter. This fact might suit certain applications and the fact that the glass can be free and easily cut to size makes it worth considering for sure!
Steel tops of 8-10mm can be used (i have videos on my channel) but you need to assist the warping to your advantage but cutting a relief hole. Thicker steel like 20mm seems to be quite stable. There are examples of 20mm steel used on the vortex stoves that seems to work perfectly well without much heat distortion however 20mm steel is not cheap!
Cast iron is perfect, you can get it cut to any shape or size at any water jet facility but otherwise it is tricky or more to the point time consuming to cut with a grinder or torch.    
Steel will spread the heat making usable heat zones for cooking but, takes a fair amount of time to heat up and without a hole to place a pan over, it might never get hot enough to boil water.

 
Austin Shackles
Apprentice Rocket Scientist
Posts: 149
Location: Portugal
100
2
transportation gear earthworks solar rocket stoves
  • Likes 6
  • Mark post as helpful
  • send pies
    Number of slices to send:
    Optional 'thank-you' note:
  • Quote
  • Report post to moderator
If they don't seal well enough I can always put some sealer stuff on them.   We'll find out in due course

About to start mortaring the first layer bricks in place, as soon as finish my tea that is.
 
Jay Angler
steward
Posts: 12420
Location: Pacific Wet Coast
6991
duck books chicken cooking food preservation ungarbage
  • Likes 8
  • Mark post as helpful
  • send pies
    Number of slices to send:
    Optional 'thank-you' note:
  • Quote
  • Report post to moderator

Burra Maluca wrote:
And look what showed up - SEZAM  cast iron stove plate with 3 holes, 68 x 52 cm

Just for anyone who doesn't know how these are supposed to work:
For some purposes, the closer the pot is to the flame, the faster things will heat up. The different sized rings are so you can choose a size that most perfectly fits your pot. This would work awesome for plane steel or cast iron woks as the pot would sit down into the size hole you chose.  

Wheaton Labs has a special name which I've forgotten, for a pot that fits part way down below the surface of the stove - they built one. You get heating on the sides as well as the bottom, so cooking happens faster.

However, I agree that these aren't going to seal as perfectly as "no holes". So long as people are aware of that and monitor their CO (Carbon Monoxide) levels, this type of stove top has been used for a very long time (a version made of cob, for centuries in Japan) and so I doubt it was actively killing too many people.

I recall seeing a special tool that fits the little hole visible in the pictures, allowing you to safely remove circles when they're already hot.
That's an awesome find Burra and Austen - the stove looks awesome!
 
Burra Maluca
out to pasture
Posts: 12484
Location: Portugal
3346
goat dog duck forest garden books wofati bee solar rocket stoves greening the desert
  • Likes 9
  • Mark post as helpful
  • send pies
    Number of slices to send:
    Optional 'thank-you' note:
  • Quote
  • Report post to moderator

Jay Angler wrote:This would work awesome for plane steel or cast iron woks as the pot would sit down into the size hole you chose.  


Oooh a wok! It's been a long time since I used a wok. I do still have one somewhere. I need to find it...


However, I agree that these aren't going to seal as perfectly as "no holes". So long as people are aware of that and monitor their CO (Carbon Monoxide) levels, this type of stove top has been used for a very long time (a version made of cob, for centuries in Japan) and so I doubt it was actively killing too many people.


There are a couple of badges I keep meaning to do involving fitting smoke and CO detectors. I think they should go on the to-do list before autumn when we start firing the dragon up regularly.

I recall seeing a special tool that fits the little hole visible in the pictures, allowing you to safely remove circles when they're already hot.


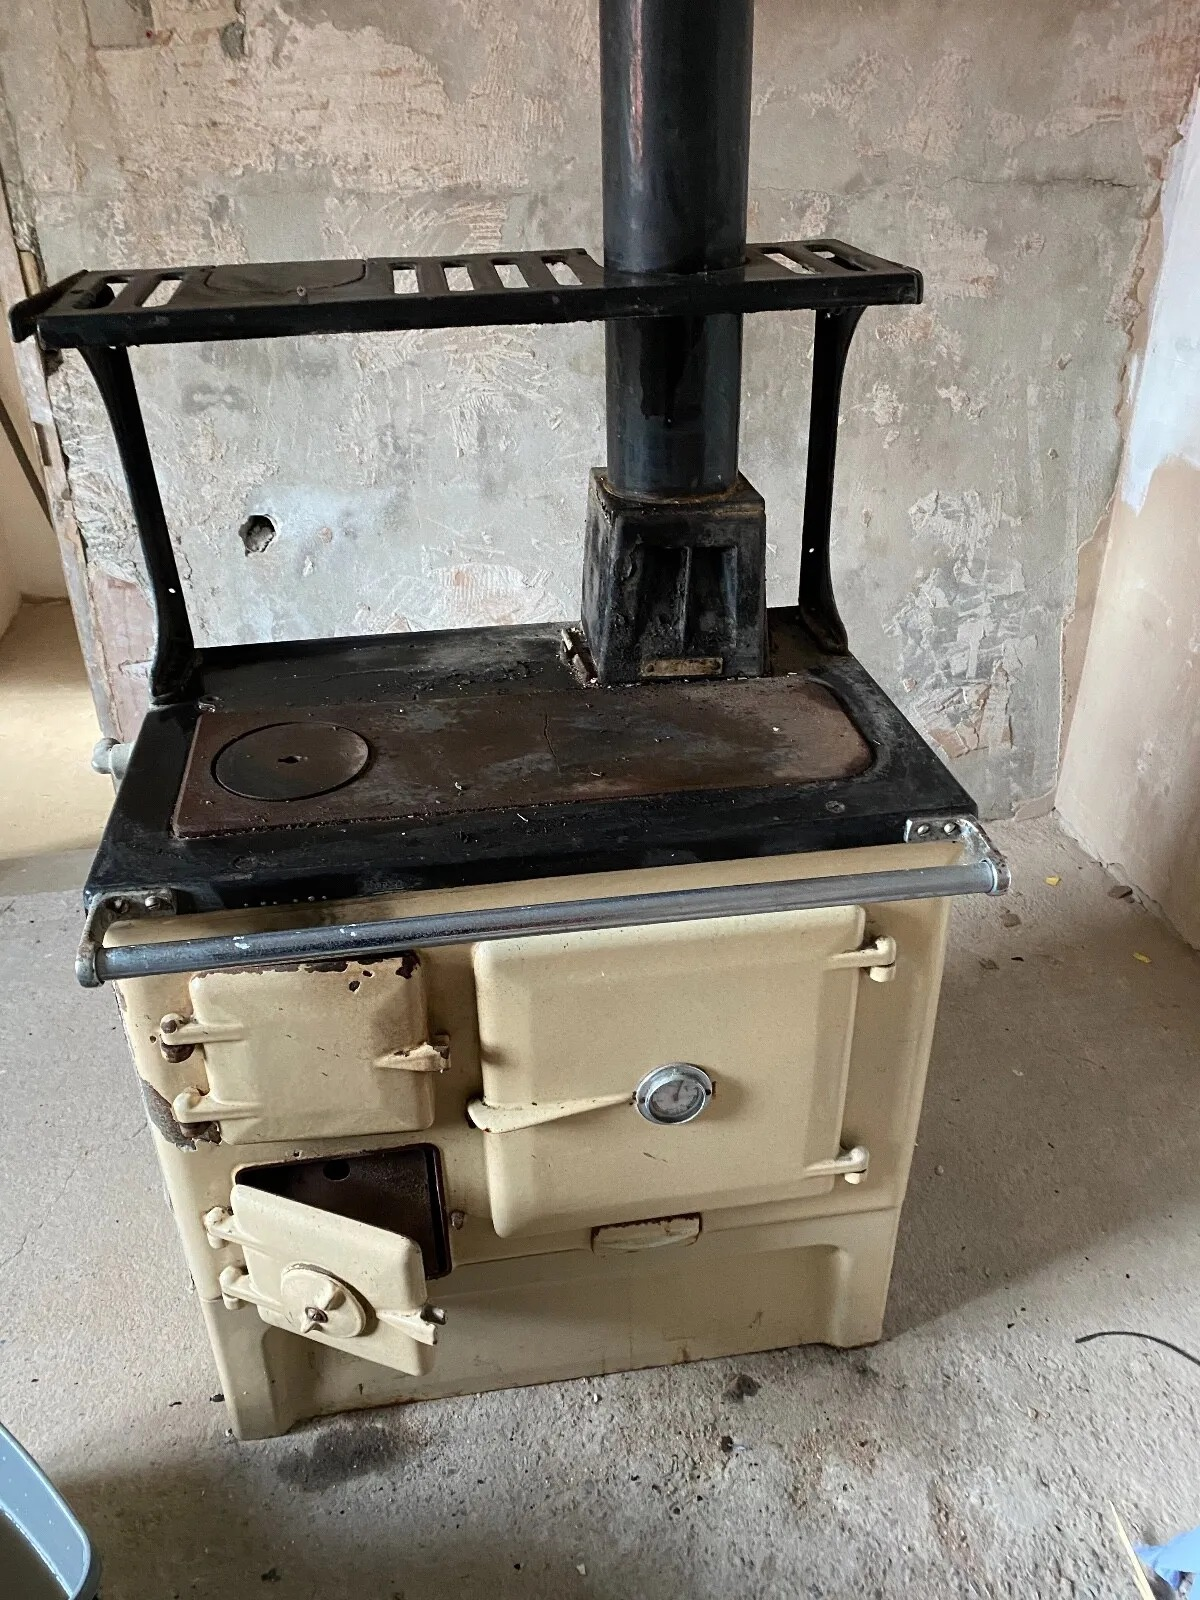
I remember having a rayburn in the house I lived in as a young adult. It looked a lot like this...


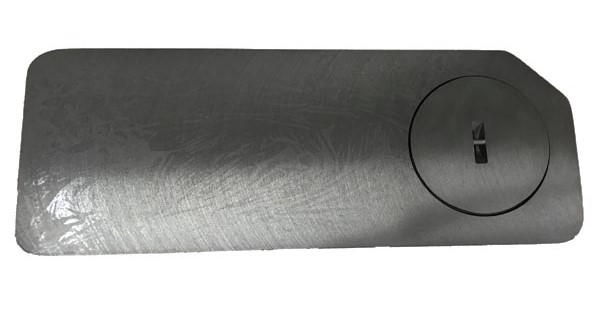
The hotplate had a removable bit, like this, with a slot in it that you could stick a special tool in to lift it out.


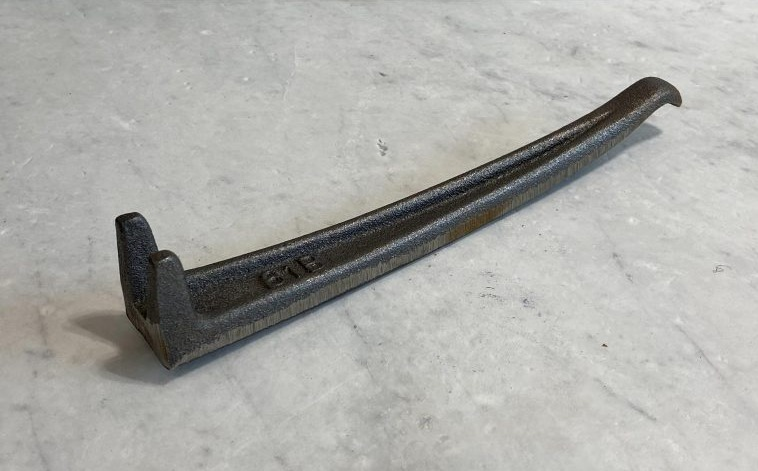
And this was the tool. Funny how seeing that thing after all these years stirs old memories...


It was shaped so that you used one end to lift the discs in the hotplate out, and the other end could spin the air intake open or closed, or help open or close the doors so you didn't burn your hands. It's still second nature to me to reach for a tool to open a wood-burning stove door, and they are generally home-made things these days.

I'm sure Austin can invent a suitable double ended tool for us when we know exactly what is needed to suit whatever doors we end up with.


leila hamaya
pollinator
Posts: 1596
Location: Root, New York
318
forest garden foraging trees fiber arts building medical herbs
  • Likes 7
  • Mark post as helpful
  • send pies
    Number of slices to send:
    Optional 'thank-you' note:
  • Quote
  • Report post to moderator

Jay Angler wrote:

Burra Maluca wrote:
And look what showed up - SEZAM  cast iron stove plate with 3 holes, 68 x 52 cm

Just for anyone who doesn't know how these are supposed to work:
For some purposes, the closer the pot is to the flame, the faster things will heat up. The different sized rings are so you can choose a size that most perfectly fits your pot. This would work awesome for plane steel or cast iron woks as the pot would sit down into the size hole you chose.  

Wheaton Labs has a special name which I've forgotten, for a pot that fits part way down below the surface of the stove - they built one. You get heating on the sides as well as the bottom, so cooking happens faster.

However, I agree that these aren't going to seal as perfectly as "no holes". So long as people are aware of that and monitor their CO (Carbon Monoxide) levels, this type of stove top has been used for a very long time (a version made of cob, for centuries in Japan) and so I doubt it was actively killing too many people.

I recall seeing a special tool that fits the little hole visible in the pictures, allowing you to safely remove circles when they're already hot.

That's an awesome find Burra and Austen - the stove looks awesome!


yes, this is what i was going to say - and add - depending on how you burn wood, it can be a bit tricky to master woodstove cooking. it takes a really long time to get something to boil and you have to feed a lot of wood, and a lot of the right type of wood (nice dry hardwood for instance) to get it hot enough to like boil water or keep a consistant temperature.
i tend to burn sketchy scrappy whatever i can get my hands on stuff, that makes it harder, but you can get the result with chopping all your pieces quite small to get that extra heat for a quicker boil.

some recipes can be tricky if you need a long time to boil for instance, and equally tricky on the other side if you want something that is a "low" setting on a regular stove.
for that you can get rise ups, sort of the ooposite effect as the holes, to lift the pots above the top, just a metal plate  (some times ceramics or ceramics can be used as well, especially in a pinch)
held up an inch or two and then you can set the pots on that to stimulate a "low" setting and slow cook something or keep it warm.
anywho those removable metal holes make it a lot easier because you put the pot right inside the holes and this will make it infinitely easier if you dfo intend to use it for real cooking. glass probably works better, too, so those holes will come in handy. of course its your build, so depending on how much you want it to function for cooking, but i would seriously recommend leaving them usable and able to be removed if you do want to cook on it on a regular basis.

one last note you can use regular clay, and not have to source the refined clay.  if you dont have any in your subsoil around...maybe try to check by a river if you know of one...as clay is often found in the banks of a river...being that it travels down the rivers and tends to deposit the clay. if all else fails maybe try to find a local potter, if they arent willing to part with any maybe they can give you the right idea.
 
Joylynn Hardesty
master pollinator
Posts: 4954
Location: Due to winter mortality, I stubbornly state, zone 7a Tennessee
2118
6
forest garden foraging books food preservation cooking fiber arts bee medical herbs
  • Likes 6
  • Mark post as helpful
  • send pies
    Number of slices to send:
    Optional 'thank-you' note:
  • Quote
  • Report post to moderator

Jay Angler wrote:Wheaton Labs has a special name which I've forgotten, for a pot that fits part way down below the surface of the stove - they built one. You get heating on the sides as well as the bottom, so cooking happens faster.


Was it the Lorena, here?
 
Jay Angler
steward
Posts: 12420
Location: Pacific Wet Coast
6991
duck books chicken cooking food preservation ungarbage
  • Likes 6
  • Mark post as helpful
  • send pies
    Number of slices to send:
    Optional 'thank-you' note:
  • Quote
  • Report post to moderator

Joylynn Hardesty wrote:

Jay Angler wrote:Wheaton Labs has a special name which I've forgotten, for a pot that fits part way down below the surface of the stove - they built one. You get heating on the sides as well as the bottom, so cooking happens faster.


Was it the Lorena, here?

Yes! I was pretty sure it started with an "L", but was too unsure to try to search for it. Thanks Joylynn!
 
Austin Shackles
Apprentice Rocket Scientist
Posts: 149
Location: Portugal
100
2
transportation gear earthworks solar rocket stoves
  • Likes 9
  • Mark post as helpful
  • send pies
    Number of slices to send:
    Optional 'thank-you' note:
  • Quote
  • Report post to moderator
First layer is all done!  would've been done several days ago if I hadn't run out of mortar.  Now I can start on building the stove itself!
 
Gerry Parent
Rocket Scientist
Posts: 1809
Location: Kaslo, BC
525
building solar woodworking rocket stoves wood heat greening the desert
  • Likes 5
  • Mark post as helpful
  • send pies
    Number of slices to send:
    Optional 'thank-you' note:
  • Quote
  • Report post to moderator
Any way you could include pictures Austin?
You'll appreciate having them here years from now when you want to review your build and/or help others with their builds :)
 
Joylynn Hardesty
master pollinator
Posts: 4954
Location: Due to winter mortality, I stubbornly state, zone 7a Tennessee
2118
6
forest garden foraging books food preservation cooking fiber arts bee medical herbs
  • Likes 6
  • Mark post as helpful
  • send pies
    Number of slices to send:
    Optional 'thank-you' note:
  • Quote
  • Report post to moderator
This is awesome Austin! Thanks for being a hero for Burra!
 
Austin Shackles
Apprentice Rocket Scientist
Posts: 149
Location: Portugal
100
2
transportation gear earthworks solar rocket stoves
  • Likes 9
  • Mark post as helpful
  • send pies
    Number of slices to send:
    Optional 'thank-you' note:
  • Quote
  • Report post to moderator
We're making progress.   Up to layer 3 now and the dragons have (nearly) all come to inspect it.  Or maybe they think it's a new dragon playground, I'm not sure.


On to layer 4 and various bridges next!

Oh, and Burra reminded me to say that the iron stove top has arrived, and that we managed to source a sack of fireclay.  We can get perlite, it seems, so that should be insulation for the core sorted when we get that far
 
Burra Maluca
out to pasture
Posts: 12484
Location: Portugal
3346
goat dog duck forest garden books wofati bee solar rocket stoves greening the desert
  • Likes 9
  • Mark post as helpful
  • send pies
    Number of slices to send:
    Optional 'thank-you' note:
  • Quote
  • Report post to moderator
We got a couple more layers built over the weekend.

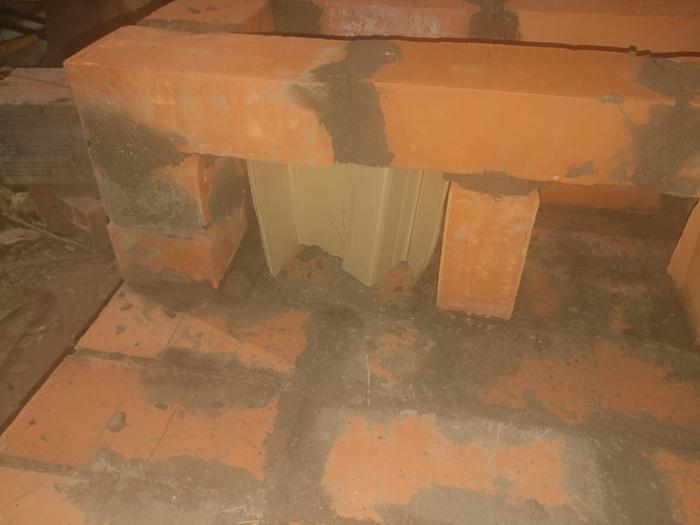
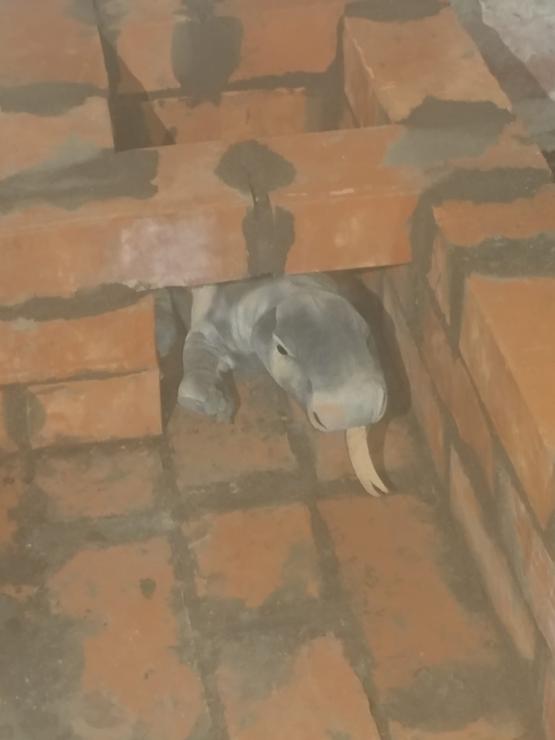
Bridges and tunnels seem to be appearing...

Folded bits of cardboard seem to ensure the bricks stay in place while the mortar sets.


It looks a bit like a mini stonehenge now.


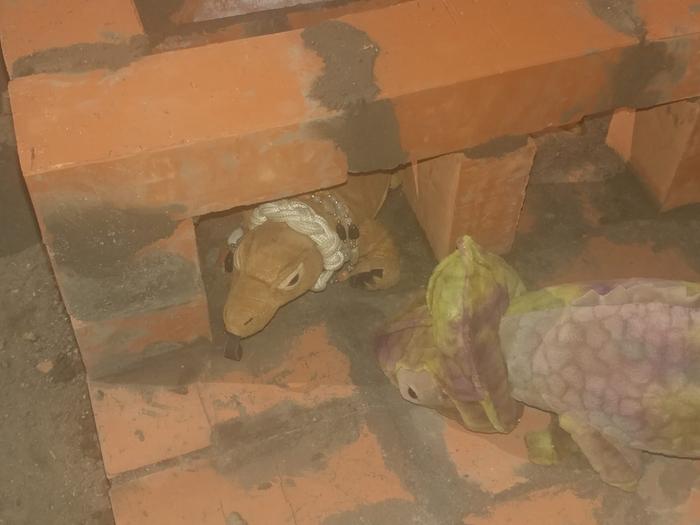
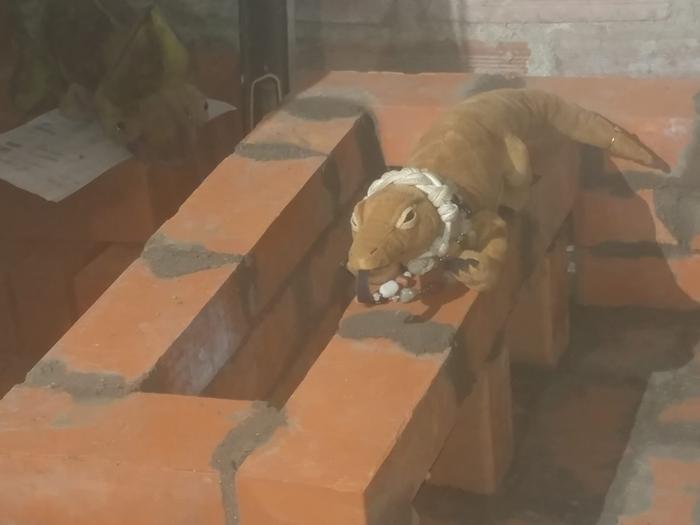
Serra is the matriarch of the little dragon family. She seems to think that leaders ought to be bridges, so she's testing that idea out...


Iggy is checking out the pathways and tunnels to see if he can figure out which way the dragon-breath will flow.


It's also important to keep checking that everything is level.


Also, I'm not entirely certain that I wasn't dreaming, but I think I saw this happening last night when I went downstairs to the 'bathroom'. I can only assume that the geckos that hang out on the door are really dragons in disguise and they all come indoors to play at night and are practicing their building skills...


Firebricks, a sheet of metal and vermiculite are the next things on the shopping list.


eva guo
Posts: 24
  • Likes 9
  • Mark post as helpful
  • send pies
    Number of slices to send:
    Optional 'thank-you' note:
  • Quote
  • Report post to moderator
Wow. Looks great, Austin and Burra. Wish I could build one. I just stacked some fire bricks. Have no idea how to mortar.
IMG_1325.jpg
[Thumbnail for IMG_1325.jpg]
 
I'm still in control here. LOOK at this tiny ad!
rocket mass heater risers: materials and design eBook
https://permies.com/w/risers-ebook
reply
    Bookmark Topic Watch Topic
  • New Topic