

|
.png)
|

|

|

|

|
|
|
|
|
|
|
|

|

|
.png)
|

|

|


Kirk Mobert wrote:The mortar is clay/sand, again using locally sourced clay soil for the clay and locally sourced sand too. Cement based mixes can't handle the heat and should NEVER be used in stoves.
The plywood form is for making the arches. The bricks are laid over the form and then it's taken down and moved for the next row.
 1
1
paul wheaton wrote:Old school bricks made from clay will do quite well.


Ask me about food.
How Permies.com Works (lots of useful links)
Mjølner Rankenberg wrote:And what about the mortar?
1
I think that because my mix is really light (wood ash and all) it insulates well, which helps get the temps up. The other important detail is undersized bell leading to a hot chimney (not too hot, you'd have to work hard to get burned on it).
....The firebox mix is intended to be able to make anyplace in the world, by the poorest people.
John Daley Bendigo, Australia The Enemy of progress is the hope of a perfect plan
Benefits of rainfall collection https://permies.com/t/88043/benefits-rainfall-collection
GOOD DEBT/ BAD DEBT https://permies.com/t/179218/mortgages-good-debt-bad-debt
1
2
God of procrastination https://www.youtube.com/watch?v=q1EoT9sedqY
2


 3
3
For all your Montana Masonry Heater parts (also known as) Rocket Mass heater parts.
Visit me at
dragontechrmh.com Once you go brick you will never go back!
1
1
2
6
3


Thanks,
Coco
Fernandez

Skill verified by gir bot")

Intermountain (Cascades and Coast range) oak savannah, 550 - 600 ft elevation. USDA zone 7a. Arid summers, soggy winters
4
For all your Montana Masonry Heater parts (also known as) Rocket Mass heater parts.
Visit me at
dragontechrmh.com Once you go brick you will never go back!
6
4
Silence is Golden
For all your RMH needs:
dragontechrmh.com
2
5
6


 4
4
paul wheaton wrote:Lessons:
1: for a batch box rocket mass heater, make sure that the riser slot is taller than the wood feed. Or else smoke will come out the front. And smoke out the front is utterly unacceptable.
2: As matt walker mentions: no matter what glass you use, the casserole lids break. I suspect that the glass that is for electric stove tops might work, but they don't come in the casserole lid shape. So it may be possible that something could be cobbled together. So we went with a cast iron skillet as a door.
3: We know that firebrick doesn't have enough insulation to be a riser, which is why one riser design is to wrap durablanket around standard firebrick. We are beginning to learn that the orange firebrick (insulated firebrick) is better, but not much better.
4: For most of the burn of this, there would be smoke. That is absolutely unacceptable.
So we solved #2. And for #1, #3 and #4 we had plans on things we could do to fix it .... but ....
5: A normal rocket mass heater in this space would probably make the space quite comfortable in about ten minutes. And really warm on a really cold day in about 20 minutes. But this rocket mass heater had no barrel for "quick heat". So it would often times take three hours to to get the space comfortable. And since it is a batch box, it was a lot of wood. And then after a long three hours, people would go to bed only to wake up an hour later to find themselves in a sauna. They would open the window so it could cool a bit so they could get back to sleep. And then wake up to a cold cabin. This is absolutely unacceptable.
All of our ideas to solve #5 were weak and probably would not help enough
Since this rocket mass heater is so beautiful, we had very long discussions about ways to save it. But in the end, we made the difficult decision: it is time to replace it. On august 26th, 2020 it was removed.
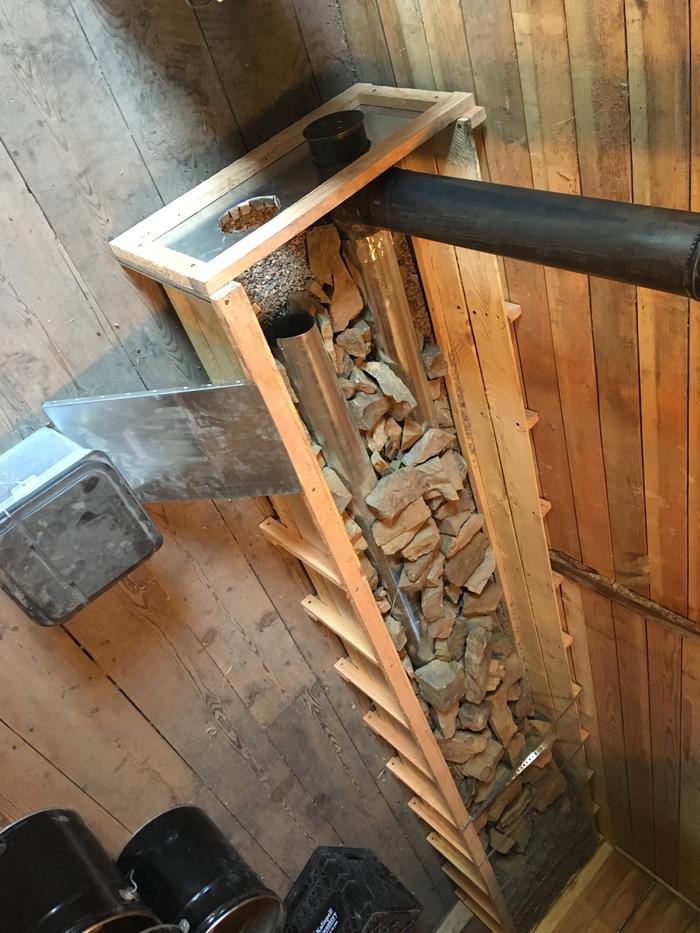
A pebble style, j-tube, 4-inch rocket mass heater is going in:
(pic from Dez's thread)
The pebble mass will be partly a bench and partly under the bed.
10 humans raise one child https://www.kickstarter.com/projects/positiverealfutures/an-actually-fun-tv-show-about-a-future-with-real-hope

Skill verified by jordan barton")

Skill verified by Mike Barkley") 5
5
For all your Montana Masonry Heater parts (also known as) Rocket Mass heater parts.
Visit me at
dragontechrmh.com Once you go brick you will never go back!
2

|
Mrs. Robinson, you're trying to seduce me. Aren't you? Give us some privacy tiny ad.
It's a bit like "run away to the circus" but with gardening
https://wheaton-labs.com/bootcamp
|


