Cloth pads generally come in one of two forms: "All-in-One", or with a removable insert.
With All-in-One style pads, you make a back (often out of wool) that acts as a waterproof layer and wraps around your underwear, and you attach to that layers of absorption. These are easy to carry and have on hand. You could make multiple pads in various thicknesses, so you have thinner ones for light-flow days, and thicker ones for heavy flow and night time. You can also make them in various shapes for night-time vs day.
Here are some tutorials/patterns for making "All-in-One" style pads:
With Removable Insert style pads, you make a back (often out of wool) that acts as a waterproof layer and wraps around your underwear. And then you use a second insert to absorb most of the flow. This insert can be easily changed out. This can make the washing of the pad a lot easier, as the more layers you have sewn together, the harder it is for water to move between them to fully clean your pad. You can also customize these by having various thicknesses of inserts for various heaviness of flow.
To attach your pad to your underwear, you can use string, buttons, metal snaps or maybe other innovative ideas! You might want to use wool thread to sew the pad's backing (especially if using a wool back), as cotton will wick and draw the fluid through the cotton threads and through to the other side.
Another option is to make menstrual underwear.
To complete this BB, the minimum requirements are:
- sew one menstrual pad
- use natural materials
To document your completion of the BB, provide proof of the following:
- a picture of your materials (with a description of the natural materials you used)
- a progress picture
- a picture of the finished pad
The last time I made pads was almost 8 years ago, and I've learned some things from those years of wearing cloth pads, as well as from years of washing diapers:
(1) The wool backs like to be treated differently than the cotton absorbant layers. If you wash out all the lanolin in the wool, it doesn't repel the fluids as well, and you get more leakage.
(2) Having a bunch of layers of cloth sewn tightly together makes it hard for water to get through. I learned this the "fun" way, with my babies getting diaper rashes from the ammonia buildup in their diapers, and with my pads smelling a bit off. (My "magic" way of combating ammonia build-up was to switch to using flat diapers and wash them on HOT with a full scoop of soap. I'd have them churn in the hot water for at least 30 minutes. Then I would do a hot rinse. Then I did a cold rinse. That kept the diapers clean, smell free, and without ammonia build-up. This procedure also worked on my pads, but sometimes I had to wash them twice just to make sure they were clean. That's a lot of hot water!)
(3) I hate white cloth for menstrual pads. It's stains and then it's just not...fun...to look at. But, I also like being able to gauge my flow.
(2) Use an absorbent, single layer cloth that folds to be the absorbent layer--and unfolds in the wash! I still have a BUNCH of old diaper cloth that nice and clean and absorbent and still in good shape. That will be the absorbent layer.
(3) I dyed the wool backs and cotton inserts with natural dyes! The dye vats I made to dye my kids' Easter eggs still had LOTS of color in them. LOTS. I couldn't let that go to waste. Definitely not!
Now for pictures:
First I took an existing PUL pad that I'd purchased loooong ago, and used that as the pattern. I traced it and added a seam allowance.
I cut out two matching pieces of fabric and sewed them together with thin wool yarn I had. On my other pads, I noticed that anywhere there was a seam, the blood traveled right down the threads to the other side. Not useful! I'm hoping using wool will prevent that. (This is also why I purposefully didn't sew along the side of the pad next to "wings" like most people do. I don't want the fluids flowing down that!)
sewing the two layers together. I did a sort of blanket stictch for extra security since I only had chunky yarn and couldn't make tiny stitches
I turned it right side out, finished the edge, and made sure to clean it well to strip it so it would accept dye. Then I dyed it! One was dyed in cochineal (the dark purple), another in logwood (somehow it turned brown!), one in madder (the orange-ish brown), and the lighter purple was cochineal with copper mordant, since the dye vat was getting exhausted by that point.
you don't really need pictures of this for the BB, but it's fun!
Meanwhile, I also transformed a LOT of cloth diapers into pretty colors. What can I say, the dye-vats kept providing! The black and indigo colors actually came from logwood with copper mordant. The lavenders purples came from cochineal with copper mordant. And the spotted purple was the first dip of cochineal, and then into logwood.
you can also see my own laundry there, as well as an undyed cloth diaper for reference
I chose the blotchy purple for making my first absorbable insert. I cut it.
Cutting it in thirds, then in half.
I hemmed the raw edged with cotton thread I had. Here it is edged and folded up, next to the purple wool back:
can you tell I like purple?
I hate snaps. They hate me. Buttons are easier. Why do people always say to use snaps? You don't have to use snaps!. Buttons are easy and easy to find. So I used wool thread to make a button hole, and sewed on the metal button with wool thread.
I forgot to take a picture while sewing on the button, so this finished pad picture will have to do!
I used some wool/linen/silk yarn I had (probably not the best choice....) to make the straps. Sewed them on. Now the pad is done!
finished pad with an extra insert, along with the logwood, madder, and paler cochineal pad backs I still need to finish!
This was all a bit more complicated than it needed to be, because I wanted to play with dying. You could literally felt an old sweater, cut it out in the shape of a pad, blanket stitch the edge of it just to be safe, sew a button on the back, and then sew a strap on top and on bottom. That's the back. Then get any old piece of cloth (preferably something soft) and hem it into a rectangle to be a foldable insert. Pads don't have to be hard!
I used a 100% cotton flannel bedsheet to make this pad. I didn't worry about waterproofing or extra absorbent layers because I just needed something for light spotting, and the flannel is pretty absorbent already and this pattern ends up with four layers. The pattern is self-drafted because none of the ones I've tried off the internet have fit my weird body contours very well. I closed it with just a button and buttonhole.
IMG_20210811_232458.jpg
My cotton fabric.
IMG_20210811_233021.jpg
My pattern.
IMG_20210811_233911.jpg
Sewing it together.
IMG_20210812_003932.jpg
Finished pad.
IMG_20210812_003919.jpg
Finished pad, buttoned.
They/them. Autistic and disabled permie newbie in zone 6a.
I generally use menstrual cups but they can leak on heavy days, even when changed often. If I’m working or out and about, it’s nice to have a backup.
Rather than buying new cloth pads (Domino have been my favorite brand) or period undies (haven’t found a new favorite) this cycle , I decided to try making some. (Nicole’s early posts and saving money provided me with inspiration!)
I don’t have my sewing machine with me, so I opted for a simpler upcycled pattern using 100% cotton baby blankets from the thrift store. This pattern does not require any snaps, buttons or other types of fasteners. (I’m hoping they were washed enough times to be rid of possible flame retardants. I found a flannel shirt on the 99 cent rack… but I liked the patterns of the baby blankets more, which were 3 for $1.99.)
I also don’t have regular access to a washing machine, so I opted to boil the baby blankets in my InstantPot (on the high sauté setting… I also don’t have any larger stovetop pots at this time. I stayed in the kitchen and stirred the blankets to prevent boiling over or other problems.)
Nicole Alderman approved this submission. 
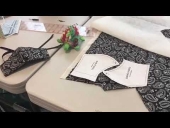
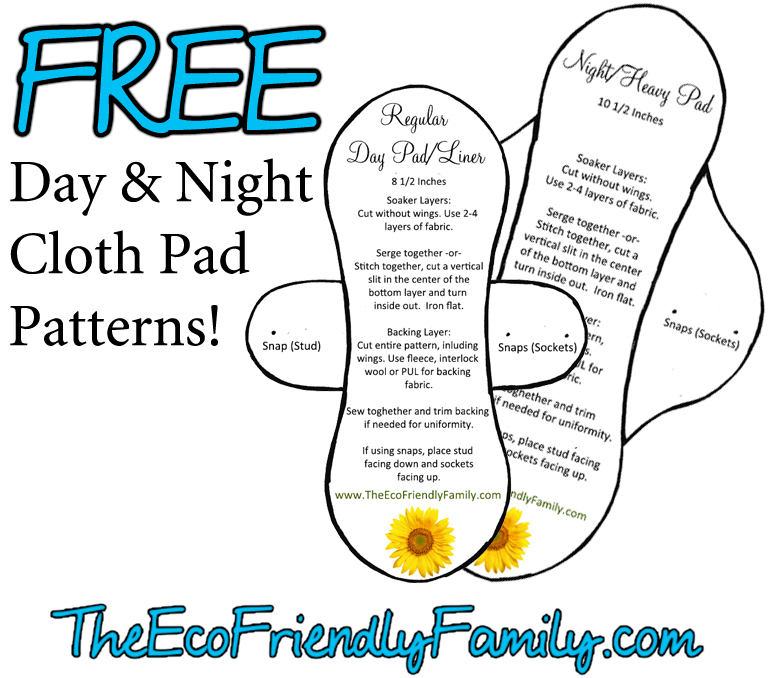
Note: I hereby certify that this badge bit is complete, and congratulate you on your Textile air badge! Bravo on making your own pads! I'm pretty sure that cotton baby blankets don't have flame retardants--at least I sure hope they don't!
I RELEASE YOU! (for now .... ) Feel free to peruse this tiny ad:
Paul Wheaton's Permaculture and Homesteading Stuff