|

|
|
|
|

|

|

|

|

|
 9
9


Skill verified by gir bot")

Skill verified by Mike Haasl")

Skill verified by Mike Haasl")

Skill verified by Jeremy VanGelder")

Skill verified by Paul Fookes")

Skill verified by Alexandra Malecki")

Skill verified by Timothy Norton")

Skill verified by Timothy Norton")


 4
4
Proudly presenting RocketMassHeaters.com
A good starting point to all RMH research
How Permies.com works
5
Benjamin Dinkel wrote:
Since you have the core (riser, feed and burn tunnel) built to dimension of the rocket oven book already
Benjamin Dinkel wrote:
My guess why it didn’t get up to temperature is that it wasn’t insulated, or was it before dismantling it?
Benjamin Dinkel wrote:
Any exhaust pipe should be fine. We’re talking about the exhaust after the oven, right?
4
Clay McGowen wrote:
I’m actually not sure if that was or wasn’t built to the specs of the book - the builder said he stuck to the video and avoided the extra coin of the book.
Maybe that’s something I ought to investigate.
Clay McGowen wrote:
How are you thinking that would work? Would I dry stack the riser and disassemble when I want to move?
Clay McGowen wrote:
I’m actually not sure if that was or wasn’t built to the specs of the book - the builder said he stuck to the video and avoided the extra coin of the book.
Maybe that’s something I ought to investigate.
Clay McGowen wrote:
I was under the impression it was not insulated and operated as-was, per those pictures.
Would a five minute style riser be more or less insulative than brick?
Clay McGowen wrote:
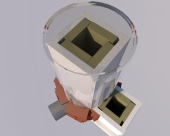
The exhaust is already in place, I was more thinking of using the stovepipe to surround the ceramic fiber blanket and use that five-minute version in place of a brick riser.
Proudly presenting RocketMassHeaters.com
A good starting point to all RMH research
How Permies.com works

 6
6
For all your Montana Masonry Heater parts (also known as) Rocket Mass heater parts.
Visit me at
dragontechrmh.com Once you go brick you will never go back!
1
Invasive plants are Earth's way of insisting we notice her medicines. Stephen Herrod Buhner
Everyone learns what works by learning what doesn't work. Stephen Herrod Buhner
7
Anne Miller wrote:Quick question that might help other answer your question.
Are you planning on using while it is in that cart or do you plan to set it up once it is moved?
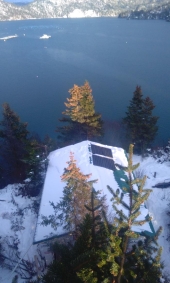
thomas rubino wrote:
That appears to be a 6" rocket, made of heavy firebrick.
That style riser will take quite a while to come up to temps.
Benjamin Dinkel wrote:
How often do you plan on moving it? Is it in one piece now and you were able to move it?
thomas rubino wrote:
Please do not use the refractory mortar, once it is dry it is extremely hard to remove.
Bricks assembled with this mortar can be taken apart with a rubber mallet, and the mortar can be saved in a bucket to be rehydrated and used again and again.
Benjamin Dinkel wrote:
That explains the oven not getting to temperature I think.
Made from brick it would have more mass, so start a bit more sluggish but then keep the temperature for longer. In any case, the riser needs to be insulated.


 11
11


 13
13


")
")


 4
8
4
8

"We carry a new world here, in our hearts..." --Buenaventura Durruti
"Don't wish it were easier. Instead, wish you were better." --Jim Rohn

Skill verified by gir bot") 8
8
| time | activity | temperature |
|---|---|---|
| 17:20 | priming the riser | ambient ~35°F |
| 17:23 | first stick in | <200°F |
| 17:37 | three loads of wood through | 340°F |
| 17:40 | five loads of wood through | 520°F |


 5
5
Proudly presenting RocketMassHeaters.com
A good starting point to all RMH research
How Permies.com works
5
You should never forget that every creature has its purpose in the cycle of nature and can also be very important to humans. Sepp Holzer's Permaculture
4
Benjamin Dinkel wrote:First of, sorry for loosing you Pyrex pan! Lucky you caught it on video though, it's quite something to see.
Benjamin Dinkel wrote:I wonder how much more efficient you could get the oven if you insulated the core and riser?!
T Blankinship wrote:Are you getting any smoke from the font of the oven? From the pictures it looks like there is no cob around the font of the barrel
The insulation on the oven looks to be compacted at the bottom of the oven or is it just the picture?
T Blankinship wrote:Another issue I have had is getting the right temperature. If I put a thermometer on the door and one on a rack on the inside I get a +/- 50 different. Do you have the same issue?
8


 5
5
Clay McGowen wrote:
T Blankinship wrote:Are you getting any smoke from the font of the oven? From the pictures it looks like there is no cob around the font of the barrel
The insulation on the oven looks to be compacted at the bottom of the oven or is it just the picture?
Yes and yes...
I'm only getting a little smoke, right at the start of a burn, but the amount is definitely non-zero.
The insulation is also definitely compacted a bit. I put my hand on the bottom on the metal near the riser and the top near the chimney, both were about the same temperature, but I'd expect the top to be hotter if the insulation was equal.
Both are symptoms of the same experience - a 500 mile journey from Arlee, to Wheaton Labs, then back to my house, then a grand tour around my backyard in a wheelbarrow.
I'd like to cob up the front but haven't made time for that.
I'm not sure what to do about the insulation concern
T Blankinship wrote:Another issue I have had is getting the right temperature. If I put a thermometer on the door and one on a rack on the inside I get a +/- 50 different. Do you have the same issue?
Undoubtedly. I don't quite trust the thermometer inside, but I do trust my own senses as well as the cooking times and food behaviors I've observed.
There is significant stratification inside my oven and, given the fact that it's not quite level, that's both top to bottom and front to back.
I'd love to come up with a solution for this as well, but I'm really struggling to think of a viable option.
Maybe a fan like in a convection oven? But I have no desire to add electrical power to this delightfully off-grid solution.
Maybe one of those heat-powered/Peltier fans that go on a wood fired stove? But the clearances don't seem like they'd work very well...
If anyone has thoughts on how I could insulate the burn chamber, I'd appreciate hearing.
For reference, the outside dimensions are roughly 30inches long x 9inches tall x 9inches wide
I'm leaning towards ceramic fiber board for the portability but open to other materials too.
Especially with the price, fragility of that material, and non-standard dimensions I need...
Superwool with standard clay brick beyond that?


 5
5
How Permies works: https://permies.com/wiki/34193/permies-works-links-threads
My projects on Skye: The tree field, Growing and landracing, perennial polycultures, "Don't dream it - be it! "

|
What's wrong? Where are you going? Stop! Read this tiny ad:
building a permaculture community with hands on gardening and natural building
https://wheaton-labs.com/bootcamp
|