• Post Reply Bookmark Topic Watch Topic
  • New Topic
permaculture forums growies critters building homesteading energy monies kitchen purity ungarbage community wilderness fiber arts art permaculture artisans regional education skip experiences global resources cider press projects digital market permies.com pie forums private forums all forums
this forum made possible by our volunteer staff, including ...
master stewards:
  • Nancy Reading
  • Carla Burke
  • r ranson
  • John F Dean
  • paul wheaton
  • Pearl Sutton
stewards:
  • Jay Angler
  • Liv Smith
  • Leigh Tate
master gardeners:
  • Christopher Weeks
  • Timothy Norton
gardeners:
  • thomas rubino
  • Jeremy VanGelder
  • Maieshe Ljin

Plumbing Badge Oddball thread

BB plumbing and hot water - straw badge
  • Mark post as helpful
  • send pies
    Number of slices to send:
    Optional 'thank-you' note:
  • Quote
  • Report post to moderator
Some PEP badges allow for oddball points.  This was introduced in this thread.

When submitting something in the official Oddball badge, you get points based on the time it would take a professional to do the same task if they have a bit of luck.

When submitting something within a badge that allows oddball points (Homesteading, Metalworking, etc), they are based on the time it would take a talented newbie to do the same task.

When you did something that should be in a badge but there isn't a BB for it, post about it in that badge and maybe it will become a BB.  If that badge allows oddball points, you can submit it there, otherwise it has to go into Oddball badge.

Some examples:
You welded up a 20 foot unicorn - put it into the Metalworking Oddball thread
You made a candle - put it in the regular Oddball thread since it isn't a clear fit for an existing badge
You build a pump house - post it in Homesteading since it should be a BB there and/or put it in Homesteading Oddball
COMMENTS:
 
Posts: 34
Location: Eastern Missouri 6a
24
kids dog trees chicken bike building
  • Likes 2
  • Mark post as helpful
  • send pies
    Number of slices to send:
    Optional 'thank-you' note:
  • Quote
  • Report post to moderator
I had to do routine service on a well water filtration system.  I didn't see a badge for it but figured it might be worth some oddball points.

I had to secure the water intake, change out the filter and clean out the housing, and restock the brine tank.

All told it probably took 20-30 minutes.
IMG_20210619_144502_747.jpg
Securing the water filter intake and outflow (bypass left secured as well)
IMG_20210619_143235_592.jpg
Wrenching the filter housing open
IMG_20210619_144108_712.jpg
Old filter (lots of iron in the water here!)
IMG_20210619_142736_006.jpg
Filter intake and outflow reopened
IMG_20210622_063022_245.jpg
Bine tank stocked with anti iron pellets
Staff note :

Approved for 1/2 point

 
pollinator
Posts: 1495
855
2
trees bike woodworking
  • Likes 4
  • Mark post as helpful
  • send pies
    Number of slices to send:
    Optional 'thank-you' note:
  • Quote
  • Report post to moderator
Approved submission
I feel the journey to my next Oddball Milestone will be long. So here’s the next tiny step.

Fix slow draining kitchen sink and stop weird glugging noise

The kitchen sink wasn’t draining as well as it should and every now and then there would be some strangle gurgling and glugging noise, which irritated my slightly OCD wife! Do we call the landlord? Do we call a plumber? In the words of Bob the Builder Can we fix it? Yes, we can!

I cleared everything out from under the sink. Then I notified every one what I was up to, taped the tap shut and put a large mixing bowl under the u-bend before removing all the gubbins.


A large slimy lump of black gunk plopped out.


The pipes were coated with a thick layer of black slime. The vent unit was totally clogged.


I took everything to the basement sink and cleaned the tubes with an old flannel.


I now had a whole family of slime things.


And clean pipes.


I reinstalled all the parts.


Sink draining properly and no strange noises. Happy wife . . . Job done.
Staff note (gir bot) :

Someone approved this submission.
Note: Certified for 1 plumbing oddball point!

 
steward
Posts: 15505
Location: Northern WI (zone 4)
4846
7
hunting trees books food preservation solar woodworking
  • Likes 2
  • Mark post as helpful
  • send pies
    Number of slices to send:
    Optional 'thank-you' note:
  • Quote
  • Report post to moderator
Approved submission
I installed a back up water pump in my plumbing system.  That way we'll be able to get potable water even if the power is out.  I bought an Oasis hand pump.  If you get one, buy it directly from Tim at Oasis pumps for a much better price than through the distributors.

I had to tee into my plumbing before and after my shallow jet pump to create the manual pump bypass.  I messed up the first go around because I wanted a system that would work without turning valves on and off.  So I put a check valve between the electric pump and the pressure tank to keep the hand pump from pumping in a circle.  Unfortunately that messed with the electric pump and it needed to be removed.  

So I partially disassembled it and replaced that with a valve and added a valve at the outlet of the hand pump.  Now I can just turn some valves and manually pump water into my pressure tank and around the house.

I found that I can develop about 24psi of pressure with the pump.  If I wanted to let some air out of the pressure tank balloon, I could pump several gallons into the tank and I could use faucets around the house.  They'd be a bit slower than normal but it's better than hauling water from the lake and filtering it.  As is I could pump about 3 quarts of water into the pressure tank.  When pumping right out of the spigot by the pump, I could generate a quart of water in 6 pumps.

Starting-position.jpg
Starting position
Starting position
Tearing-things-apart-pump-mounted.jpg
Tearing things apart, pump mounted
Done-Oh-crap-the-electric-pump-doesn-t-work...-Oh-it-s-that-new-check-valve-to-the-right-of-the-gauge.-Damn...jpg
Done! Oh crap, the electric pump doesn't work... Oh, it's that new check valve to the right of the gauge. Damn..
Take-it-apart-again.jpg
Take it apart again
Take it apart again
New-valve-here.jpg
New valve here
New valve here
New-valves-on-either-side-of-the-hand-pump-plus-another-union-to-make-removal-easier.-All-done-.jpg
New valves on either side of the hand pump, plus another union to make removal easier. All done!
Staff note (gir bot) :

Someone approved this submission.
Note: Certified for 6 plumbing oddball points.

 
gardener
Posts: 1569
Location: Washington State
985
6
forest garden trees rabbit earthworks composting toilet fiber arts sheep wood heat woodworking rocket stoves homestead
  • Likes 2
  • Mark post as helpful
  • send pies
    Number of slices to send:
    Optional 'thank-you' note:
  • Quote
  • Report post to moderator
With 40 acres as a private venue campground, there is often maintenance and upgrades.  We have six four-stall permanent outhouses and one (two-stall) willow feeder for use by campers. This spring, while preparing (cleaning, stocking, etc.) the campground for our spring event and summer rentals, I replaced three toilet seats.   Since there is no replace a toilet seat BB, I'm hoping this is worth some points here.
0.JPG
Our 4-Stall Permanent "Honey Bucket" Style Outhouses
1.JPG
Typical Stall - before
2.JPG
Stall 1 - during (white seat removed)
3.JPG
Stall 1 - After - new wood seat installed
5.JPG
Stall 2 - During
Stall 2 - During
6.JPG
Stall 3 - After
Stall 3 - After
7.JPG
Three old white seats on the way to the landfill
 
Edward Norton
pollinator
Posts: 1495
855
2
trees bike woodworking
  • Likes 5
  • Mark post as helpful
  • send pies
    Number of slices to send:
    Optional 'thank-you' note:
  • Quote
  • Report post to moderator
Approved submission
Basement Waste Water repair

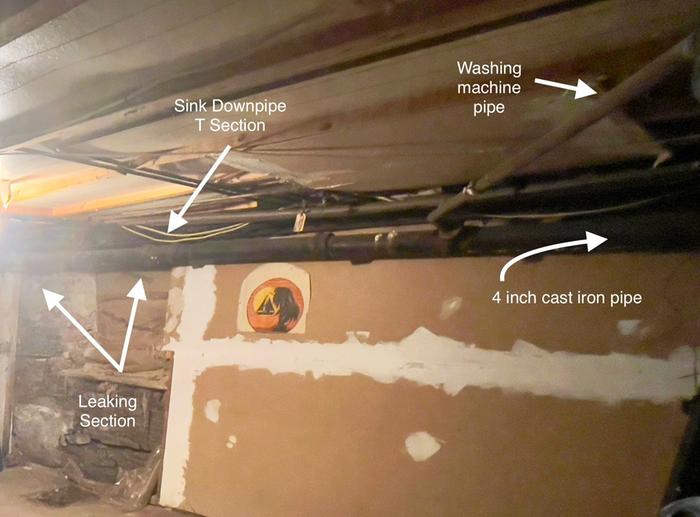
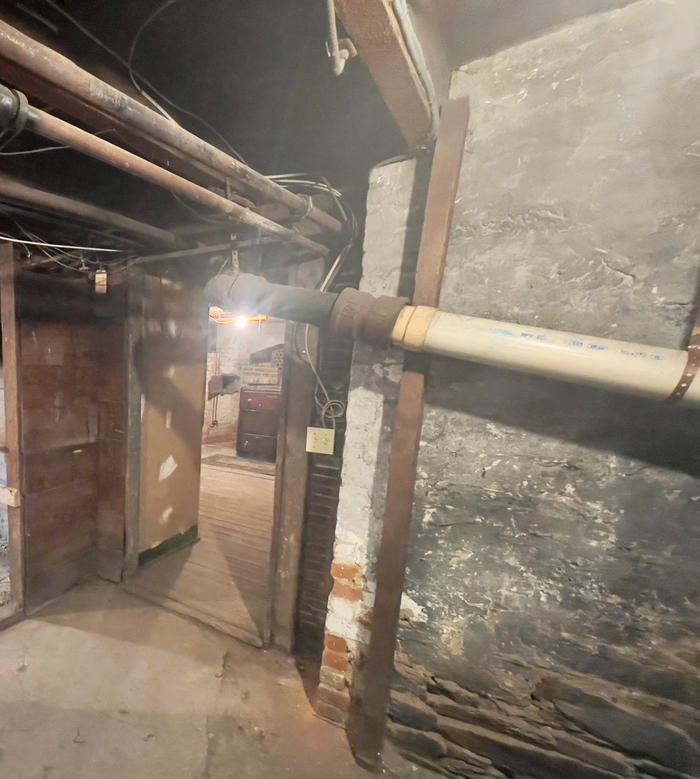
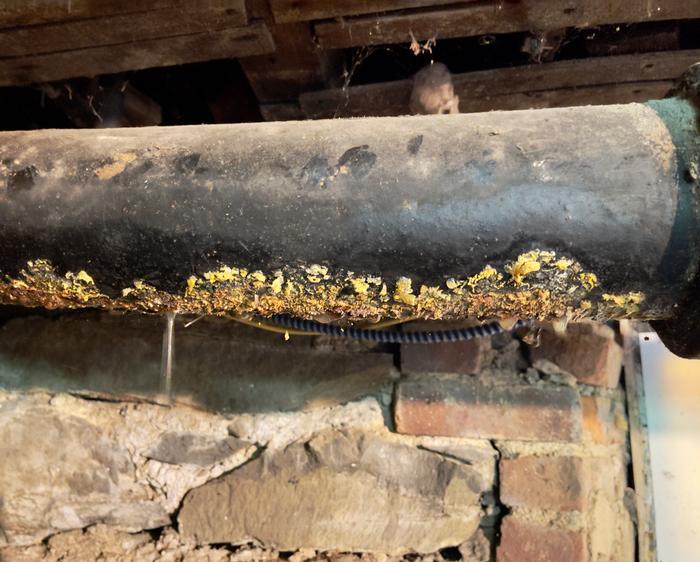
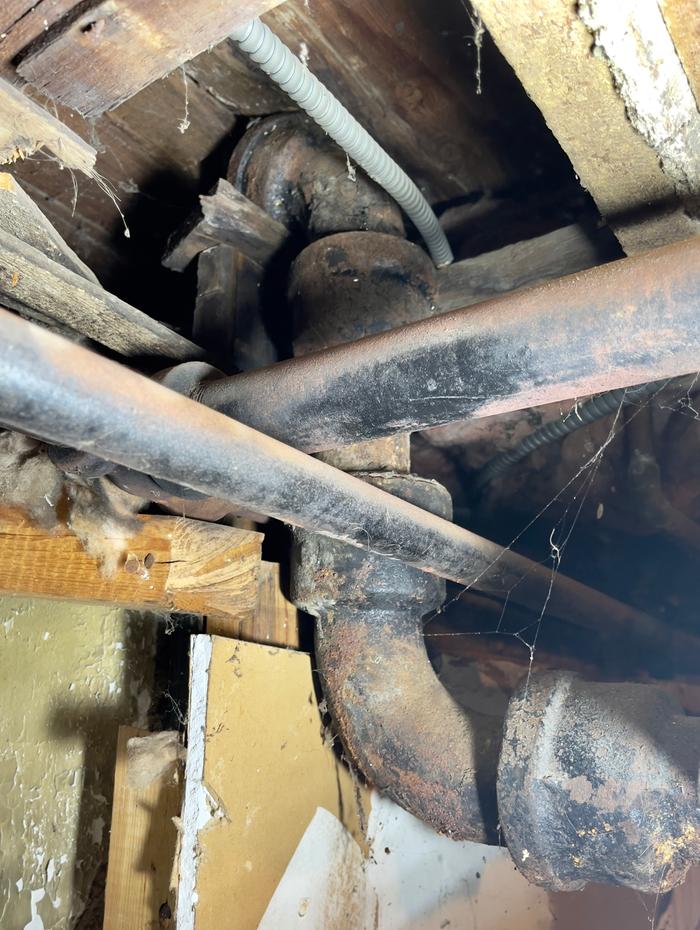
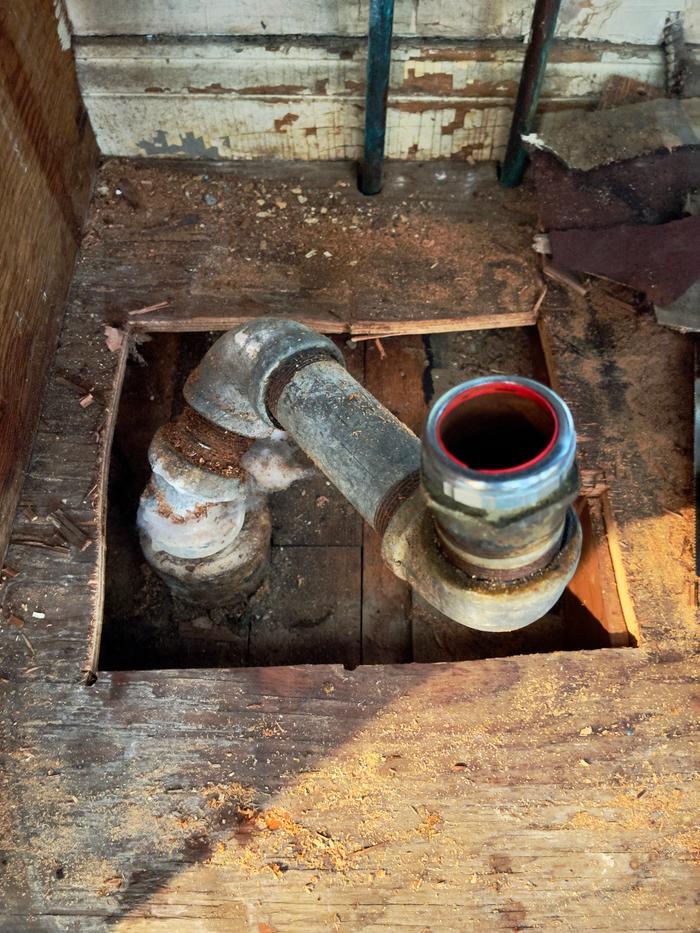
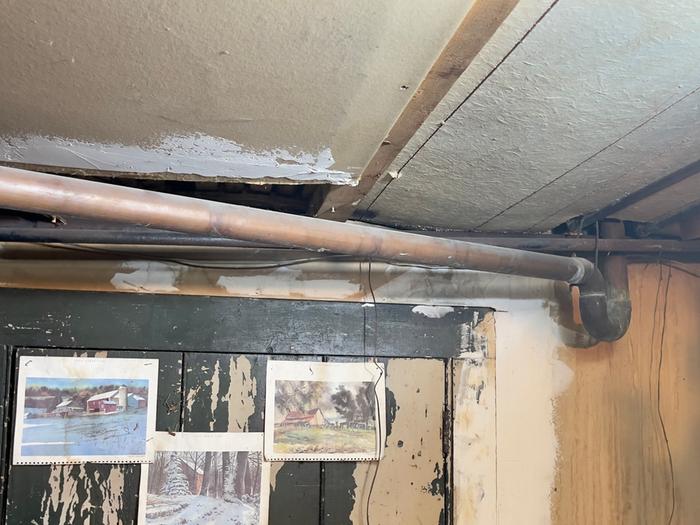
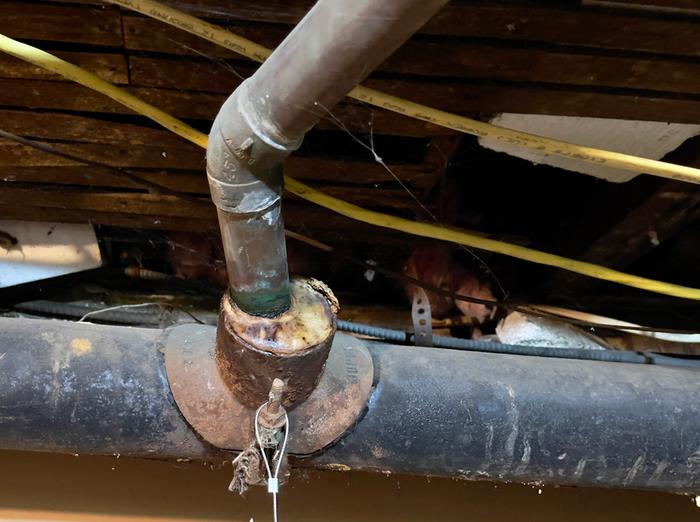
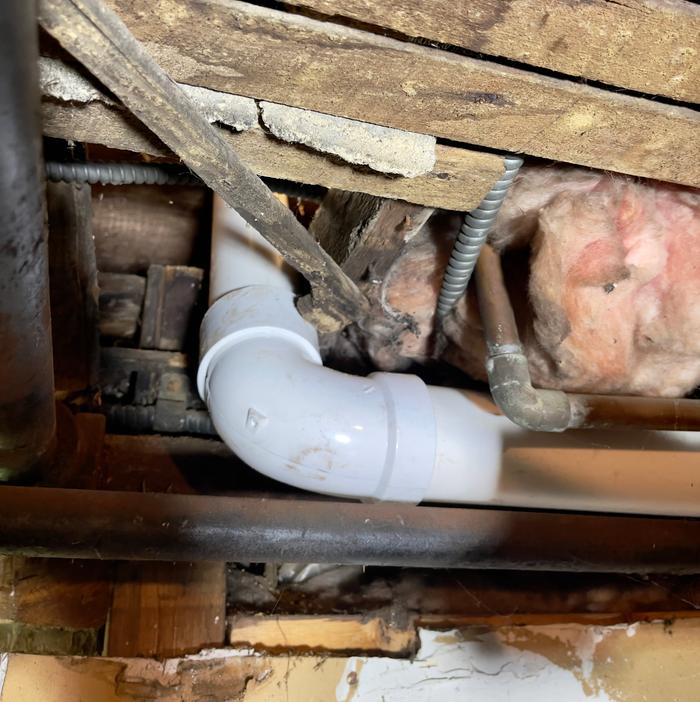
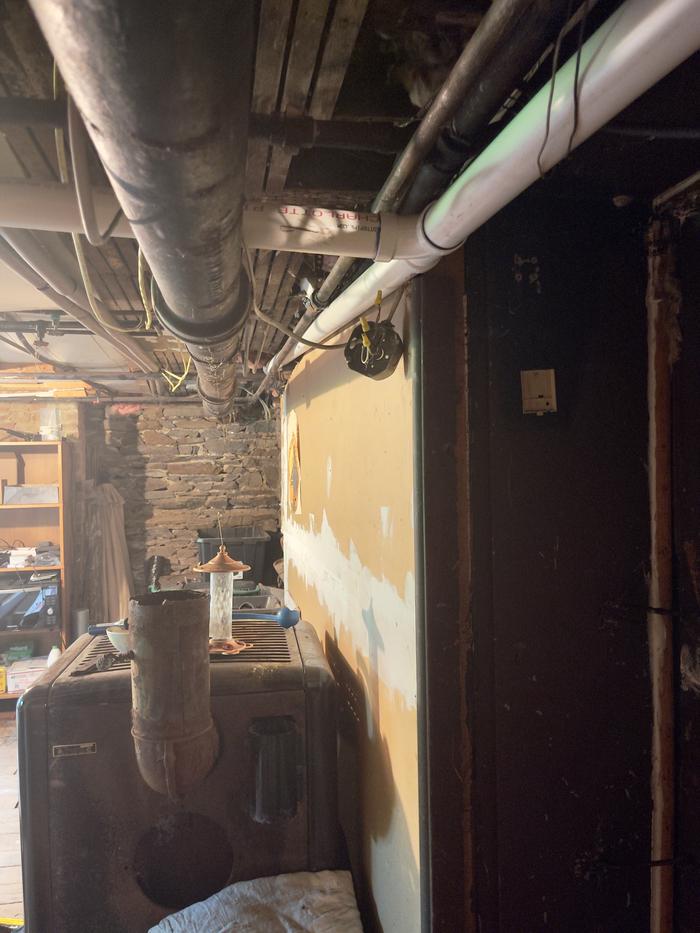
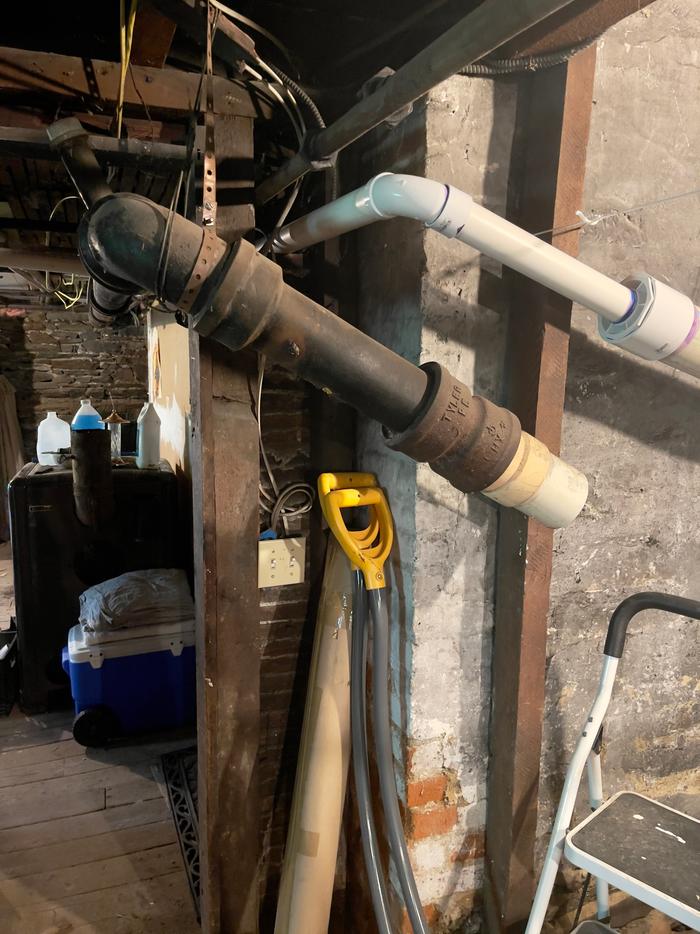
There’s a 4 inch cast iron waste pipe in my basement. It used to be connected to a bathroom that no longer exists. It is still used by the kitchen sink and washing machine. The pipe runs the full length of the basement, it is badly installed running through door frames, tied up with random bits of wire. It is also heavily corroded, drips in a couple of places and was on my long list of tasks to be done. On Thursday it jumped to the top of the list after a large crack appeared and kitchen sink water was flowing out at an unacceptable rate.


The problem pipe - picture taken when we first moved in


Pipe runs through a door frame and at head height across backdoor - yes, I have banged my head on it more than once


Leaking and corroded section

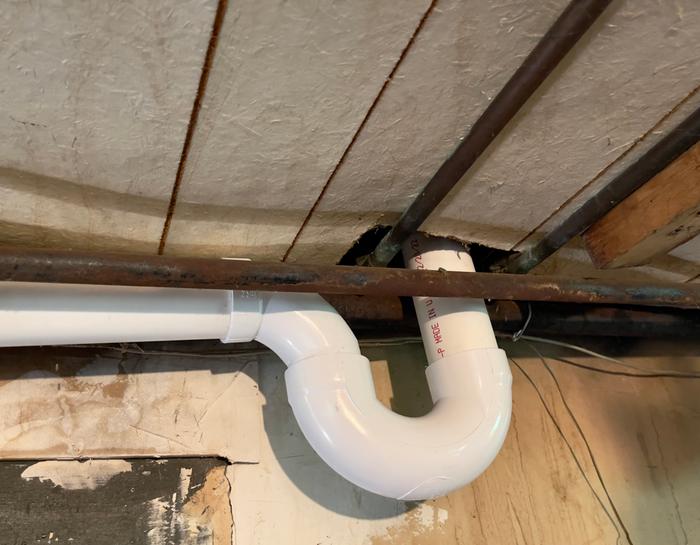
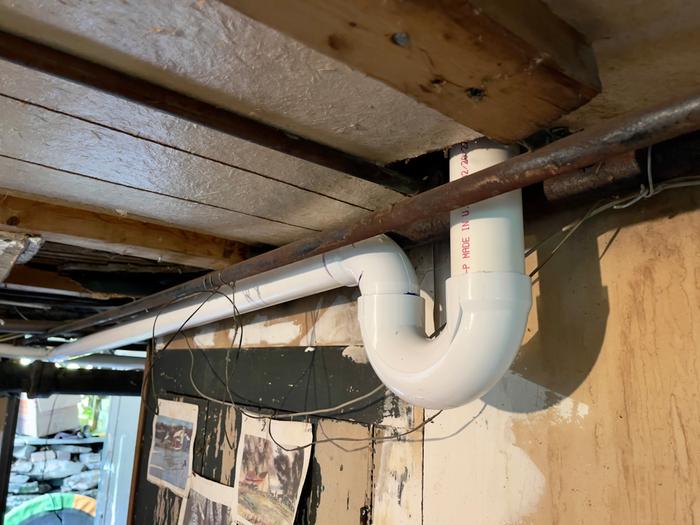
I will rip out the entire kitchen and install a new kitchen when time and money allow. The room under the kitchen is currently a store room that also needs a lot of work including removing / rerouting / replacing all pipes and wires that crisscross the ceiling. The ceiling itself is a disaster - layers and layers of bodges. All this will be done, but not today. Today I need a rapid solution, but I was going to do things properly, code compliant and within the constraints of existing services. This isn’t a final solution, pipes will be rerouted into the ceiling space when i renovate the two rooms.

I started by removing the section of pipe that was leaking, working from the section that comes down from the old bathroom towards the sink T section. I used a demolition chisel and hammer to crack the cast iron in a controlled fashion.


The inside of the pipe was a semisolid mass of waste and a fine gravel which I assume is cat litter as the previous owner had 18 cats . . .

Once I removed the pipe as far as the kitchen T section, I started working on removing the kitchen sink waste water pipe.


The pipe had a total of seven elbows threaded through existing services. Every joint was correded and set solid.


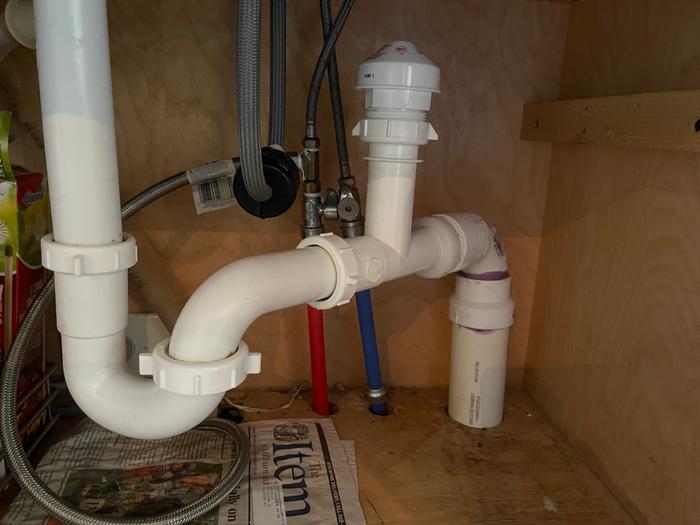
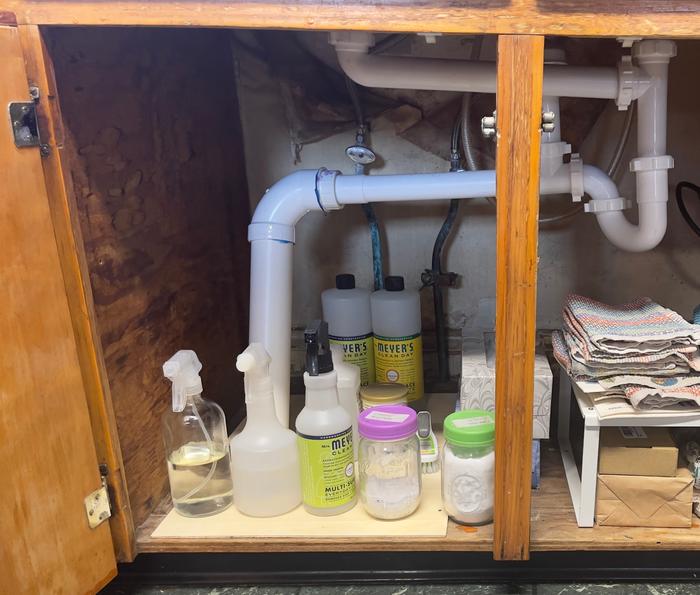
Section in the under-sink cupboard


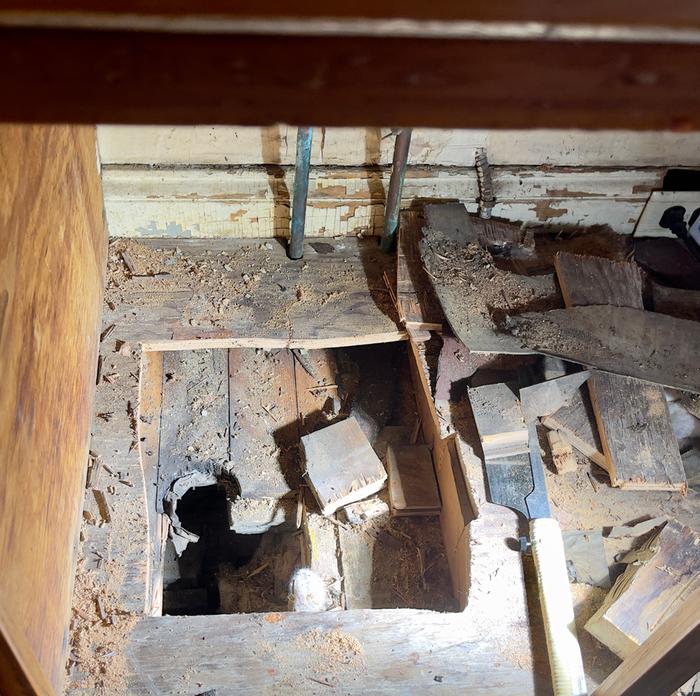
After removing two layers of plywood, old kitchen tiles and two layers of floorboards, I could remove the old waste pipe

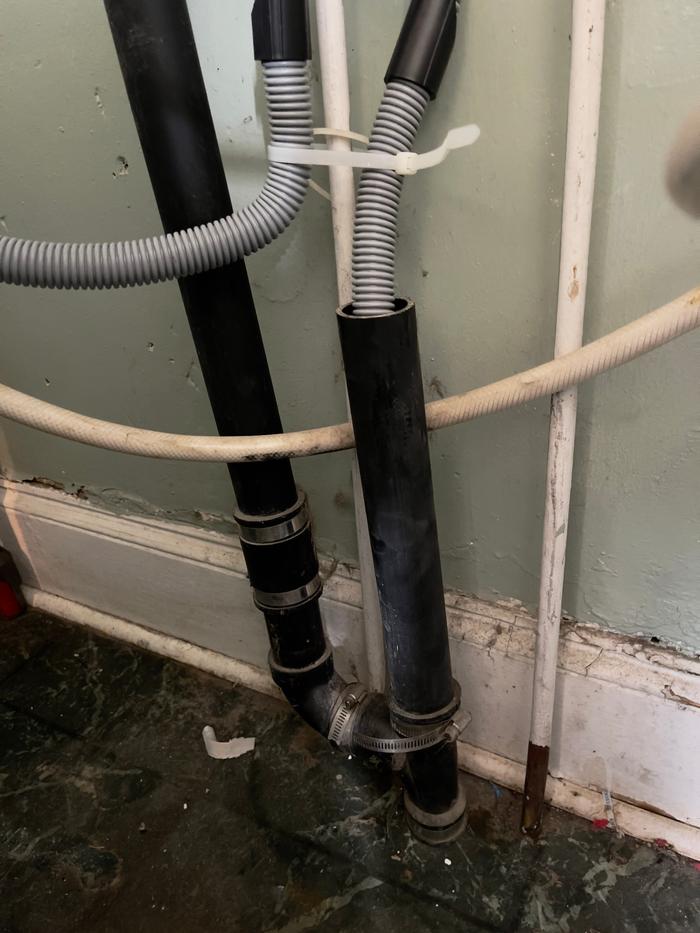
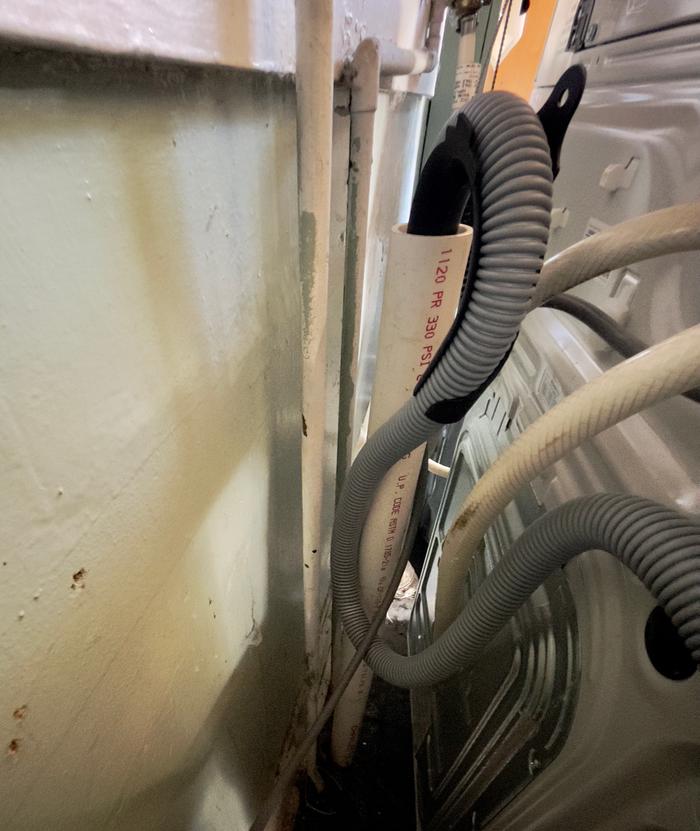
The waste pipe from the washing machine needed repalcing because it isn’t code compliant - less than two inches in diameter and no slope.


Behind the washing machine


Basement section which is flat horizontal


Connection with cast iron pipe which occasionally drips


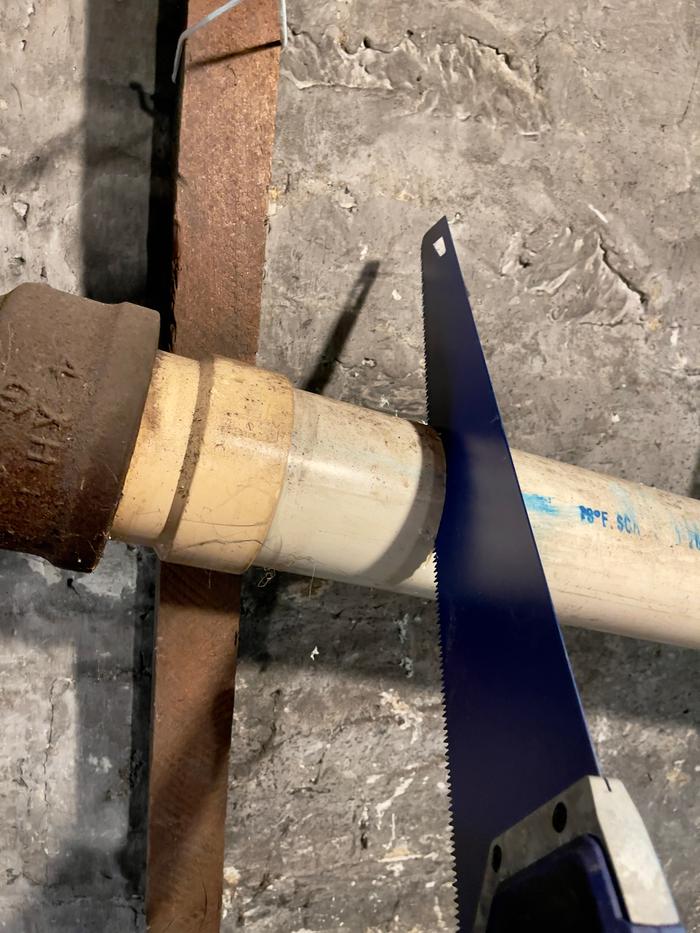
For now I’m using the existing 4 inch PVC pipe, I just needed to remove the cast iron section.

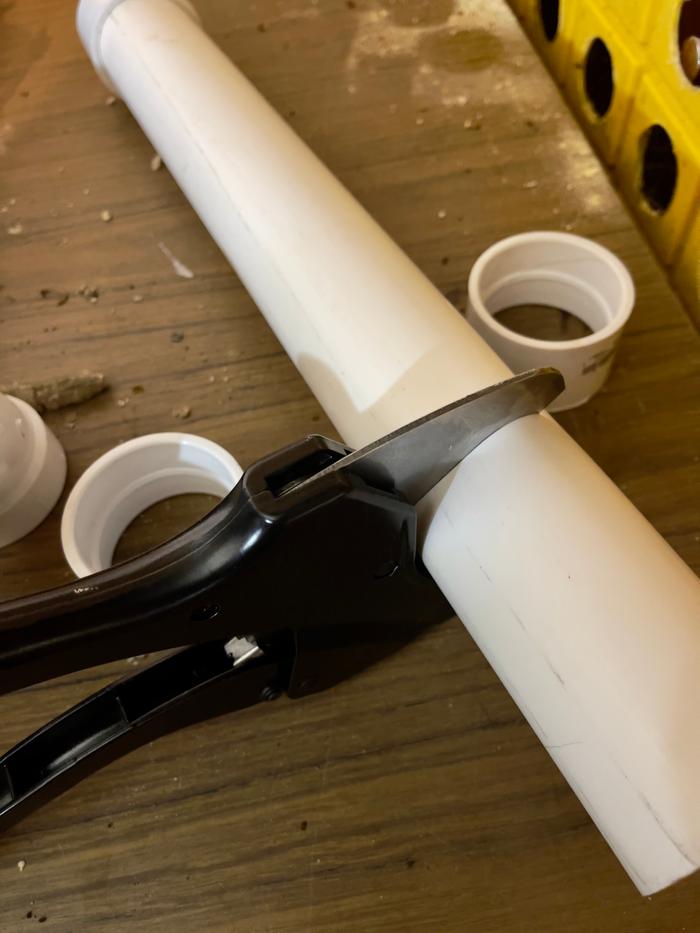
Now I could start measuring and cutting pipe. I did an entire dry fit before glueing up.


Cutting pipe


Dry fitting


Dry fitting


Glue up


Checking pipe slope for code compliance


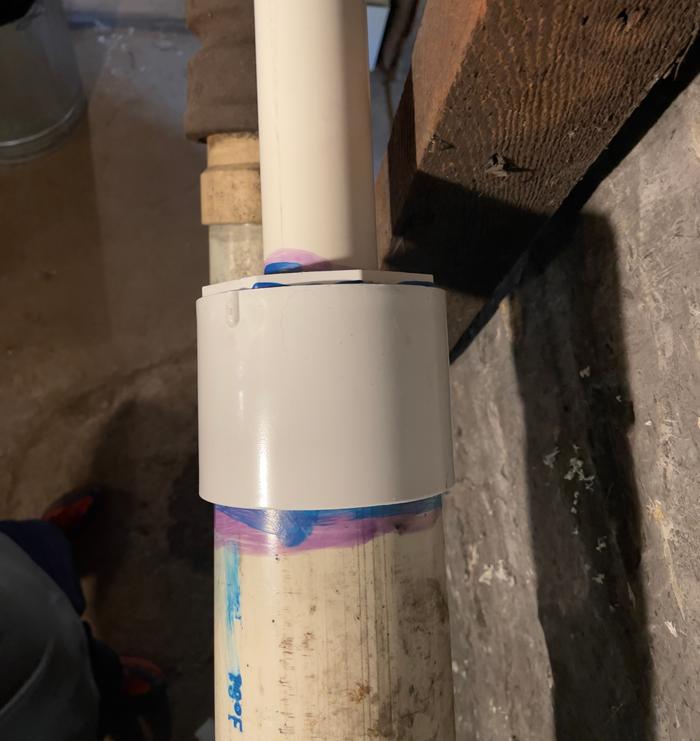
2 inch to 4 inch joint


Washing machine section completed


New section next to old - increase of five inches head clearance


Old section going through door frame next to new section


Washing machine connected and working as planned


Kitchen sink connected and working

It took me and my son all day to do this work. I’ve done some basic plumbing before but only with sections that screw together, the plumbing you can see under the sink that was a previous plumbing odd ball. We needed to do a fair ammount of research making sure it was done properly and to code. Since moving in the room under the kitchen has been used as a store room mostly for gardening stuff. It all needed boxing and moving out before we could get started. The existing pipe required full PPE - not plesant in the current heatwave! The primer and cement were also pretty unpleasant and my son was rightly worryed about the toxicity.

We both learnt a lot and happy with the result. I look forward to renovating the kitchen and moving the plumbing into the ceiling / floor space.
Staff note (gir bot) :

Someone approved this submission.
Note: Certified for 8 points - Good job!

 
Mike Haasl
steward
Posts: 15505
Location: Northern WI (zone 4)
4846
7
hunting trees books food preservation solar woodworking
  • Likes 3
  • Mark post as helpful
  • send pies
    Number of slices to send:
    Optional 'thank-you' note:
  • Quote
  • Report post to moderator
Approved submission
I set up a water pump and pressure tank for rainwater in my greenhouse!  There is a BB for setting up a potable pump but this water isn't potable so I'm just putting the whole system here in oddball.

First, the water is mostly filtered before it gets to the greenhouse but I heard that household pumps can't handle any debris on their pumpy parts so I started with a whole house filter.  Then I mated a pump from the Habitat Restore to a new pressure tank with a hunk of wood.  Then a bunch of plumbing ensued to connect it all up, keep it as compact as possible and allow for various unknown future uses.  

My main intent is to be able to water without turning on a sprinkler pump all the time.

After getting it all together I realized I needed a check valve before the pump or the pressure tank would just relieve itself back through the pump to the rain barrels.  So I had to redo all the plumbing between the filter and the pump today.

My normal plumbing projects require an average of 4 trips to Menards and have 1 leak.  This one took 6 trips and had zero leaks :)

Photo notes:
1. Original water entry before I did anything with pumps
2. Sorting out filter plumbing bits
3. Filter installed for a sprinkler pump.  Worked great till the sprinkler pump died.....
4. Layout as of a week ago as phase 2 began
5. Mating pump and tank with bolts in the way using a block of wood with relief holes cut in it
6. Pump and tank together, added feet so it wouldn't sink into the ground over time.  Untreated wood so hopefully it stays dry and lasts a decent while...
7. Pump in position
8. Laying out the plumbing
9. First run is done.  Turns out I had to redo it this morning cuz of the need for a check valve...
10. All together and spraying water!!!
11. Piping all together, pressure gauge, unions and all the works
12. Alternate view.  2' stub to the left for potential connection to a line that goes over to the garden in the future
13. End of the run at the other side of the greenhouse.  This system has two spigots and two spots with threaded plugs for potentially adding more spigots or connections in the future.
20220812_121707.jpg
[Thumbnail for 20220812_121707.jpg]
20220812_121716.jpg
[Thumbnail for 20220812_121716.jpg]
20220812_124352.jpg
[Thumbnail for 20220812_124352.jpg]
20220912_163120.jpg
[Thumbnail for 20220912_163120.jpg]
20220912_163310.jpg
[Thumbnail for 20220912_163310.jpg]
20220912_165706.jpg
[Thumbnail for 20220912_165706.jpg]
20220912_173444.jpg
[Thumbnail for 20220912_173444.jpg]
20220912_174218.jpg
[Thumbnail for 20220912_174218.jpg]
20220913_153717.jpg
[Thumbnail for 20220913_153717.jpg]
20220915_161806.jpg
[Thumbnail for 20220915_161806.jpg]
20220915_163251.jpg
[Thumbnail for 20220915_163251.jpg]
20220915_163256.jpg
[Thumbnail for 20220915_163256.jpg]
20220915_163310.jpg
[Thumbnail for 20220915_163310.jpg]
Staff note (gir bot) :

Edward Norton approved this submission.
Note: Certified for 10 points - nice work

 
Posts: 95
Location: Billings, MT
53
homeschooling kids trees food preservation fiber arts building
  • Likes 5
  • Mark post as helpful
  • send pies
    Number of slices to send:
    Optional 'thank-you' note:
  • Quote
  • Report post to moderator
Approved submission
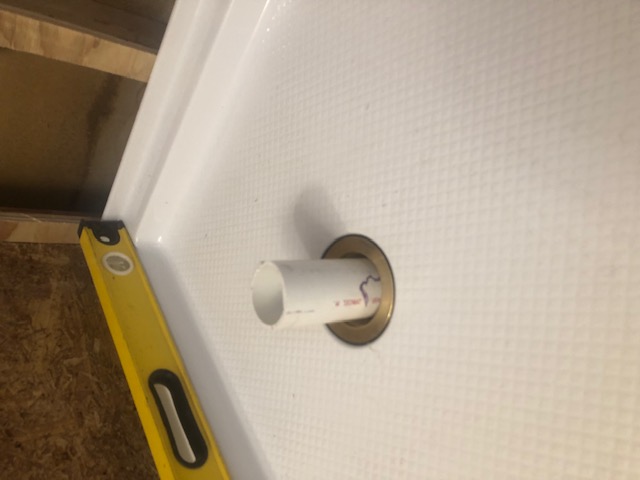
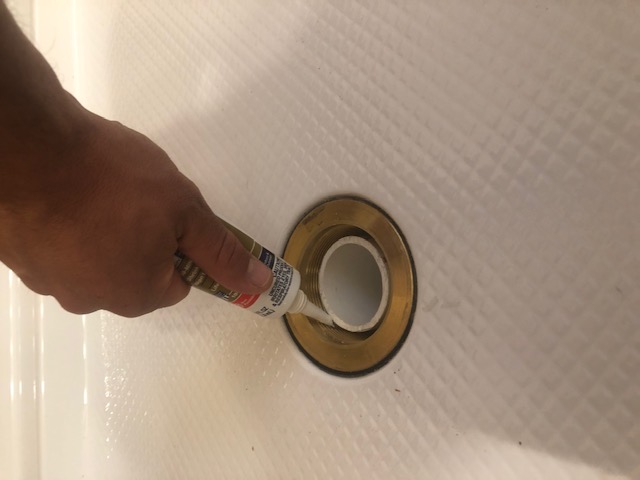
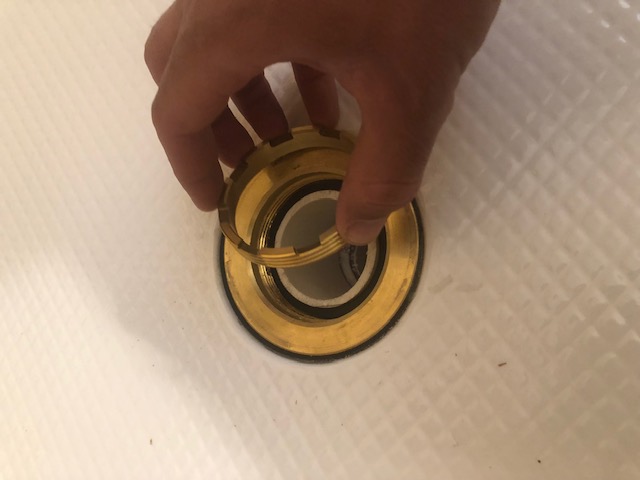
I was on a shower remodel job and had to change the drain size to meet code from bath (1.5") to shower (2") before/while installing a shower pan.  It is kind of like moving a drain and vent (which is a BB), but not as involved but still plumbing.
Pan-Drain-1.jpg
Shower pan
Shower pan
Pan-Drain-2.jpg
drain caulked
drain caulked
Pan-Drain-3.jpg
Drain installed on shower pan
No-Drain.jpg
No piping
No piping
Test-Fit-2.jpg
Test fit new pipe
Test fit new pipe
Priming-and-gluing.jpeg
Prime and glue
Prime and glue
New-Drain.jpg
Glued up and cut to height
Silicone.jpg
caulk for good measure
Seal.jpg
seal in
seal in
Seal-2.jpg
brass ring in
brass ring in
Drain-done.jpg
Drain and shower pan installed
Staff note (gir bot) :

Mike Barkley approved this submission.
Note: Certified for 2 plumbing oddball points.

 
pollinator
Posts: 104
Location: PNW Steppe climate, not far from the big river.
57
2
homeschooling kids solar wood heat homestead
  • Likes 4
  • Mark post as helpful
  • send pies
    Number of slices to send:
    Optional 'thank-you' note:
  • Quote
  • Report post to moderator
Approved submission
Hey PEP-folks,
Oddball plumbing bits that befell me recently.
A 2500 gallon HDPE cistern had a bad seam weld from the manufacturer, and had a pinhole leak.
My first time using a thermal poly welder did not 100% get the leak path (it was a windy day when I did it, hard to keep the heat).
My second go-round found the flappy bits of the first patch, and cleaned/heated/smushed them into shape, bonding with the base polyethylene.
The poly welder is basically a glorified soldering iron, with a trowel-type tip. The kit includes rods of filler and a fine stainless mesh which can be used to bridge and strengthen affected areas. If it happens again, I want to deploy the heat gun to help soften the affected area, and make the welder more effective, rather than relying only on the heat from the tip.
Total time involved was about 45min, 1st session of ~30min, applying the larger-area patch, and the second session shorter, only melting in the implicated edges.

There's no doubt debate to be had over the use of plastic water tanks, but HDPE is pretty inert, and they are fairly cheap, and very common here in AZ. You work with whats in front of you. Buried concrete tanks with proper plastering would no doubt be better, but considerably more expensive, and would in this county require a permit, which on-grade tanks do not. Such is life.

Happy homesteading!
Mark
leaky-tank-seam.jpg
[Thumbnail for leaky-tank-seam.jpg]
leaky-repair.jpg
[Thumbnail for leaky-repair.jpg]
poly-welder-kit.jpg
[Thumbnail for poly-welder-kit.jpg]
poly-welder-in-action.jpg
[Thumbnail for poly-welder-in-action.jpg]
clean-the-tip.jpg
[Thumbnail for clean-the-tip.jpg]
cleaned-tip.jpg
[Thumbnail for cleaned-tip.jpg]
completed-weld.jpg
[Thumbnail for completed-weld.jpg]
Staff note (gir bot) :

Someone approved this submission.
Note: Certified for 1/2 point

 
master gardener
Posts: 4249
Location: Upstate NY, Zone 5, 43 inch Avg. Rainfall
1721
monies home care dog fungi trees chicken food preservation cooking building composting homestead
  • Likes 2
  • Mark post as helpful
  • send pies
    Number of slices to send:
    Optional 'thank-you' note:
  • Quote
  • Report post to moderator
Approved submission
Short Story

I would like to submit for your consideration a house water main replacement. I hired out for an excavator to do the dirt work to expedite the process due to a water leak cutting off water to two houses. Roughly 80 or so feet of piping, punched through a rubblestone basement wall, installed to a main shutoff and then to the meter. I have not had experience with this type of pipe but having the basics of plumbing made it fairly easy to handle.  A day of work at a careful pace.

The village side couldn't let their excavator punch through a remaining chunk of dirt so I had to hand dig it and feed the pipe through so they could make their connections.


Long Story

For your consideration...

A tale about the not so handy homeowner and the mysterious leak.

The village I live in has been talking for months about the lower water levels at the village reserve. We have a lot of old pipes running under these streets and there was a worry that another main had started to leak (two or three have busted in the recent past). I am pretty chummy with my neighbor who recently moved in as well as the volunteer fire department that is located next to my immediate neighbor. It just so happens that a lot of the volunteers there also work on the village department of public works. My neighbor needed to have the water shut off at the street to be able to repair his main shutoff that was leaking in his basement, he just joined the fire department was well so he knew the village guys, and he gets it all arranged.

I'm home, bebopping around as one does, and I go to turn on my sink to wash dishes and there is nothing. It is about mid-day so I found it odd as I haven't been alerted to any planned water outage. I go outside and see a handful of guys fiddling around at the shutoff so I walk over and casually ask when they expect water back to the street. They looked at me silent for a moment before somebody said they only shut off water to my neighbors house.

Guys, I was tied into my neighbors water feed line. We each had our own meters, but we didn't have an independent shutoff for our individual houses at the curb.

GUYS, THE DPW WORKERS FOUND OUT WHERE THE LEAK WAS THAT WAS DRAINING THE WATER RESERVES.

No pressure right?

My neighbor and I got another fella we both knew with an excavator and hired him to cut us two lines to our house along our property line because the way the pipes were already plumbed didn't make sense.

The hardest part of the process, and the most back breaking was trying to get a hole through my rubblestone foundation. The house is estimated to be built in the 1850s but that foundation was tough. I managed to get enough of a hole to slide the copper pipe through. It has now convinced me to start repointing my foundation on the inside but that is for a separate project.

Once the pipe got laid out, I needed to put in a shutoff for the main and then hook it into the meter which was straight forward. I made sure to clean the pipe up nice but it being brand new it was a pleasure to use over old existing copper.

The DPW made their connections and no leaks were had. No plumbing was damaged and air was purged from the pipes thankfully.

So crisis averted, now I can boast about my new copper water main that should last way past my lifespan.
Main1.png
We are in trouble.
We are in trouble.
Main2.PNG
My old galvanized main, cut the pipe at the valve and the rest came with it.
Main3.PNG
Village side new valves
Main4.PNG
Trenched
Trenched
Main5.PNG
Rubblestone foundation
Main6.png
They wouldn't connect it... Hand Dig Time
Main7.png
Connected to Village Valves
Main8.jpg
Pipe coming from wall, valve, to meter
Main9.jpg
Better shot of connection to the meter
Staff note (gir bot) :

Someone approved this submission.
Note: Certified for 2.5 points (only the plumbing work counted)

 
It wasn't my idea to go to some crazy nightclub in the middle of nowhere. I just wanted to stay home and cuddle with this tiny ad:
rocket mass heater risers: materials and design eBook
https://permies.com/w/risers-ebook
reply
    Bookmark Topic Watch Topic
  • New Topic