• Post Reply Bookmark Topic Watch Topic
  • New Topic
permaculture forums growies critters building homesteading energy monies kitchen purity ungarbage community wilderness fiber arts art permaculture artisans regional education skip experiences global resources cider press projects digital market permies.com pie forums private forums all forums
this forum made possible by our volunteer staff, including ...
master stewards:
  • Nancy Reading
  • Carla Burke
  • r ranson
  • John F Dean
  • paul wheaton
  • Pearl Sutton
stewards:
  • Jay Angler
  • Liv Smith
  • Leigh Tate
master gardeners:
  • Christopher Weeks
  • Timothy Norton
gardeners:
  • thomas rubino
  • Jeremy VanGelder
  • Maieshe Ljin

Continuing Adventure in Roundwood Timber Framing

 
Posts: 70
Location: nemo, 5a/b
18
3
kids fungi foraging trees cooking building
  • Likes 6
  • Mark post as helpful
  • send pies
    Number of slices to send:
    Optional 'thank-you' note:
  • Quote
  • Report post to moderator
Hello everyone,
I'm still new here, but I wanted to share my ongoing experiment with Roundwood Timber Framing. We are essentially following the plans from Ben Law's Roundwood Timber Framing book, and will end up with something quite similar to his first build. My partner and I will be heading back to our land in a few days now that the weather has become campable again.

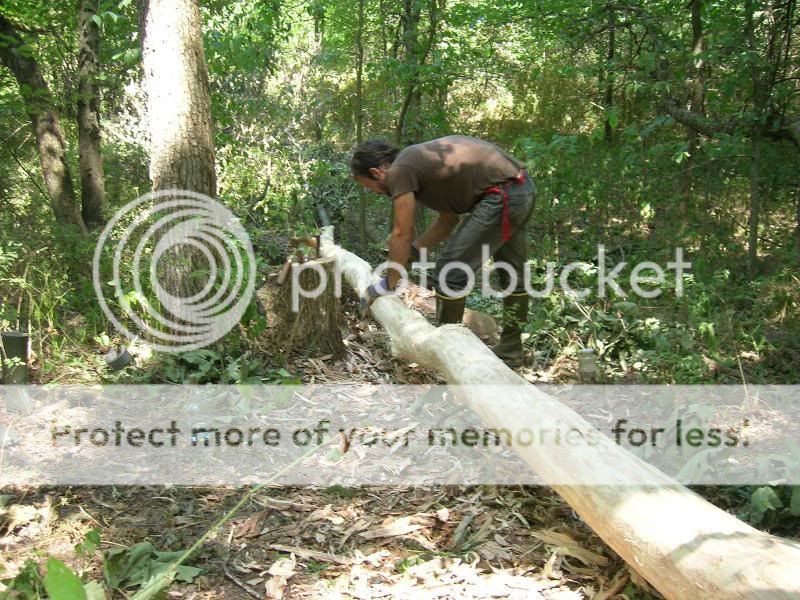
Last year we harvested the main 16 timbers for the jowls and crucks (not quite sure if I'm using the correct terms). Anyway, the ones that will be exposed underneath the structure.
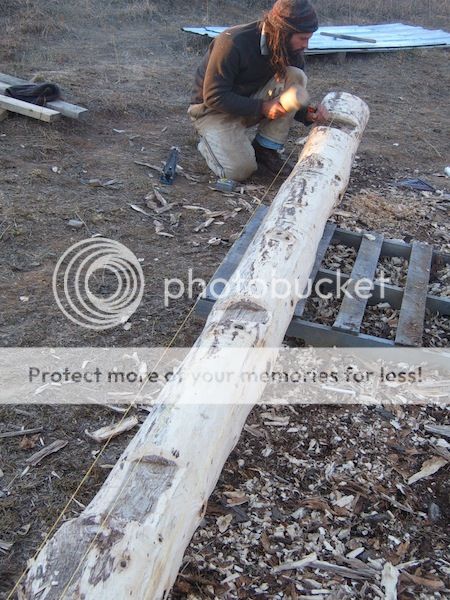
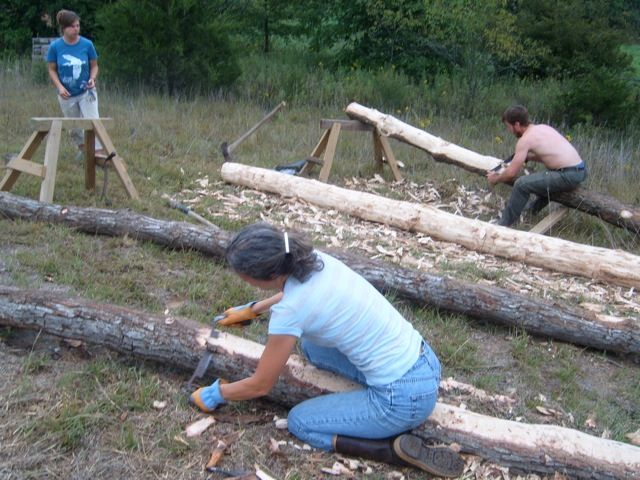
We're using white oak harvested from the forest on our land. It's all 2nd or 3rd growth that needed a good thinning, and they seem to be a pretty good size. Also, the longer diagonal timbers all have a bit of a bend to them which would be bad for milling, but great for our purposes. We peeled the bark off a lot of them right where we cut them in order to return some organic matter back to the forest floor.


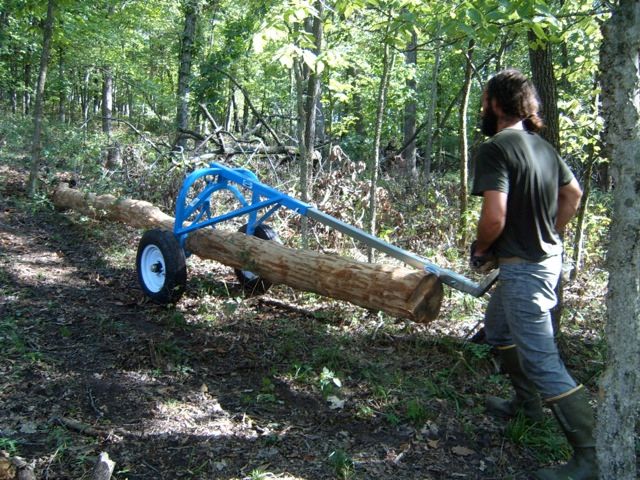
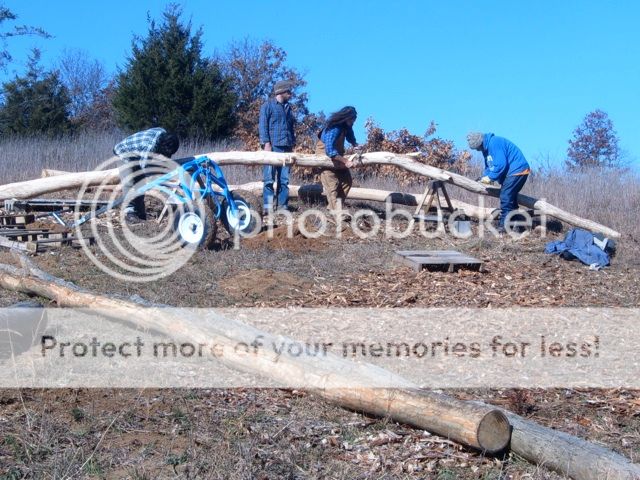
Our friends down the road had recently bought a log arch which I used to try and maneuver some trees out of the woods.


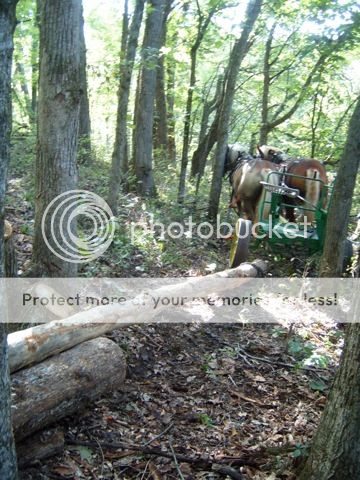
It's a wonderful tool that allows you to move incredibly heavy logs with one or two people. I had no trouble going downhill especially, but any incline made it exponentially harder. Eventually our Amish neighbor brought over his draft horses and made it all much easier.


We had a tricky time getting them across a seasonal creek, but with some extra long chains we got them all across and over to the building site.
Fortunately we have a number of lovely friends in the area who were willing to come over for some log peeling work parties.


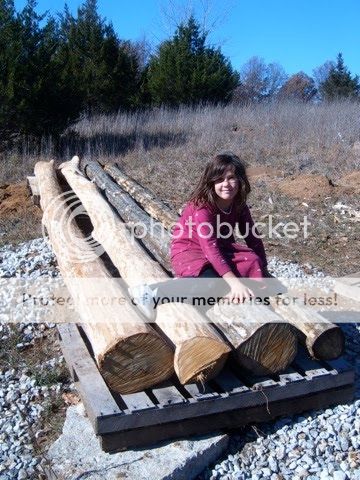
After getting all the logs peeled we got them up off the ground and left for the winter.


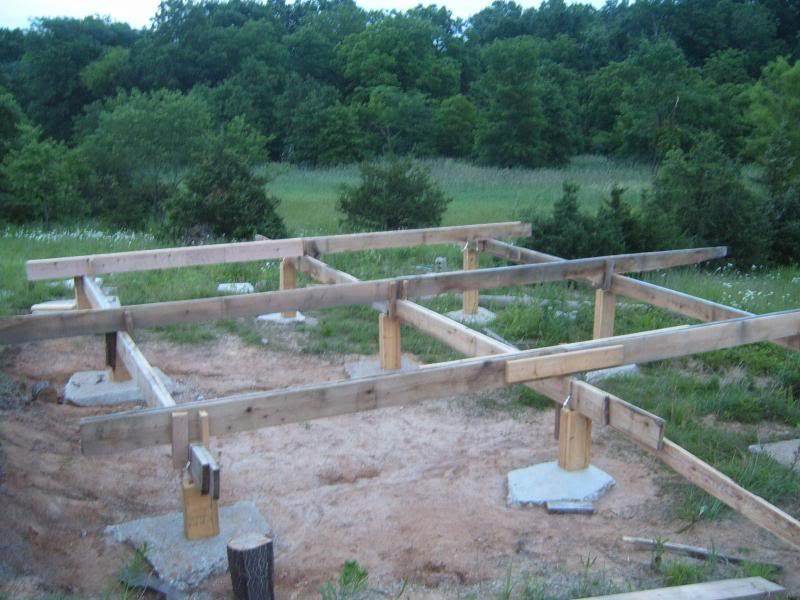
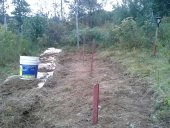
Earlier that year we had dug the pits and filled them with gravel for the foundation. We were able to get some nice pieces of urbanite from a nearby house that was getting torn down. I don't have pictures of that at the moment.

So when we return we're hoping to build the framing bed and start notching out the joints. If all goes well we'd like to get the frame raised and maybe put of roof on before we have to leave in the fall. Who knows how things will go and what unforeseen obstacles will arise?

If there is any interest I could post updates and more pictures as we continue to build. Also, if anyone has experience with this building style I'd appreciate any advice or feedback or whatever tidbits you'd like to contribute!

-WY
 
pollinator
Posts: 4715
Location: Zones 2-4 Wyoming and 4-5 Colorado
492
3
hugelkultur forest garden fungi books bee greening the desert
  • Mark post as helpful
  • send pies
    Number of slices to send:
    Optional 'thank-you' note:
  • Quote
  • Report post to moderator
Howdy Mike, I am interested in watching and hearing about your progress. Someday in the next five or so years I hope to build a log hogan or two on my property in Wyoming.
 
gardener
Posts: 345
Location: Midcoast Maine, Zone 5b
24
  • Mark post as helpful
  • send pies
    Number of slices to send:
    Optional 'thank-you' note:
  • Quote
  • Report post to moderator
Wish I had some Amish neighbors! Looking forward to seeing your project come together.
 
Posts: 6
  • Mark post as helpful
  • send pies
    Number of slices to send:
    Optional 'thank-you' note:
  • Quote
  • Report post to moderator
Hey,
Been framing various projects for the last five years in the round and have a very good understanding.Let us know how ya getting on.
 
Miles Flansburg
pollinator
Posts: 4715
Location: Zones 2-4 Wyoming and 4-5 Colorado
492
3
hugelkultur forest garden fungi books bee greening the desert
  • Mark post as helpful
  • send pies
    Number of slices to send:
    Optional 'thank-you' note:
  • Quote
  • Report post to moderator
Howdy Dylan, Maybe you could start another thread and show us some of your stuff? Have you ever done a hogan ?
 
Mike Patterson
Posts: 70
Location: nemo, 5a/b
18
3
kids fungi foraging trees cooking building
  • Likes 1
  • Mark post as helpful
  • send pies
    Number of slices to send:
    Optional 'thank-you' note:
  • Quote
  • Report post to moderator
Thanks for the replies. Once we get our camp set up and we're back on the land full time I'll have some updates.

The logs seem to have survived the winter just fine. A little discolored and some cracking, but it doesn't seem like it'll be an issue. The foundation might need a few minor adjustments. Our 2x8's for the framing bed seem to be in good shape as well.

One question I have, and maybe Dylan would have some insight, is about what species of tree would be good for the ridge beam and wall plates. I understand that it needs to be quite straight and have minimal tapering. Of the locally available trees, shagbark or shellbark hickory seems to fit those requirements pretty well. We need something about 30 ft. long, and pretty much every other tree species is either very large in diameter by that size or has a lot of tapering. I've seen some cut black locust that looks like it might work as well, but I'm not sure if there's a good local source. Are there any tree species that you might recommend, Dylan?

In other news, the pond we put in last summer has filled up much more than we expected, so that's pretty exciting!

-WY
 
Dylan Walker
Posts: 6
  • Mark post as helpful
  • send pies
    Number of slices to send:
    Optional 'thank-you' note:
  • Quote
  • Report post to moderator
Hey just starting a project so I know the feeling of starting up a build. So exciting it keeps me awake sometimes.
So for us wall plates and ridge poles can be less durable if enclosed and the weather doesn't get to them unless your wall plate is exposed? As am from the other side of the pond I would'nt want to say what species as I'll be just guessing!Though the taper in a pole can be on the underside , so creating a horizontal plane on top. This could work for the ridge pole though it does become problematic as the rafters are at on end resting on the pole and at the other buried in some what.
I haven't had the pleasure of a hogan roof yet but am just starting a recipcal roof,our first. There's great info out there and even spread sheets to work it all out! I will post up some photos when I can...

 
Mike Patterson
Posts: 70
Location: nemo, 5a/b
18
3
kids fungi foraging trees cooking building
  • Likes 1
  • Mark post as helpful
  • send pies
    Number of slices to send:
    Optional 'thank-you' note:
  • Quote
  • Report post to moderator
Thought that I should post an update in case anyone was interested.
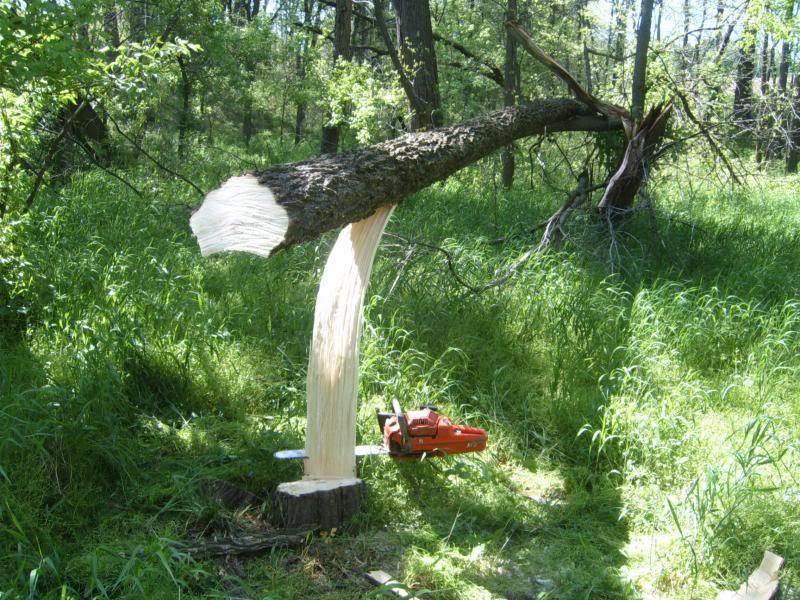
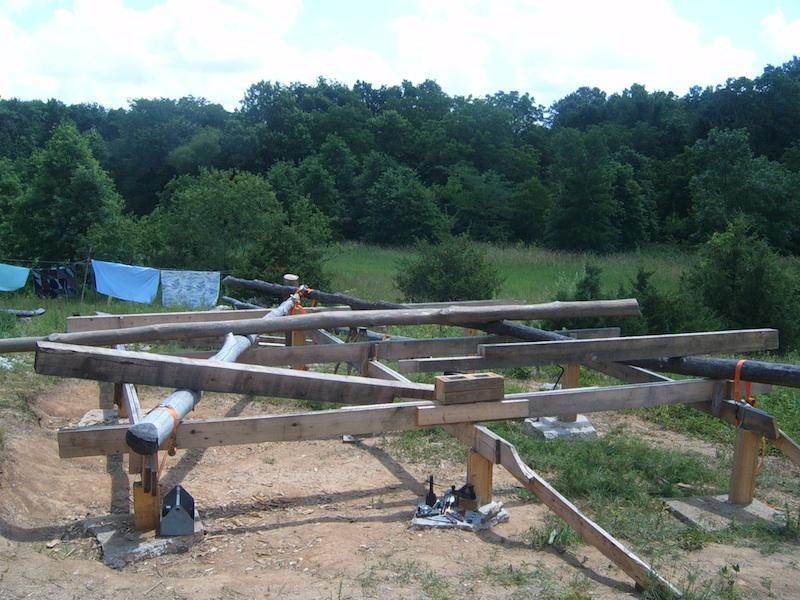
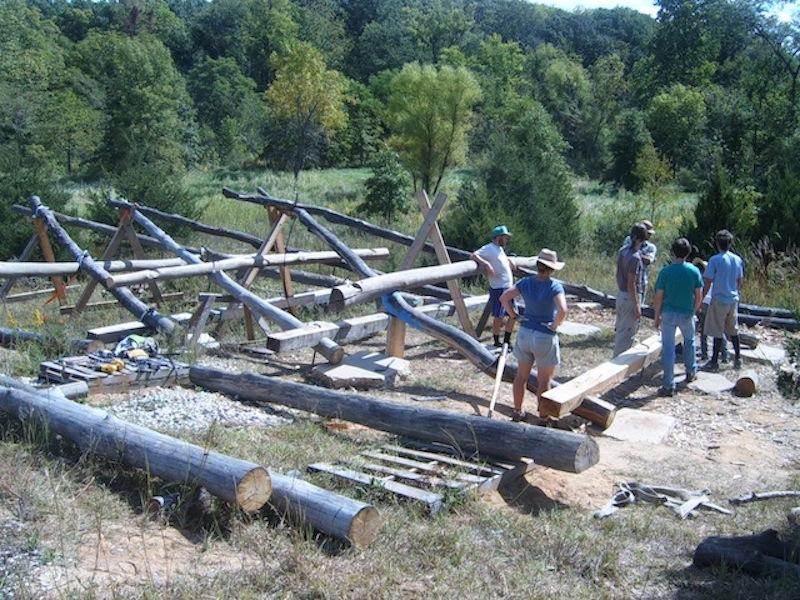
We've been making steady progress throughout this summer, despite having to learn as we go and there really only being two of us working on this project. We've been figuring out the somewhat tricky round on round joinery, and friends and neighbors have been able to help us out when we needed to lift and move around these very large and heavy timbers. For the tie beams I decided to try ash and hackberry. Both grow fairly straight with minimal tapering. It seems like the ash is doing some major checking, but maybe that won't be an issue? I also got a nice long hackberry for one of the wall plate, and still need to figure out something for the ridge pole. There was a bit of a breeze when I was felling the big hackberry, so I was able to get a nice picture of "how not to cut down a tree."


I decided to build the framing bed on the foundation because it seemed like a good idea. We'll have to do a lot of shuffling around of logs later in the process because of this, but it shouldn't be a big deal. So far it's been very solid and I can appreciate how incredibly useful it is for this method.


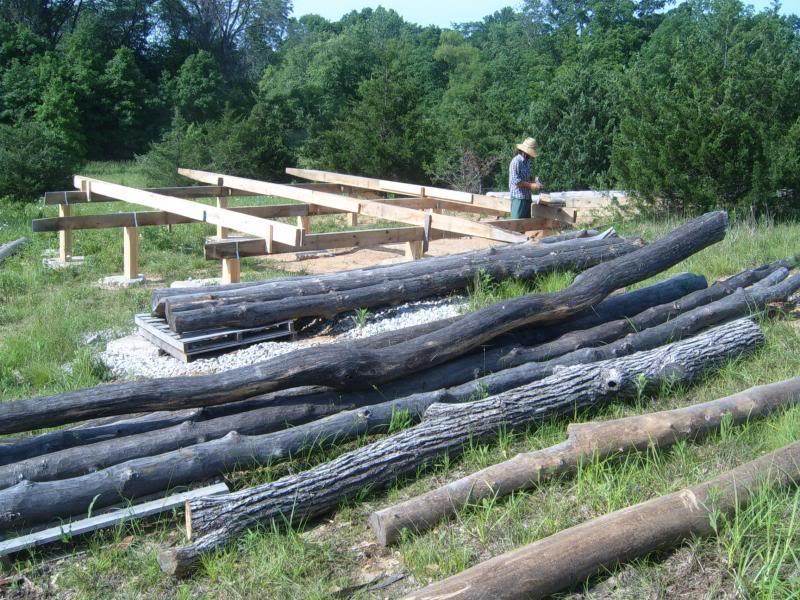
Timbers eagerly awaiting to be turned into a house...


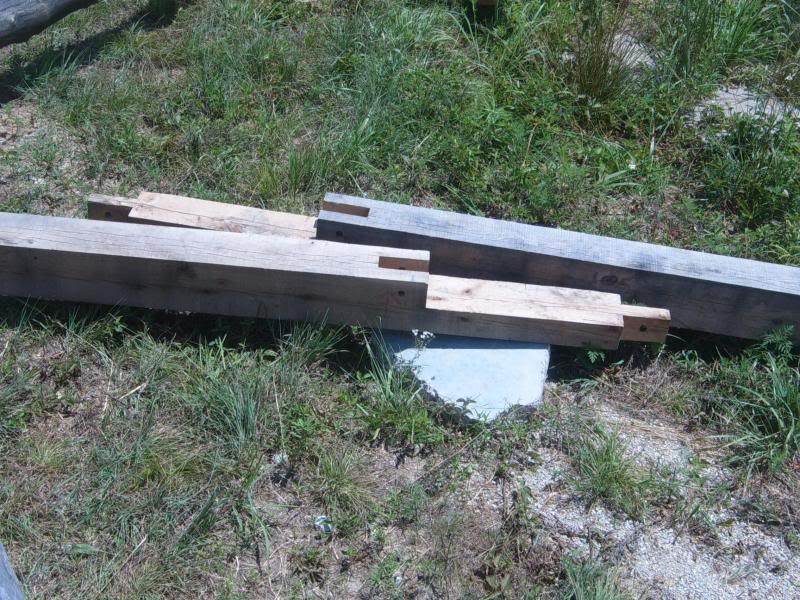
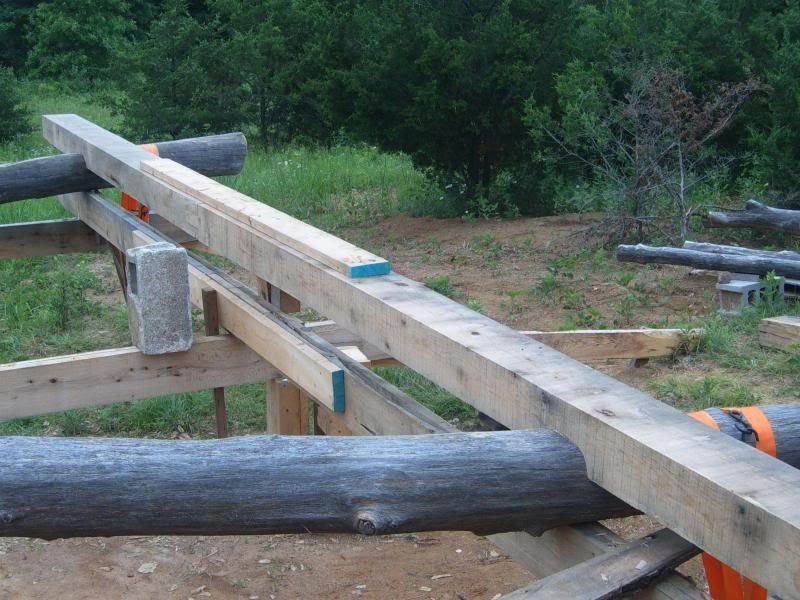
Since we're doing "underfloor tie-beams", our first task was joining two 12' red oak 6"x8"s with a scarf joint. It was nice to be able to warm-up with dimensional timbers before diving into the round joinery.


Finished and notched into the crucks. We screwed on a 2x6 to hold it together while we jockeyed it around.


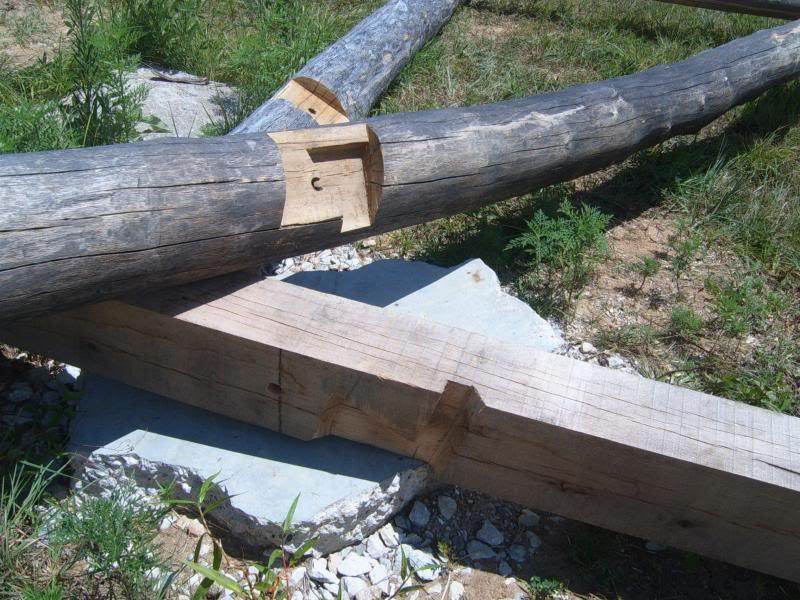
Here's that joint, I forget what it's called...


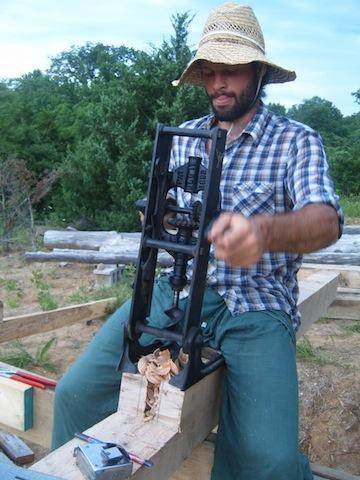
By the way, this tool is amazing. An antique hand-cranked morticer.


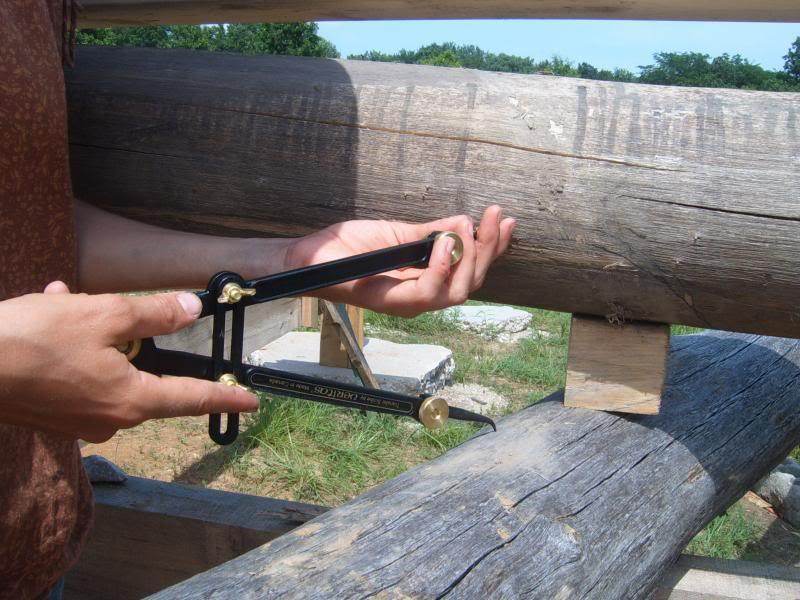
Next we had to get comfortable with the transfer scribe. Once it's 'set', it's not too difficult to work with. There have been a few times where it felt like I just couldn't get it in to certain places because of the angle or something, but for the most part it's been very useful and accurate.


So eventually we got all the joints cut for our first bent and we took it all apart and moved it off the framing bed. At some point we'll get it all ratcheted together and ready for lifting. Our neighbor has been making us some framing pins.


After that we got the next round of timbers up onto the framing bed and started on that. Hoping that we'll be getting quicker and more efficient as we move along.


So that's pretty much it for now. Basically 25-30% done with the notching. We took some time off to visit family and whatnot.
And that reminds me... while I was visiting my family in Ohio, I dove into Lake Erie one evening and didn't know/forgot that it was crazy shallow water at that spot. So with my freshly broken neck, I don't know how much more I'll be getting done on the house this year. I was very fortunate to not die and also not be paralyzed at all, but I won't be able to lift heavy stuff for a bit and I have to wear this annoying neck brace.


I'm hoping that fairly soon I can get back to the homestead and at least do some notching and stuff like that, but unfortunately heavy lifting is kind of a huge part of what we need to do at this point.
Womp womp.

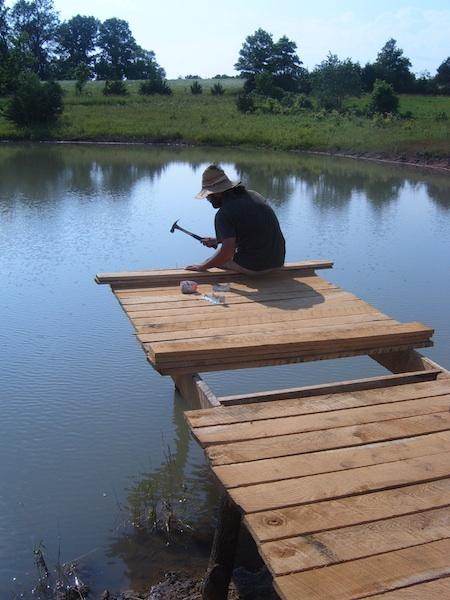
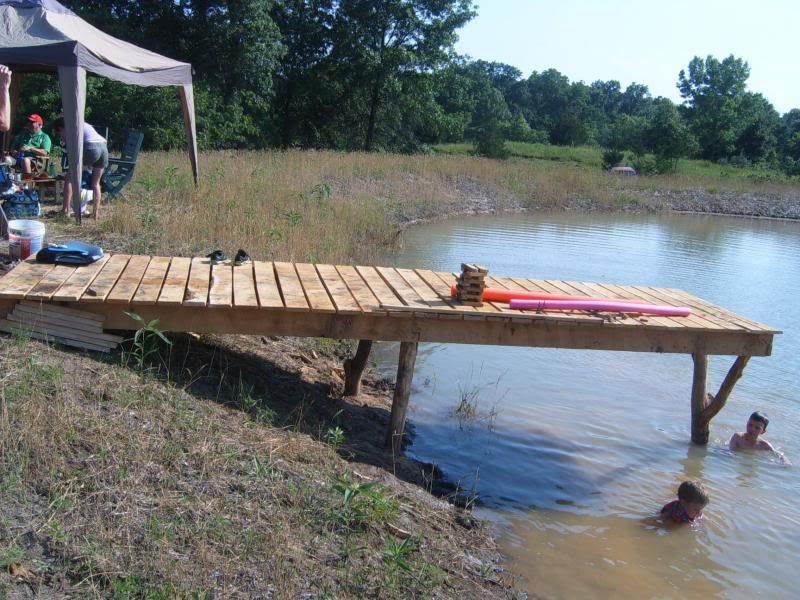
In other news, before we left I was able to finish building a dock on our quickly filling pond, which was pretty exciting for us.


All things considered, we're pleased with our progress thus far. We'll see how much more we can get done this season considering the recent developments, and I'll try to keep posting here with any more news or pictures.

Until then,
-WY
 
Posts: 32
  • Mark post as helpful
  • send pies
    Number of slices to send:
    Optional 'thank-you' note:
  • Quote
  • Report post to moderator
wow fairplay ta ye!

progress looks great... cant wait to see the next progress report

and thats a quality neck break if ever i seen one!
 
Mike Patterson
Posts: 70
Location: nemo, 5a/b
18
3
kids fungi foraging trees cooking building
  • Likes 1
  • Mark post as helpful
  • send pies
    Number of slices to send:
    Optional 'thank-you' note:
  • Quote
  • Report post to moderator
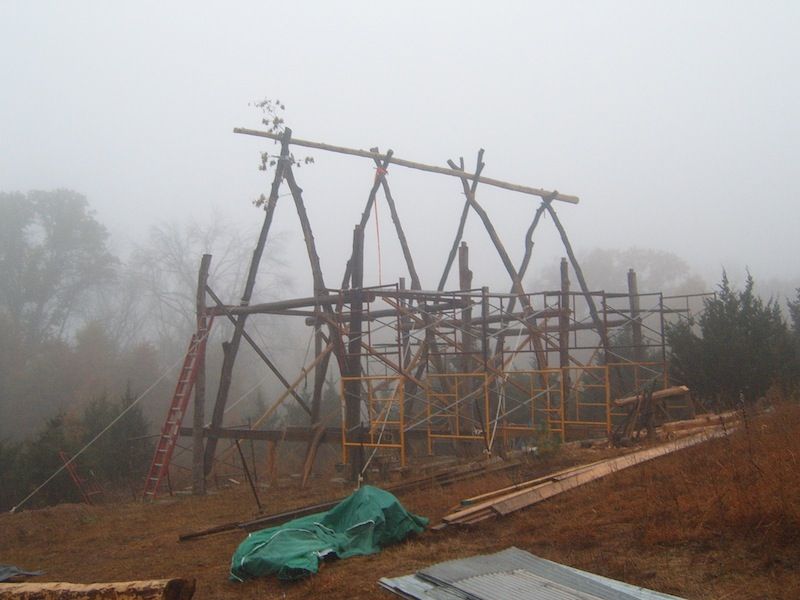
So we got our frame raised a couple weekends ago. Thought I might share some photos for anyone interested.

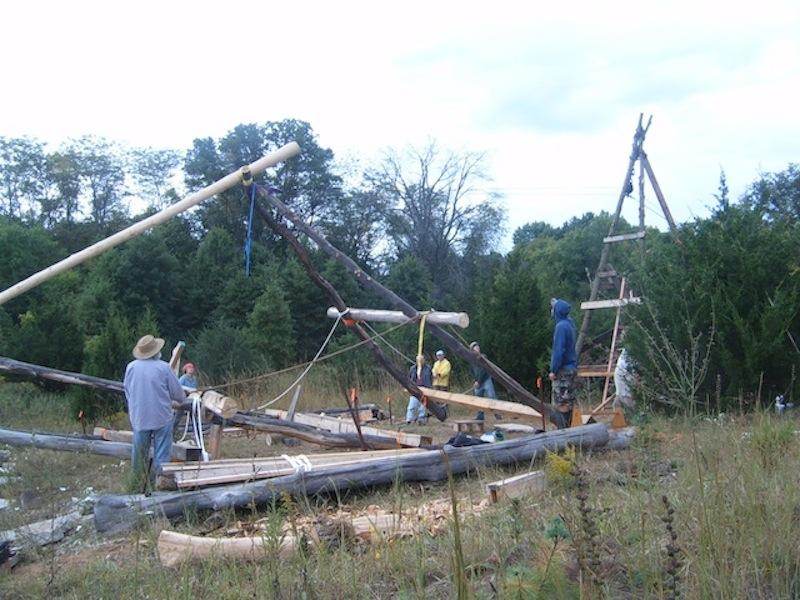
We got all the bents assembled on the foundation and propped up for the raising.


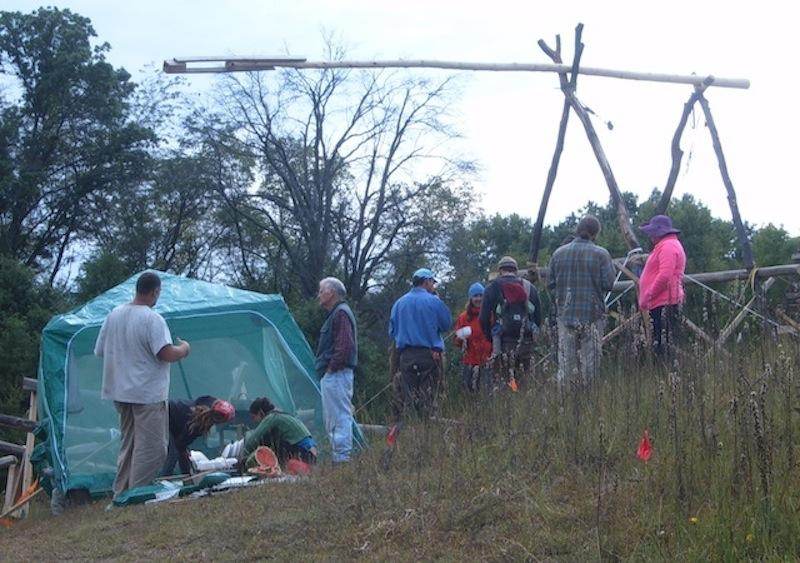
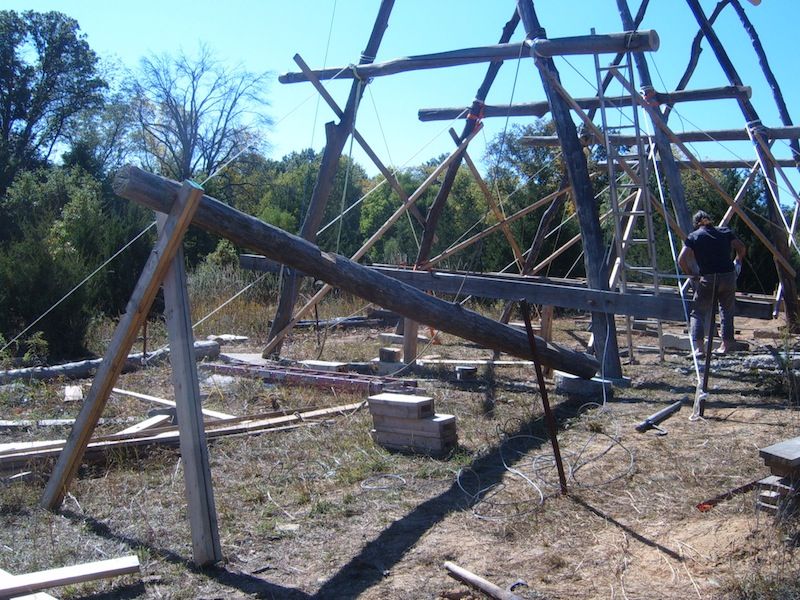
Then we built a big ol' tripod (or is it a quintpod if it has 5 legs?) thingy to hang a pulley.


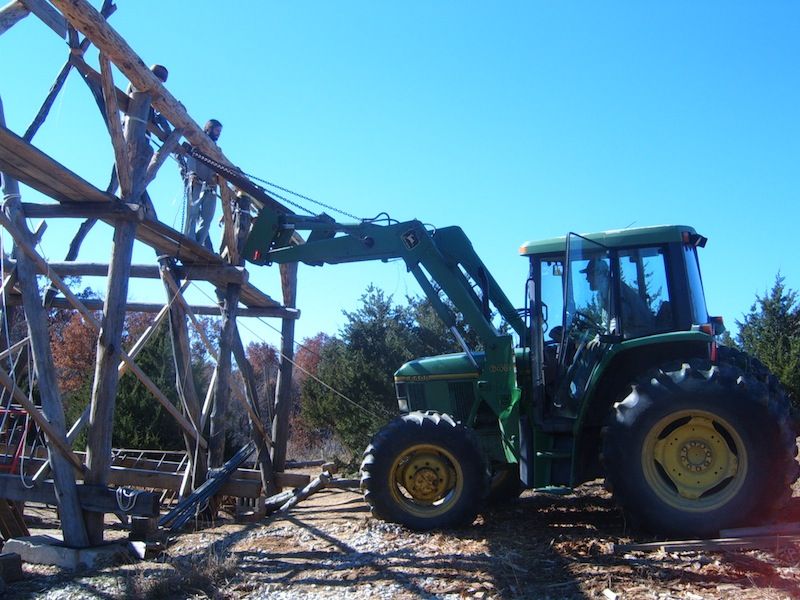
We bought a boat winch I think they're called, rated at 2800 lbs. and bolted it to the draw bar of our neighbors tractor. We had 90 ft. of 3/8 in. cable for it, so we had to move the tractor a couple times.


And we started raising. We found a nice straight shagbark hickory for our ridgepole.


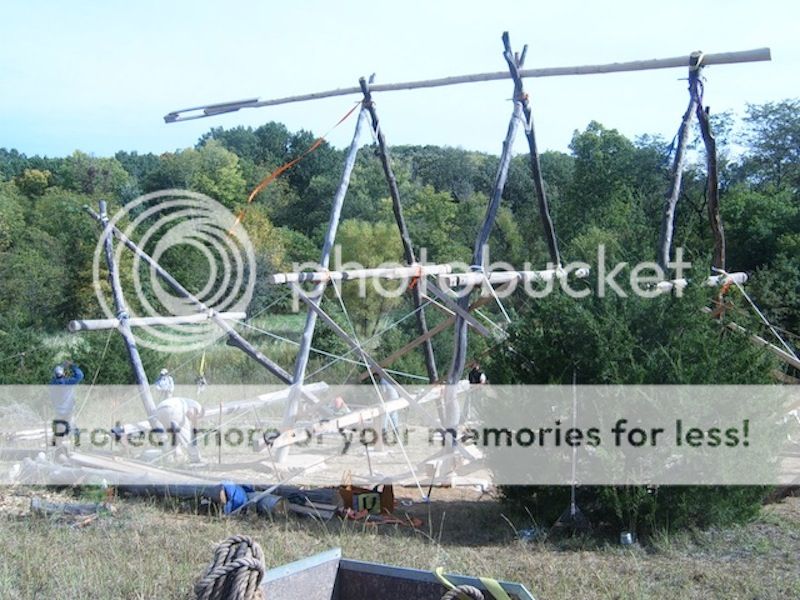
We got up #2 and took a lunch break. The first two were definitely the most difficult.


Last bent coming up.


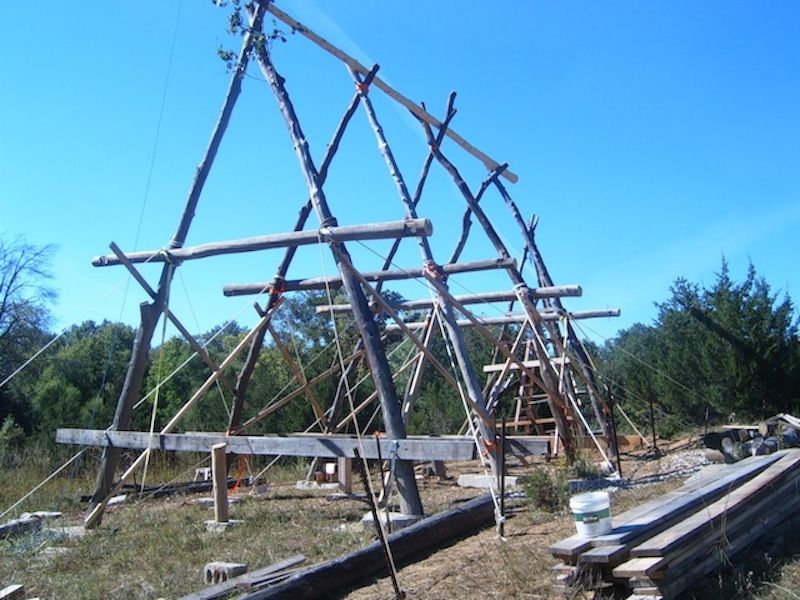
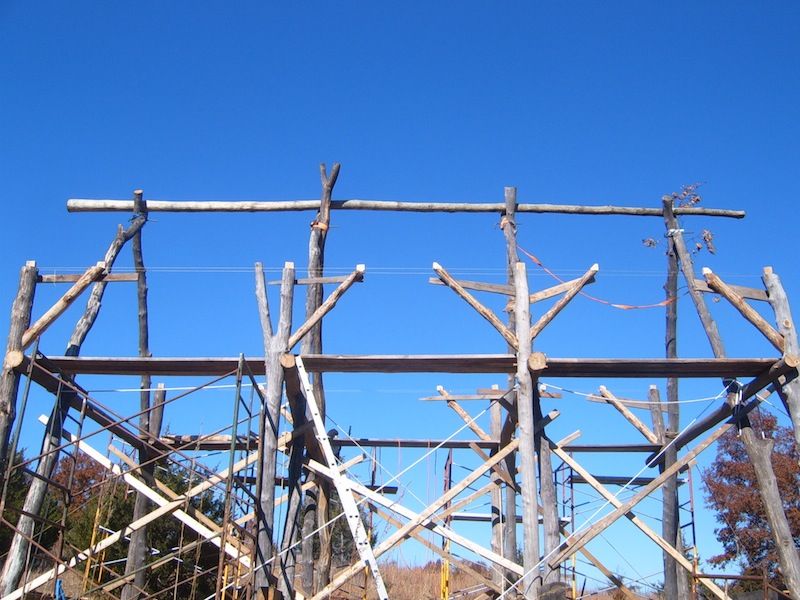
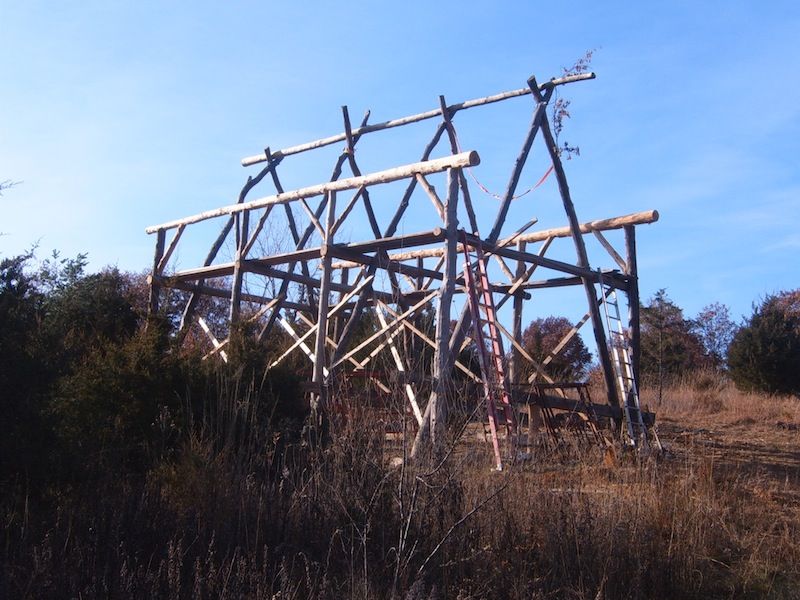
And then it was all up and standing.


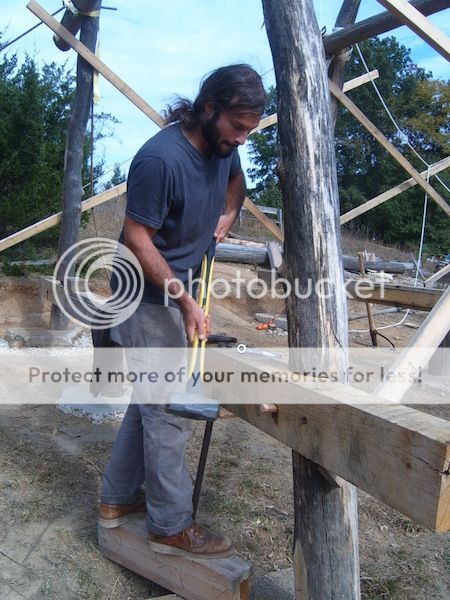
We ended up having to shift the bents around a bit to get them lined up and help the ridgepole fit better. We've been able to get a couple of our posts raised now, and I've been working on getting the wood pegs hammered in. I don't have a picture, but the floor ended up coming out really level, which was satisfying.

If I had more time I'd write more about it, but I'll have to wait for another day. I'll try to get some more pics as well.

-WY
 
pollinator
Posts: 1234
Location: Chicago/San Francisco
196
  • Mark post as helpful
  • send pies
    Number of slices to send:
    Optional 'thank-you' note:
  • Quote
  • Report post to moderator
Mike

Thanks for sharing. That looks like good progress. I'm not familiar with that style and am looking forward to see what it turns into. <g>


Rufus
 
Mike Patterson
Posts: 70
Location: nemo, 5a/b
18
3
kids fungi foraging trees cooking building
  • Likes 2
  • Mark post as helpful
  • send pies
    Number of slices to send:
    Optional 'thank-you' note:
  • Quote
  • Report post to moderator
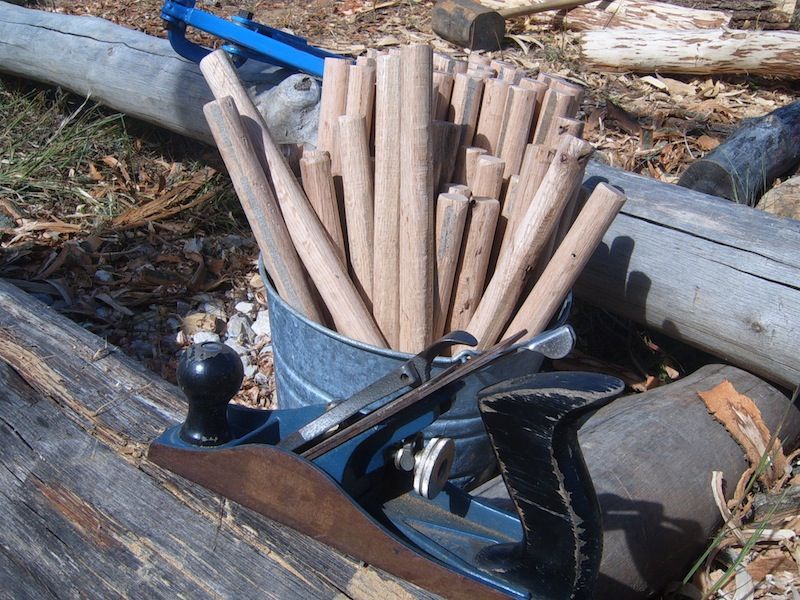
Bucket full-o-pegs.


It was a bit of a tight fit getting these pegs in, which I suppose is a good thing. After a couple of broken pegs we figured it out; little bit of linseed oil and a hose clamp helped.


We ended up raising the jowl posts with the boat winch as well, which worked well.


Jowls up, and you can see the tenons on some.


So to get the wall plates up, we didn't have the luxury of large tripods and chain blocks and all that jazz. We decided to "shoot the moon", so to speak, and have all the braces ready with their tenons and the mortices carefully measured and pre-cut on the wall plates.


And now the sketchy part. Our neighbor came over with his tractor after we tried to explain over the phone what we were trying to do. He put a large 4"x4" piece of steel on his bale spike or something like that, with a chain in there somewhere, and we tried to get the wall plates somewhat balanced on the tip of that since we needed the full reach of his tractor. Then a few of us were up on the frame by the jowls ready to... receive? the wall plate?


This was the shorter side, which was a bit easier. It worked, but I'm not sure how. It took a bit of adjusting and pounding here and there. For me it was sketchier than raising the bents.


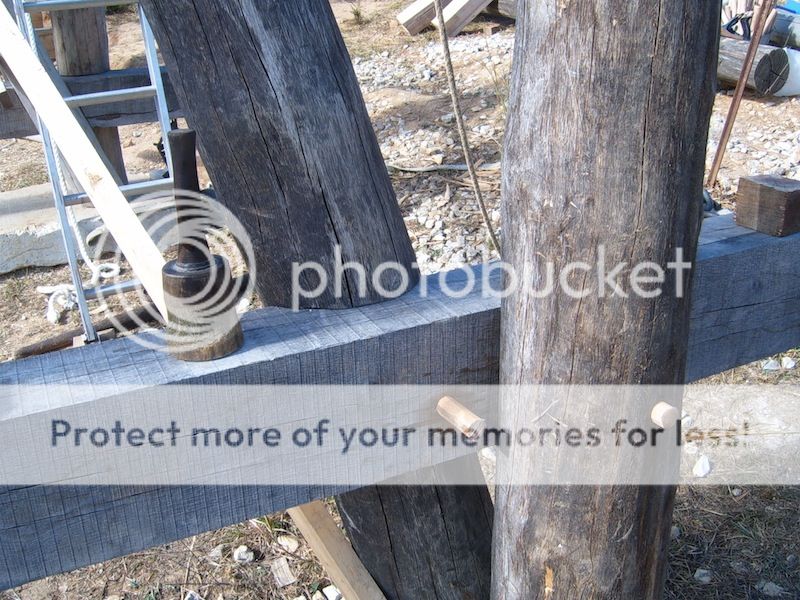
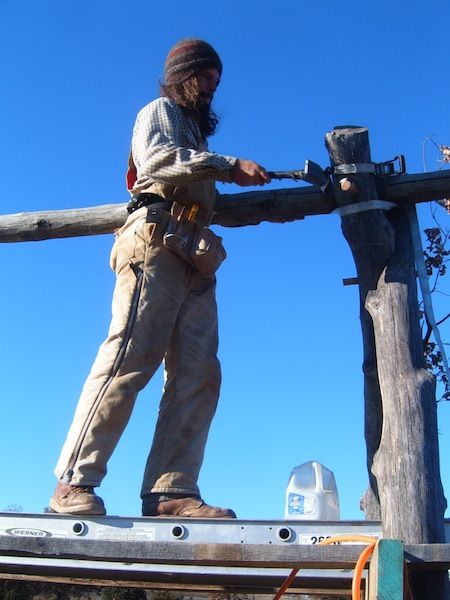
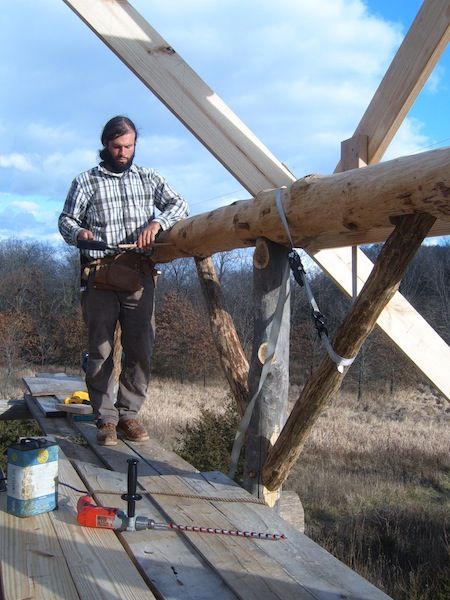
Here's pegging the crucks into the ridge pole. You're supposed to do that, right?


And pegging the braces.


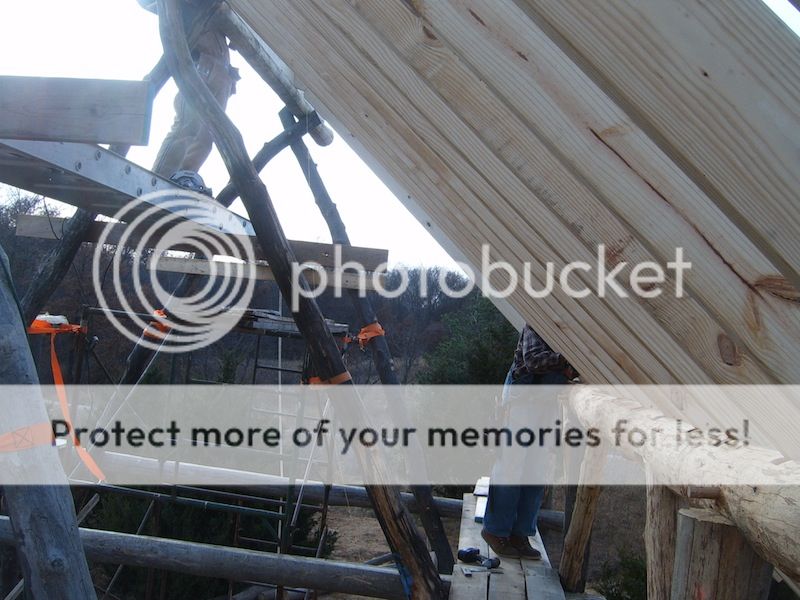
You can see the beginnings of our roof rafters, which I'll save for the next post.

-Wy
 
Posts: 1670
Location: Fennville MI
83
  • Mark post as helpful
  • send pies
    Number of slices to send:
    Optional 'thank-you' note:
  • Quote
  • Report post to moderator
Looks great. Always fun to follow this sort of project.
 
Posts: 101
Location: Parikkala, Finland USDA Zone 4a
5
  • Mark post as helpful
  • send pies
    Number of slices to send:
    Optional 'thank-you' note:
  • Quote
  • Report post to moderator
You might be interested in the ideas this engineer uses to assemble a full-sized Stonehenge replica using only a single human power. It's all about balance... http://youtu.be/lRRDzFROMx0
 
Posts: 225
Location: Estonia, Zone 5/6
5
  • Likes 1
  • Mark post as helpful
  • send pies
    Number of slices to send:
    Optional 'thank-you' note:
  • Quote
  • Report post to moderator

Brian Ham wrote:You might be interested in the ideas this engineer uses to assemble a full-sized Stonehenge replica using only a single human power. It's all about balance... http://youtu.be/lRRDzFROMx0


That was cool to watch Brian! Cheers. Here's a slightly better quality version of the video http://www.youtube.com/watch?v=pCvx5gSnfW4

Great construction there Mike! Look forward to seeing the progress. Get well soon! Maybe up the dose on good ol' bone broths.
 
pollinator
Posts: 251
41
hugelkultur duck forest garden books urban wofati
  • Mark post as helpful
  • send pies
    Number of slices to send:
    Optional 'thank-you' note:
  • Quote
  • Report post to moderator
Really neat project. I guess i have a layman's question, there was a guy on a pbs special from my child hood. He cut his trees and like you guys left them over winter to dry to make them easer to move alone and notch I guess. And i know using green wood means some shrinking and scary poping but if someone bought land and could not afford to wait for the logs to dry could they use fairly fresh cut wood?
 
Mike Patterson
Posts: 70
Location: nemo, 5a/b
18
3
kids fungi foraging trees cooking building
  • Mark post as helpful
  • send pies
    Number of slices to send:
    Optional 'thank-you' note:
  • Quote
  • Report post to moderator
Hey Brandon, thanks for reminding me that I've been long overdue for an update on our progress. In response to your question, we were not intending to let our logs dry over winter. We just weren't expecting the cutting, hauling, and bark peeling to take so long. We would have liked to have done our joinery with green wood, and we figured they would still be kinda green when we got around to it the next season. It is my understanding that using fairly fresh cut wood is fine, but there are others here with much more knowledge and experience than me.

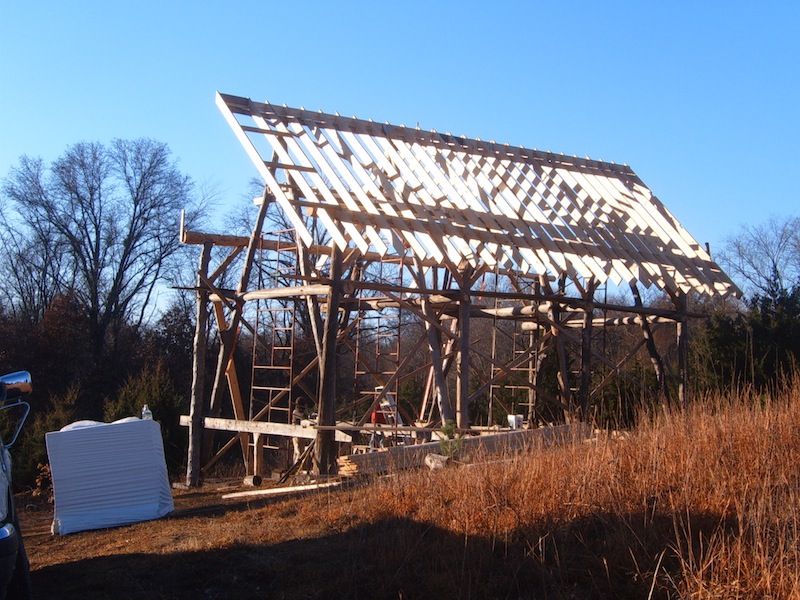
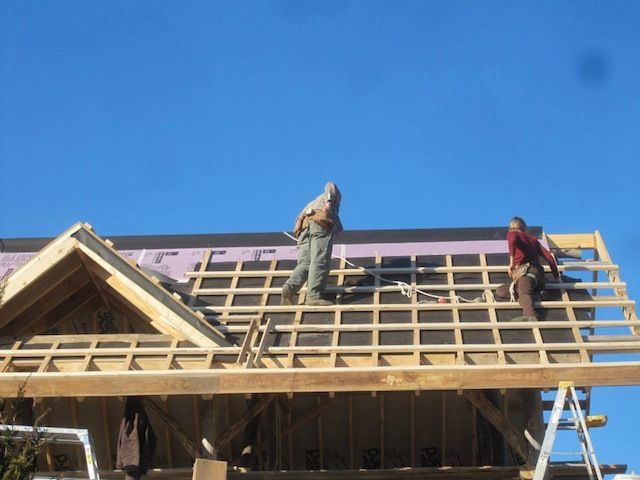
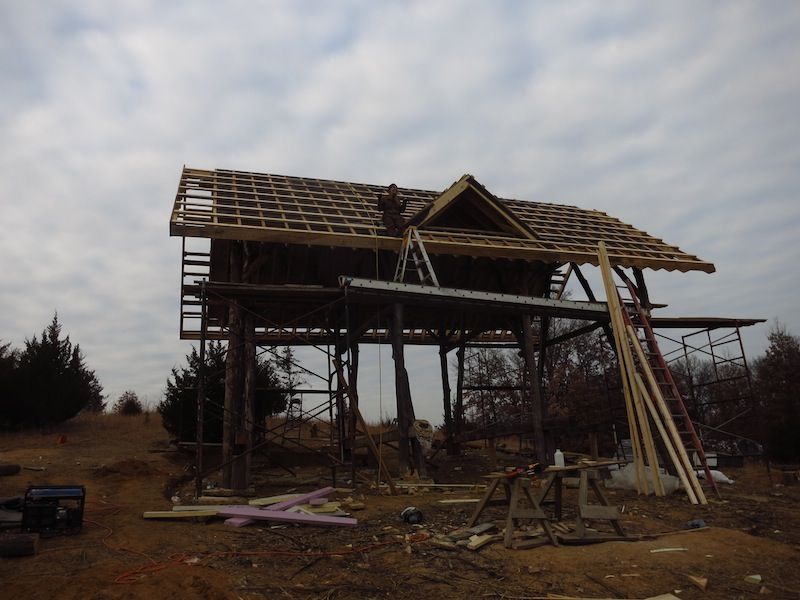
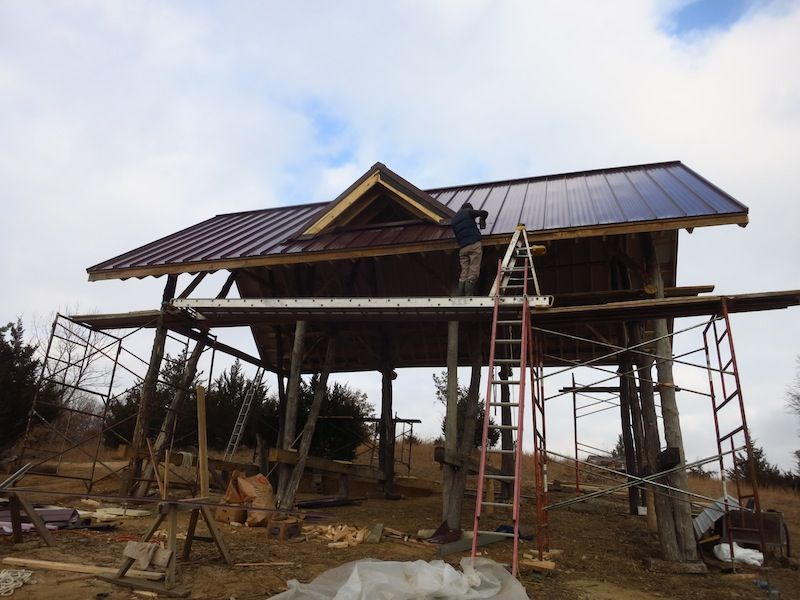
So about a year ago we put the roof on before winter set in. I'll try to spare you of any boring details, but feel free to ask any questions for clarity.
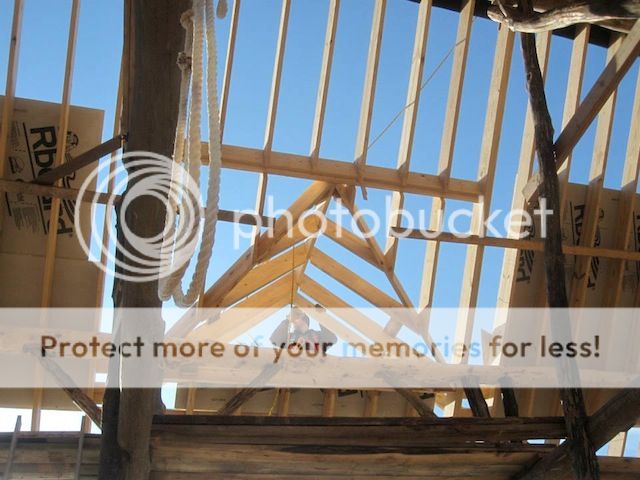
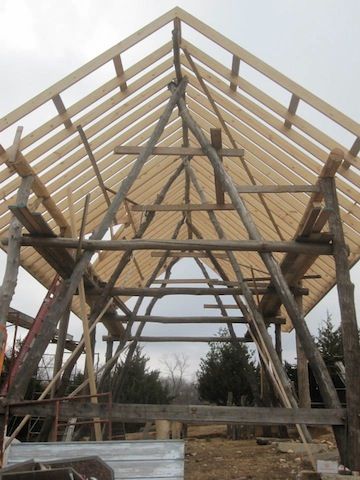
Basically every rafter had to be individually measured and custom cut to fit on our wonky red oak wall plate. We were hoping for a flat-ish surface to attach our roof metal to, so it seemed worth the trouble.


"Easy side" finished...


We thought having a gable dormer window on the south side would be nice, but it made framing that side about twice as long and difficult as the north. Oh well.


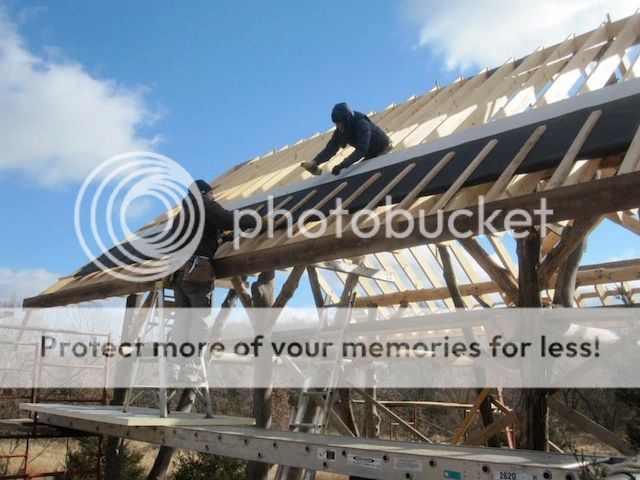
So our rafters are 16 ft. 2x8s. We had a hard time sourcing these dimensions from reclaimed sources, and the local Amish mills don't really cut stuff that long either, so we made our first purchase from a conventional lumber yard. I believe it's yellow pine from somewhere down south. The materials for our roof were the only things we bought new, and I guess it seemed worth it to invest in a good hat. On top of the rafters we laid down 2 inches of rigid foam boards. R-10 - R-12. On top of these we laid out tar paper, and on top of that we screwed 1x2 oak strips parallel to the rafters under them, in order to sandwich the foam and tar paper to the rafters.


We worked bottom to top so it all could be shingled and whatnot. Then over all that we put 2x4 purlins for the metal roofing, also making a handy ladder to work up to the ridge.


We sprang for standing seam metal roofing for the supposed longevity. I guess we'll see how that goes.


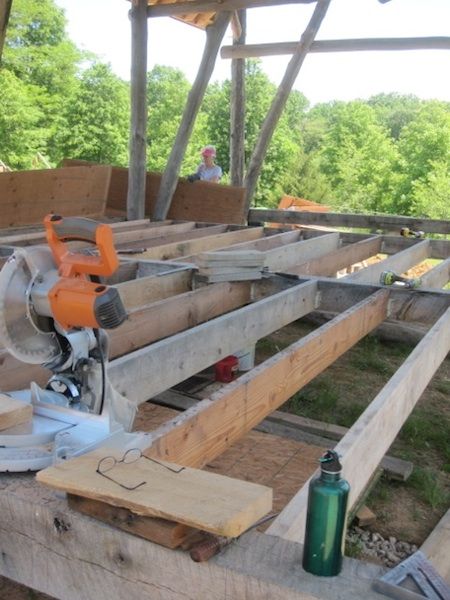
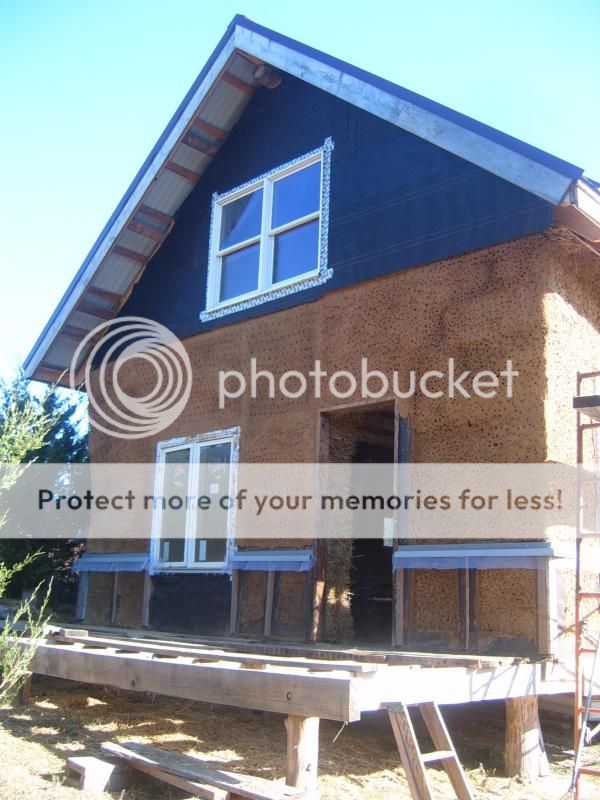
That's where we left off last fall. When we came back in the Spring we started in on the floor, joists and all that. We used about half reclaimed 2x8s and half local Amish oak 2x8s. Put on a subfloor of various sizes of reclaimed 1x. And also, perhaps mistakenly, but on an under floor joist covering of reclaimed 3/8 plywood.


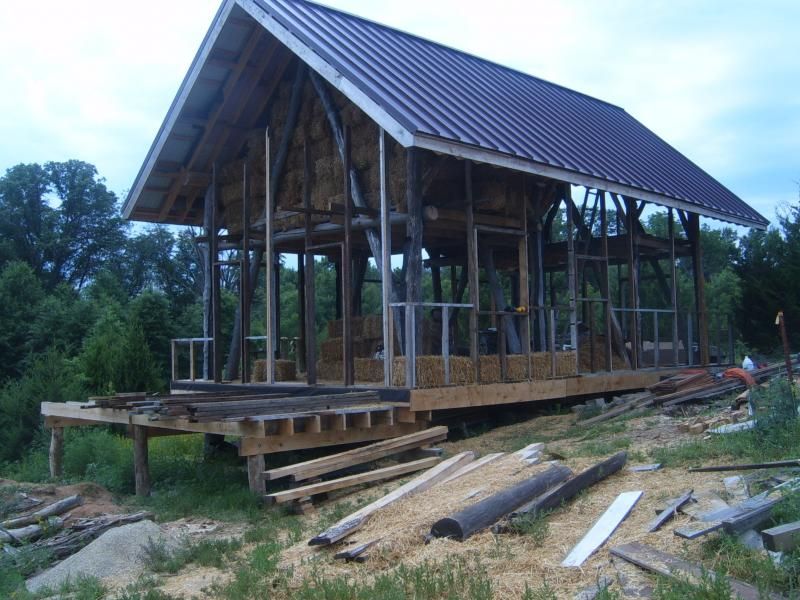
In order to make our sub floor wide enough for our bale walls, we needed to do some rough porch framing.


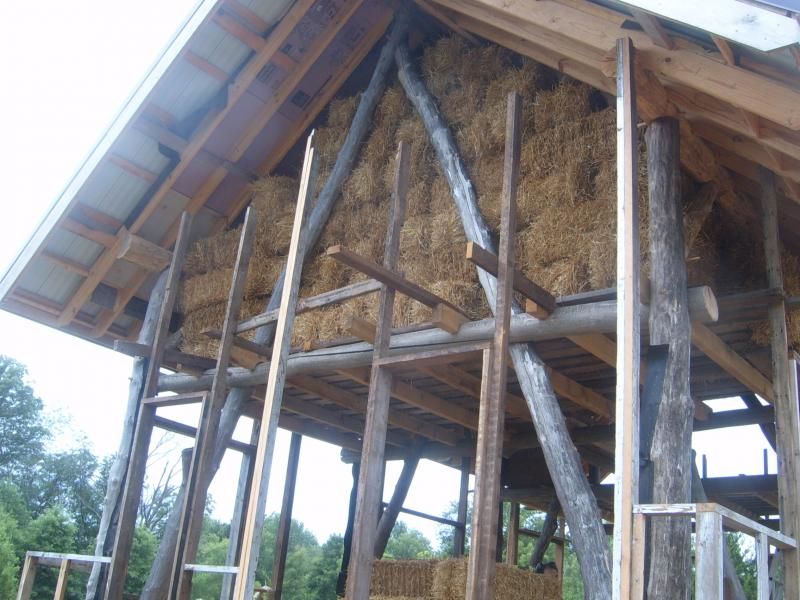
Next was doing some framing before putting in bales.


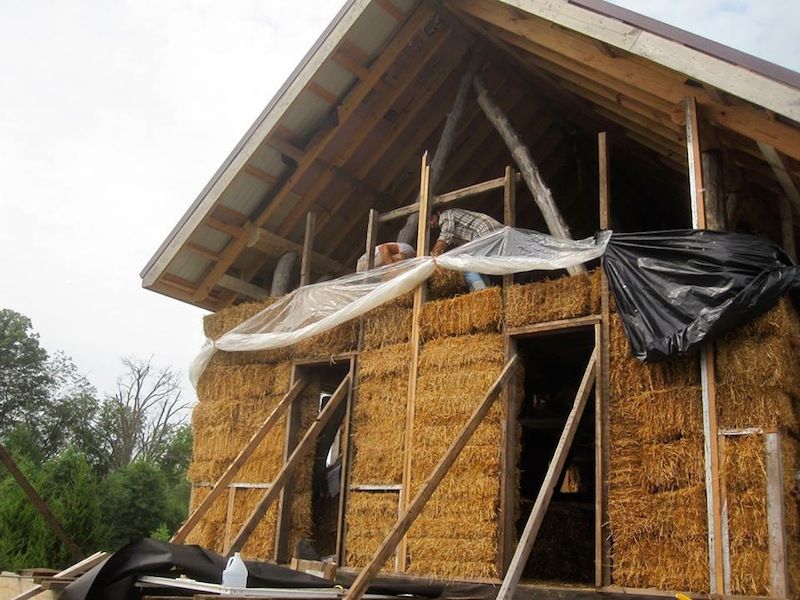
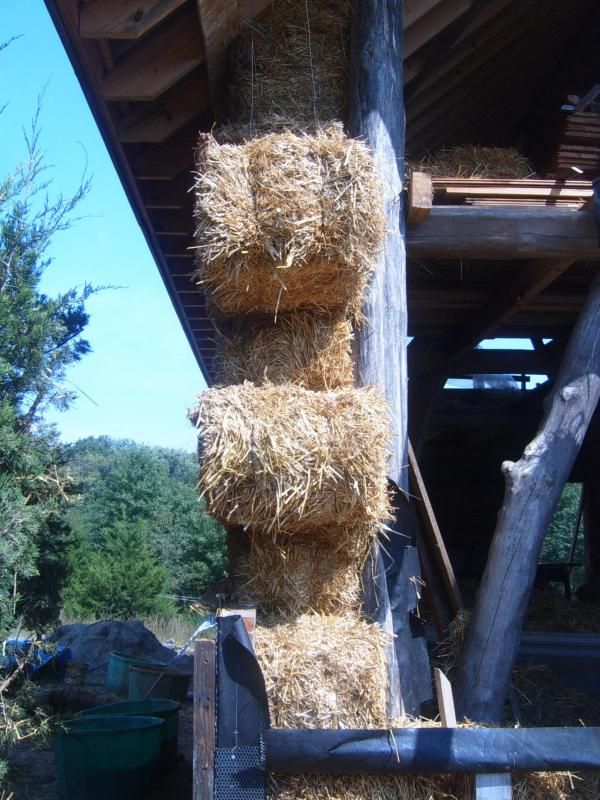
And then bale stacking. Blah blah blah...


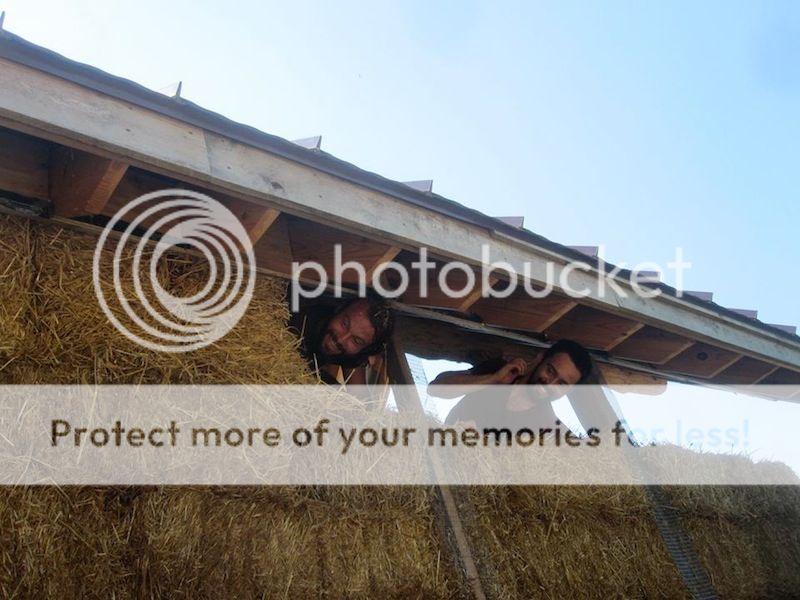
Eventually we got most of the bales up.


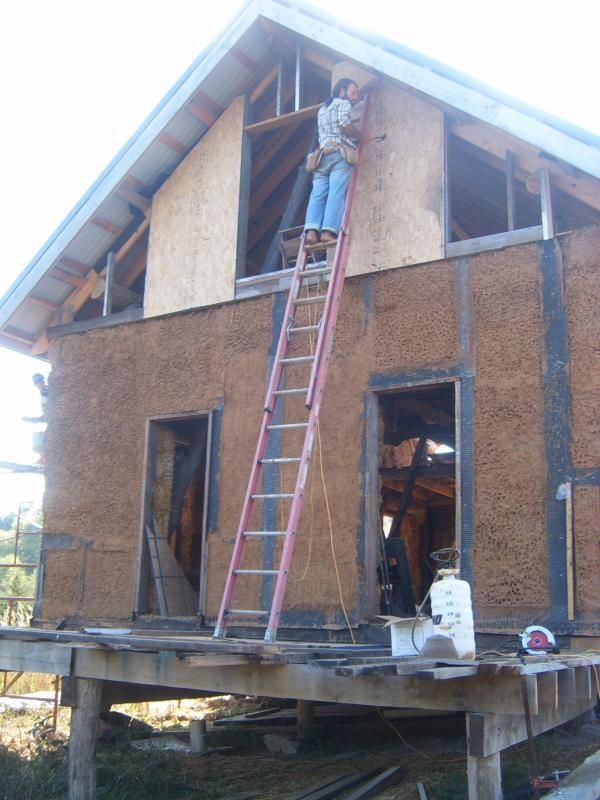
It seems I don't have any more current pictures. We got a rough coat of plaster on the North and East sides and most of the South side. The South still needs a feel custom bales jammed in near the top, and the West received an unprecedented 9 inches of rain in one night last week, so I'm in the process of removing soaked bales and replacing them with not soaked bales. I suppose that makes me realize that sitting here posting about all this isn't helping us with the million or so things that we'd like to finish before it gets too cold again.

I'll try to post more as soon as we get more pictures. Hopefully this wasn't too much quickly jumbled in here, but that's about where we're at. If anyone has a burning desire to camp in Missouri this fall and do some natural plastering, feel free to send me a message!

-WY
 
brandon gross
pollinator
Posts: 251
41
hugelkultur duck forest garden books urban wofati
  • Mark post as helpful
  • send pies
    Number of slices to send:
    Optional 'thank-you' note:
  • Quote
  • Report post to moderator
Thanks for the response and I look forward to keeping up woth youguys progress great thread.
 
Posts: 9
  • Mark post as helpful
  • send pies
    Number of slices to send:
    Optional 'thank-you' note:
  • Quote
  • Report post to moderator
Cool project, thanks for sharing and keep posting
 
Posts: 48
1
  • Mark post as helpful
  • send pies
    Number of slices to send:
    Optional 'thank-you' note:
  • Quote
  • Report post to moderator
Whats the budget?
 
Posts: 240
Location: Southern Minnesota, USA, zone 4/5
15
cattle duck trees pig woodworking
  • Mark post as helpful
  • send pies
    Number of slices to send:
    Optional 'thank-you' note:
  • Quote
  • Report post to moderator
Hey, that's starting to look real nice!

Keep it up, I know it can be trying to stay fired up about projects that last for years.
 
gardener
Posts: 5170
Location: Cincinnati, Ohio,Price Hill 45205
1010
forest garden trees urban
  • Mark post as helpful
  • send pies
    Number of slices to send:
    Optional 'thank-you' note:
  • Quote
  • Report post to moderator
Thank you so much for taking the time to share.
I am curious about your foundation,is it pilings in gravel notched and pegged to the framing?
 
Mike Patterson
Posts: 70
Location: nemo, 5a/b
18
3
kids fungi foraging trees cooking building
  • Mark post as helpful
  • send pies
    Number of slices to send:
    Optional 'thank-you' note:
  • Quote
  • Report post to moderator
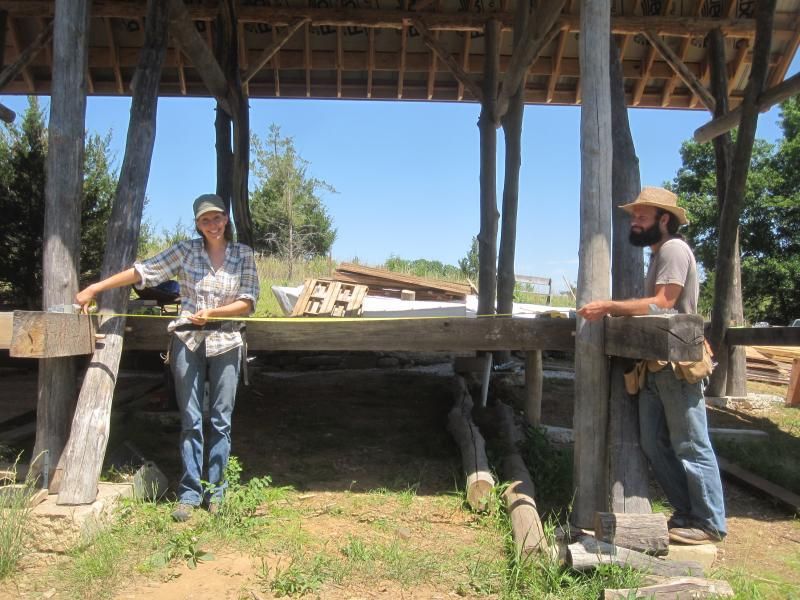
Thanks for the questions. We didn't come into the project with any real savings, so our budget every year has been whatever we can afford. We've been keeping track of what we spend to a certain extent, but I don't really have exact numbers at the moment. If I had to guess I'd say we've spent well under ten thousand on materials, but I could be forgetting a few things. That's mostly in the roof and windows. The foundation, speaking of that, was relatively inexpensive. We dug 12 pits that were about a cubic meter with a rented compact excavator, bought 17 tons of gravel, tamped the gravel into the pits, hauled free urbanite from a demo site in town and put those on top of the gravel. We leveled the slabs, took measurements with a transit level since they were all at different levels, and cut the bottoms of the posts accordingly. Pretty much just like in Ben Law's book, for better or worse. It worked better than I expected it to, and the total foundation cost was around $500, including the excavator.

Just today we got a first coat of plaster on all the walls, and are pretty close to having the gable ends all framed out. Still on track to getting the bare minimum done to have it closed in for the winter.

Thanks for the encouragement and questions! I'll try to get more pictures soon.

-WY
 
Mike Patterson
Posts: 70
Location: nemo, 5a/b
18
3
kids fungi foraging trees cooking building
  • Likes 3
  • Mark post as helpful
  • send pies
    Number of slices to send:
    Optional 'thank-you' note:
  • Quote
  • Report post to moderator
Now that we've wrapped up another season of building, I guess I'll post a final update on the progress.

Remember that big rain I mentioned?

That never happens.

Also, it was kinda fun to take down a wall that had a corner with a plastered and non-plastered wall. I was pretty impressed with how the one coat of plaster held the entire half of the bale rigid.


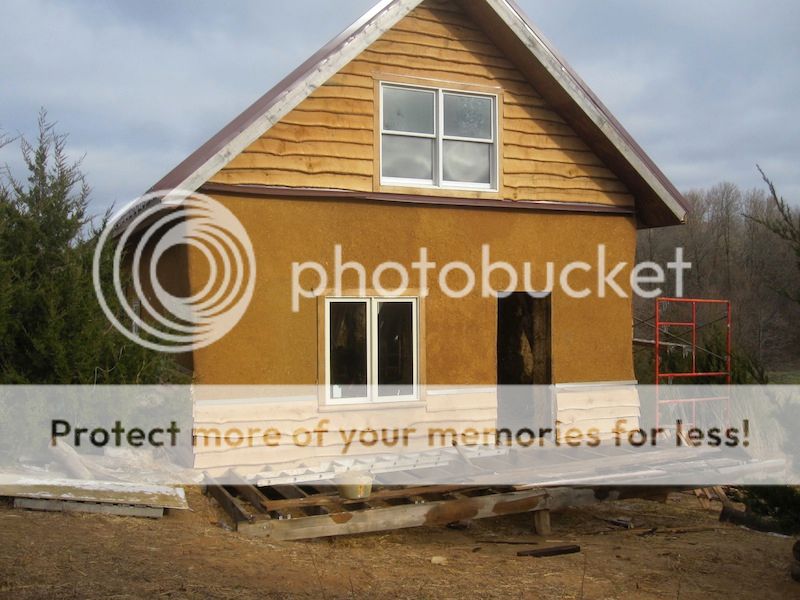
We decided to leave the exterior with 2 coats of plaster, maybe doing a 3rd finish coat sometime next year. We framed the gable ends with 2x4s and osb.


Then we covered the outside with tar paper and put the windows in.


I don't know if I have any good pictures of it, but we had to do some tedious soffit building all around the eaves. We cut up and ran a strip of metal venting stuff and covered the rest with plywood, stained with an oil and pigment something or other.

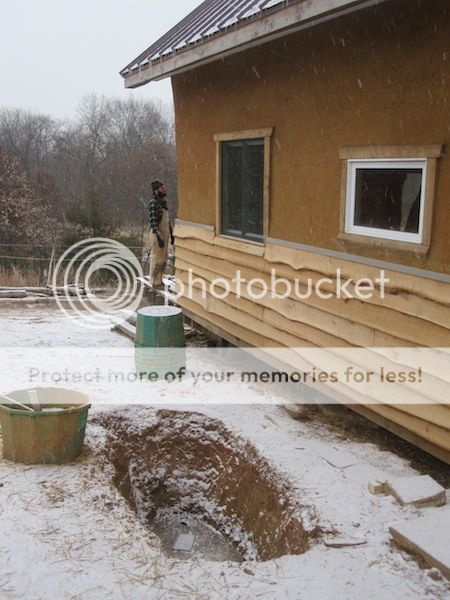
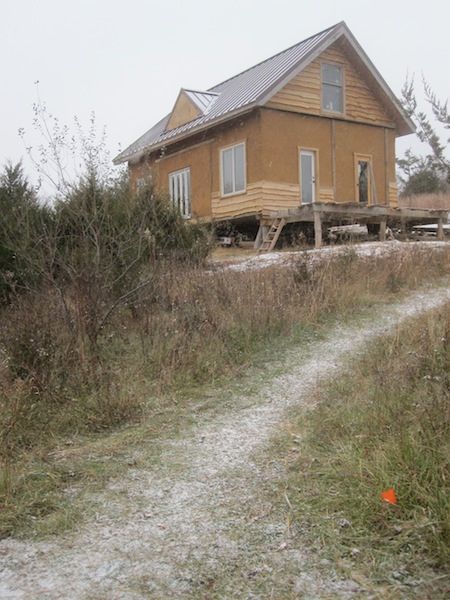
We went with some live edge oak siding for the gable ends and for the lower parts of the walls that would get the most exposure. We are very pleased with the aesthetic the live edge gave, but the unexpected surprise was how nice it was to not have to remain level. It made the whole process more forgiving and easy. At least it seemed that way.


It was very satisfying to remove the mountain of straw that had accumulated in the house and have some open space again.

Other than that we just filled all the cracks and holes the best we could. We couldn't find an adequate front door, so we put up a piece of plywood, and we also plywooded up the gable dormer to finish at some other time. We'll see how it holds up through another winter!


-WY
 
pollinator
Posts: 230
Location: CW Ontario, Zone 5
50
4
hugelkultur forest garden foraging cooking
  • Mark post as helpful
  • send pies
    Number of slices to send:
    Optional 'thank-you' note:
  • Quote
  • Report post to moderator
Totally sweet Mike!
 
alex wiz
Posts: 48
1
  • Mark post as helpful
  • send pies
    Number of slices to send:
    Optional 'thank-you' note:
  • Quote
  • Report post to moderator
I'd love to see another update!
 
Mike Patterson
Posts: 70
Location: nemo, 5a/b
18
3
kids fungi foraging trees cooking building
  • Mark post as helpful
  • send pies
    Number of slices to send:
    Optional 'thank-you' note:
  • Quote
  • Report post to moderator
Sorry for not seeing your post sooner! I'm not sure how relevant or interesting updates are at this point. If it's OK for this to just become somewhat of a project blog or something like that, that's fine with me, but I want to respect the format or whatever.

Anyway, last year we did a lot of blown in cellulose insulation in the ceiling and floors. It was messy and miserable, and I don't think I have any good pictures to post, which is probably good since I don't want to trigger any of the trauma from all of that. We also put up our ceiling wood; reclaimed knotty pine tongue and groove wallboards that we picked up for pretty cheap from a local place tearing it out. The backsides of the boards were flat and un-finished which we liked the look of more than the yellowish polyurethane front side. There's talk of us doing some sort of finish that will probably never happen.


Here's another shot that shows the gable wall which we added another set of studs to to widen it for more cellulose. I think it ended up being 14" or something like that. There's also the hole for our stovepipe, which I'll talk about more later.


We also put up some pretty minimal interior framing. Just a small bathroom in the middle of the north side of the house which will have stairs going around part of it and a kitchen wall on the other side on the east.


We then moved on to interior plaster. With the help of a couple work parties with some friends, it wasn't too drawn out or unbearable, but I did seem to end up hauling a ton of buckets of clay and water and sand and it got old pretty quick. We were able to get a finish coat on a few walls, but not all of them yet.


On the second story we did a subfloor of 1"x6" rough cut white oak from a local Amish sawmill. Made the whole house smell like bourbon.


We did a couple different techniques for our interior walls dividing the two bedrooms on the 2nd floor. One side we did lath and plaster with some really old reclaimed lath as well as some we made with a table saw. Part of it we insulated with clay slip and wood chips, and parts we left empty. The other wall we tried to do light straw-clay or whatever it's called. We used thin plywood screwed to the 2x4 studs as our forms. It worked pretty well I guess.
Here's part of a lath with chip-slip wall.


I can't seem to find any pictures of the light straw clay.

As the year started to get colder, we moved on to making it livable for the winter. That meant hauling in the ol' cookstove!


We scored some nice pieces of slate from a neighbor's auction that we laid down for the stove area, and got stainless steel stove pipe for the first section.


We had to switch to the triple walled crazy expensive stove pipe as we went through the first floor ceiling. Trying to maneuver around the timbers and avoid the dimensional framing and shoot it through the rafters was a horrific bit of math or some godawful relative of math that was somewhat maddening with only 15 and 33 degree angles to choose from, but we managed. I also wasn't expecting cutting a hole in the roof to be so nerve wracking.


And of course, the rest of it on the outside of the roof...


And it all worked! Hooray.


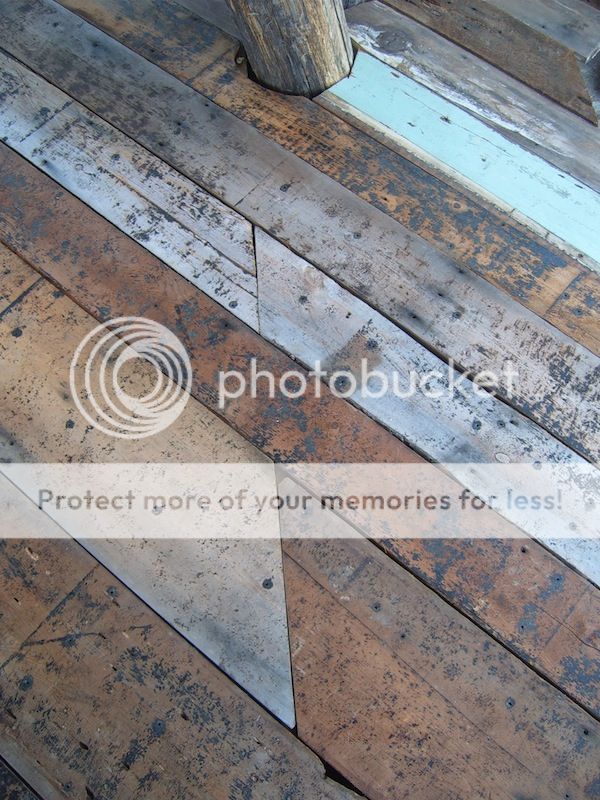
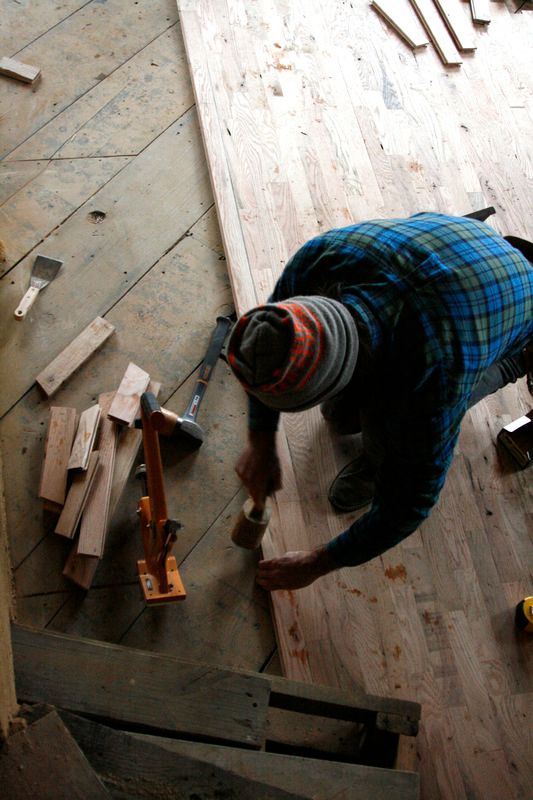
We also were able to lay down the start of our finish red oak floor. We were able to get 3rd grade pieces for about $1.10 a sq/ft.


Last fall there was a cistern built and a few other things, but I have to run so I'll save that for another post later today or tomorrow!

 
brandon gross
pollinator
Posts: 251
41
hugelkultur duck forest garden books urban wofati
  • Likes 1
  • Mark post as helpful
  • send pies
    Number of slices to send:
    Optional 'thank-you' note:
  • Quote
  • Report post to moderator
Hey thanks for the update, it is nice to see people doing not just talking which is what i do mostly. I use permies as a blog spot for a few threads and I'm sure those that choose to follow yours arnt apposes to delayed updates.
 
Mike Patterson
Posts: 70
Location: nemo, 5a/b
18
3
kids fungi foraging trees cooking building
  • Likes 1
  • Mark post as helpful
  • send pies
    Number of slices to send:
    Optional 'thank-you' note:
  • Quote
  • Report post to moderator
Ok, here's the rest...
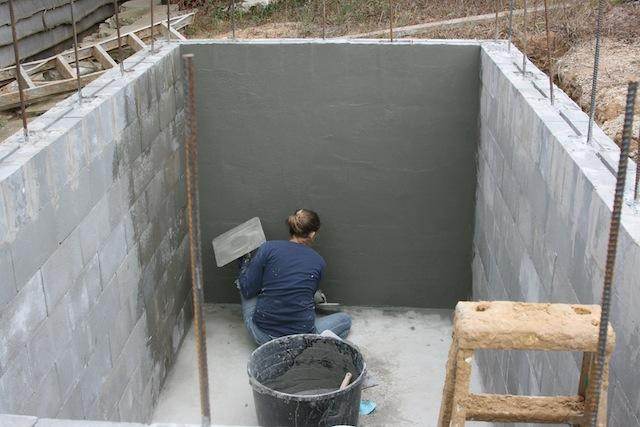
That cistern I mentioned took up a significant portion of our fall last year. Here's a few photos..


It's about 3500 gal. We're catching water from the north half of our roof, and it didn't take long to fill up. We've been bucketing water from the manhole in the top, but this year we'd like to get a good hand pump hooked up to bring it into the house.

Anyway, that was all last year. We came back in January to keep moving things along. We had some walnut milled into tongue and groove for our 2nd story finish flooring.


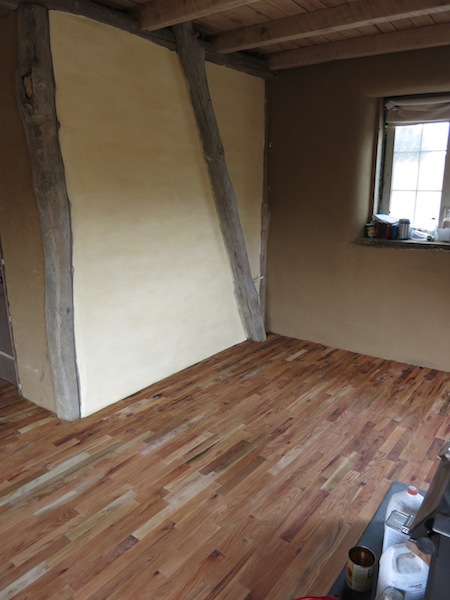
We also finished the red oak on the 1st floor, and finished up some interior walls with lime plaster and pigmented lime washes.


Here's some more floor with fresh oil and wax and whatnot..


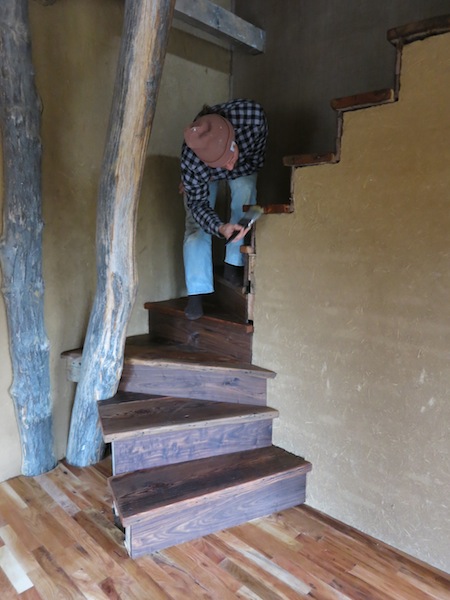
We built the stairs with nice wide sections of old fir boards from a reclaimed barn or something like that, as well as walnut risers.


We also got our bedroom mostly finished and livable. And the reason we had such a winter push to get things ready was...


A baby!!!

As you may have guessed, further finish work on the house has all but ceased. We have managed to get our garden in and stay on top of cooking and cleaning, but our expectations for the rest of this year are pretty low as far as house projects are concerned.

Needless to say, there's a lot more of this going on...


Hopefully this is still interesting to some people! I'll let you know when we get a chance to get some more work done.

-WY
 
Peter Ellis
Posts: 1670
Location: Fennville MI
83
  • Mark post as helpful
  • send pies
    Number of slices to send:
    Optional 'thank-you' note:
  • Quote
  • Report post to moderator
Looks amazing, Mike.  Great work!
 
Posts: 21
Location: Fallon, NV
forest garden tiny house food preservation
  • Mark post as helpful
  • send pies
    Number of slices to send:
    Optional 'thank-you' note:
  • Quote
  • Report post to moderator
What an awesome thread! The house is gorgeous!
 
  • Mark post as helpful
  • send pies
    Number of slices to send:
    Optional 'thank-you' note:
  • Quote
  • Report post to moderator
Congratulations with your baby!
Please keep posting.
 
master pollinator
Posts: 4964
Location: Due to winter mortality, I stubbornly state, zone 7a Tennessee
2120
6
forest garden foraging books food preservation cooking fiber arts bee medical herbs
  • Mark post as helpful
  • send pies
    Number of slices to send:
    Optional 'thank-you' note:
  • Quote
  • Report post to moderator
Now that baby is walking, any updates? I love what you have accomplished.
 
Posts: 4
Location: Loudoun, VA, zone 7
2
forest garden books urban
  • Mark post as helpful
  • send pies
    Number of slices to send:
    Optional 'thank-you' note:
  • Quote
  • Report post to moderator
I loved reading through these build updates -- truly inspirational! Thank you!
 
Posts: 11
1
  • Mark post as helpful
  • send pies
    Number of slices to send:
    Optional 'thank-you' note:
  • Quote
  • Report post to moderator
This looks amazing thanks for posting beautiful work and congrats on the baby!
 
I got this tall by not having enough crisco in my diet as a kid. This ad looks like it had plenty of shortening:
permaculture and gardener gifts (stocking stuffers?)
https://permies.com/wiki/permaculture-gifts-stocking-stuffers
reply
    Bookmark Topic Watch Topic
  • New Topic