• Post Reply Bookmark Topic Watch Topic
  • New Topic
permaculture forums growies critters building homesteading energy monies kitchen purity ungarbage community wilderness fiber arts art permaculture artisans regional education skip experiences global resources cider press projects digital market permies.com pie forums private forums all forums
this forum made possible by our volunteer staff, including ...
master stewards:
  • Nancy Reading
  • Carla Burke
  • r ranson
  • John F Dean
  • paul wheaton
  • Pearl Sutton
stewards:
  • Jay Angler
  • Liv Smith
  • Leigh Tate
master gardeners:
  • Christopher Weeks
  • Timothy Norton
gardeners:
  • thomas rubino
  • Jeremy VanGelder
  • Maieshe Ljin
  • Mark post as helpful
  • send pies
    Number of slices to send:
    Optional 'thank-you' note:
  • Quote
  • Report post to moderator
This is a badge bit (BB) that is part of the PEP curriculum.  Completing this BB is part of getting the straw badge in Electricity.

In this Badge Bit, you will fix an electrical appliance.  Fridge not working quite right?  Toaster only toasts on one side?  Let's fix that appliance!

There are youtube videos for nearly any type of appliance issue and repair so do some digging to figure out what is wrong, what parts you may need and how to do the job.

To complete this BB, the minimum requirements are:
  - fix a problem with an electrical appliance
  - more complicated that replacing a light bulb
  - must be an electrical issue for this BB

Electrical points earned vary from 1/2 to 4 points
 - the points awarded are up to the certifier based on the challenge of the troubleshooting and the complexity of the repair
 - replacing a heat element is likely to be low on the range
 - replacing circuit boards and motors and rat eaten wires is likely to be high on the range

To show you've completed this Badge Bit, provide proof of the following as pics or video (less than two minutes):
  - the broken appliance before you start your project
  - explanation of what was broken, how you troubleshot it and how you fixed it
  - the parts you bought (if applicable)
  - the parts you replaced (if applicable)
  - the appliance at maximum point of disassembly
  - the appliance reassembled
COMMENTS:
 
gardener
Posts: 388
Location: Zone 7a
264
6
kids rabbit chicken food preservation fiber arts
  • Likes 3
  • Mark post as helpful
  • send pies
    Number of slices to send:
    Optional 'thank-you' note:
  • Quote
  • Report post to moderator
Approved submission
My electric stove has an intermittent problem. Sometimes the heating elements work, sometimes not. This required some trouble shooting. The fan works, but no heat. Turns out the first thing I checked was the issue. I looked at the junction box for the whip and saw flashes of light and heard some sizzling sounds. So, fire hazard. The whip has bad connections and is undersized. Thankfully that's all it ended up being.
Staff note (Mike Haasl) :

I certify this for 1 point

 
gardener
Posts: 1322
741
8
hugelkultur monies foraging trees composting toilet cooking bike solar wood heat rocket stoves ungarbage
  • Likes 3
  • Mark post as helpful
  • send pies
    Number of slices to send:
    Optional 'thank-you' note:
  • Quote
  • Report post to moderator
Approved submission
A while ago I started having issues with my off-grid solar power system.  It would just shut off, losing all power, and then shortly there after come back on.  This was while there was lots of sun and I've got a new battery bank so lack of power shouldn't be the issue.  I was however at the time running electric space heaters to take advantage of "free" power to heat my place.  I make sure to do this only when there is excess solar power so I am not consuming beyond the capacity of what is being immediately generated by the sun.  No need for any extra strain on the expensive batteries!

My immediate suspicion was something overheating.  After shutting down it could naturally cool down some until the thermal protection shut off came back on, hence the short time before powering up again.  I'd go out to the building where the inverter is immediately and could smell that bad sign of overheating electronics.  So why is the inverter overheating?  My first hope was just that the vent ports were too obstructed with dust and cobwebs to allow enough air flow.  There was plenty of said dusty cobwebs, but that didn't seem to be the issue so I investigated further, digging into the scary looking guts of the system.  The next logical problem would be the cooling fans.  Like the inverter itself they are about 8 years old.  

After determining that these were 12 volt fans I got out a 12 volt battery to try powering them up to see how they run.  (I didn't want the inverter system powered up with all the guts exposed and easily able to be short circuited so that stays powered down whenever I'm inside working on it!)  To test the fans I got some scrap wire and stripped/trimmed it down so just a single strand could be inserted into the pin slots on the fan plug.  Then got the other ends of the wires to make contact with the battery terminals in order to apply power to the fans.  One worked just fine the other was very sick and barely moving.  This one would also not spin freely even without power.  I'm pretty sure I found the problem!

Since both fans are equally old and I assume have an equal number of hours on them I decided to replace them both.  They were measured and I shopped around on-line until I found replacements the right size, selecting the models that has the highest CFM air flow.  They might be louder than others, but since this is in a separate building I don't really care about the noise level.  Air flow is more important.  

I did have to get some new long thin driver bits to access some of the screws, but once I had the tools and parts it wasn't that hard to remove the old fans and install the new ones.  I put everything back together and then tested it out placing the inverter under a heavy load until the fans should kick on.  Sure enough they did.  I would say they may even be a tad bit quieter than the old ones too.  In order to show this working I held a piece of toilet paper over the vent so you can see it being blown upward.

This is my BB submission for troubleshooting and fixing an electrical appliance.
DSC05746.JPG
The appliance in question, a 4400 watt inverter.
inverter-repair1.JPG
In this photo I'm testing the fans with the spare 12 volt battery.
inverter-repair2.JPG
A shot of the bad fans so I can try to find suitable replacements.
inverter-repair3.JPG
The inner guts of the inverter before I remove the old fans.
inverter-repair4.JPG
The inveter at maximum point of disassembly. I have the old fans removed.
DSC05745.JPG
These are the old fans once removed. The one on the right is the bad one. The other will go into my spare parts pile.
DSC05737.JPG
Here is a photo showing the new replacement fans installed.
DSC05738.JPG
Everything is put back together safely into the case.
DSC05739.JPG
It all powered up fine and resumed it's role inverting my DC power to AC. Always a relief to see.
DSC05743.JPG
When under stress to get the fans running you can see the exhaust air flow lifts the piece of toilet paper.
Staff note (gir bot) :

Mike Haasl approved this submission.

Staff note (Mike Barkley) :

Two points. One for the actual work plus one for using good troubleshooting techniques & explaining the process so well. Good job!

Staff note (Mike Barkley) :

Side note... when replacing fans like that I strongly recommend spending an extra dollar or two for fans with bearings. They are much more reliable & longer lasting. Not sure which those are, just throwing it out there for general FYI to help anyone who might be in a similar situation.

 
pollinator
Posts: 259
Location: New Zealand
307
chicken food preservation fiber arts woodworking homestead
  • Likes 2
  • Mark post as helpful
  • send pies
    Number of slices to send:
    Optional 'thank-you' note:
  • Quote
  • Report post to moderator
Approved submission
The last several weeks, my toaster had become more and more reluctant to keep the lever down to complete the toasting cycle. Eventually, the lever just wouldn't stay down at all. Now, a toaster is a relatively simple appliance, and there are two principal things which go wrong: 1) the element burns out, breaking the circuit and 2) the electromagnet which holds down the lever (in modern toasters anyway) gets caked with crumbs/dust and no longer has the strength to hold the lever down.

I tested the difference by forcing the lever down and holding it; the toaster started heating up. Vigorously shaking crumbs out of the toaster temporarily fixed the issue, but it began failing again within a couple days.

All this led me to believe that the issue was that there was some buildup on the electromagnet inside the toaster. I'd probably knocked some crumbs off of it, but built-up gunk remained. In order to clean it off, I needed to open it up. This ended up being slightly more challenging than necessary, as it for some reason was constructed with triangular screws, meaning I had to take a break to get a cheap, damaged screwdriver from the dump's recycle shop, file it down with a dremel, and then open her up. The electromagnet was quite dirty and I cleaned off with a toothbrush. I cleaned off the rest of the interior as well while I was in there.

After reassembly (and gluing part of the case I accidentally damaged while opening it up), it worked! Been happily toasting since!
mb-bb-electricity-straw-fix-1.JPG
Broken toaster with anti-consumer screws
mb-bb-electricity-straw-fix-2.JPG
Opening it up with homemade screwdriver; cleaning off electronics & electromagnet
mb-bb-electricity-straw-fix-3.JPG
Fixing plastic I accidentally broke while opening it up; working now!
Staff note (gir bot) :

Mike Haasl approved this submission.
Note: Triangular screws, what a great idea     Good job!

 
pollinator
Posts: 1495
855
2
trees bike woodworking
  • Likes 2
  • Mark post as helpful
  • send pies
    Number of slices to send:
    Optional 'thank-you' note:
  • Quote
  • Report post to moderator
Approved submission
Shop Vac stopped working

My shopvac suddenly stopped working. It’s a month old and had some pretty heavy use during it’s short life. It felt a bit hot, so I left it for an hour, thinking there was some kind of over heating sensor that had tripped. I was only using it to vacuum the car, so it wasn’t being taxed.

My options were:
1) See if I could find the receipt, return to Home Depot, but I bought it 70+ miles away.
2) Buy a new one on Amazon with a monthly subscription for a 5% discount!
3) See if I could find out what was wrong and fix it myself with the help of Permies.

I went for option 3 and started a thread Fixing a wire connected to a motor - learnt a load of stuff and got the problem fixed for free!

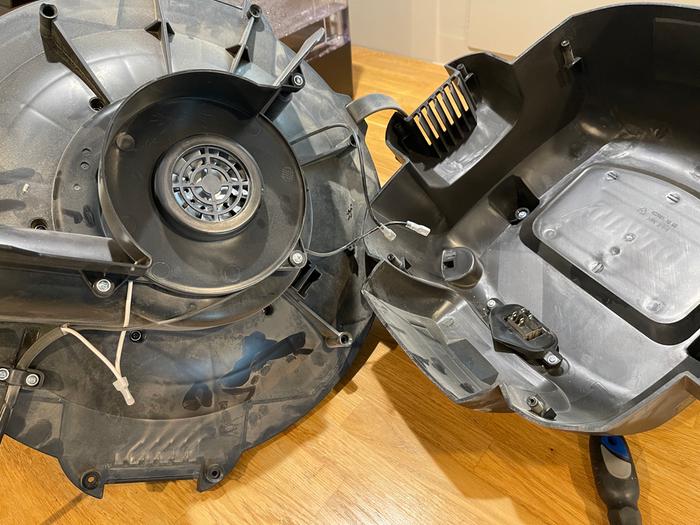
It was pretty easy to disassemble, everything held together with  Philips headed screws.


I removed the outer shell and disconnected the switch


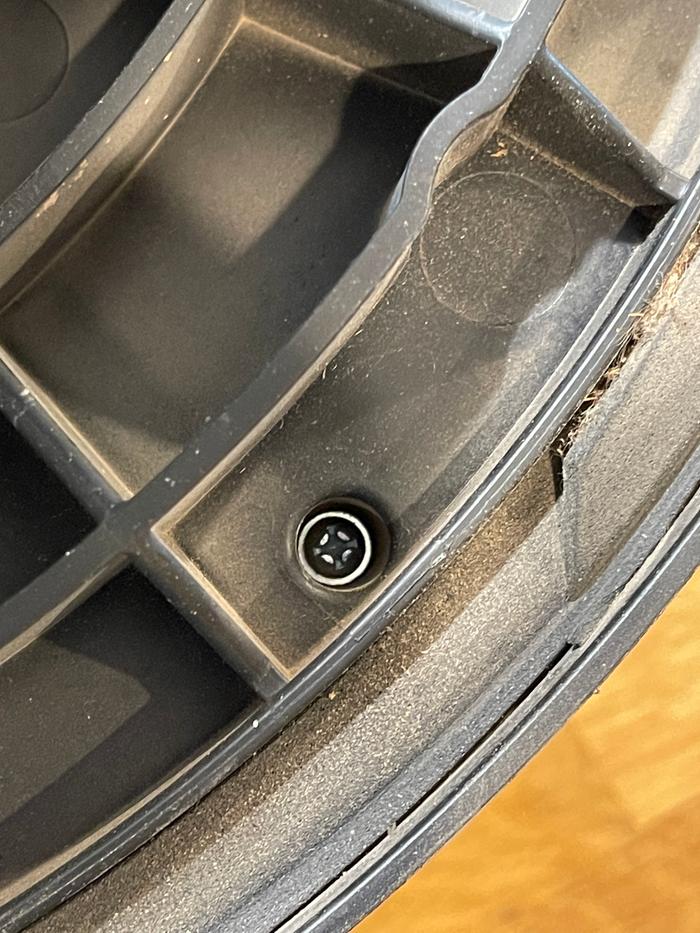
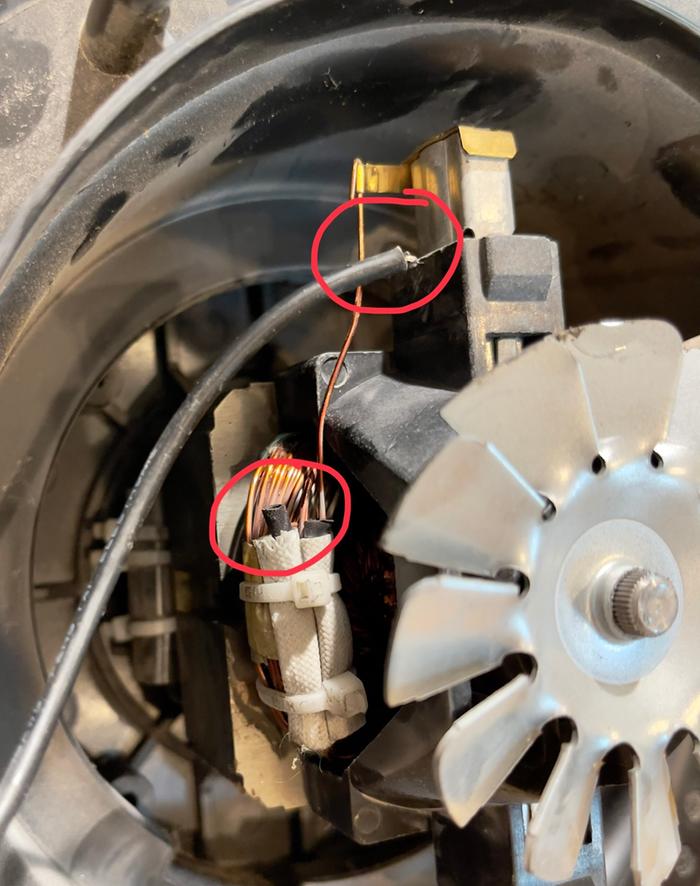
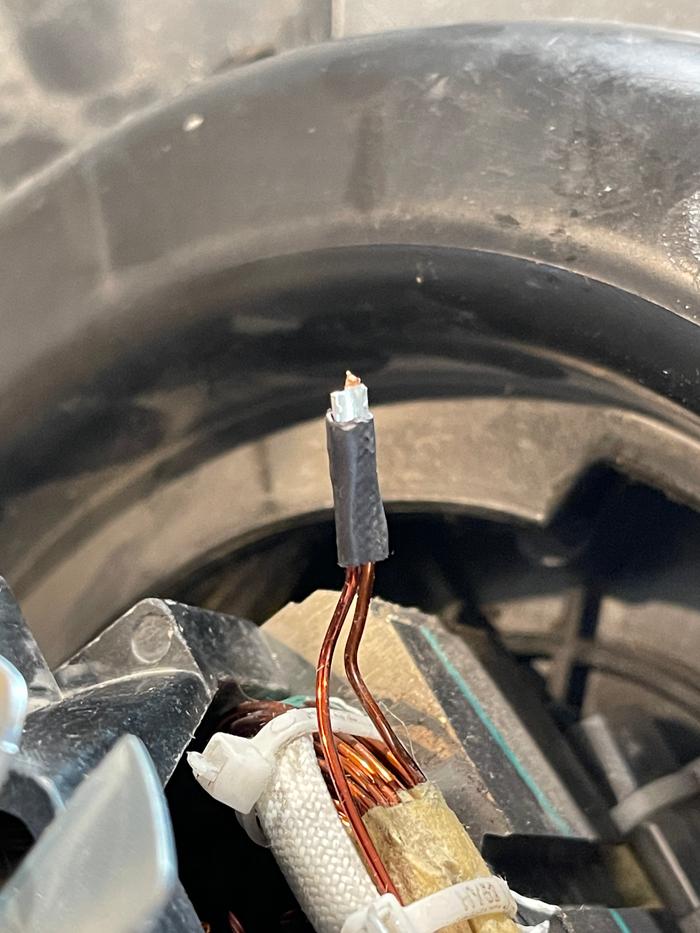
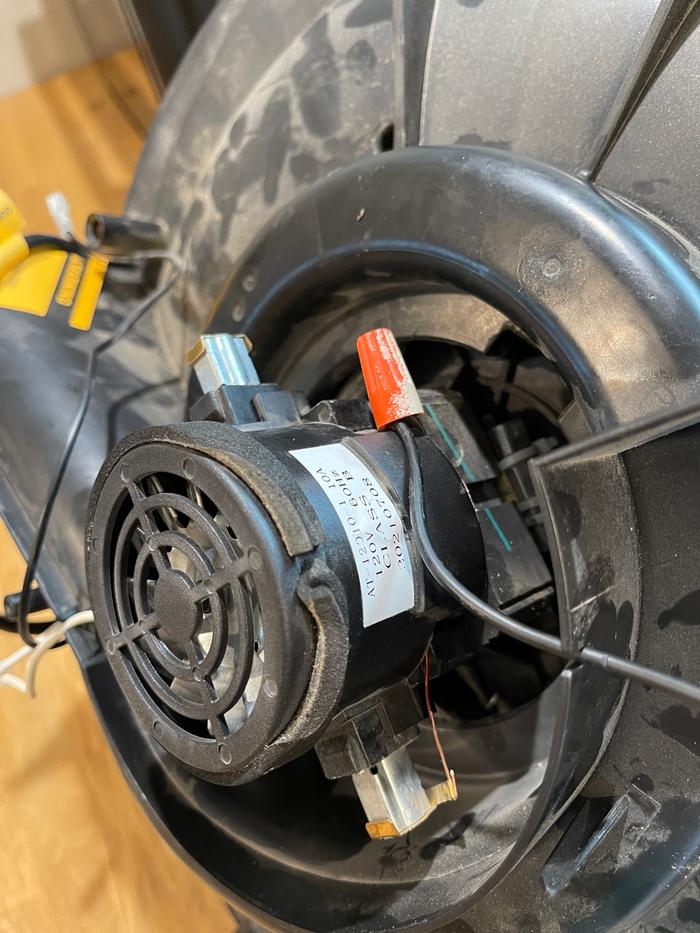
I then removed some plastic bracing to expose the motor which was under a plastic cap held on with clips. This gave me access to the electrics and I noticed the black wire was disconnected. I posted my findings in the thread above as I don’t have much experience of this kind of electronics.


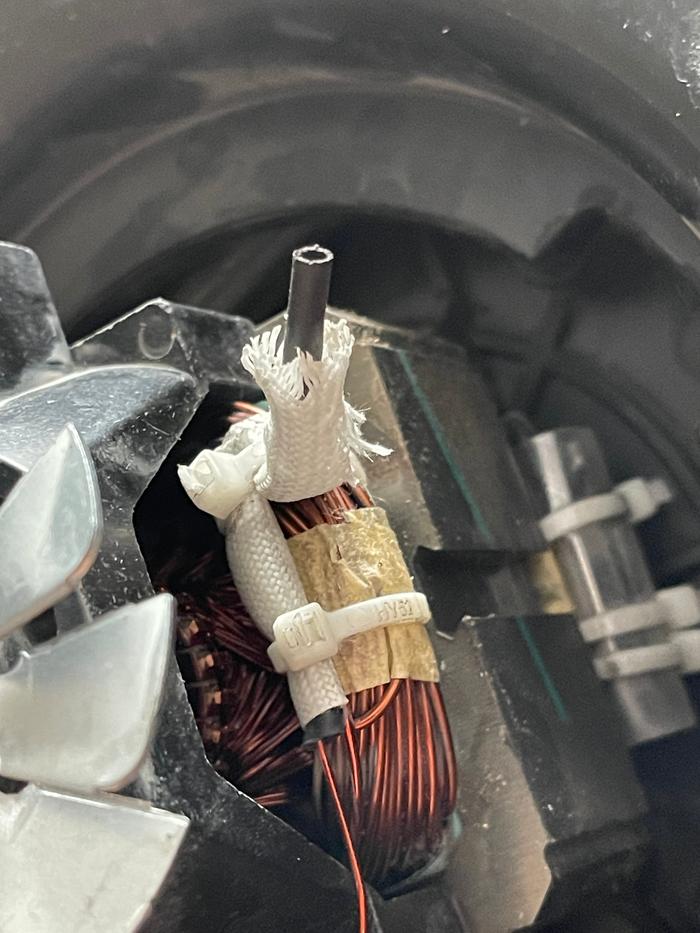
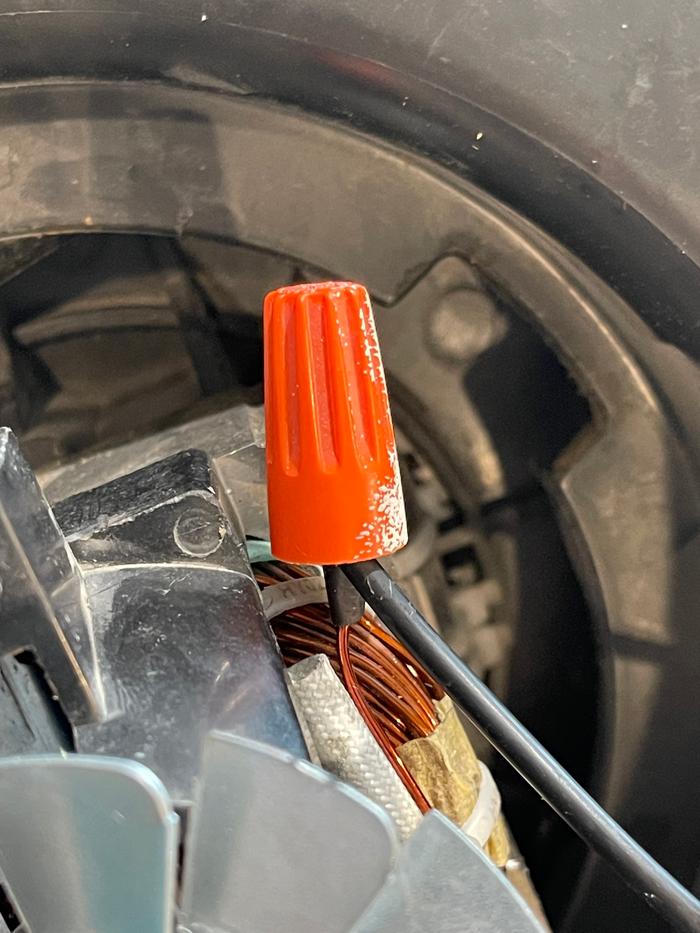
There were some great suggestions and I chose to go for a wire nut - it didn’t require skills like soldering or crimping tools. My lovely neighbour is a horder and he had a spare wire nut. I carefully extracted a length of wire from under the zip ties, to discover that the plastic wasn’t the outer layer of a wire but thermal shrink stuff.


Underneath was a crimped clip. I removed a similar length of sheath of the broken wire and both sections fitted snuggly in the wire nut, which I twisted on to get a solid connection.


I reinstalled the plastic cap over the motor making sure the nut was outside and nothing could move with the vibrations from the motor.


After reassembling the vac worked! As I mentioned in my thread, if I had gone for the first option, receipt in hand, chances are, I’d walk away with a new vac and old one would go into landfill. I now know more and have a new skill. Makes you think . . .

[youtube]https://youtube.com/shorts/oEjlb_wCEo4?feature=share[/youtube]
Staff note (gir bot) :

David Huang approved this submission.
Note: I hearby certify this complete and worth 1 point.

 
master gardener
Posts: 3271
Location: Carlton County, Minnesota, USA: 3b; Dfb; sandy loam; in the woods
1595
6
forest garden trees chicken food preservation cooking fiber arts woodworking homestead ungarbage
  • Likes 1
  • Mark post as helpful
  • send pies
    Number of slices to send:
    Optional 'thank-you' note:
  • Quote
  • Report post to moderator
Approved submission
Having somehow missed this entry, I originally posted this to oddball, but this is a perfect fit so I'm porting it over.

I have an electric dehydrator (I know, I know...a big ol' solar dehydrator is on the to-do list), but it stopped working. I just bought it a couple years ago and it works great except for, y'know, not working. I contacted their tech support and on their recommendation, bought a replacement fuse for six bucks. I did this all three months ago, but it wasn't dehydrator season, so I just sat on the new part until this morning when I cut onion blossoms from which I want to extract seeds, and had to get the dehydrator running again. I'll narrate the job in the captions below.

On troubleshooting: I approached the dehydrator to turn it on and noticed the LED panel was all black. I thought I remembered that even when turned on, it shows signs of life. I checked the plug, verified that it was plugged into a live outlet, messed with the buttons on the front panel to make sure I couldn't stimulate any response, and then examined the back panel to look for a screw-out fuse or circuit reset button. When I found nothing, I contacted the manufacturer before just taking it apart. Since they were responsive and knowledgeable, I didn't really have to diagnose the problem beyond that.

If anyone's interested in this machine, here's an Amazon link to it because it's handy.
IMG_8104-COLLAGE.jpg
This is the dehydrator, front and back. It works great other than needing a replacement fuse after 14 months. The back is nice -- phillips-head screws for things I should touch and the ones I shouldn't are triangles.
IMG_8107-COLLAGE.jpg
When I was getting ready to tip it on it's face, I realized there was a lot of crud inside that would go everywhere so I vaccuumed it quick first. Then it was just a matter of taking out 16 screws around the perimeter.
IMG_8109.jpg
This is the insides, there's not much to it.
IMG_8110.jpg
The fuse I'm replacing is inside that bent piece of insulation. It shouldn't have a kink like that. Getting that bracket loose was the trickiest part of this job.
IMG_8111.jpg
This is what came with the replacement fuse.
IMG_8114.jpg
This lead from the fuse had to be snipped off.
IMG_8115.jpg
This end could be unplugged and the new one plugged in.
This end could be unplugged from the PCB and the new one plugged in.
IMG_8116-COLLAGE.jpg
I had to strip the black wire and get it seated and crimped. I should have used a real wire-stripper but got tired of fetching more tools.
IMG_8121.jpg
Plus the little vaccuum cleaner I used, these are the tools I had to gather up for this job.
IMG_8118.jpg
And here the unit is with the lights on again. My onions seeds are drying in it as I type this.
Staff note (gir bot) :

David Huang approved this submission.
Note: I certify this complete for 1/2 point.  Nice that it ended up being an easy fix!

 
Kevin Harbin
gardener
Posts: 388
Location: Zone 7a
264
6
kids rabbit chicken food preservation fiber arts
  • Mark post as helpful
  • send pies
    Number of slices to send:
    Optional 'thank-you' note:
  • Quote
  • Report post to moderator
Approved submission
I think this issue with my oven fits here because it turned out to be the burned out motor, but I'm open to moving it.
My wife ran the self cleaning cycle on the oven as she has done many times in the past but this time the door lock failed to release.
After trying all the steps from the manual to see if it would reset I finally had to resort to getting a wire snaked behind the door and forcing the lock out of the way.
After I had the door open I tried some of the reset steps again.


With the help of my ears I could tell that the issue was a burned out motor.


Old lock pulled out


After looking for replacement locks I had sticker shock for a new item. Thankfully I was able to get a used replacement from ebay for 1/6th the price. Here is the lock ready to wire.


New lock wired and ready to install


Installed and error cleared


I'm glad I took pictures as I took the trim off or I might not have figured it out where all the screws went.


Fixed
Staff note (gir bot) :

Someone approved this submission.

Staff note (gir bot) :

Someone approved this submission.
Note: Certified for 1 point.  Nice work!

 
It used to be a lot bigger, but now it is a rather tiny ad:
GAMCOD 2025: 200 square feet; Zero degrees F or colder; calories cheap and easy
https://permies.com/wiki/270034/GAMCOD-square-feet-degrees-colder
reply
    Bookmark Topic Watch Topic
  • New Topic