• Post Reply Bookmark Topic Watch Topic
  • New Topic
permaculture forums growies critters building homesteading energy monies kitchen purity ungarbage community wilderness fiber arts art permaculture artisans regional education skip experiences global resources cider press projects digital market permies.com pie forums private forums all forums
this forum made possible by our volunteer staff, including ...
master stewards:
  • Nancy Reading
  • Carla Burke
  • r ranson
  • John F Dean
  • paul wheaton
  • Pearl Sutton
stewards:
  • Jay Angler
  • Liv Smith
  • Leigh Tate
master gardeners:
  • Christopher Weeks
  • Timothy Norton
gardeners:
  • thomas rubino
  • Jeremy VanGelder
  • Maieshe Ljin
 
gardener
Posts: 1322
741
8
hugelkultur monies foraging trees composting toilet cooking bike solar wood heat rocket stoves ungarbage
  • Likes 5
  • Mark post as helpful
  • send pies
    Number of slices to send:
    Optional 'thank-you' note:
  • Quote
  • Report post to moderator
Approved submission
The past couple days I finally tackled a project I've been saying I should do for years now.  I got this crazy old metal forming, raising hammer for $5 at a flea market a long time ago.  It was in crappy condition, rusty, with a cracked handle, and broken hammer face.  I've fixed this up to working condition again and did a couple BBs in the process.  Repairing the handle will be a different submission for the make a wedge style handle BB.  For this submission I have refurbished the hammer head.

This involved a lot of rust removal initially.  I started with a diamond abrasive sanding sponge to get the worst of it, then moved to a wire brush on a flex shaft tool as well as an 80 grit radial bristle brush on my Foredom bench lathe.  

After this I set about refinishing the faces of the hammer.  They were deeply pitted which is not a good thing for the sort of metalwork I do.  Any mark or pit on the surface of the hammer face will get imprinted on the metal I'm forming with it over and over again.  Initially I tried just working with my coarsest diamond grit sanding sponge, but that wasn't getting me anywhere significant.  The hammer face was well hardened and deeply pitted.  So I did break out the 4.5 inch angle grinder and went to town on it, being careful not to overheat the metal while also keeping the proper head shape.  With the broken corner on the boxing face there was no real repair possible.  I opted to just blend that back a bit further, softening the edge, so if I do use that side I can hopefully avoid that corner making unsightly hammer marks from a ragged edge hitting.  Then I finished up the hammer faces with sanding sponges which conform nicely to curves and brought it down to a suitably smooth finish.

There was still some rust in crevices and the hole for the handle so I decided to try the vinegar trick which I learned reading the BB submissions of others!  That seemed to work.  Finally I applied a thin coat of some old, rancid canola oil I have.  Copying M Broussard's trick I then heated it up with a fuzzy torch until it just started to smoke to set it as a better finish.

Finally, once the handle was made I got it all mounted and restored to working order.  In cleaning this up I could see this is an old hammer that has seen a lot of use.  I have to wonder what its history really is.  What stories could it tell?  I doubt I'll actually use it much as it's designed for a style of raising I don't do, not to mention larger scale pieces than I generally do as well.  Still this was somebody's workhorse hammer at one point in the past.  Hopefully I've revived it well enough that it can be for someone else in the future after me.

DSC06185.JPG
Here is the hammer in the original state I was starting with.
DSC06198.JPG
After I removed the cracked handle this is the head I was working to clean up and restore.
DSC06199.JPG
Action shot removing rust with the radial bristle brushes.
DSC06201.JPG
Big jump forward in the restoration process. I'm now doing some final finishing with sanding sponges.
DSC06203.JPG
A vinegar bath to finish removing residual rust from hard to reach places.
DSC06205.JPG
The hammer head after it was oiled with a thin coat of canola oil.
DSC06206.JPG
Close up of the refurbished broken boxing face.
DSC06207.JPG
Close up of the refurbished cross peen raising face.
DSC06224.JPG
The finished and restored hammer with it's new ash wood handle.
Staff note (gir bot) :

Mike Barkley approved this submission.

 
Posts: 119
Location: Chemung, NY
9
fungi trees medical herbs
  • Mark post as helpful
  • send pies
    Number of slices to send:
    Optional 'thank-you' note:
  • Quote
  • Report post to moderator

klara stinders wrote:Cleaned this lovely old traditional belgian tool with vinegar and an inox sponge
Gave it a vinegar bath for a total of around 3 hours, without having the handle in the vinegar.
To get closer to the handle, I wrapped an in vinegar soaked cloth around the blade so it would also get the vinegar treatment.

I had no patience, so every now and again I went to do some scrubbing, but everytime I found out I was too early.
After those 3 hours, I was happy with the end result. Dried it with a paper towel, let it sit in the air for a while, and then oiled it with linseed oil.

Can't wait for this baby to be sharpened :-)


What is this Belgian tool used for? What is it called? Thanks.
 
pollinator
Posts: 166
59
cat purity home care books chicken food preservation cooking fiber arts medical herbs seed composting
  • Likes 2
  • Mark post as helpful
  • send pies
    Number of slices to send:
    Optional 'thank-you' note:
  • Quote
  • Report post to moderator
Approved submission
Remove Rust, Clean, and Oil a Hand Tool

My hedge trimmers were left out in the rain. So much rust.

I soaked them in a tray of vinegar for 3 hours, scrubbed with steel wool, shined with a rag and linseed oil

IMG_7368.jpg
rusty front
rusty front
IMG_7369.jpg
rusty back
rusty back
IMG_7371.jpg
soaked for 3 hours in white vinegar
IMG_7373.jpg
black flecks coming off after 3 hours
IMG_7377.jpg
I used steel wool to get off the rust
IMG_7370.jpeg
Things I used
Things I used
IMG_7378.jpg
shiny
shiny
IMG_7379.jpg
shiny
shiny
Staff note (gir bot) :

R Parian approved this submission.
Note: Nicely done!

 
master gardener
Posts: 4249
Location: Upstate NY, Zone 5, 43 inch Avg. Rainfall
1721
monies home care dog fungi trees chicken food preservation cooking building composting homestead
  • Likes 2
  • Mark post as helpful
  • send pies
    Number of slices to send:
    Optional 'thank-you' note:
  • Quote
  • Report post to moderator
Approved submission
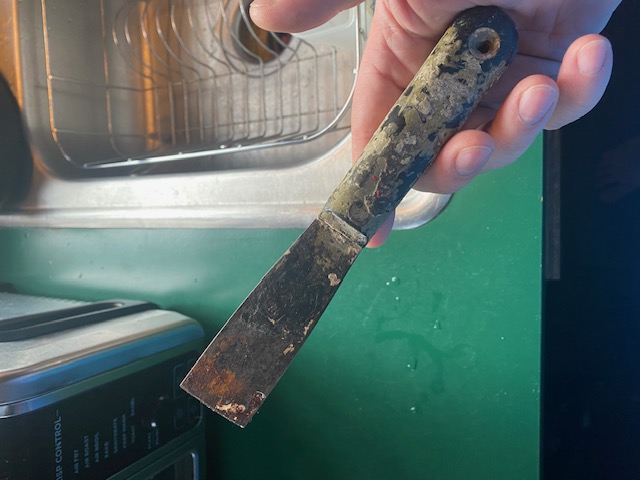
I chose a small flat puddy knife that has seen better days. It is kind of my go-to default tool and it has seen primer, tar, paint, asphalt, masonry an more. It has been overdue for a cleanup


To get certified for this BB, post the following as pictures or video (<2 min):
 - rusty tool
 - rust being removed
 - clean and oiled tool
 - description of oil and cleaning method used


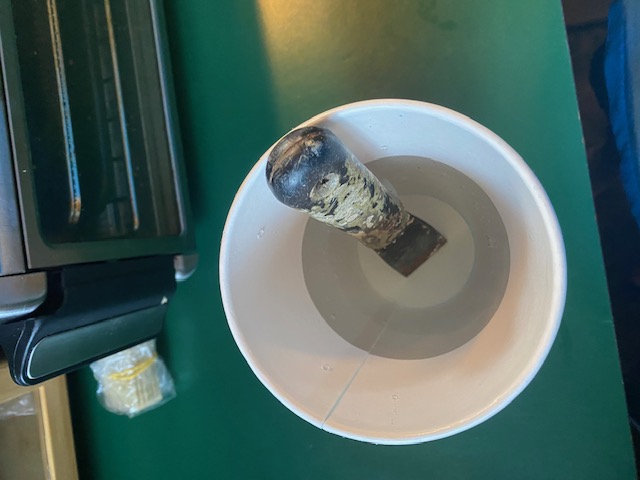
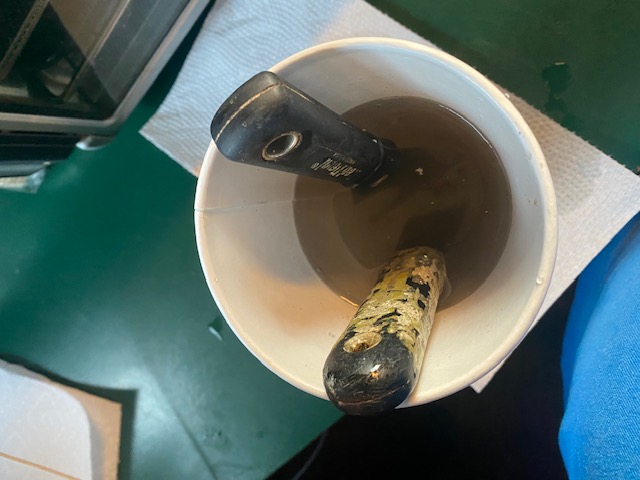
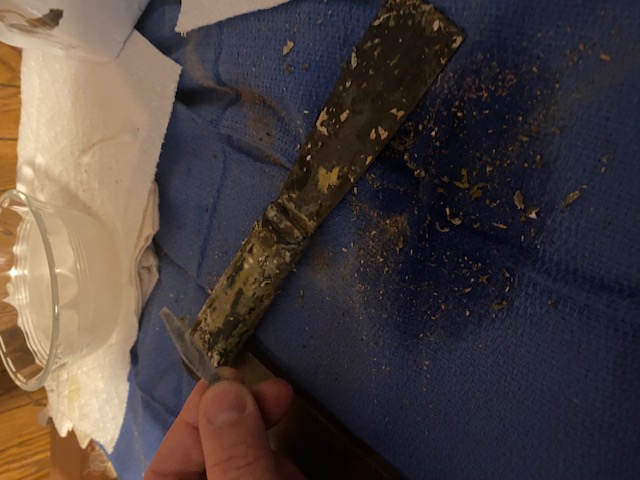
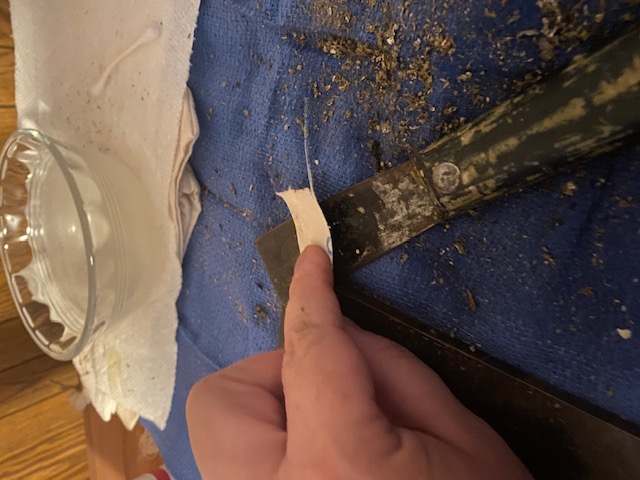
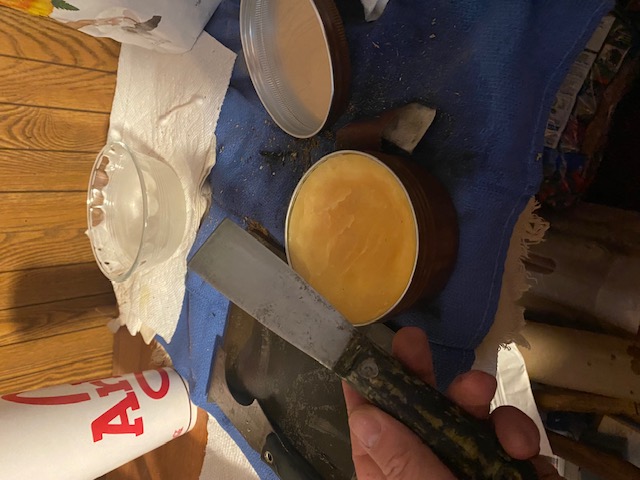
I decided on a 1 hour soak in household white vinegar followed with scraping with a puddy knife and pocketknife. This was followed by sanding to get it to a smooth shiny finish on the blade and make the handle smooth to the touch. When it was to my satisfaction I made sure it was dry and coated the blade in beeswax to protect it.
CleanRust1.jpg
Rough, bumpy, sticky, nasty
CleanRust2.jpg
Into the vinegar
Into the vinegar
CleanRust3.jpg
I decided to give the puddy knife a friend to bath with. (Scraped loose particles off)
CleanRust4.jpg
I have a small pocketknife with a broken blade that was perfect to scrape off old paint.
CleanRust5.jpg
Always good to have options. Coarser grit this time.
CleanRust6.jpg
Sandpaper < Tar, Lesson learned.
CleanRust7.jpg
Clean and coated
Clean and coated
Staff note (gir bot) :

Someone approved this submission.

 
gardener
Posts: 503
Location: Winemucca, NV
272
3
foraging food preservation cooking fiber arts greening the desert homestead
  • Mark post as helpful
  • send pies
    Number of slices to send:
    Optional 'thank-you' note:
  • Quote
  • Report post to moderator
Approved submission
I used vinegar, wire brushes, steel pot scrubber, a file, and steel wool to remove the rust and protected with linseed oil.
20230903_140922.jpg
Assorted rusty tools
20230904_164754.jpg
After soaking in vinegar
20230904_170440.jpg
Disassembled for better cleaning. It was not moving right.
20230904_190626.jpg
Cleaned and oiled with boiled linseed oil
Staff note (gir bot) :

Someone approved this submission.
Note: I certify this badge bit complete.

 
pollinator
Posts: 245
77
fungi foraging fiber arts medical herbs woodworking ungarbage
  • Likes 2
  • Mark post as helpful
  • send pies
    Number of slices to send:
    Optional 'thank-you' note:
  • Quote
  • Report post to moderator
Approved submission
Last fall we found a hatch on the side of the road - dinged up and rusty. We're guessing it fell off of a work truck after the turn. Our guess is that it had been there awhile because of the level of rust.

I have some wood working I want to do today so might as well clean her up!

The handle was still securely attached and I didn't want to take it off which made this a bit more difficult. Cordless drill with a sanding pad to get the worst of the rust off. I removed the rest by hand with sandpaper.

Spilled honing oil was used to oil metal and the wood.
20240309_082353.jpg
dinged up, chipped and rusty
20240309_082919.jpg
just getting going with the sander- I'm liking what I see
20240309_084601.jpg
other side of rusty hatchet
20240309_084521.jpg
drill with sandpaper
20240309_084950.jpg
hand sanding off more rust
20240309_085814.jpg
can't forget the top!
20240309_091259.jpg
rust free
rust free
20240309_090901.jpg
chip has been removed from the top edge
20240309_101203.jpg
the honing oil that spilled
20240309_101317.jpg
oiled hatchet
oiled hatchet
Staff note (gir bot) :

Paul Fookes approved this submission.
Note: I certify this BB complete.  Well done

 
Posts: 2
  • Likes 1
  • Mark post as helpful
  • send pies
    Number of slices to send:
    Optional 'thank-you' note:
  • Quote
  • Report post to moderator
Hello,

Your approach to tool maintenance is really ingenious! Using an angle grinder with a wire brush to remove thick rust seems to be an effective method, and using vinegar to remove the rest of the rust is an interesting trick. I'm particularly intrigued by your use of beeswax to protect the metal. It's a brilliant and environmentally friendly idea! The idea of melting the wax into the metal for long-lasting protection is certainly worth considering.
 
pollinator
Posts: 223
Location: East Texas, USA
131
books chicken fiber arts sheep homestead ungarbage
  • Mark post as helpful
  • send pies
    Number of slices to send:
    Optional 'thank-you' note:
  • Quote
  • Report post to moderator
Approved submission
I cleaned and oiled a pair of hedge-clippers.
I used vinegar, steel wool, sandpaper, paper towels, and olive oil. (Thanks to Opalyn Rose above for the tip on using glass jars to displace the vinegar so I could more easily submerge my tool.)

The vinegar soaking took a few hours, but it worked well with the other steps.

We now have a usable pair of hedge-clippers! Could use some more sharpening, but that’s a separate task and it worked for some light trimming I needed done today.
IMG_1481.jpeg
[Thumbnail for IMG_1481.jpeg]
IMG_1484.jpeg
[Thumbnail for IMG_1484.jpeg]
IMG_1491.jpeg
[Thumbnail for IMG_1491.jpeg]
IMG_1497.jpeg
[Thumbnail for IMG_1497.jpeg]
IMG_1499.jpeg
[Thumbnail for IMG_1499.jpeg]
IMG_1502.jpeg
[Thumbnail for IMG_1502.jpeg]
IMG_1504.jpeg
[Thumbnail for IMG_1504.jpeg]
Staff note (gir bot) :

Someone approved this submission.
Note: Nicely Done

 
You showed up just in time for the waffles! And this tiny ad:
Freaky Cheap Heat - 2 hour movie - HD streaming
https://permies.com/wiki/238453/Freaky-Cheap-Heat-hour-movie
reply
    Bookmark Topic Watch Topic
  • New Topic