• Post Reply Bookmark Topic Watch Topic
  • New Topic
permaculture forums growies critters building homesteading energy monies kitchen purity ungarbage community wilderness fiber arts art permaculture artisans regional education skip experiences global resources cider press projects digital market permies.com pie forums private forums all forums
this forum made possible by our volunteer staff, including ...
master stewards:
  • Nancy Reading
  • Carla Burke
  • r ranson
  • John F Dean
  • paul wheaton
  • Pearl Sutton
stewards:
  • Jay Angler
  • Liv Smith
  • Leigh Tate
master gardeners:
  • Christopher Weeks
  • Timothy Norton
gardeners:
  • thomas rubino
  • Jeremy VanGelder
  • Maieshe Ljin
  • Likes 1
  • Mark post as helpful
  • send pies
    Number of slices to send:
    Optional 'thank-you' note:
  • Quote
  • Report post to moderator
This is a badge bit (BB) that is part of the PEP curriculum.  Completing this BB is part of getting the straw badge in tool care.

Here is a video on how to sharpen scissors.


From the video description:
"How to sharpen scissors or shears for the shop. Today we are looking at sharpening scissors for use in the shop or anywhere you need truly sharp scissors. whether you need scissors for paper, crafts or good old fabric scissors learning how to sharpen scissors can prolong the life of the scissors and allow them to work as good or better than new. Whether you have the latest Fiskars scissors or a 100-year-old pair of shears, you can make them work like new once you sharpen them."

Requirements to complete:
- Disassemble scissors or garden shears and sharpen the edge properly (depending on whether anvil or by-pass), including both primary and secondary edge if applicable.
- Remove excess sap and other residue. Some "staining" is to be expected.
- Oil sufficiently for smooth action. Oil can't be petroleum derived .

To get certified for this BB, post the following:

 - Pic of dull edge or poorly cut paper
 - Action pic with disassembled scissors/shears showing method of sharpening.
 - Pic of reassembled, sharpened scissors/shears possibly cutting paper
 - Describe the sharpening method and oil used.
COMMENTS:
 
gardener
Posts: 580
Location: Pembrokeshire, UK
434
2
dog forest garden gear fungi foraging trees building medical herbs woodworking homestead
  • Likes 2
  • Mark post as helpful
  • send pies
    Number of slices to send:
    Optional 'thank-you' note:
  • Quote
  • Report post to moderator
Approved submission
These are an antique pair of forged steel scissors made in Sheffield, UK. Unfortunately I couldn't disassemble them as the fastening has perished and the slot was breaking down. I may have managed to get the blades apart with a bit more force but I didn't want to risk breaking them and necessitating further repairs - the thread for older, British-made tools tends to be BSW/Whitworth and it's not easy to come by the fastenings any more.

I sharpened the blades in position using a whetstone and a diamond stone. The diamond stone is a little coarse and needs to be cleaned up using the whetstone (which is approximate 2000 grit). The combination leaves a good edge though.

The scissors are a little stained due to age but they are free from grease (which I wiped off using an oily rag).

I oiled the scissors using some plant-based chain oil for my bicycle, Green Oil.

Apologies for the difficulty in the finished shots. It's quite hard to focus on the edge of a sharp blade!

Here is a video showing the scissors doing their thing: https://vimeo.com/553427792
1.jpg
Edge of blade with visible knicks
2.jpg
Blade itself is flat and dull
3.jpg
Blade, looking much sharper.
4.jpg
Another shot of the honed blade.
Staff note (gir bot) :

Mike Barkley flagged this submission as an edge case BB.
BBV price: 0
Note: please include a pic of the worn fastener for further consideration

Staff note (gir bot) :

Mike Barkley approved this submission.

 
Luke Mitchell
gardener
Posts: 580
Location: Pembrokeshire, UK
434
2
dog forest garden gear fungi foraging trees building medical herbs woodworking homestead
  • Mark post as helpful
  • send pies
    Number of slices to send:
    Optional 'thank-you' note:
  • Quote
  • Report post to moderator
I've included two photos: the first is the current state of the fastener (not the slot being broken down by the screwdriver) and the second after another attempt (today) to loosen it. The steel of the fastener is softer than my screwdriver bit and is being bent and damaged.
PXL_20210726_084215643.jpg
Fastener
Fastener
PXL_20210726_084330955.jpg
After another go at loosening
 
master pollinator
Posts: 4991
Location: Canadian Prairies - Zone 3b
1352
  • Mark post as helpful
  • send pies
    Number of slices to send:
    Optional 'thank-you' note:
  • Quote
  • Report post to moderator
I agree that caution is advised with these old fasteners. Sometimes the threads are so badly siezed that the head of the screw will snap off. Repairing that is a nasty job.
 
Luke Mitchell
gardener
Posts: 580
Location: Pembrokeshire, UK
434
2
dog forest garden gear fungi foraging trees building medical herbs woodworking homestead
  • Likes 1
  • Mark post as helpful
  • send pies
    Number of slices to send:
    Optional 'thank-you' note:
  • Quote
  • Report post to moderator
That is my fear. The scissors are pretty old and have some sentimental value as they belonged to my late grandmother. I also try to abide by the aphorism of "if it ain't broke, don't fix it"; these scissors are sharp and function well, especially after the attention that I've given them for this BB. I'd rather not risk breaking the bolt (which is clearly on its last legs) and having to try a lengthy, unnecessary repair.
 
Douglas Alpenstock
master pollinator
Posts: 4991
Location: Canadian Prairies - Zone 3b
1352
  • Mark post as helpful
  • send pies
    Number of slices to send:
    Optional 'thank-you' note:
  • Quote
  • Report post to moderator
The BB may require it, but I find it's not always necessary or practical to disassemble scissors for sharpening. High-end scissors may benefit, though restoring hollow ground edges is a specialized business. My 2 cents.
 
Posts: 34
Location: Portland OR, 8b
40
2
urban bike woodworking
  • Mark post as helpful
  • send pies
    Number of slices to send:
    Optional 'thank-you' note:
  • Quote
  • Report post to moderator
Approved submission
I sharpened a pair of scissors I found in the road years ago while biking. Apparently this type of scissor is called a "Trauma Shear" and is used to cut away clothing from injured people.

The edge wasn't in terrible shape, but had a few nicks, and the whole thing was pretty rusty. Before sharpening, it would generally cut reasonably okay with a snipping action, and couldn't cut with a sliding action at all.

I removed the rust with vinegar and a wire brush.

I was unable to take them apart for this process, as the screw had previously been mangled. I tried to unmangle the screw using a sharpened stainless steel bicycle spoke, and cleared enough of the screwhead notch to get a small flathead screwdriver to engage, but the screw was stuck enough that my screwdriver bit broke first. From the previous conversation here, it seems like there might be some leeway for this BB in cases where disassembly is infeasible.

I flattened the back sides of the blades using a file and a piece of 320 grit sandpaper glued to a flat piece of wood, across both edges of the hollow-ground back. I clamped the scissors with each blade facing up and the other jaw stuck open, and sharpened the bevel with the same file and sandpaper/wood.

I dripped a bit of grapeseed oil into the pivot point, and wiped some over the places where I had removed the rust.

After sharpening, they cut well with a snipping action, and sometimes can do a little bit of sliding-action cutting, but still not from end-to-end of a sheet of paper. I believe that the reason that I'm not able to get them to cut better with a sliding action is because the pivot screw is stuck and there's a bit of slop that would ideally be taken out.
rusty.jpeg
[Thumbnail for rusty.jpeg]
edgebefore.jpeg
[Thumbnail for edgebefore.jpeg]
derusting.jpeg
[Thumbnail for derusting.jpeg]
mangled-screw.jpeg
[Thumbnail for mangled-screw.jpeg]
back.jpeg
[Thumbnail for back.jpeg]
bevel.jpeg
[Thumbnail for bevel.jpeg]
sharp.jpeg
[Thumbnail for sharp.jpeg]
Staff note (gir bot) :

Paul Fookes approved this submission.
Note: I certify this BB complete.  These scissors have a drop pressed pin which cannot be removed, so cannot be disassembled.  Well done Timothy.

 
gardener
Posts: 1322
741
8
hugelkultur monies foraging trees composting toilet cooking bike solar wood heat rocket stoves ungarbage
  • Mark post as helpful
  • send pies
    Number of slices to send:
    Optional 'thank-you' note:
  • Quote
  • Report post to moderator
Approved submission
I intend to soon start doing some clothes patching, sewing, and general fabric related things so it seems like a good idea to initially make sure my scissors are sharp enough to cut fabric.  No surprise to me that they weren't.  I actually sharpened two pair of scissors, but one of them I couldn't get the screw/nut off to take them apart so I won't bother submitting that one and just do this one pictured below instead.  The screw was still very hard to undo.  I suppose that might be a design feature of scissors so they aren't constantly getting too loose or too tight as they are used.

Once apart I did some general cleaning with a wire brush on a flex-shaft tool and a bit of abrasive paper where more effort was needed.  Then I put them in the vise and worked to file the cutting edge.  Initially I tried my large file, but the metal on the first pair of scissors (not shown) was so hard the file didn't want to do much!  I could have made it work, but decided since I have a better tool I should just use it.  So I got out my set of various grit diamond files, starting with a coarse one and working my way down to the finest.  Then a bit of touch up to remove the bur from the flat side of the scissors.  

As I do want to cut clean fabric with these I didn't want to use a messy oil on them so I rubbed on a light coat of coconut oil.  Then with much effort managed to get the screw back in.  To my delight this all actually worked!  These scissors have never cut so beautifully since I've owned them!  In my initial test with the scrap of fabric it cut just a tiny bit before simply closing down on it without cutting at all.  Once sharpened they slice right through.  Yay!
DSC06069.JPG
First shot of my trying to cut fabric prior to sharpening.
DSC06070.JPG
Second shot of trying to cut fabric prior to sharpening. Hopefully between the two you can see they didn't function well.
DSC06071.JPG
The screw is removed, disassembling the scissors.
DSC06072.JPG
close up action shot of the diamond file working on one side clamped in my vise.
DSC06073.JPG
A wider angle view of the sharpening action with the diamond files. While actually sharpening I had two hands on the file, but I needed one to take the photo.
DSC06074.JPG
Cleaned, sharpened, and reassembled they cut neatly through the fabric scrap.
DSC06075.JPG
A second shot of cutting the fabric after sharpening.
Staff note (gir bot) :

R Parian approved this submission.
Note: Certified!

 
master gardener
Posts: 4249
Location: Upstate NY, Zone 5, 43 inch Avg. Rainfall
1721
monies home care dog fungi trees chicken food preservation cooking building composting homestead
  • Mark post as helpful
  • send pies
    Number of slices to send:
    Optional 'thank-you' note:
  • Quote
  • Report post to moderator
Approved submission
Requirements to complete:
- Disassemble scissors or garden shears and sharpen the edge properly (depending on whether anvil or by-pass), including both primary and secondary edge if applicable.
- Remove excess sap and other residue. Some "staining" is to be expected.
- Oil sufficiently for smooth action. Oil can't be petroleum derived .


To get certified for this BB, post the following:

- Pic of dull edge or poorly cut paper
See Attached
- Action pic with disassembled scissors/shears showing method of sharpening.
See Attached
- Pic of reassembled, sharpened scissors/shears possibly cutting paper
See Attached
- Describe the sharpening method and oil used.
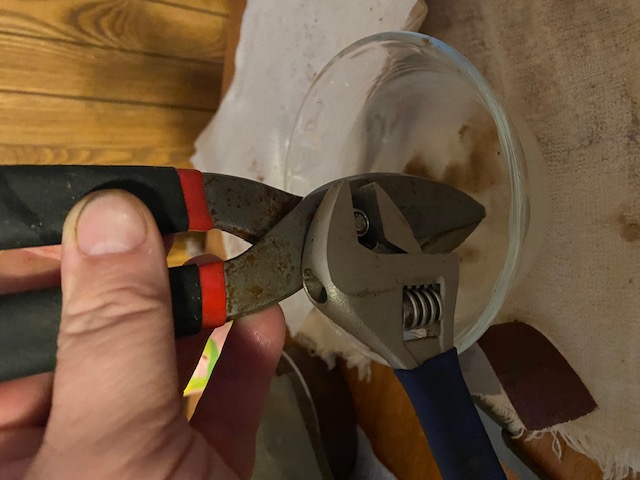
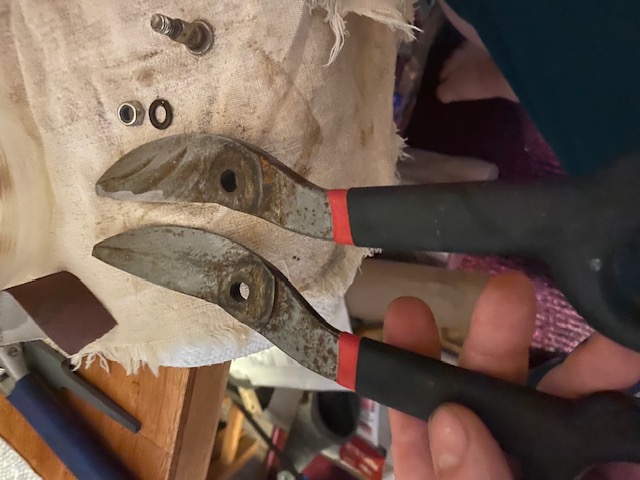
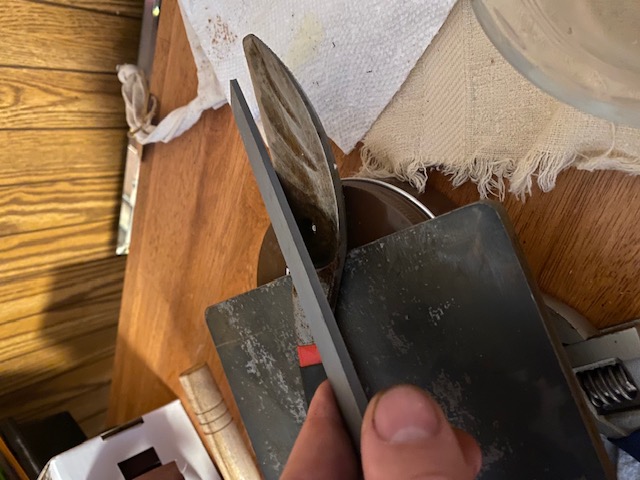
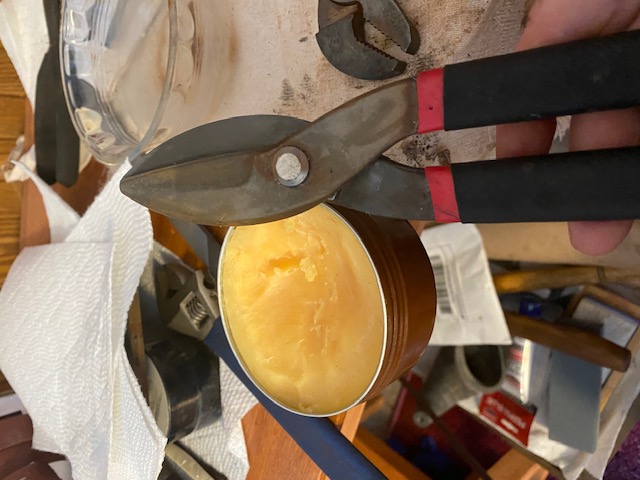
I utilized a flat file to sharpen the edges of my shears and utilized warmed beeswax to coat and protect the metal.
Shears1.jpg
Beat up, needs some TLC
Shears-2.jpg
Vinegar bath is always a go to
Shears3.jpg
Did alright.
Did alright.
Shears4.jpg
Some sandpaper to work off the rusty spots and burrs.
Shears5.jpg
Disassemble to get all the nooks and prep for sharpening
Shears6.jpg
Not the best edges, not the worst. I think I can fix them up without having to resort to any extraordinary effort.
Shears7.jpg
Flat file and finesse
Shears8.jpg
Beeswax to coat and protect. It kept melting and slipping onto my lap.
Shears9.jpg
Cuts like butter.
Cuts like butter.
Staff note (gir bot) :

Someone approved this submission.

 
pollinator
Posts: 259
Location: New Zealand
307
chicken food preservation fiber arts woodworking homestead
  • Mark post as helpful
  • send pies
    Number of slices to send:
    Optional 'thank-you' note:
  • Quote
  • Report post to moderator
Approved submission
I sharpened three pairs of scissors (in case one of them was judged not suitable for the BB!). None of them were able to be separated. The centre one's screw head stripped a bit when I tried to remove it, and the screw doesn't go all the way through.

Each pair of scissors was ok at cutting paper prior to sharpening, but not fabric. After being sharpened, they were all able to cut fabric.

Scissors were sharpened with a file and then a fine grit stone. They were oiled with sewing machine oil.
mb-bb-tool-straw-scissors-1.JPG
Scissors, initial cuts on paper and fabric
mb-bb-tool-straw-scissors-2.JPG
Initial blades
Initial blades
mb-bb-tool-straw-scissors-3.JPG
Sharpening
Sharpening
mb-bb-tool-straw-scissors-4.JPG
Final blades
Final blades
mb-bb-tool-straw-scissors-5.JPG
Scissors, cuts on paper and fabric after sharpening
Staff note (gir bot) :

Someone approved this submission.

 
Posts: 123
64
  • Mark post as helpful
  • send pies
    Number of slices to send:
    Optional 'thank-you' note:
  • Quote
  • Report post to moderator
Approved submission
I've been wanting to try one of these sharpening contraptions and they had this one on sale. And it's actually the accusharp brand! Anyways this was my test scissors before I tried any good ones. I didn't oil them because the screw in is plastic and didn't want anything funky happening in there. The spots on the blade are whatever they coated the metal in doing something. See why they where the test pair.
20241114_204245.jpg
Hard to cut
Hard to cut
20241114_204729.jpg
Scissors and sharpener
20241114_205247.jpg
Disassembled and sharpening. Imagine camera hand on the sharpener handle.
20241114_210024.jpg
Reassembled and easy cut paper.
Staff note (gir bot) :

Paul Fookes approved this submission.
Note: I certify this BB complete.  Well done

 
Not looking good. I think this might be the end. Wait! Is that a tiny ad?
Freaky Cheap Heat - 2 hour movie - HD streaming
https://permies.com/wiki/238453/Freaky-Cheap-Heat-hour-movie
reply
    Bookmark Topic Watch Topic
  • New Topic