• Post Reply Bookmark Topic Watch Topic
  • New Topic
permaculture forums growies critters building homesteading energy monies kitchen purity ungarbage community wilderness fiber arts art permaculture artisans regional education skip experiences global resources cider press projects digital market permies.com pie forums private forums all forums
this forum made possible by our volunteer staff, including ...
master stewards:
  • Carla Burke
  • Nancy Reading
  • John F Dean
  • r ranson
  • Jay Angler
  • paul wheaton
stewards:
  • Pearl Sutton
  • Leigh Tate
  • Devaka Cooray
master gardeners:
  • Christopher Weeks
  • Timothy Norton
gardeners:
  • thomas rubino
  • Matt McSpadden
  • Jeremy VanGelder

PEP Badge: Oddball

BB oddball - sand badge
 
pollinator
Posts: 108
Location: Japan
65
kids home care personal care foraging urban cooking medical herbs solar ungarbage
  • Likes 4
  • Mark post as helpful
  • send pies
    Number of slices to send:
    Optional 'thank-you' note:
  • Quote
  • Report post to moderator
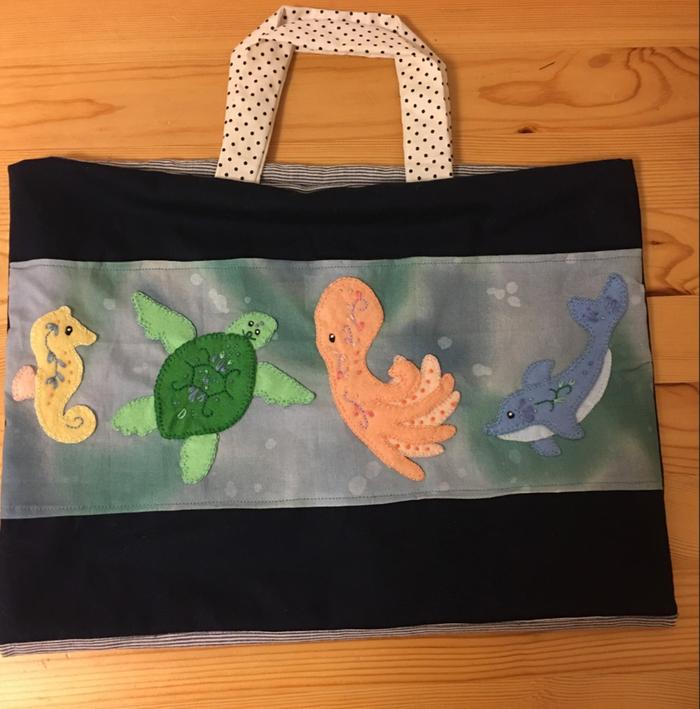
I just wanted to ask if something like this would qualify? I made this set about 3 years ago now for my eldest son when he started kindergarten. In Japan each kid needs a very specific set of school bags. The school usually gives you the dimensions and what you need to make. It is traditional for the mum to hand make them for the kids but a lot of parents buy now. Anyway I'm not the best machine sewer but i'm not bad at embroidery so I made some nice appliques for my son who likes sea creatures.

I'm asking because i'm about to make a similar set for my youngest kid as he will be starting soon and it takes a while for me to make them. He'll probably get dinosaurs. If it will qualify then i'll take pictures. Thank you.

IMG_20201102_194122.jpg
Finished bags
Finished bags
IMG_20201102_194137.jpg
Cutting out appliques
IMG_20201102_194148.jpg
Hand stitching
Hand stitching
IMG_20201102_194217.jpg
Finished the sea horse
IMG_20201102_194230.jpg
Finished octopus
Finished octopus
IMG_20201102_194247.jpg
All four for the book bag
IMG_20201102_194306.jpg
Finished book bag (construction done by me too but definitely less that perfect. Still they are used 3 years later so not too bad)
IMG_20201102_194049.jpg
Lunch set
Lunch set
IMG_20201102_194108.jpg
Inside the puffer fish bag
 
steward
Posts: 15517
Location: Northern WI (zone 4)
4852
7
hunting trees books food preservation solar woodworking
  • Mark post as helpful
  • send pies
    Number of slices to send:
    Optional 'thank-you' note:
  • Quote
  • Report post to moderator
I think there might be some BBs in Textiles Straw level that could line up with those projects.  Unless they're manmade materials.  Then the only place for them is here in Oddball.  The scoring in Oddball starts with the amount of time it would take a professional with a bit of luck and all the tools/materials ready to go.  Then it's adjusted up, or more likely down, for the Otis factor (how much Otis would like it) and the PEX factor (how it fits into Paul's permaculture ethics).
 
N.Y. Anzai
pollinator
Posts: 108
Location: Japan
65
kids home care personal care foraging urban cooking medical herbs solar ungarbage
  • Mark post as helpful
  • send pies
    Number of slices to send:
    Optional 'thank-you' note:
  • Quote
  • Report post to moderator

Mike Haasl wrote:I think there might be some BBs in Textiles Straw level that could line up with those projects.  Unless they're manmade materials.  Then the only place for them is here in Oddball.  The scoring in Oddball starts with the amount of time it would take a professional with a bit of luck and all the tools/materials ready to go.  Then it's adjusted up, or more likely down, for the Otis factor (how much Otis would like it) and the PEX factor (how it fits into Paul's permaculture ethics).


On that last one, the majority is natural materials the felt is wool and the materials are cotton. There are a few plastic pieces sewn in because the kindergarten specified plastic and not metal (probably so the kids don't hurt themselves or each other with them). The beads on the end are the same. I feel like wood would probably be okay. I think I might use fabric for the appliques this time because i'm vegan now and don't want to use wool. Oh the velcro on the cutlery holder. That's plastic. I could next time sew a metal popping button or even just regular button. I'll have a think.  Anway I'll see where it might fit in textiles then. I think there is one for making a regular bag but I don't see anything for embroidery.

Anyway thank you for answering my questions :)
 
Mike Haasl
steward
Posts: 15517
Location: Northern WI (zone 4)
4852
7
hunting trees books food preservation solar woodworking
  • Likes 1
  • Mark post as helpful
  • send pies
    Number of slices to send:
    Optional 'thank-you' note:
  • Quote
  • Report post to moderator
My pleasure!  And I'm not the textiles expert so hopefully they can chime in on if zippers/beads/buttons also need to be natural or if it's just the fabric parts.  Or better yet, maybe you can ask in one of the appropriate textile BB threads so the answer will appear there for others in the future, vs here in Oddball...
 
pollinator
Posts: 117
Location: 6.b.
31
forest garden chicken cooking
  • Likes 4
  • Mark post as helpful
  • send pies
    Number of slices to send:
    Optional 'thank-you' note:
  • Quote
  • Report post to moderator
Odd-ball task?

The gate was originally slapped on by the previous owner and set to open into a hill (in other words, it opened 8 inches and then hit earth). I took the door off, removed the hinges, flipped to the other side, added some wood so the hinges would fit, and swapped out all of the screws for better ones. Some of the attached metal fence (to keep a dog from pushing through) needed to be stapled down as well, easy with supplies on hand. Took about 45 minutes and now the door opens towards down-hill and I can drive my tractor through. Major score for future work flow :)

I'm not sure I could have gone much faster, I was racing the sun and don't have anything in the way of task lighting in my arsenal yet.
20201023_172504.jpg
Gate off the fence.
Gate off the fence.
20201023_183647.jpg
Gate back on the fence!
Staff note :

Certified for 0.5 oddball points

 
gardener
Posts: 1571
Location: Washington State
985
6
forest garden trees rabbit earthworks composting toilet fiber arts sheep wood heat woodworking rocket stoves homestead
  • Likes 1
  • Mark post as helpful
  • send pies
    Number of slices to send:
    Optional 'thank-you' note:
  • Quote
  • Report post to moderator
Here is my submission for my Oddball Sand Badge.  Sand Badge Requirement: 5 points. I have earned 5.5 points.

  Ply-Split Braiding (4.5 points)
  Bookshelf (1 point)
Staff note (Mike Haasl) :

You hereby are awarded the Oddball Sand badge.  Congratulations!

 
steward
Posts: 21564
Location: Pacific Northwest
12053
11
hugelkultur kids cat duck forest garden foraging fiber arts sheep wood heat homestead
  • Likes 6
  • Mark post as helpful
  • send pies
    Number of slices to send:
    Optional 'thank-you' note:
  • Quote
  • Report post to moderator
I made a bow!

My son's been learning about the medieval age, and wanted a bow, so we made one!

This is the tutorial I used:


In the tutorial, he says it should take about an hour to make a greenwood bow, though it took him 1.5 hours. (Let's not talk about how long it took me, haha!)

When I made it in that shape, though, we found (1) it wasn't flexible enough for it's short length, and (2) the uncarved "back" of the bow was causing it to crack. So, following the advice on this blog, I made the bow much thinner and flatter on the back.
20201101_154956.jpg
harvesting the hazel from my native, copiced hazelnut tree
20201101_180127.jpg
Carving it down
Carving it down
20201101_191429.jpg
Carved down even more
20201106_115341.jpg
My daughter getting a chance to shoot it
20201106_134838.jpg
Now it's my son's turn!
20201109_113326.jpg
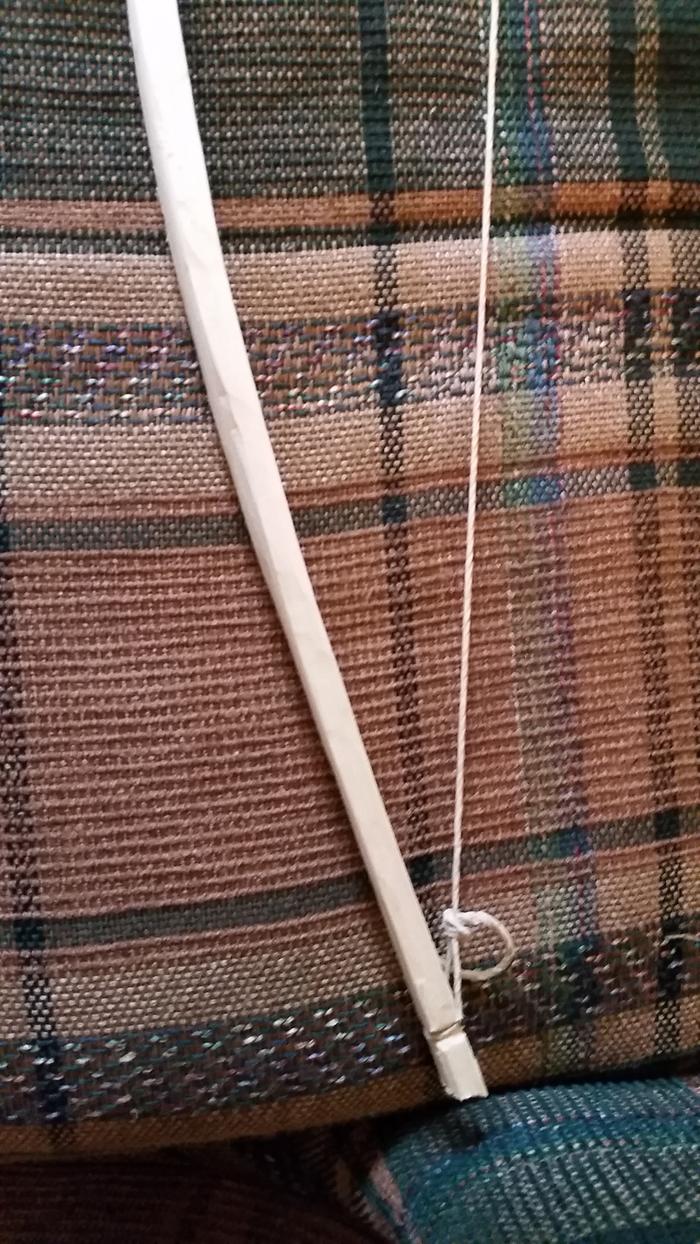
Restrung it to get a decent picture (hard to get a picture when the kids are constantly using it!)
20201109_113354.jpg
Close up of the end
Close up of the end
20201109_113426.jpg
another close up
another close up
Staff note (Mike Haasl) :

I certify this for 1 oddball point

 
Posts: 167
49
homeschooling forest garden urban cooking medical herbs writing
  • Likes 7
  • Mark post as helpful
  • send pies
    Number of slices to send:
    Optional 'thank-you' note:
  • Quote
  • Report post to moderator
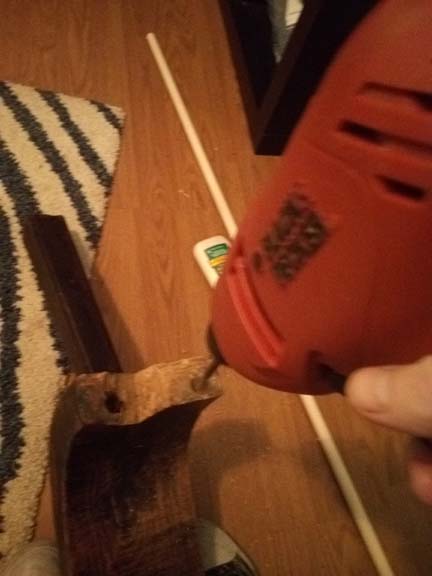
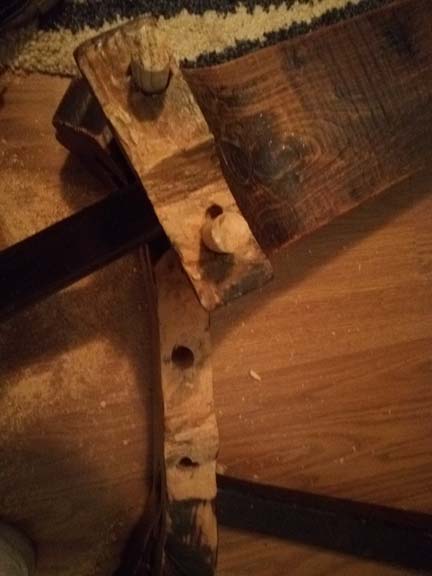
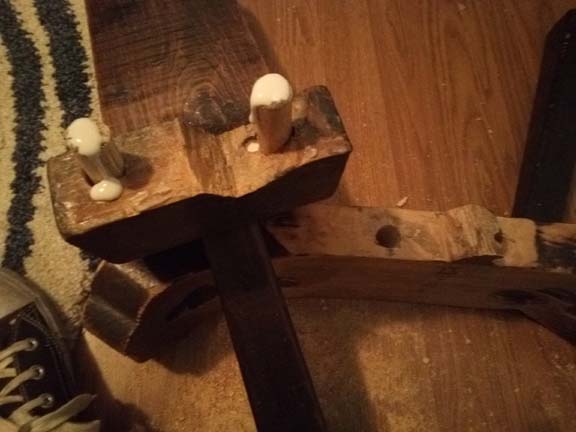
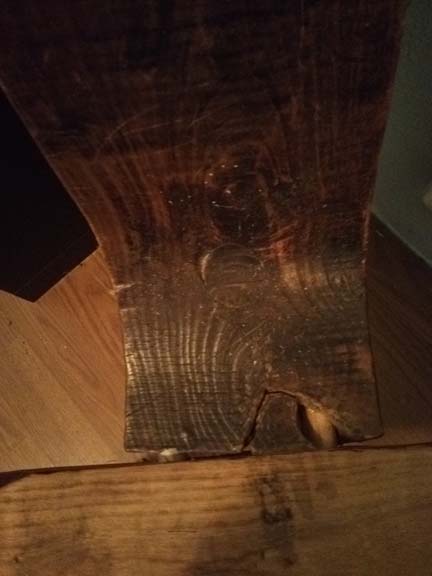
This is a chair my grandfather carved about 70 years ago.  He's passed now, and the chair is what I asked for from his stuff.  So many good memories of many of the grandchildren in it.  I've had it for a long while now.  One of the friends of the youngers who is a person of size thought he would be funny sitting it.  Not so funny.  "It was like that when I got here."  I decided to try my hand at repairing it.  First I tried to remove the old glue from the broken dowel (split on top and bottom).  No luck, either with heat or a chisel.  I went to the local hardware store and bought a wood boring bit for my drill.  They're wonderful!  I hadn't used one before, but it made short work of preparing the hole.  Next, I cut a dowel with a handsaw.  Then I cut another one that actually fit.  "Measure once and cut twice," right?  Glued the ends and joined it together.  Let it dry in front of the heater.  Sturdy enough again to hold me.

Submitting for 0.25 of an oddball point.

PS The missing piece of wood that allows the dowel to show through has "always" been missing.

ETA: Correction; it's the one on the right that is original
Oddball-chair-01.jpg
broken
broken
Oddball-chair-02.jpg
using the wood boring bit
Oddball-chair-03.jpg
making sure theyfit (one on the left is original)
Oddball-chair-04.jpg
a little glue
a little glue
oddball-chair-05.jpg
good as new
good as new
Oddball-chair-06.jpg
closeup -- I left the same amount of space that he had left with the original dowel
Staff note (Mike Haasl) :

I certify this for 1/2 oddball point!

 
pollinator
Posts: 247
Location: KY - Zone 6b (near border of 6a), Heat Zone 7, Urban habitat
123
monies home care fungi foraging plumbing urban food preservation bee building homestead ungarbage
  • Likes 5
  • Mark post as helpful
  • send pies
    Number of slices to send:
    Optional 'thank-you' note:
  • Quote
  • Report post to moderator
I didn't think a lot that I do would qualify for PEP given that I'm on a small urban lot. But finding this category maybe opens the door? I'm submitting here because it uses adhesives. It didn't look like it would qualify in the metalworking PEP. If this is more appropriate somewhere else I can move it where needed.

I submit making steel garden arbors from repurposed carpet racks.

I wanted to maximize growing space on our small lot. I'd been wondering what I'd use for going vertical in the garden. I tried some bits and bobs over the last few years but most just rotted away or had to be contantly repaired. That seemed like wasted labor to me so I had in my mind to do something more lasting.  

A local store went out of business in early February. There was a huge rug rack that operated much the same way the old poster displays in department stores worked...like the pages of a book. I was talking to the manager the week before final closing. I asked what was going to happen to the rug rack and he said they paid a lot for it but it wasn't selling at the deep going out of business discount. He asked why I'd consider it and I said I was looking at ways to grow plants vertically and would use the "page" frame portions to make arbors between the beds (over the paths). He told me to come back Monday and anything in the store would be free. I did, and it was. The "pages" are steel circle and square stock. The overall frame that held all of the pages was far too heavy and beastly to use. It did not disassemble and was a HEAVY steel square stock. I'm not sure what happened to it but suspect it was given to the metal scrappers.

The large "page frames were rectangular, about 70" x 95".
The smaller ones were triangular, and the long side was about 66".


Some ends had a few inches of longer pegs or extensions.

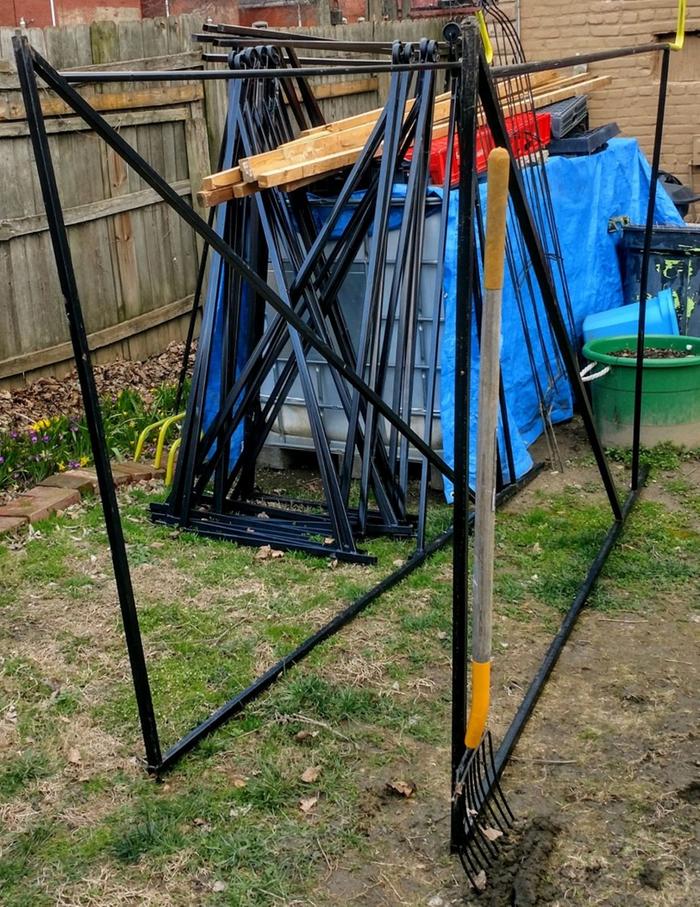
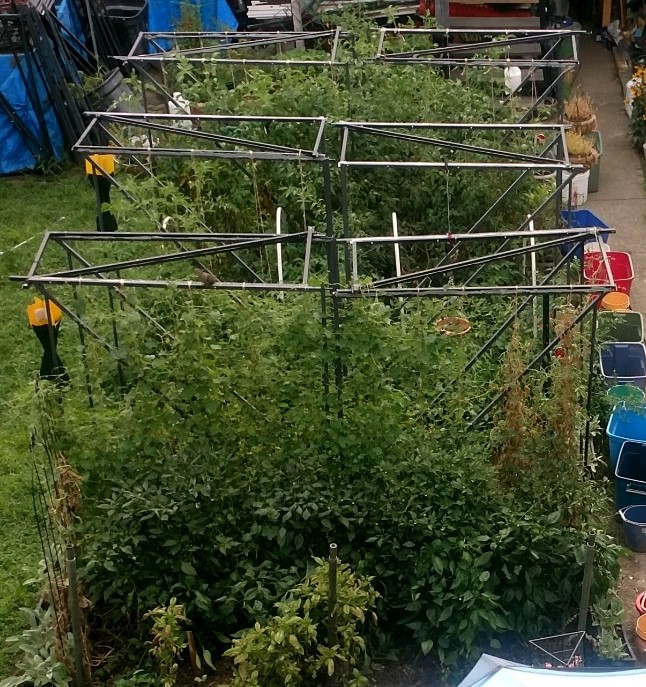
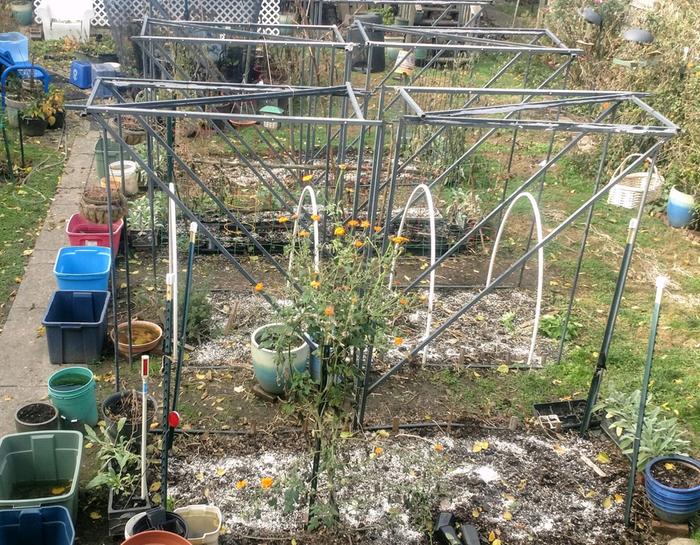
I took two of the triangles to make a top for each arbor by using a heavy grade exterior adhesive and then screwed the pieces together. I then affixed them to the long side ones by the same methods to form the arbor frams. I tested them this year and they expanded my ability to grow by maximizing actual bed space for more plants and allowing me to grow up and over the arbors. I went pretty well though I may look at adding a few horizontal "rungs" in order to aid plants especially in wind. I did use jute twine this last season to help vines go up (as with tomatoes, cukes, cucamelons, etc) and it worked ok...but seems to lack true support for plants that way and gets me back to the same problem of having to redo them each year...thus time spent redoing something I could be using on other tasks.

The almost 8 foot high structures are movable. I still have more racks that will to be used to aid tall plants along the Northern fence. I'll be installing those in about a month as I'm awaiting final leaf drop so I can make sure I'm placing the structures so as not to interrupt perennial plant emergence. If I have anything left over, there may be one or two more structures.

Not only can they be used as arbors, but we hang plants and bird feeders from them and they are used as bird perches by a fair number of birds daily. The birds enrich the beds as well since they spend so much tiome roosting on the structures.

I'm pretty happy with the score and they will be used for years until they rust away.

On the manufacture side:

1  rug racks - free
2) two tubes of exterior grade heavy construction adhesive - $6.00 each = $12.00
3) bolts, screws, & washers - roughly $14.00

Delivery of the racks was free thanks to someone on the scene. I only live about a mile from the store.

I already had the drill and saws. I did mangle 4 drill bits but they were all from the quarter bin at the restore last year so $1.00.

I did have to saw off solid core stock projections (about 1/2") in order to be able to join them and the yellowish colored bent pieces (round stock) from the big racks in order to use the remaining portions as legs to sink in the ground.

Cleaned all of the steel so there would be a dirt-free surface for the adhesive.

A friend just gave me some odds and ends paint cans and caulk from a cleanup he did. I think there is enough black to paint the adhesive that shows but I'm going to use some leftover caulk to seal any cracks between racks before painting. Free.

I think that makes the total approximately $27.00. I already got that out of them from use this season so the rest is gravy. Diverted from the metal recycling or waste stream were metal racks, paint, & caulk.

Now if I could just salvage some big cattle panels for trying to grow gourds and squashes over the compost area and up to the fire escape...
GardenBedArbors1.jpg
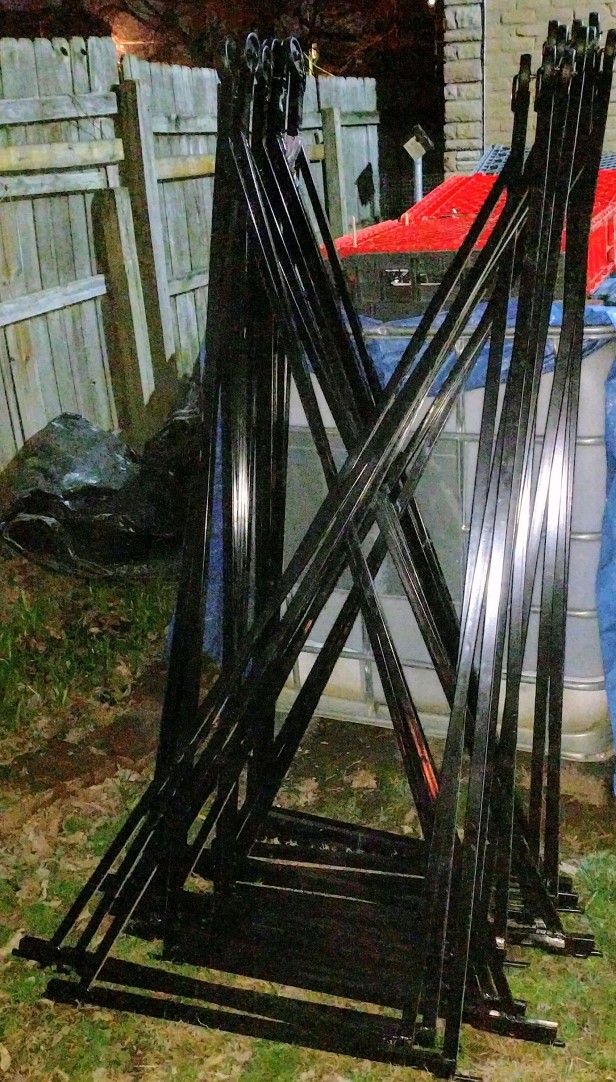
A stack of the rectangular rug racks I used for the sides of the arbors.
GardenBedArbors2.jpg
A stack of the triangle racks.
GardenBedArbors2a.jpg
Another shot of the triangular racks.
GardenBedArbors3.jpg
Two triangular racks together showing how I made the tops of the arbors.
GardenBedArbors4.jpg
Planning to see how the racks might join. Some mods had to be made on all racks.
GardenBedArbors5.jpg
More planning on the receiving beds...
GardenBedArbors6-midseason.jpg
Here are the repurposed rug rack arbors in-use about mid-season.
GardenBedArbors7-after-brush-removal-and-fall-prep-started.jpg
This is a shot from yesterday showing dead tomato, cucumber, and cucamelon vines removed for the season and beds in the middle of being prepped for fall.
 
Posts: 119
Location: Montréal, QC
77
2
foraging tiny house fiber arts building rocket stoves homestead
  • Likes 4
  • Mark post as helpful
  • send pies
    Number of slices to send:
    Optional 'thank-you' note:
  • Quote
  • Report post to moderator
It’s that time... Put up plastic film on the windows to improve insulation and decrease energy usage for heating. It probably took me about half an hour to clean and put up the tape on all the windows, plus half an hour for each window - cutting pieces, peeling and sticking the plastic, trimming edges, and using a hair dryer to get it taut and smooth. So around 3 hours total.
plastic-on-windows-cleaning.jpg
[Thumbnail for plastic-on-windows-cleaning.jpg]
plastic-on-windows-tape.jpg
[Thumbnail for plastic-on-windows-tape.jpg]
plastic-on-windows-blow-drying-out-wrinkles.jpg
[Thumbnail for plastic-on-windows-blow-drying-out-wrinkles.jpg]
plastic-on-windows-1.jpg
[Thumbnail for plastic-on-windows-1.jpg]
plastic-on-windows-2.jpg
[Thumbnail for plastic-on-windows-2.jpg]
plastic-on-windows-3.jpg
[Thumbnail for plastic-on-windows-3.jpg]
plastic-on-windows-4.jpg
[Thumbnail for plastic-on-windows-4.jpg]
plastic-on-windows-5.jpg
[Thumbnail for plastic-on-windows-5.jpg]
Staff note (Mike Barkley) :

I certify this BB is complete for 2 oddball points & a shiny new air badge!

 
Alas, poor Yorick, he knew this tiny ad:
A PDC for cold climate homesteaders
http://permaculture-design-course.com
reply
    Bookmark Topic Watch Topic
  • New Topic