I built a greenhouse! It's not an Oehler greenhouse so I think it's a better fit for Oddball. I spent a year designing the greenhouse and figuring out how all the joints/corners/weatherproofing layers would work. I realize that time doesn't go into the Oddball points but I just want to mention that a lot of brain power went into it :)
The greenhouse is a passive solar design to maximize solar gain in my latitude (45 degrees north). My goal was to be able to grow tropical plants without fossil fuel heat. I got close but I'm not there yet. I also wanted to build it as naturally as possible while still holding up to my humid climate (inside and out) for as long as possible. Some of my compromises:
I did pour a cement footing but I went with a shallow "frost protected" footing so it didn't have to go 4' deep.
I used a block stem wall to raise the glazing above the snowline and provide a solid support for the trusses
There is a vapor barrier and moisture barrier on the walls/roof and the glazing is two layers of poly greenhouse film. I can't see any way around the barriers. The greenhouse film allowed for a curved wall to give strength to the building with fewer structural components
The siding is cement board since it's fully exposed to the weather
Some of the good things I did:
All the wall studs and side wall insulation was reclaimed/used
The insulation on the roof side is rockwool
The interior siding boards were from trees I helped sawmill
The white on the interior components is as "good" a stain as I could buy since I need to protect the wood from humidity and rot
Some notes:
Curves suck to build. Joining the roof to the walls was a real struggle.
I built the trusses using a template
It's 40' long, 20' wide and 18' high
Top vents are 4' by 8' on wax cylinder openers
Bottom vents are patio doors, one on an automatic opener
There are two layers of poly and I spaced them apart with cedar to avoid needing an inflation fan. Installing those spacers was a challenge
The wall/roof insulation is R40 with hardly any thermal bridging
The walls are actually two walls to prevent thermal bridging and allow for the odd widths of insulation I was reusing
It took about 60 hours a week from April 1 till Mar 1 to build it. The passive ventilation works great in summer. When it's 90 outside it is below 105 inside. On a sunny -2F day it can get up to 98F inside. The coldest its been inside in the past two winters is 16F (compared to -29F outside). So it's not tropical (yet) but it's still pretty awesome. I have a long thread on the build so if you want to see more photos, check it out Here
Putting North siding on which is outside the structure while the side wall structure is behind the siding. Yes that makes the corners really hard to detail
Door installed (metal is just stacked there, it's for another project)
Reused-insulation-going-in.jpg
Reused insulation going in
End-wall-siding-is-installed.jpg
End wall siding is installed
Hey-is-that-a-banana-in-Wisconsin-.jpg
Hey, is that a banana in Wisconsin?
I make a Maple Syrup instructional movie! Check it out HERE SKIP books, get 'em while they're hot!!! Skills to Inherit Property See me in a movie building a massive wood staircase:Low Tech Lab Movie
Thanks Paul! I believe I now have the 220 total Oddball points required for the Wood level certification. While I could link to all the other submissions, this one just above this post covered 220 all by itself. Thanks!
I make a Maple Syrup instructional movie! Check it out HERE SKIP books, get 'em while they're hot!!! Skills to Inherit Property See me in a movie building a massive wood staircase:Low Tech Lab Movie
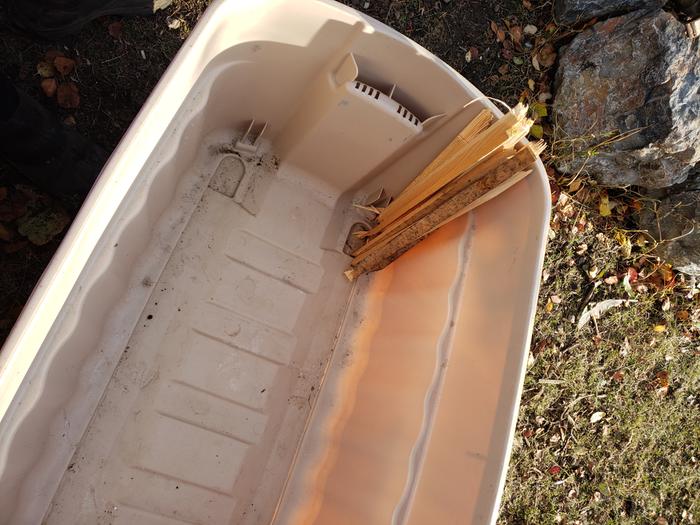
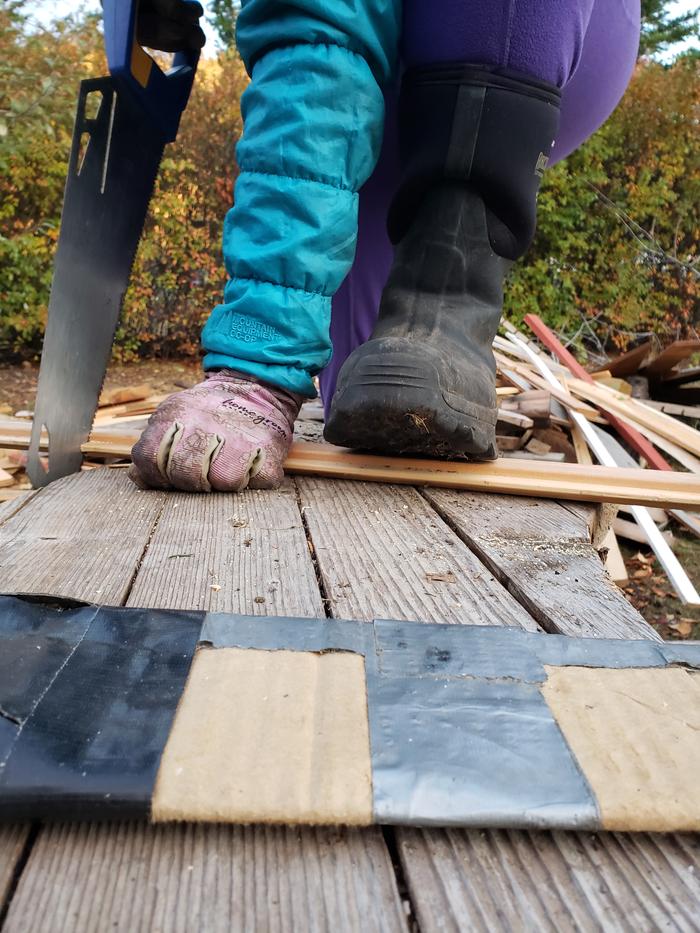
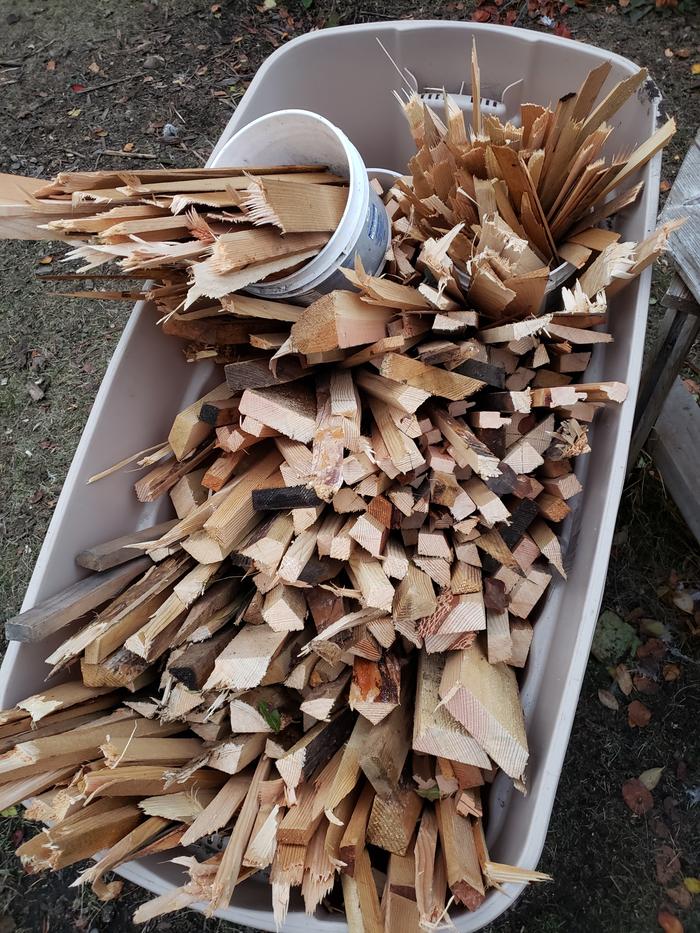
The other day when I was going to harvest some wild apples (for my foraging badge) I knew I needed some sort of apple picker for the high up branches where all the remaining apples are at this point. I've been meaning to make something fancy with my metalworking skills but when I finally sat down to do this I began thinking about what was needed for the project and what I already had on hand. I realized I could use bits bobs and scraps already on hand to make one. The main bucket is an old vinegar bottle from the recycle bin being repurposed instead. Then I gathered some long screws and bolts I already have, combined with some grid beam scrap from another project I'm working on to make the raking tines. This all got bolted to an old extension pole I saved years ago after the head of it broke off. To finish it off I busted out the duct tape to soften some of the sharp edges. It's not pretty, but it is functional.
Here are some photos.
These are the basic parts I started with, though they changed some as I got going and saw what would work better.
Wonder if I can get half a point for cleaning coloured pencil off wood? Used organic natural toothpaste but I don't think it is grey water friendly. (We use this one as my son has enamel hypoplasia and needs fluoride in his toothpaste. No fluoride in the water in Japan). The whole TV stand had a blue line down it courtesy of my 2 year old 😭
IMG_20201024_120309.jpg
IMG_20201024_120324.jpg
IMG_20201024_120437.jpg
IMG_20201024_120503.jpg
IMG_20201024_121200.jpg
Finished!
Staff note
:
This looks more like an ordinary chore for someone with a 2 year old rather than an oddball task. I think it's not eligible for this BB.
My friend was given a crab trap and *really* wanted me to take her crabbing. So I figured I'd make my own "bucket style" crab trap so we'd double our chances of catching something.
As usual, all the parts were scrounged or made.
First I made two bait boxes, as my friend needed one. The plastic mesh and baling twine were salvaged, the toggle fastener was whittled from a piece of Ocean Spray.
Next I needed the trap. I had a smaller and larger aluminium bike rims from a local bike shop to use as the form. A neighbor had a scrap of netting he was happy to donate, and he gave me a homemade net needle also - I've never had one of those and it was cool learning how to use it effectively!
I also needed a float, so I made one out of a scrap of styrofoam. Version 1 was actually too large, so my net had too much buoyancy. I used a knife and cut out parts to make it smaller.
Cutting the netting is a little tricky in that it's important that you're actually cutting across pairs of threads to make sure you're on the straight line you want and not going off on a tangent.
We've gone crabbing 3 times now, twice since I made the float smaller which made it work better. Last trip out I caught 2 legal crabs (Red Rock's have to be larger than 4 1/2 inches across the back - we aim for at least 5 inches). Unfortunately a friend took that picture, so I can only offer a picture of the "too small, it goes back to grow" crab who was quite enjoying the dead chicken leg I'd baited the trap with (Hubby raises meat birds and this one died of heart failure so I chopped it up and put it to good use.)
I have no idea how long a professional would take to make such a trap, but judging from the way my neighbor operated that net needle, probably not more than a couple of hours. Since I was trying to figure out how to do it with no real instructions and had to scrounge parts, I spent at least 6 hours, but it was fun to do.
So I'm not sure how this will work for point but follow me on my journey here for a moment:
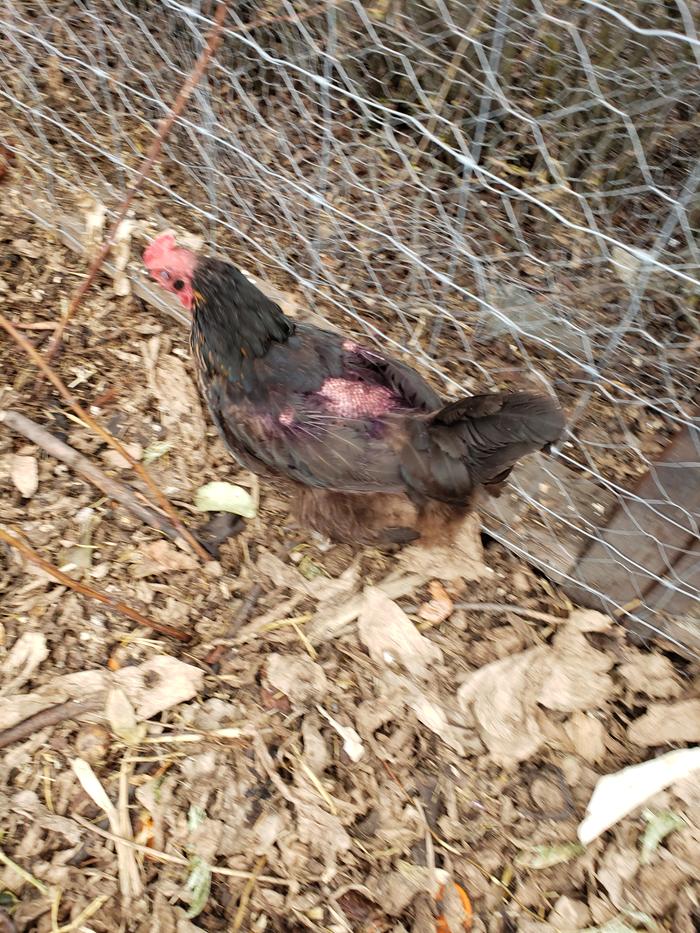
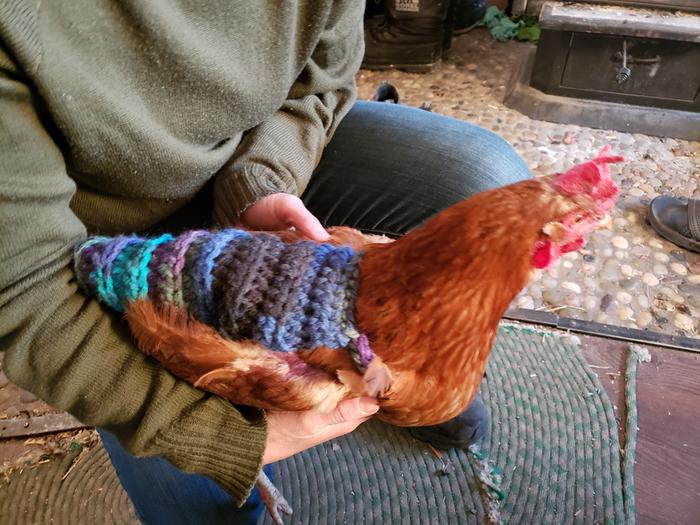
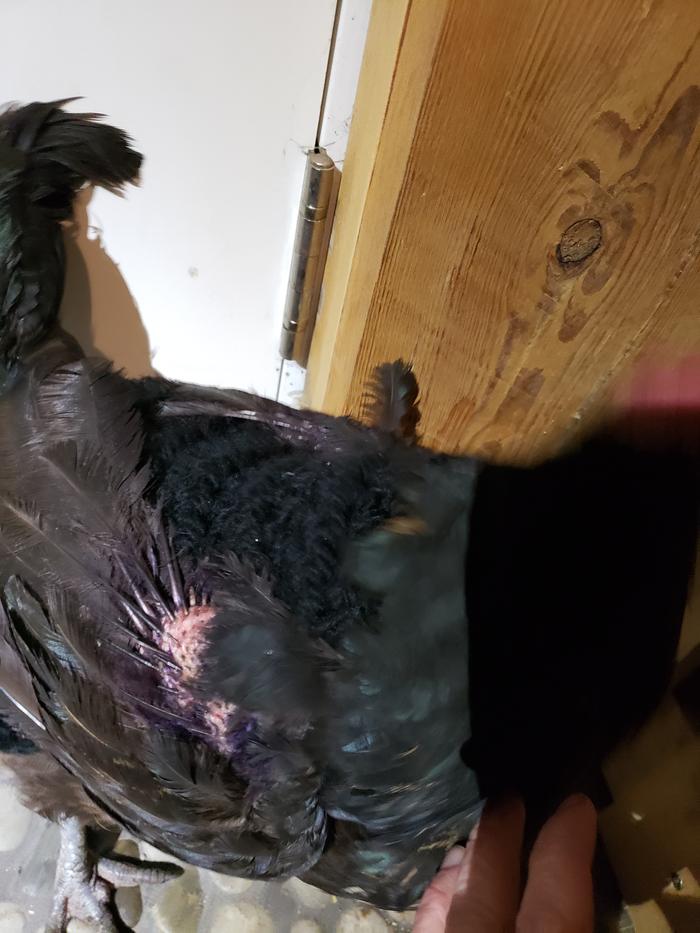
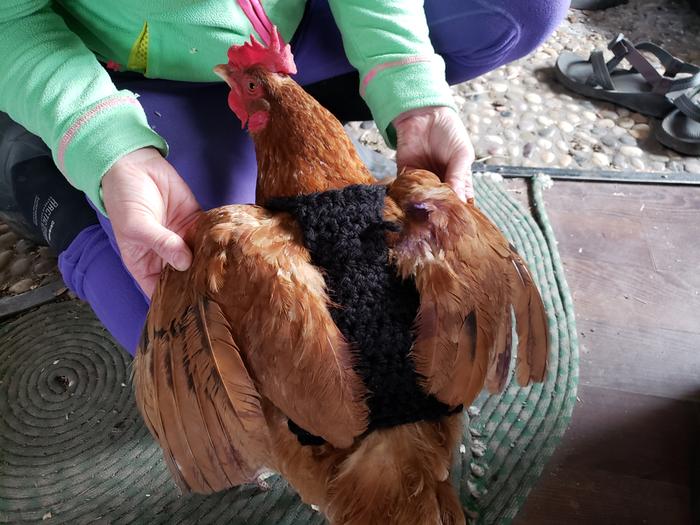
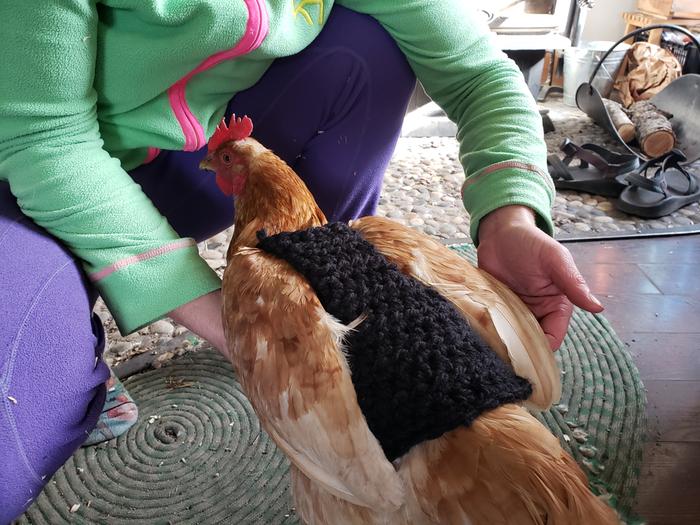
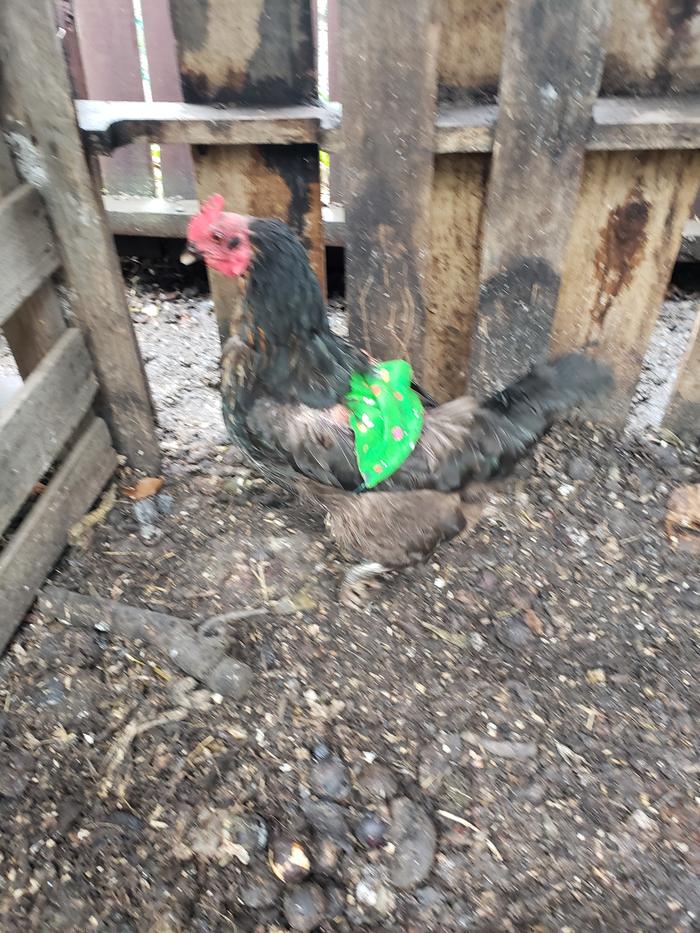
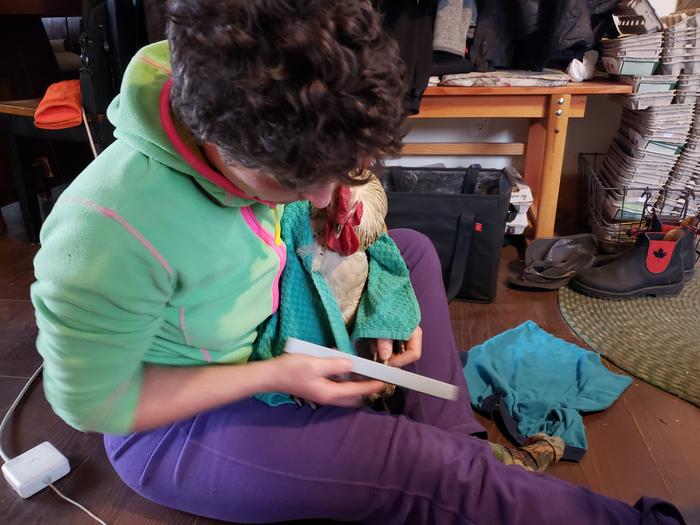
I had a problem - Naked chicken! (Apparently she and two others were Romeo's "favourites")
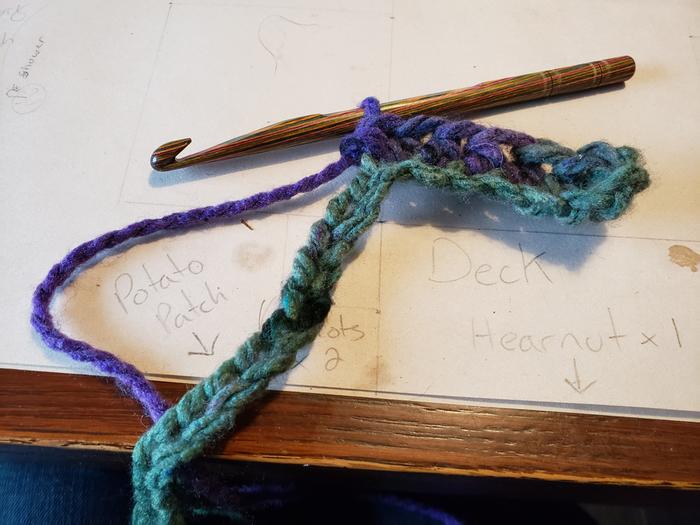
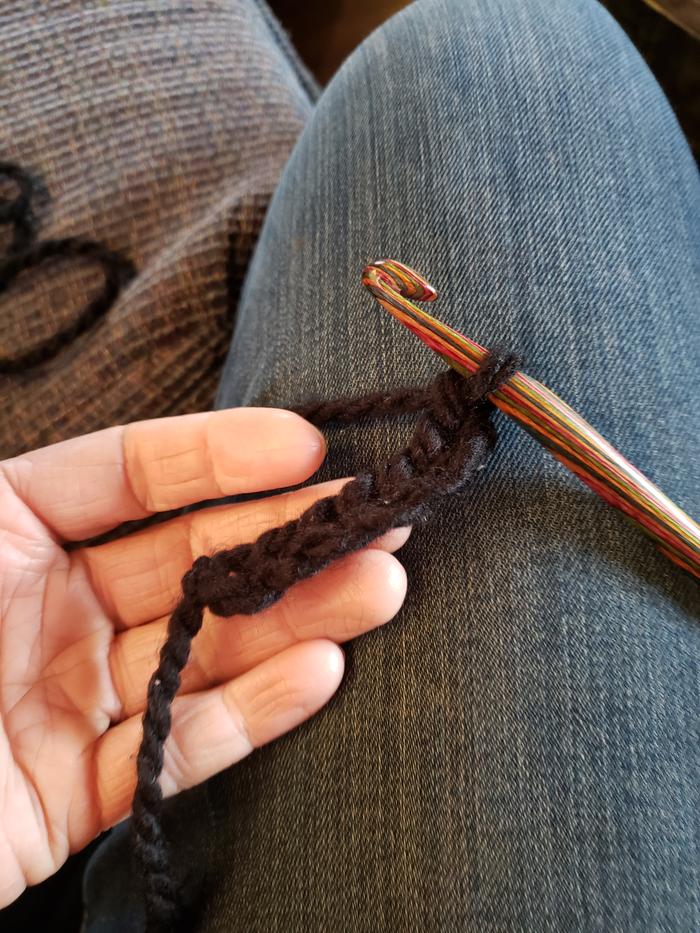
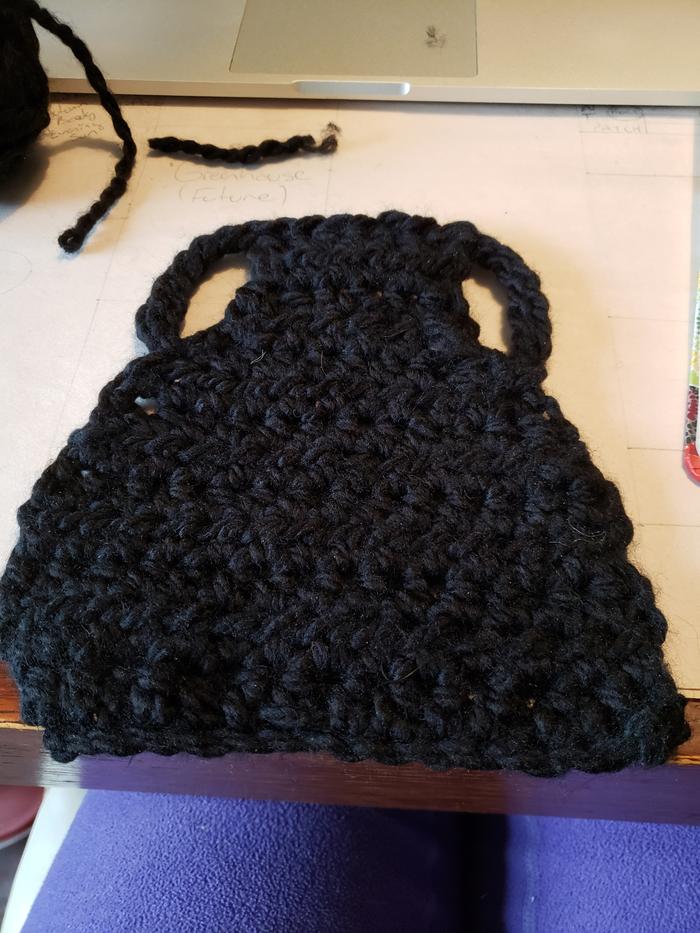
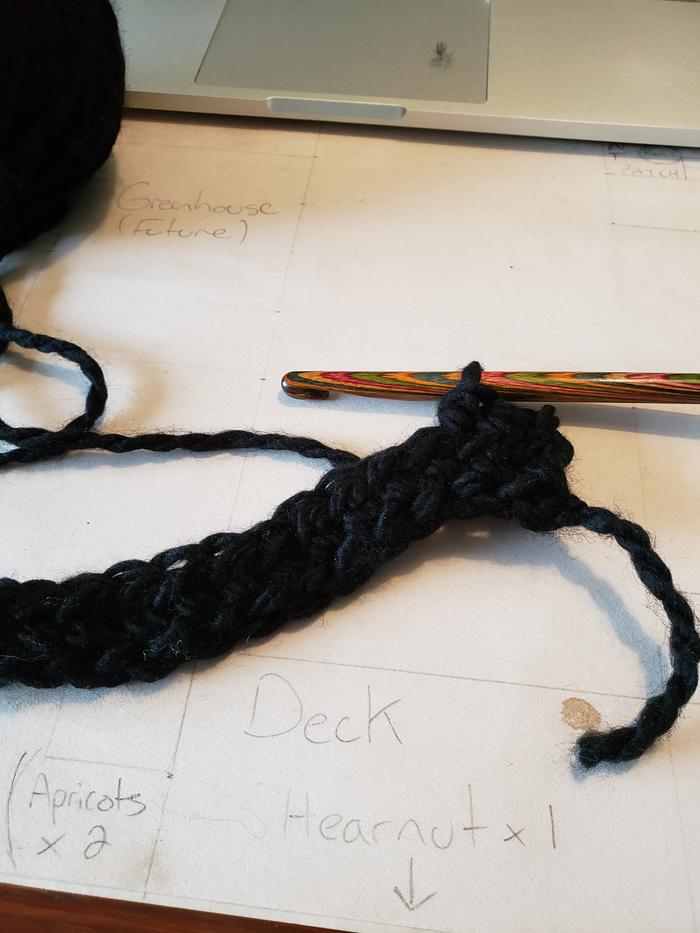
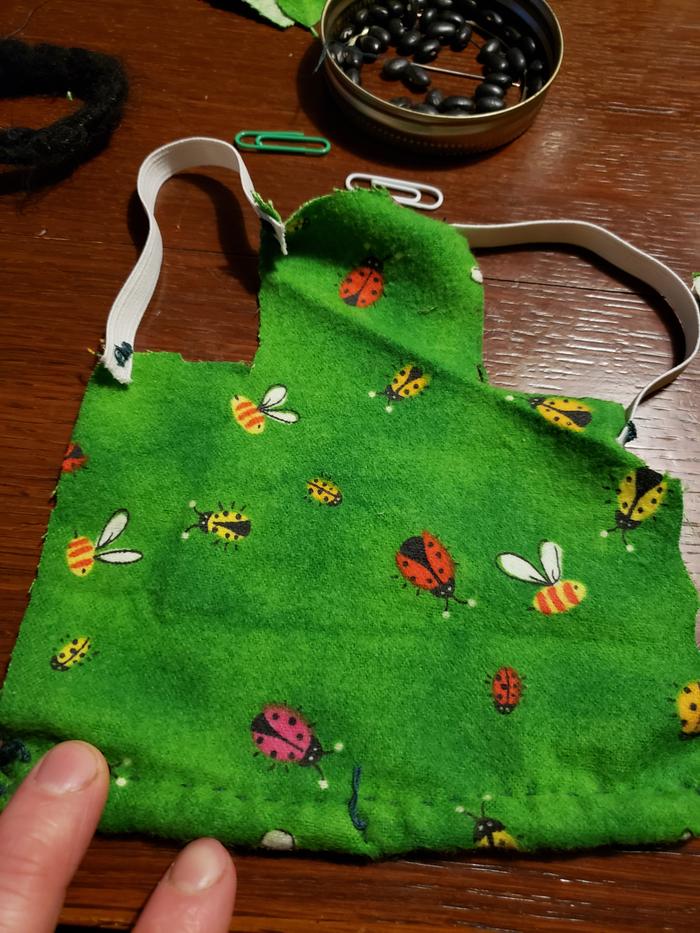
I felt bad for said naked chickens so I did some research and found "chicken saddles" as the solution. I made up my own crochet pattern and went to work.
Version 1 - Funky multi-colour chickens saddle
Problems: Version one was a little loose around the wings but the biggest problem was the bright colours. The other hens thought that she was being attacked by something and would run away from her screaming!
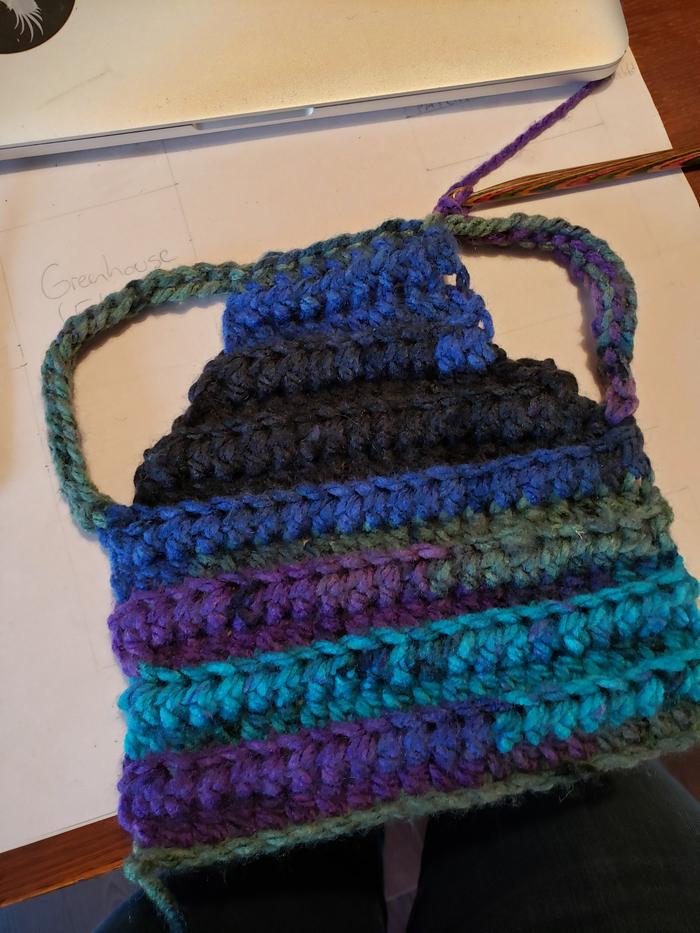
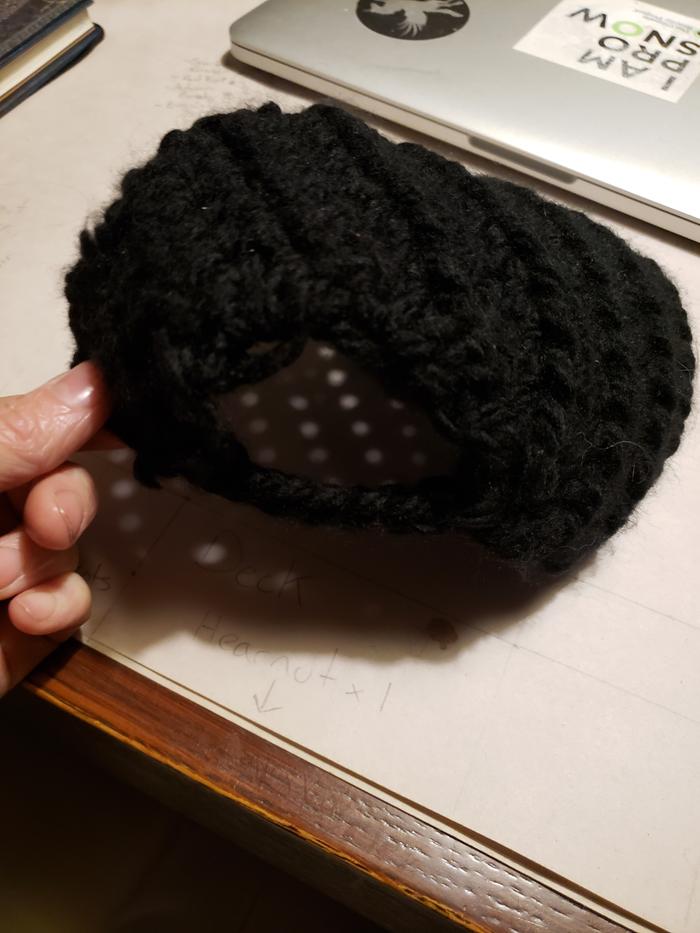
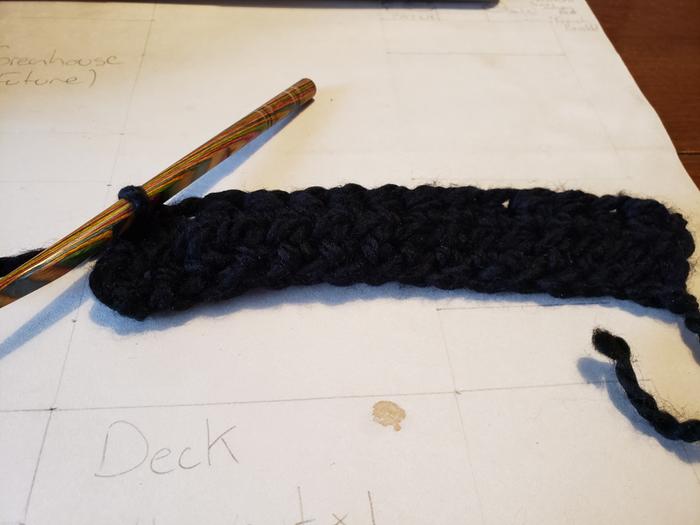
Version 2 - Sexy little black number
Version 2.1
Version 2.2
Version 2.3
Problems: See below :(
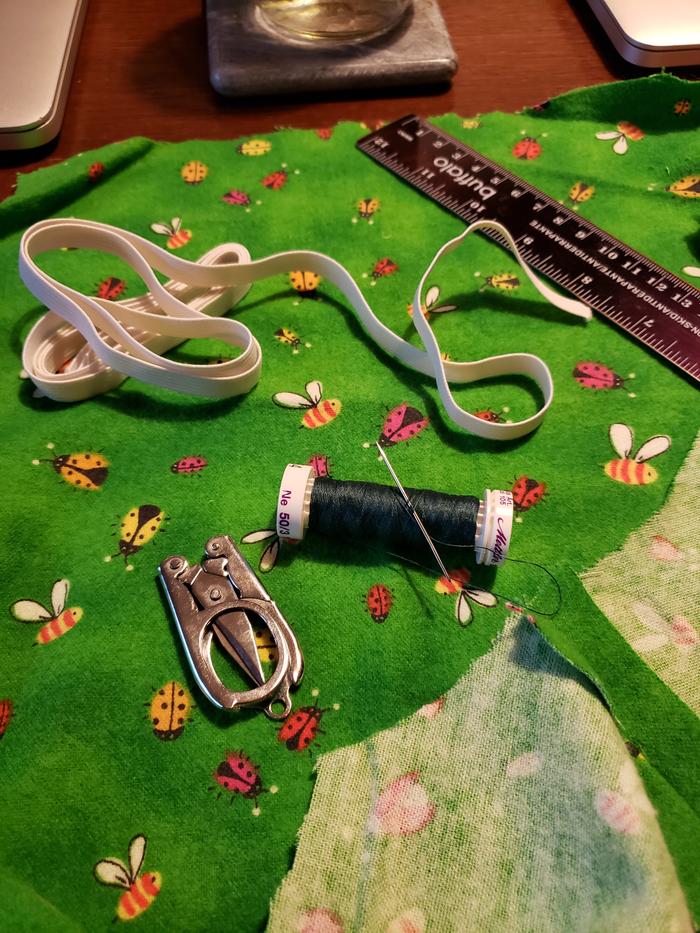
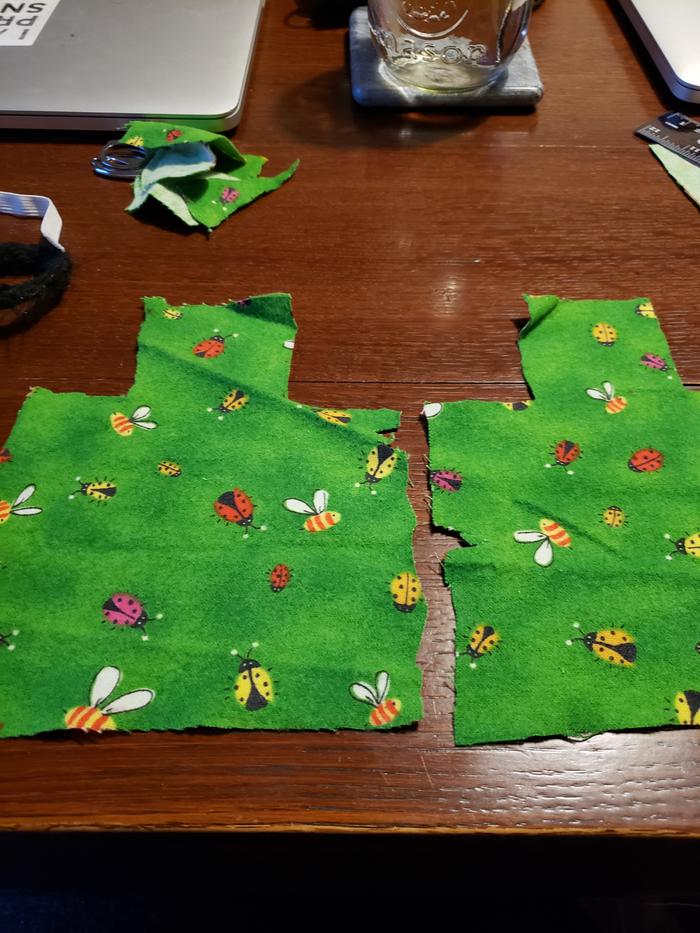
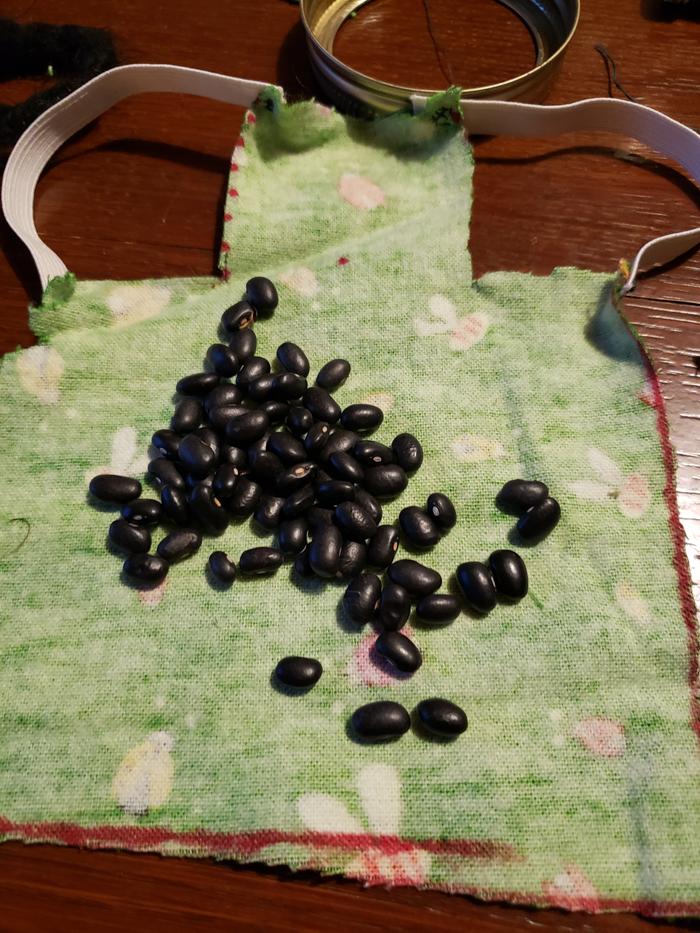
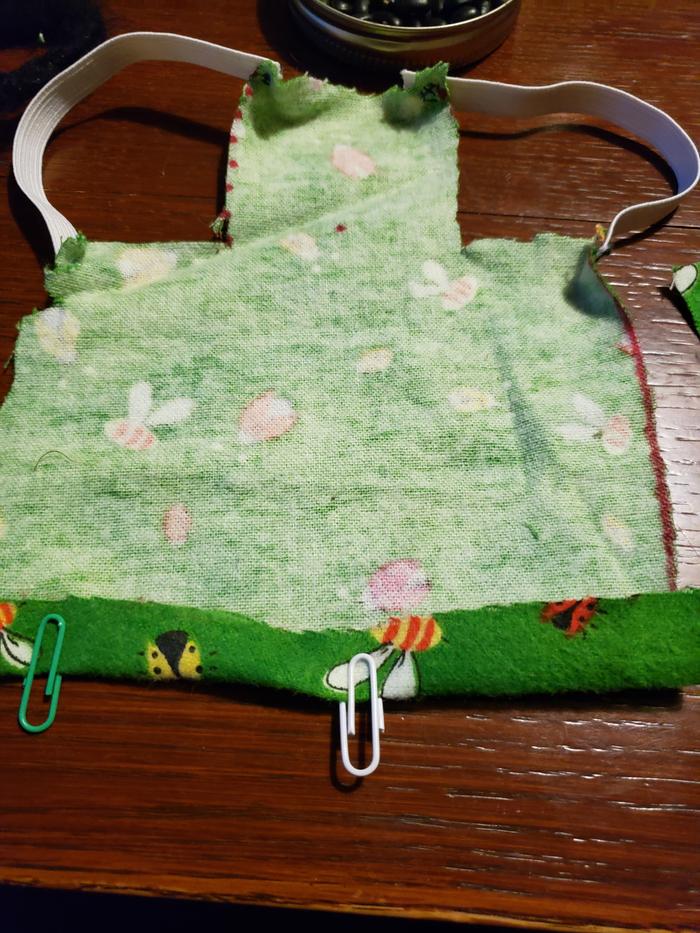
Version 3 - Full of beans!
Version 3 lasted long enough for the hens to start regrowing their feathers.
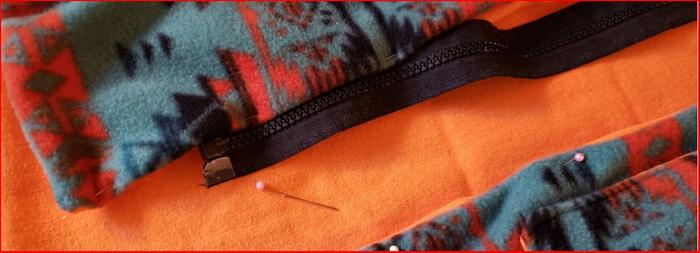
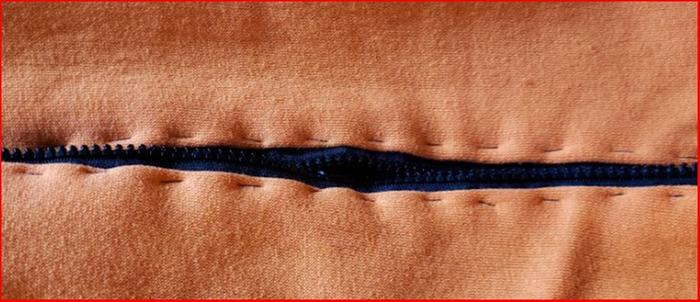
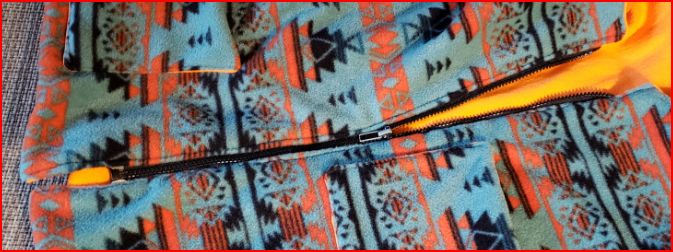
I'm posting here because the materials aren't natural.
A friend used scrap fabric and sewed me a vest, but she didn't have a zipper. Installing zippers *after* the vest is finished is trickier than doing it as step one which would be the normal approach, but I managed to do so.
This is a skill worth knowing as many coats end up in the landfill due to broken zippers - they're often the first thing that goes. Being able to replace the zipper will allow it to be used longer.
There are more pictures in the tutorial I linked to.


 7
7


![[Thumbnail for DSC04759s.jpg]](/t/97787/a/120892/DSC04759s.jpg "Filename: DSC04759s.jpg
Description:")


-installed.jpg "Filename: Here-s-how-I-got-up-there-to-put-the-cedar-spacers-on.-Lower-vents-(reused-patio-doors)-installed.jpg
Description: Here's how I got up there to put the cedar spacers on. Lower vents (reused patio doors) installed")
.jpg "Filename: Door-installed-(metal-is-just-stacked-there-it-s-for-another-project).jpg
Description: Door installed (metal is just stacked there, it's for another project)")


Skill verified by Nikki Roche")

Skill verified by L. Johnson")

Skill verified by Opalyn Rose")

Skill verified by Opalyn Rose")

Skill verified by L. Johnson")

Skill verified by Nikki Roche")

Skill verified by Jeremy VanGelder")

Skill verified by Christopher Weeks")

Skill verified by paul wheaton")

Skill verified by Nicole Alderman")

Skill verified by Nicole Alderman")

Skill verified by Mike Barkley")

Skill verified by Mike Barkley")

Skill verified by Mike Barkley")

Skill verified by Mike Barkley")

Skill verified by Ash Jackson")

Skill verified by Nicole Alderman")

Skill verified by Opalyn Rose")

Skill verified by Ash Jackson")

Skill verified by Opalyn Rose")

Skill verified by Opalyn Rose")

Skill verified by Opalyn Rose")

Skill verified by gir bot")

Skill verified by Nicole Alderman")

Skill verified by Mike Haasl")

Skill verified by Mike Haasl")


Skill verified by gir bot")
![[Thumbnail for IMG_20201024_120309.jpg]](/t/97787/a/122323/IMG_20201024_120309.jpg "Filename: IMG_20201024_120309.jpg
Description:")
![[Thumbnail for IMG_20201024_120324.jpg]](/t/97787/a/122324/IMG_20201024_120324.jpg "Filename: IMG_20201024_120324.jpg
Description:")
![[Thumbnail for IMG_20201024_120437.jpg]](/t/97787/a/122325/IMG_20201024_120437.jpg "Filename: IMG_20201024_120437.jpg
Description:")
![[Thumbnail for IMG_20201024_120503.jpg]](/t/97787/a/122326/IMG_20201024_120503.jpg "Filename: IMG_20201024_120503.jpg
Description:")


Skill verified by gir bot")
![[Thumbnail for C-pattern-and-cut-material.JPG]](/t/97787/a/122341/C-pattern-and-cut-material.JPG "Filename: C-pattern-and-cut-material.JPG
Description:")
![[Thumbnail for C-side-seam-on-box-and-start-of-toggle-closure.JPG]](/t/97787/a/122342/C-side-seam-on-box-and-start-of-toggle-closure.JPG "Filename: C-side-seam-on-box-and-start-of-toggle-closure.JPG
Description:")
![[Thumbnail for C-homemade-crab-bait-box.JPG]](/t/97787/a/122343/C-homemade-crab-bait-box.JPG "Filename: C-homemade-crab-bait-box.JPG
Description:")
![[Thumbnail for C-toggle-closure.JPG]](/t/97787/a/122344/C-toggle-closure.JPG "Filename: C-toggle-closure.JPG
Description:")
![[Thumbnail for t-make-a-float.JPG]](/t/97787/a/122345/t-make-a-float.JPG "Filename: t-make-a-float.JPG
Description:")
![[Thumbnail for t-float-installed.JPG]](/t/97787/a/122346/t-float-installed.JPG "Filename: t-float-installed.JPG
Description:")
![[Thumbnail for T-cutting-salvaged-netting.JPG]](/t/97787/a/122347/T-cutting-salvaged-netting.JPG "Filename: T-cutting-salvaged-netting.JPG
Description:")
![[Thumbnail for T-finished-trap.JPG]](/t/97787/a/122348/T-finished-trap.JPG "Filename: T-finished-trap.JPG
Description:")
![[Thumbnail for too-small-crab-and-bait.JPG]](/t/97787/a/122349/too-small-crab-and-bait.JPG "Filename: too-small-crab-and-bait.JPG
Description:")