• Post Reply Bookmark Topic Watch Topic
  • New Topic
permaculture forums growies critters building homesteading energy monies kitchen purity ungarbage community wilderness fiber arts art permaculture artisans regional education skip experiences global resources cider press projects digital market permies.com pie forums private forums all forums
this forum made possible by our volunteer staff, including ...
master stewards:
  • Carla Burke
  • Nancy Reading
  • John F Dean
  • r ranson
  • Jay Angler
  • paul wheaton
stewards:
  • Pearl Sutton
  • Liv Smith
  • Anne Miller
master gardeners:
  • Timothy Norton
  • Christopher Weeks
gardeners:
  • Andrés Bernal
  • Jeremy VanGelder
  • Matt McSpadden

PEP Badge: Oddball

BB oddball - sand badge
 
pollinator
Posts: 1495
854
2
trees bike woodworking
  • Likes 2
  • Mark post as helpful
  • send pies
    Number of slices to send:
    Optional 'thank-you' note:
  • Quote
  • Report post to moderator
Moved to PEP plumbing straw oddball section

I feel the journey to my next Oddball Milestone will be long. So here’s the next tiny step.

Fix slow draining kitchen sink and stop weird glugging noise

The kitchen sink wasn’t draining as well as it should and every now and then there would be some strangle gurgling and glugging noise, which irritated my slightly OCD wife! Do we call the landlord? Do we call a plumber? In the words of Bob the Builder Can we fix it? Yes, we can!

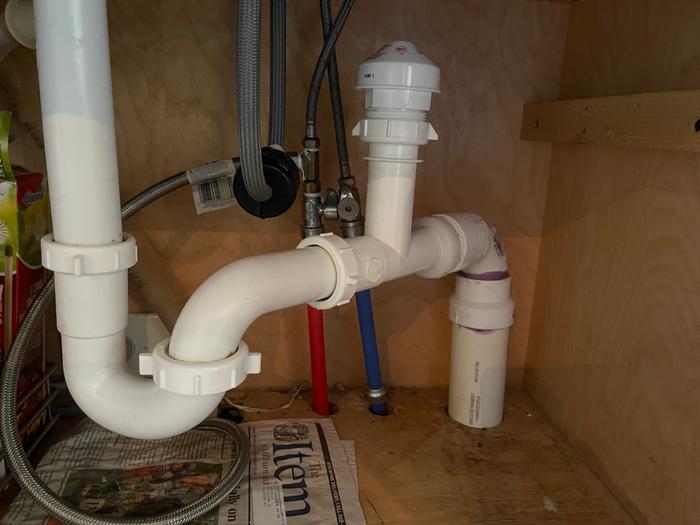
I cleared everything out from under the sink. Then I notified every one what I was up to, taped the tap shut and put a large mixing bowl under the u-bend before removing all the gubbins.


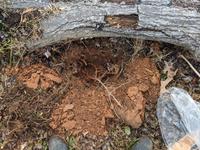
A large slimy lump of black gunk plopped out.


The pipes were coated with a thick layer of black slime. The vent unit was totally clogged.


I took everything to the basement sink and cleaned the tubes with an old flannel.


I now had a whole family of slime things.


And clean pipes.


I reinstalled all the parts.


Sink draining properly and no strange noises. Happy wife . . . Job done.
 
gardener
Posts: 1868
Location: Japan, zone 9a/b, annual rainfall 2550mm, avg temp 1.5-32 C
926
2
kids home care trees cooking bike woodworking ungarbage
  • Likes 9
  • Mark post as helpful
  • send pies
    Number of slices to send:
    Optional 'thank-you' note:
  • Quote
  • Report post to moderator
Approved submission
My garden beds don't meet the PEP growies requirements, but they were a lot of work... so I submit them for oddball points!

Sourcing of materials:
Raised bed logs:
One of my friend has a large mountain property, he actively manages it. Part of that includes lots of forest thinning. If you're unfamiliar Japanese forests were mostly all cut down and replanted with cedar and cypress (huge mistake in retrospect, but most everyone realizes it now). Part of the management is removal of smaller trees to allow larger cedars to grow for timber sales. Not wholly permie, but the logs are getting cut anyway so if they don't get used they are turned into biomass fuel. Anyhow, I got a truckload of thinned logs from him for what he would get at biomass fuel price, or about 6000 yen. Not a bad deal.

Fill material:
Mostly tree prunings from my garden, but I had also been given various bits of wood that people thought I might be able to use for woodworking. Unfortunately most of it was too difficult for me to manage before it got punky, so it went into the ground with all my hordes of accumulated prunings.

Work:
Most of the work in this submission was digging and peeling logs. I dug with a shovel and hoe, filled with wood, and piled on the dug-out dirt on top. I tried to stack the logs as carefully as possible to keep them on mostly with gravity, but it required a lot of carving and removing knots and high spots - these are NOT prime lumber, they are full of deformities and taper a lot. So ultimately I also put in support stakes on all sides to help keep them in place.


IMG_20200208_115205352.jpg
After unloading and sorting logs by size
IMG_20200208_155632768_HDR.jpg
Peeling begins...
Peeling begins...
IMG_20200228_163158494-2.jpg
Peeling continues
Peeling continues
IMG_20200325_140707185_HDR.jpg
Showing the dug-out trench of one bed with the dirt in the aisle
IMG_20200325_141524930_HDR.jpg
First layer of big fill material
IMG_20200325_142138103_HDR.jpg
Second layers on top
IMG_20200325_151947983.jpg
Covered with dirt
Covered with dirt
IMG_20200407_083313046_HDR.jpg
Same process repeated a total of six times
20200403_190046-ANIMATION.gif
Giffed progress
Giffed progress
Staff note (gir bot) :

Paul Fookes approved this submission.
Note: I certify this BB complete for 2 points. Well presented design

Staff note (Nicole Alderman) :

I'm embedding the gif here. Hopefully it works!

Staff note (gir bot) :

Someone approved this submission.
Note: That's a lot of hard work. Good job. Certified for 20 oddball points.

Staff note (gir bot) :

Paul Fookes approved this submission.
Note: I certify this BB complete for 20 points. Well presented design

 
steward
Posts: 15391
Location: Northern WI (zone 4)
4779
7
hunting trees books food preservation solar woodworking
  • Likes 2
  • Mark post as helpful
  • send pies
    Number of slices to send:
    Optional 'thank-you' note:
  • Quote
  • Report post to moderator
Approved submission
Last winter I put tongue and groove pine on the ceiling in my basement.  It was generally a straightforward installation except for one detail.

The room is really long and I didn't want the lines of the t&g to make it look even longer.  So I took one piece and ran it cross wise to seem like a beam.  Then I offset the near half of the room from the far half by 1/2 the width of the t$g.  That way as your eye follows the joints it gets broken up by the "beam".

Of course I had to work around light fixtures and other things...

I face screwed the boards on with trim screws so if I need to run a wire or do plumbing work, I can take it back down with a bit of effort.
Before-looking-south-towards-the-big-window.jpg
Before looking south towards the big window
Blocking-for-the-beam-.jpg
Blocking for the beam
Before-looking-north-towards-stairs.jpg
Before looking north towards stairs
-Beam-installed-and-starting-on-North-half-of-room.jpg
Beam installed and starting on North half of room
First-South-board-going-up-with-deliberate-offset-from-the-run-of-the-North-half.jpg
First South board going up with deliberate offset from the run of the North half
Getting-brighter-down-here-already-.jpg
Getting brighter down here already!
South-half-done.jpg
South half done
South half done
North-half-waiting-on-some-detail-work-by-the-stairs.jpg
North half, waiting on some detail work by the stairs
My-prying-tool-to-get-the-boards-tight.jpg
My prying tool to get the boards tight
North-half-done.jpg
North half done
North half done
View-to-the-North.jpg
View to the North
View to the North
Staff note (gir bot) :

Someone approved this submission.
Note: Certified for 8 oddball points. Looks great!

 
gardener
Posts: 388
Location: Zone 7a
264
6
kids rabbit chicken food preservation fiber arts
  • Likes 4
  • Mark post as helpful
  • send pies
    Number of slices to send:
    Optional 'thank-you' note:
  • Quote
  • Report post to moderator
Approved submission
My state forestry service has a tree sale once a year. It's a decent deal. $25 for 10 seedlings, and a huge selection. The only issue is getting your order in before they all sell out. Does your state do a tree sale?
I ordered and received Red Mulberry seedlings.

Open images in new tab for full resolution
Tree #1

Tree #2

Tree #3

Tree #4

Tree #5

Tree #6
Staff note (gir bot) :

Someone approved this submission.
Note: Certified for 1/2 oddball point

 
steward
Posts: 21438
Location: Pacific Northwest
11880
11
hugelkultur kids cat duck forest garden foraging fiber arts sheep wood heat homestead
  • Likes 3
  • Mark post as helpful
  • send pies
    Number of slices to send:
    Optional 'thank-you' note:
  • Quote
  • Report post to moderator
Approved submission
The Textile badge doesn't seem to have a place for my repair (all the upholstery stuff is for padded chairs, and there's no leather-working for camp chairs in there, either).

This is my daughter's beloved camping chair. She sits in it everywhere--inside, outside, whatever. I often steal it and sit in it when I'm making a fire, as it's just the right height. Sadly, the plastic canvas fabric has decided to degrade and is crumbling and ripping.

When my parents' old couch kicked the bucket a good........20 years ago (man, I feel old), they saved all the good leather. They passed along some of said leather on to me. One section of the leather nearly perfectly the seat bottom. So, I cut said leather right at the seam and sewed that sucker to the chair. With a saddle stitch. It was a pain (literally and figuratively. You try sewing with two needles simultaneously while wending your hands and the thread through the legs of the chair without it tangling.) This took at least 3 hours to hand sew, as well as time to punch all the sewing holes, etc. I got faster as I went along, so maybe someone else could get the whole thing done in 1.5 hours?

It's all sewn with beeswaxed linen thread. I'll eventually sew a leather back on the chair, too, since it's also starting to crumble and it'd look a lot better that way. But, for now my daughter needs her chair to sit at her lego table and build her little lego creations!

giant rip in the plastic canvas camping chair


Hey hey, look it fits!


pinning the leather down and marking all the lines to punch the sewing holes


about half of it sewn


fully repaired chair bottom!


happy daughter in her newly repaired chair
Staff note (gir bot) :

Inge Leonora-den Ouden approved this submission.
Note: this is real Upcycling!

Staff note :

This is certified for four oddball points.

 
L. Johnson
gardener
Posts: 1868
Location: Japan, zone 9a/b, annual rainfall 2550mm, avg temp 1.5-32 C
926
2
kids home care trees cooking bike woodworking ungarbage
  • Likes 7
  • Mark post as helpful
  • send pies
    Number of slices to send:
    Optional 'thank-you' note:
  • Quote
  • Report post to moderator
Approved submission
I suppose I qualify for the sand badge (5 points) now:

Garden Beds (20 points): https://permies.com/p/1344872
Greenhouse Shelving (2 points): https://permies.com/p/1344548
Planing Board (1 point): https://permies.com/p/1344582

Total 23 points.

Staff note (gir bot) :

Mike Barkley approved this submission.

 
L. Johnson
gardener
Posts: 1868
Location: Japan, zone 9a/b, annual rainfall 2550mm, avg temp 1.5-32 C
926
2
kids home care trees cooking bike woodworking ungarbage
  • Likes 3
  • Mark post as helpful
  • send pies
    Number of slices to send:
    Optional 'thank-you' note:
  • Quote
  • Report post to moderator
Approved submission
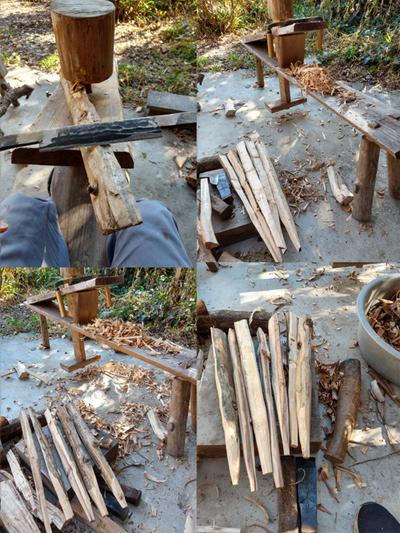
My raised bed garden is 99% biodegradable. That includes the stakes that are holding up the logs used for the raised beds. They need regular replacing. Recently I've been using the leftover cedar logs, as they will last a bit longer than branches of fruit trees and such. Turning them into stakes is a bit of labor though. It took me about 2 and a half hours to accomplish this work. I could have skipped some of the draw-knife work, but I think smooth sides to the stakes will also help them last longer.

First I cut the lengths with my silky.

Then I split them with an axe and some wedges when necessary.

Then I used my drawknife to smooth the sides to give fungus less surface area to grow on and shaved down to a point to make them easier to drive into the ground.

Then I staked them into the ground to support the sides of the beds.

And I use the shavings to mulch the aisles of the garden.
Staff note (gir bot) :

Someone approved this submission.
Note: Certified for 1 oddball point

 
pollinator
Posts: 253
Location: North Island, New Zealand
306
chicken food preservation fiber arts woodworking homestead
  • Likes 3
  • Mark post as helpful
  • send pies
    Number of slices to send:
    Optional 'thank-you' note:
  • Quote
  • Report post to moderator
Approved submission
I wear long sleeved shirts while biking and gardening to protect myself from the dangerous ultraviolet rays of the southern hemisphere sun. I got drenched while biking, and, when I tried to remove my soaking wet shirt, tore the sleeve just under the cuff. The cuffs were in sorry shape, so I decided to replace both. Fortunately, the cuffs were actually a bit long, so I just attached the new cuff on the shortened sleeve.

The new cuff is made from scrap old jeans and lined with op-shop bedsheet. Treadle sewing machine and thread and needle were used; no electricity for this project!

This doesn't fit into the Textiles badge, so I'm putting it here in oddball. I'm competent at sewing (maybe somewhat slower than a professional), and the process took 1.5 hours.
mb-bb-oddball-011_01.JPG
Torn sleeve; cutting off cuffs; making new cuffs
mb-bb-oddball-011_02.JPG
Sewing on new cuffs; chiseling buttonholes; stitching buttonholes
mb-bb-oddball-011_03.JPG
New cuff!
New cuff!
Staff note (gir bot) :

Paul Fookes approved this submission.
Note: Congratulations. I certify this BB complete for 2 Oddball points

 
Nicole Alderman
steward
Posts: 21438
Location: Pacific Northwest
11880
11
hugelkultur kids cat duck forest garden foraging fiber arts sheep wood heat homestead
  • Likes 3
  • Mark post as helpful
  • send pies
    Number of slices to send:
    Optional 'thank-you' note:
  • Quote
  • Report post to moderator
Approved submission
My daughter out-grew her old purple mittens (and was not keen on wearing her brother's old red ones), so I knit and felted her some pink ones! The only textile BB for mittens is for adult mittens, and while the mittens before being felted to fit an adult hands, they're not terribly good because they are knitted loosely to felt well.

pink yarn in teal yarn bowl with knitting needles
The beginning of a the first mitten. Wrist is knitted in washable wool/silk blend, while the hand is knit from worsted weight wool.


pink mittens being knitted
first mitten done--except for tying off the threads--and second mitten is begun


both mittens knitted with yarn tied off. Note they are as large as my hands.


pink felted mittens
mittens on my daughter's 5-year old hands. They fit!


I since my daughter was having fun playing in the warm water as I hand felted these, I had her put them on and stretched and felted them on her hands to fit her perfectly!

all of the mittens I've knit for my kids over the years as their hands have grown!


For fun, you can see some of the other pairs of mittens I've made in these pictures (there's also pictures in the Homespun Challenge):

my son in his red mittens


close-up of my son's mittens in action. They do a great job of keeping hands warm and cozy in the snow!


While digging through old pictures for mittens, I found this one (from 2019) of my kids being pulled on their sled with their cousins. All four are wearing mittens I knitted and felted!

4 kids being pulled on a sled
my son's in the front, and daughter in the back, and my nieces are in the middle.


Apparently, I've knit and felted 7 pairs of these to keep my family warm and cozy for years!

Having knit these so many times, I'm now able to get a mitten knit in 1.5 hours. It takes at least 3 hours to do both pairs, and then an extra 15 minutes to hand felt them to just the right size (you wouldn't want to felt them in the washing machine, because you'd end up with it felting to the wrong shape/size).
Staff note (gir bot) :

Ashley Cottonwood approved this submission.
Note: I certify this BB complete! 4 oddball points awarded

 
pollinator
Posts: 2980
Location: Meppel (Drenthe, the Netherlands)
962
dog forest garden urban cooking bike fiber arts
  • Likes 2
  • Mark post as helpful
  • send pies
    Number of slices to send:
    Optional 'thank-you' note:
  • Quote
  • Report post to moderator

Nicole Alderman wrote:...

...
(you wouldn't want to felt them in the washing machine, because you'd end up with it felting to the wrong shape/size).


Yes, that happened to me when I felted a pair of slippers I knitted in the washing machine. They came out 2 sizes smaller than my feet! All I could do was giving them as a gift to a friend who has small feet.  

Your mittens look very good!
 
If you send it by car it's a shipment, but if by ship it's cargo. This tiny ad told me:
two giant solar food dehydrators - one with rocket assist
https://solar-food-dehydrator.com
reply
    Bookmark Topic Watch Topic
  • New Topic