• Post Reply Bookmark Topic Watch Topic
  • New Topic
permaculture forums growies critters building homesteading energy monies kitchen purity ungarbage community wilderness fiber arts art permaculture artisans regional education skip experiences global resources cider press projects digital market permies.com pie forums private forums all forums
this forum made possible by our volunteer staff, including ...
master stewards:
  • Nancy Reading
  • Carla Burke
  • r ranson
  • John F Dean
  • paul wheaton
  • Pearl Sutton
stewards:
  • Jay Angler
  • Liv Smith
  • Leigh Tate
master gardeners:
  • Christopher Weeks
  • Timothy Norton
gardeners:
  • thomas rubino
  • Jeremy VanGelder
  • Maieshe Ljin
  • Mark post as helpful
  • send pies
    Number of slices to send:
    Optional 'thank-you' note:
  • Quote
  • Report post to moderator
This is a badge bit (BB) that is part of the PEP curriculum.  Completing this BB is part of getting the straw badge in textiles.

In this badge bit, you will make a small weaving loom.

Here's some information on building looms: https://permies.com/t/50910/permaculture-fiber-arts-tools/fiber-arts/loom

To complete this BB, the minimum requirements are:
- build a loom capable of weaving a warp-faced fabric at least 2" wide
- weave a small sample of warp-faced cloth to show the loom works

To show you've completed this Badge Bit, provide proof of the following as pics or video (less than two minutes):  
-  your materials used to make the loom
-  the process of making the loom
-  the finished loom making warp-faced cloth

Examples of backstrap weaving and loom set up:


Making and using a tablet loom:


Example of tablet weaving and set up:


COMMENTS:
 
steward & author
Posts: 38408
Location: Left Coast Canada
13659
8
books chicken cooking fiber arts sheep writing
  • Likes 7
  • Mark post as helpful
  • send pies
    Number of slices to send:
    Optional 'thank-you' note:
  • Quote
  • Report post to moderator
Approved submission
I did this a while back: https://permies.com/t/50910/permaculture-fiber-arts-tools/fiber-arts/loom#523826

It's a tablet or 'card' loom.  I made mine out of playing cards.


On the left are examples of commercial weaving cards or tablets.  And you can see the deck of cards I'm using for this project.


measuring it square.


first card cut and holes punched.


loom complete


loom in action.


Staff note (Ash Jackson) :

I certify this BB complete!

 
r ranson
steward & author
Posts: 38408
Location: Left Coast Canada
13659
8
books chicken cooking fiber arts sheep writing
  • Likes 9
  • Mark post as helpful
  • send pies
    Number of slices to send:
    Optional 'thank-you' note:
  • Quote
  • Report post to moderator
Not submitted for points, but an example of an even simpler loom I made

Get some straight sticks (old broom handles, wooden spoon handles, whatever - just ask before cutting them up)
Cut them to length.


add yarn


weave a bit


all done


The cloth I made becomes the backstrap for the loom - the sticks and that strap go together.  But you can make lots of different style cloths including the belt this BB is for.

And here's the tutorial I used: https://backstrapweaving.wordpress.com/backstrap-basics-an-article-from-weavezine-by-laverne-waddington/
 
gardener
Posts: 1569
Location: Washington State
985
6
forest garden trees rabbit earthworks composting toilet fiber arts sheep wood heat woodworking rocket stoves homestead
  • Likes 12
  • Mark post as helpful
  • send pies
    Number of slices to send:
    Optional 'thank-you' note:
  • Quote
  • Report post to moderator
Approved submission
Here is my submission for the Make a Small Loom BB - Textile Aspect - straw.

I learned quite a lot about what works and what does not while I was modifying the loom dowels, measuring and warping the loom, and most specifically to use nylon (or a slick material) for the string heddles.  I used mason line for the heddles because the cotton thread would catch on the warp and not change the shed at all!

To get certified for this BB, I have posted:
- a picture of materials - dowels
- Using a chisel to notch the ends of the dowels
- a picture of putting the warp on the loom - making the loom work
- a picture of the nylon string heddles finished and weaving started
- a picture of the finished loom making cloth
1.jpg
Several sizes and shapes of dowels and boards.
2.JPG
Using a chisel to notch the ends of the Loom Bar dowels
3.JPG
Putting the warp on the loom and securing it to the loom bars
4.JPG
The nylon string heddles finished and weaving started
5-Weaving.JPG
The assembled (finished) loom making cloth - about 3.5"
Staff note (r ranson) :

I certify this BB complete!

 
steward
Posts: 21553
Location: Pacific Northwest
12040
11
hugelkultur kids cat duck forest garden foraging fiber arts sheep wood heat homestead
  • Likes 4
  • Mark post as helpful
  • send pies
    Number of slices to send:
    Optional 'thank-you' note:
  • Quote
  • Report post to moderator
Approved submission
We've been learning a lot about vikings and tablet weaving, so my son picked out colors and a pattern, and we made tablets from thin wood we had left over from another project.

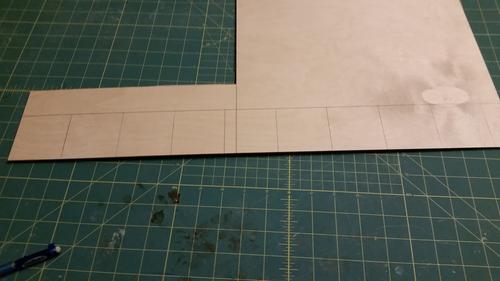
I measured off the wood to make 9 tablets


  • https://permies.com/t/68930/a/129318/thumb-20201229_170857.jpg caption="measured in 1/2 inch from each edge to find the right places to drill" width=500


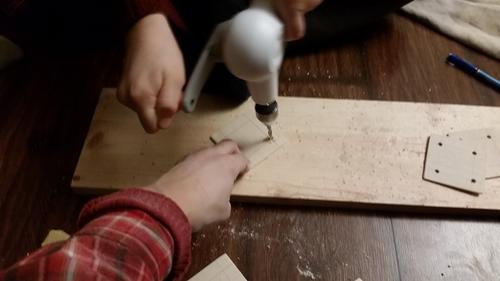
  • My kids helped drill a few holes :D


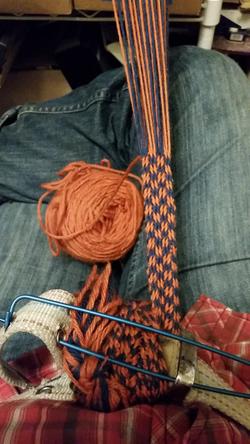
    one side attached to my belt
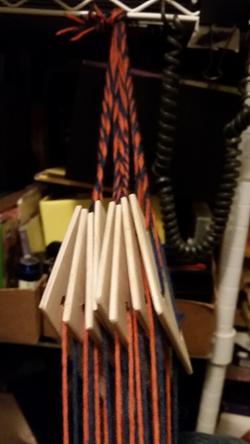
    other side attached to the shelf


    my son stepped in to weave a few rows
    image is stuck sideways, but here's the belt on my son!


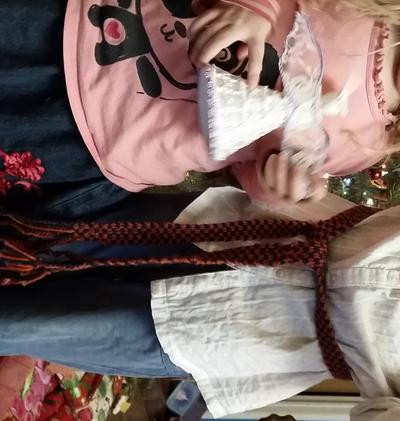
    All in all, I learned a LOT. Both my kids enjoyed learning about weaving. My husband has decided it's magic. And he looked at me really funny when I said "warp threads"--I think he was imagining threads traveling at warp speed :D. My beginning weaving was rather atrocious, but evened out toward the end.  A great project! I didn't have a shuttle, so I just stuck the ball of yarn through the warp "shed" and smacked it down with the edge of my hand to tighten the weaving.

    Staff note (gir bot) :

    r ranson approved this submission.

     
    pollinator
    Posts: 122
    Location: Gloucestershire, UK
    89
    5
    foraging urban cooking fiber arts ungarbage
    • Likes 5
    • Mark post as helpful
    • send pies
      Number of slices to send:
      Optional 'thank-you' note:
    • Quote
    • Report post to moderator
    Approved submission
    I had a lot of fun doing this. I made a tablet loom and did a test weave. I made the loom out of lego creator cards the kids had, a hole punch and scissors. Here are my pics.
    IMG_20210122_193847.jpg
    Cards
    Cards
    IMG_20210122_200139.jpg
    Punching cards
    Punching cards
    IMG_20210122_200519.jpg
    Rounding off cards
    Rounding off cards
    IMG_20210123_121524.jpg
    Loom in use
    Loom in use
    IMG_20210123_130420.jpg
    Finished piece
    Finished piece
    Staff note (gir bot) :

    r ranson approved this submission.

     
    steward
    Posts: 12433
    Location: Pacific Wet Coast
    6996
    duck books chicken cooking food preservation ungarbage
    • Likes 2
    • Mark post as helpful
    • send pies
      Number of slices to send:
      Optional 'thank-you' note:
    • Quote
    • Report post to moderator
    Approved submission
    I made a tablet loom because I wanted to make a thin strap for another project.

    These were very sturdy cards from when the kids were little. A little thicker than usual playing cards. Also, I think, a little slipperier.


    This image shows the stack of finished cards and my small project set up as a test.


    I tried twice to make a tiny shuttle out of wood I had handy, but it was too dry and the first 3 tries split. Then I remembered a neighbor had given me a net needle and it was a great tool for a small project like this one.


    Here you can see I'm almost done weaving. I'm using antique silk thread which was both extremely slippery to use and so shiny that it was hard to see what I was doing under artificial light. The white loops were to weave in the end of the weft thread, although after weaving it in side to side, I used a needle back and forth in the long direction to make it more secure.  Between the slippery cards and the slippery silk, the elastic bands in the picture were used to put around the cards whenever I had to take a break. I also have issues with the whole right/left - forward/back thing, so I used the two playing cards to keep track of whether I should be going towards me (the number "2") or  away (the Jack for "back").
    The broken dog leash made a great tie and hook to fasten the far end onto a table leg. The near end I tied to me.
    Staff note (gir bot) :

    Nicole Alderman approved this submission.
    Note: I hereby certify that this badge bit is complete!

     
    Posts: 12
    4
    3
    • Likes 6
    • Mark post as helpful
    • send pies
      Number of slices to send:
      Optional 'thank-you' note:
    • Quote
    • Report post to moderator
    Approved submission
    I don't know if this counts, but I made a super simple loom out of sturdy cardboard and so far it's doing pretty good. I'm not finished with my piece (I'm making a small bag), but I'm pretty happy with the results so far.
    I will update this once I get the bag finished and see how well the cardboard fairs on a second project.
    20220130_000505.jpg
    materials to make a cardboard weaving loom
    20220130_000931.jpg
    making a cardboard weaving loom
    20220130_001223.jpg
    making a cardboard weaving loom
    20220130_022209.jpg
    small cardboard loom warped and ready to weave
    20220130_022340.jpg
    close-up of cardboard loom threaded
    20220204_015319.jpg
    woven piece on cardboard weaving loom
    Staff note (gir bot) :

    Nicole Alderman approved this submission.
    Note: I hereby certify that this badge bit is complete, and congratulate you on your first air badge! Great job making a loom out of what you had around!

     
    r ranson
    steward & author
    Posts: 38408
    Location: Left Coast Canada
    13659
    8
    books chicken cooking fiber arts sheep writing
    • Likes 1
    • Mark post as helpful
    • send pies
      Number of slices to send:
      Optional 'thank-you' note:
    • Quote
    • Report post to moderator

    Ari Stephenson wrote:I don't know if this counts, but I made a super simple loom out of sturdy cardboard and so far it's doing pretty good. I'm not finished with my piece (I'm making a small bag), but I'm pretty happy with the results so far.
    I will update this once I get the bag finished and see how well the cardboard fairs on a second project.


    That looks good to me, but I can't see the button where I approve the BB.  Is it possible to edit your post and click "submit for BB certification" instead of reply?
     
    Nicole Alderman
    steward
    Posts: 21553
    Location: Pacific Northwest
    12040
    11
    hugelkultur kids cat duck forest garden foraging fiber arts sheep wood heat homestead
    • Likes 2
    • Mark post as helpful
    • send pies
      Number of slices to send:
      Optional 'thank-you' note:
    • Quote
    • Report post to moderator

    r ranson wrote:

    Ari Stephenson wrote:I don't know if this counts, but I made a super simple loom out of sturdy cardboard and so far it's doing pretty good. I'm not finished with my piece (I'm making a small bag), but I'm pretty happy with the results so far.
    I will update this once I get the bag finished and see how well the cardboard fairs on a second project.


    That looks good to me, but I can't see the button where I approve the BB.  Is it possible to edit your post and click "submit for BB certification" instead of reply?


    I found out special certifier button to convert it to a BB post, and certified it! It's good to know to look for the "submit for BB certification" in the future, though!
     
    Ari Stephenson
    Posts: 12
    4
    3
    • Likes 3
    • Mark post as helpful
    • send pies
      Number of slices to send:
      Optional 'thank-you' note:
    • Quote
    • Report post to moderator
    😮 Oh my goodness! I really appreciate this! I didn't think it would qualify as a BB, especially since I didn't write up a description of how I did what, yet, and my project isn't finished.
    I'm speechless (almost). ☺️
    I know this may seem like a little thing to some people, but to me, it makes me feel like my hard work is starting to pay off and be recognized.

    I really do appreciate that, a lot!!!
     
    Jay Angler
    steward
    Posts: 12433
    Location: Pacific Wet Coast
    6996
    duck books chicken cooking food preservation ungarbage
    • Likes 3
    • Mark post as helpful
    • send pies
      Number of slices to send:
      Optional 'thank-you' note:
    • Quote
    • Report post to moderator

    Ari Stephenson wrote:I know this may seem like a little thing to some people, but to me, it makes me feel like my hard work is starting to pay off and be recognized.

    PEP is all about "small stuff that builds to big stuff". This BB was for building the loom. There will be other BB's about learning to use natural fibers, because they're required, making some of those fibers yourself, and the list goes on. You made a loom, and the picture shows it works! Bravo - and carry on! We'd still like to see the finished product.
     
    pollinator
    Posts: 259
    Location: New Zealand
    307
    chicken food preservation fiber arts woodworking homestead
    • Likes 4
    • Mark post as helpful
    • send pies
      Number of slices to send:
      Optional 'thank-you' note:
    • Quote
    • Report post to moderator
    Approved submission
    I prepared some tablet cards from chocolate cardboards to make a small tablet weaving setup. I used this setup to set up my warp-weighted loom for weaving. The initial tablet weaving was quite messy as it is some of the older handspun I have from back before I was very good (or had access to nice wool--just took what folks gave me in big feed sacks, haha). A good use for the scrap!

    All the yarn in the image is my handspun--I've gotten quite a bit better over the last seven years!
    mb-bb-textiles-straw-required-loom-1.JPG
    Preparing the tablet weaving loom
    Preparing the tablet weaving loom
    mb-bb-textiles-straw-required-loom-2.JPG
    Using the tablet weaving to prepare material for an upright loom
    Using the tablet weaving to prepare material for an upright loom
    Staff note (gir bot) :

    Paul Fookes approved this submission.
    Note: Well done beautiful fibre.  I certify this BB complete

     
    Posts: 181
    Location: Tacoma WA
    28
    2
    hugelkultur forest garden food preservation fiber arts medical herbs homestead
    • Likes 3
    • Mark post as helpful
    • send pies
      Number of slices to send:
      Optional 'thank-you' note:
    • Quote
    • Report post to moderator
    Approved submission
    I made Weaving Sticks from Oregon Grape sticks that were left over from Medicinals.  

    I cut 7" sticks from some peeled Oregon Grape, scraped the last of the bark off with a knife, and smoothed off all knots. The skinny end was tapered into a soft point.  Measuring 1" from the thick end, I made a slight groove all the way around each stick. Everything was sanded smooth. Using thin cotton thread, I tied the string to the groove, then tied off the ends to make a loop.  I used this loop to hold the warp yarn.

    Here is a great description of how to weave:
    https://www.montessorihandwork.com/post/stick-weaving-lesson

    I learned a lot while testing the weaving sticks. Things I will do differently next time: use thinner sticks to increase the tension, make a thinner groove, make the groove in the thinner end, and the point on the thick end. I only made a few sticks as proof of concept, but more will allow for a wider piece.  This is certainly a perfectly portable project.
    oregon-grape-harvest-(1).jpg
    Fresh oregon grape stems
    Fresh oregon grape stems
    Stick-weaving-beginning.jpg
    Cleaning up the sticks
    Cleaning up the sticks
    weaving-sticks-carved.jpg
    Finished carving the points and grooves,
    Finished carving the points and grooves,
    White-loops-tied-to-sticks-with-warp-threaded.jpg
    Warped
    Warped
    Begin-weft-by-tieing-off-to-the-first-stick..jpg
    Starting the weft
    Starting the weft
    Weaving-sticks-held-in-hand-while-sliding-the-weaving-down-the-warp.jpg
    Weaving position
    Weaving position
    Staff note (gir bot) :

    Nicole Alderman approved this submission.
    Note: I hereby certify that this badge bit is complete! I love your use of the old Oregon Grape Root sticks, and this new way of weaving. I want to try it now!

     
    author & steward
    Posts: 5298
    Location: Southeastern U.S. - Zone 7b
    3081
    5
    goat cat forest garden foraging food preservation fiber arts medical herbs writing solar wood heat homestead
    • Likes 1
    • Mark post as helpful
    • send pies
      Number of slices to send:
      Optional 'thank-you' note:
    • Quote
    • Report post to moderator
    Approved submission
    I made a tablet loom.

    Materials - pack of playing cards, scissors, and hole punch.


    Making the tablets.


    Punching the holes for the yarn.


    I used the backstrap method to tension it, so I also needed a belt and metal ring to set up the loom.

    Weaving width is adjustable depending on the number of tablets used and the size of yarn.

    To learn about tablet weaving, my first project was a sampler.

    Tablet loom weaving.
    Staff note (gir bot) :

    Someone approved this submission.

     
    Posts: 95
    Location: Billings, MT
    53
    homeschooling kids trees food preservation fiber arts building
    • Likes 4
    • Mark post as helpful
    • send pies
      Number of slices to send:
      Optional 'thank-you' note:
    • Quote
    • Report post to moderator
    Approved submission
    Howdy, Permies!  I opted to make a larger loom.  The more I researched looms, the more I was confused by them.  So, in my confusion, I decided to go back to the basics.  Keep it simple, over, under, over, under.  I made a frame, and put some nails in it to space out the warp yarn.  To weave I use a couple of thin maple scraps to go over-under-over-under then I turn the stick to the side to make space between the warp to slide the shuttle through.  I accidentally made a handy feature where the shuttles fit right at the bottom under the fabric, resting on the bottom frame.  A couple extra sticks are used to help adjust tension, and voila!  There was some red cotton yarn and white cotton yarn in the stash, so I thought a gingham fabric would be fun to try for my first foray into weaving.
    Materials.jpg
    [Thumbnail for Materials.jpg]
    Frame.jpg
    [Thumbnail for Frame.jpg]
    Shuttle-1.jpg
    [Thumbnail for Shuttle-1.jpg]
    Shuttle-2.jpg
    [Thumbnail for Shuttle-2.jpg]
    Shuttle-3.jpg
    [Thumbnail for Shuttle-3.jpg]
    Loom.jpg
    [Thumbnail for Loom.jpg]
    Weaving-1.jpg
    [Thumbnail for Weaving-1.jpg]
    Staff note (gir bot) :

    Paul Fookes approved this submission.
    Note: Congratulations Gunnar. I certify this BB Complete

     
    gardener
    Posts: 2108
    Location: Zone 8b North Texas
    563
    3
    hugelkultur forest garden foraging earthworks food preservation fiber arts bee medical herbs seed wood heat composting
    • Likes 1
    • Mark post as helpful
    • send pies
      Number of slices to send:
      Optional 'thank-you' note:
    • Quote
    • Report post to moderator
    Approved submission

    To complete this BB, the minimum requirements are:
    - build a loom capable of weaving a warp-faced fabric at least 2" wide

    To show you've completed this Badge Bit, provide proof of the following as pics or video (less than two minutes):  
    -  your materials used to make the loom
    -  the process of making the loom
    -  the finished loom making cloth


    I'll be creating a stick loom from 6 chopsticks instead of 4 to meet the 2" requirement for my belt.  The material is 100% wool yarn.

    I drilled small holes in the chopstick handles.  I put the yard through the holes, looped it and tied it to the other yarn loops to hold the warp yarn.

    I used this link to show me how to weave with a stick loom.
    https://www.montessorihandwork.com/post/stick-weaving-lesson

    I began my weft by tying off to the first stick.  Then, began weaving the wool yarn through the stick loom.

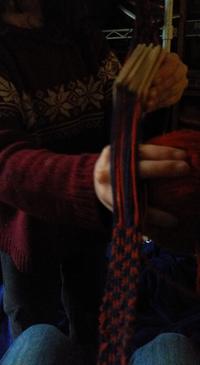
    This was a fantastic experience!  After dropping a couple wefts I learned to look at each end to verify which direction I was to go.  I figured out I needed to keep my work at the bottom of the chopsticks to easier release it down onto the belt.  I wrestled with it at first.  Then, after having to unwind the yarn from the fabric a couple times, I realized I needed to keep the yarn behind the loom as I weave.  Fun stuff!

    1-Wool-yarn.jpg
    This is the 100% wool yarn used to weave on my stick loom.
    This is the 100% wool yarn used to weave on my stick loom.
    2-chopsticks-to-make-stick-loom.jpg
    Using chopsticks to make my stick loom.
    Using chopsticks to make my stick loom.
    3-drilling-chopsticks.jpg
    I drilled holes to hold the yarn for the warp.
    I drilled holes to hold the yarn for the warp.
    4-stick-loom.jpg
    This is my stick loom
    This is my stick loom
    5-How-I-hold-stick-loom.jpg
    This is how I hold the loom to weave.
    This is how I hold the loom to weave.
    8-weaving-a-belt-on-the-stick-loom.jpg
    How I weave the yarn through the stick loom.
    How I weave the yarn through the stick loom.
    9-belt-over-2-in-wide.jpg
    measuring the width of a stick loom woven belt
    Belt over 2 in wide. Thanks for letting me add this!
    Staff note (gir bot) :

    Someone approved this submission.
    Note: Measuring tapes in the picture make life easier for evaluators!

     
    pollinator
    Posts: 245
    77
    fungi foraging fiber arts medical herbs woodworking ungarbage
    • Mark post as helpful
    • send pies
      Number of slices to send:
      Optional 'thank-you' note:
    • Quote
    • Report post to moderator
    Approved submission
    Created weaving sticks from some chopsticks we had laying around. Drilled small holes in the ends and sanded the squareness off of them to help the yarn slide off as I weave. I had fun listening to podcasts and weaving with my kitty on my lap.
    20240320_124837.jpg
    drilling the holes in the chopsticks
    drilling the holes in the chopsticks
    20240320_124922.jpg
    all drilled
    all drilled
    20240321_102050.jpg
    starting to weave
    starting to weave
    20240321_111918.jpg
    just over 2" wide fabric
    just over 2" wide fabric
    Staff note (gir bot) :

    Someone approved this submission.

     
    Apprentice Rocket Scientist
    Posts: 853
    Location: 4a, high mountain dessert
    410
    3
    kids foraging rabbit fiber arts medical herbs bee
    • Mark post as helpful
    • send pies
      Number of slices to send:
      Optional 'thank-you' note:
    • Quote
    • Report post to moderator
    Approved submission
    I started by making a shuttle from a wooden shim that was lying around. I cut it, sanded it, and finally oiled it.
    Next, I found a cast-off stick in my woodpile. It was too short to be the edge of a beehive I made. It shall be my heddle. Next, I measured 1/4" marks all along the heddle, and cut them with the skinniest saw I could find. A hack saw? While the heddle was clamped. Then I sanded the bergeebers out of it, and finally, I oiled it with walnut oil.
    The last piece of my very simple loom is a poster board that I marked at half inch intervals and cut with scissors about an inch into each side. That's all!
    20241201_140210.jpg
    A shim and pocket knife
    A shim and pocket knife
    20241201_164111.jpg
    The heddle, getting sawed a million times
    The heddle, getting sawed a million times
    20241201_152608.jpg
    The heddle gets sanded and filed
    The heddle gets sanded and filed
    20241201_154304.jpg
    Oiling the shuttle and heddle
    Oiling the shuttle and heddle
    20241201_154710.jpg
    Marking the edge of the poster board loom
    Marking the edge of the poster board loom
    20241201_155905.jpg
    All three pieces, ready to string up. I mean warp
    All three pieces, ready to string up. I mean warp
    20241201_163352.jpg
    Making material!
    Making material!
    Staff note (gir bot) :

    Cheryl Loomans approved this submission.
    Note: I hearby certify this BB as complete! Love your use of the hack saw😉

     
    r ranson
    steward & author
    Posts: 38408
    Location: Left Coast Canada
    13659
    8
    books chicken cooking fiber arts sheep writing
    • Mark post as helpful
    • send pies
      Number of slices to send:
      Optional 'thank-you' note:
    • Quote
    • Report post to moderator

    To complete this BB, the minimum requirements are:
    - build a loom capable of weaving a warp-faced fabric at least 2" wide


    This is a good place to mention part of this bb is to show one knows the difference between warp and weft.

    However we have several above this post with weft faced fabric.  

    It's kind of awkward what to do next.

    So I am placing this as a marker and that bb applications after this will be held to a stricter standards.  

    I will see what I can do to improve the  bb description.
     
    Rebekah Harmon
    Apprentice Rocket Scientist
    Posts: 853
    Location: 4a, high mountain dessert
    410
    3
    kids foraging rabbit fiber arts medical herbs bee
    • Mark post as helpful
    • send pies
      Number of slices to send:
      Optional 'thank-you' note:
    • Quote
    • Report post to moderator
    Hey R Ranson! I just learned what warp and weft-faced fabric means and differences. Yep, sorry that my cardboard loom didn't fit the aim of the original bb. Learning!
     
    Something must be done about this. Let's start by reading this tiny ad:
    12 DVDs bundle
    https://permies.com/wiki/269050/DVDs-bundle
    reply
      Bookmark Topic Watch Topic
    • New Topic