• Post Reply Bookmark Topic Watch Topic
  • New Topic
permaculture forums growies critters building homesteading energy monies kitchen purity ungarbage community wilderness fiber arts art permaculture artisans regional education skip experiences global resources cider press projects digital market permies.com pie forums private forums all forums
this forum made possible by our volunteer staff, including ...
master stewards:
  • Nancy Reading
  • Carla Burke
  • r ranson
  • John F Dean
  • paul wheaton
  • Pearl Sutton
stewards:
  • Jay Angler
  • Liv Smith
  • Leigh Tate
master gardeners:
  • Christopher Weeks
  • Timothy Norton
gardeners:
  • thomas rubino
  • Jeremy VanGelder
  • Maieshe Ljin

PEP Badge: Oddball

BB oddball - sand badge
 
pollinator
Posts: 1495
855
2
trees bike woodworking
  • Likes 2
  • Mark post as helpful
  • send pies
    Number of slices to send:
    Optional 'thank-you' note:
  • Quote
  • Report post to moderator
Approved submission
I’d like to apply for my sand badge:

permies.com/p/1321548 - 1 point
permies.com/p/1331933 - 3 points
permies.com/p/1333304 - 1/2 point
permies.com/p/1341097 - 2 points

I’m really going to have to think outside the box to get 40 points. Oddball is hard!
Staff note (gir bot) :

Mike Barkley approved this submission.
Note: Well done Edward. Enjoy your shiny new oddball badge.

 
pollinator
Posts: 3089
Location: Meppel (Drenthe, the Netherlands)
1018
dog forest garden urban cooking bike fiber arts
  • Likes 3
  • Mark post as helpful
  • send pies
    Number of slices to send:
    Optional 'thank-you' note:
  • Quote
  • Report post to moderator
Approved submission
O, I did not think of asking for the Sand Badge Oddball before. But now I apply for it.  I do have the needed points:

https://permies.com/wiki/150/97787/pep-oddball/PEP-Badge-Oddball#1219413 3 points for my warm slippers  
https://permies.com/wiki/210/97787/pep-oddball/PEP-Badge-Oddball#1315464 2,5 points for my floor quilt
Staff note (gir bot) :

Mike Barkley approved this submission.
Note: Those look great Inge. Here's the badge. Enjoy.

 
steward
Posts: 21553
Location: Pacific Northwest
12040
11
hugelkultur kids cat duck forest garden foraging fiber arts sheep wood heat homestead
  • Likes 3
  • Mark post as helpful
  • send pies
    Number of slices to send:
    Optional 'thank-you' note:
  • Quote
  • Report post to moderator

Edward Norton wrote:I’m really going to have to think outside the box to get 40 points. Oddball is hard!


It sure is! I nickle and dimed myself up to 40 points, and it took a long time. But, it's so worth it to have a Straw badge (plus, all the stuff was stuff I already needed to do. So the main problem was just documenting and posting it. Sometimes that took more time than the project!)
 
Edward Norton
pollinator
Posts: 1495
855
2
trees bike woodworking
  • Likes 2
  • Mark post as helpful
  • send pies
    Number of slices to send:
    Optional 'thank-you' note:
  • Quote
  • Report post to moderator

Nicole Alderman wrote:
It sure is! I nickle and dimed myself up to 40 points, and it took a long time. But, it's so worth it to have a Straw badge (plus, all the stuff was stuff I already needed to do. So the main problem was just documenting and posting it. Sometimes that took more time than the project!)


On reflection,  I think it's a badge that will just happen. I don't do many big projects at the moment but that will all change next year. thanks for the encouragement.
 
gardener
Posts: 2106
Location: Gulgong, NSW, Australia (Cold Zone 9B, Hot Zone 6) UTC +10
999
6
hugelkultur fungi chicken earthworks wofati food preservation cooking bee building solar rocket stoves
  • Likes 2
  • Mark post as helpful
  • send pies
    Number of slices to send:
    Optional 'thank-you' note:
  • Quote
  • Report post to moderator

Edward Norton wrote:

Nicole Alderman wrote:
It sure is! I nickle and dimed myself up to 40 points, and it took a long time. But, it's so worth it to have a Straw badge (plus, all the stuff was stuff I already needed to do. So the main problem was just documenting and posting it. Sometimes that took more time than the project!)


On reflection,  I think it's a badge that will just happen. I don't do many big projects at the moment but that will all change next year. thanks for the encouragement.


Absolutely, it is a learning journey.  If you race to the finish line it can become a chore. I did the external wiring up of the granny flat next door and discovered that it is a BB and the same with rebuilding our solar from the ground up.
When I am doing a task I think whether or not this is on my learning curve.  I have completed a compound mallet and about to complete the journal because I really learned  a lot about using nature to create a tight joint, plus the one I bought broke after a few hits. The Hugelkulture is currently under water but it may take a couple of years to complete.  So definitely, it will happen , just embrace the journey. Enjoying seeing your BB stuff.
Cheers
 
Inge Leonora-den Ouden
pollinator
Posts: 3089
Location: Meppel (Drenthe, the Netherlands)
1018
dog forest garden urban cooking bike fiber arts
  • Likes 2
  • Mark post as helpful
  • send pies
    Number of slices to send:
    Optional 'thank-you' note:
  • Quote
  • Report post to moderator

Nicole Alderman wrote:

Edward Norton wrote:I’m really going to have to think outside the box to get 40 points. Oddball is hard!


It sure is! I nickle and dimed myself up to 40 points, and it took a long time. But, it's so worth it to have a Straw badge (plus, all the stuff was stuff I already needed to do. So the main problem was just documenting and posting it. Sometimes that took more time than the project!)


You're right Nicole, that is the main problem. Making photos of different steps of what I do ... I am still not used to it.

 
gardener
Posts: 388
Location: Zone 7a
264
6
kids rabbit chicken food preservation fiber arts
  • Likes 6
  • Mark post as helpful
  • send pies
    Number of slices to send:
    Optional 'thank-you' note:
  • Quote
  • Report post to moderator
Approved submission
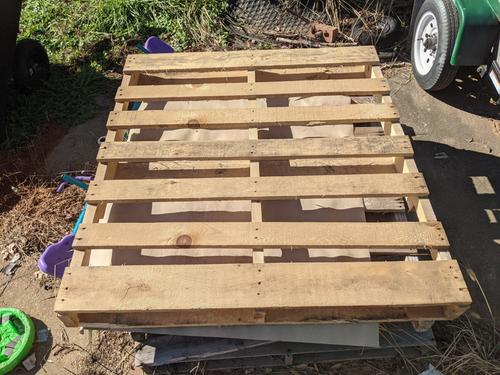
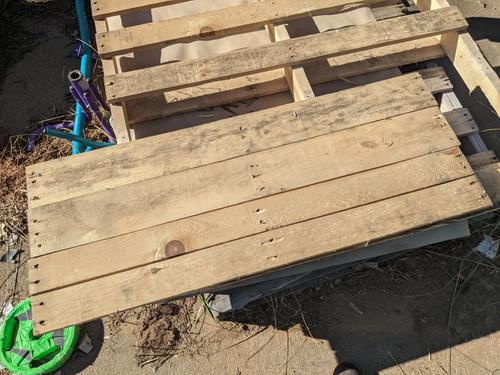
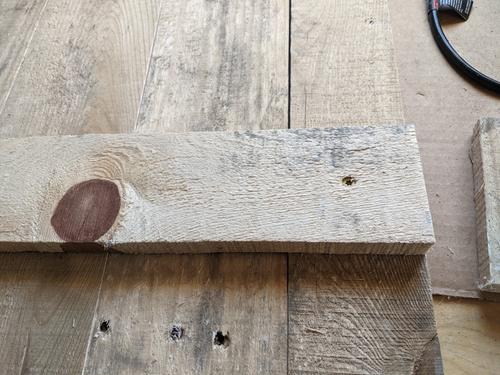
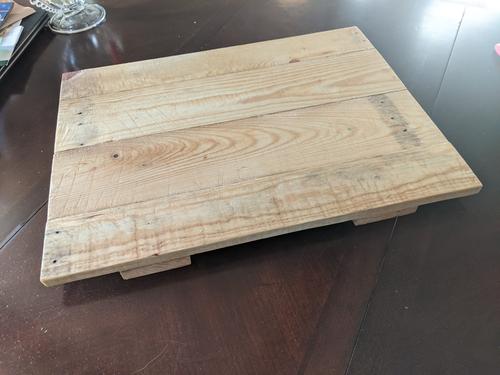
My wife wanted a serving tray. And so begins many a story.
I had a pallet that hadn't yet been weathered

I removed the boards I needed

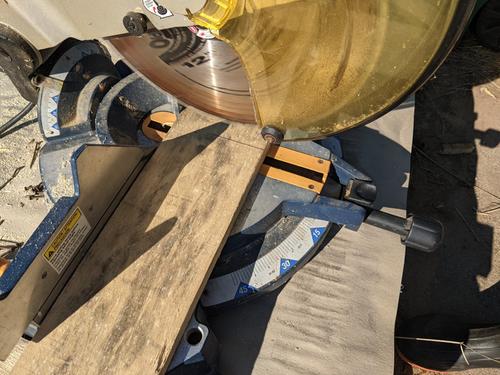
Cut them to length.

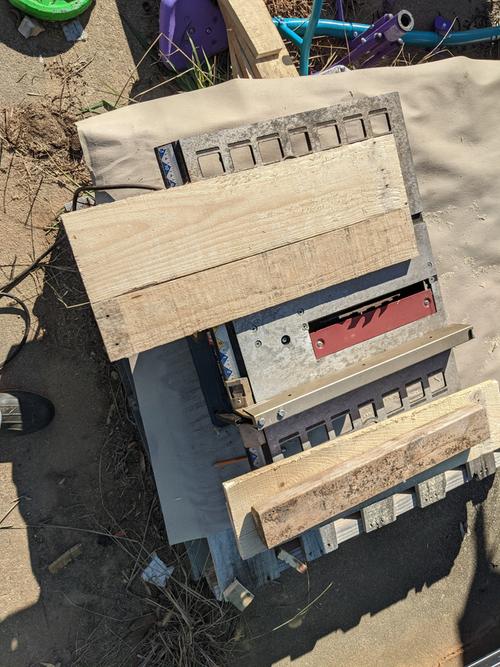
Ran the seam down the table saw to plum them up a bit.

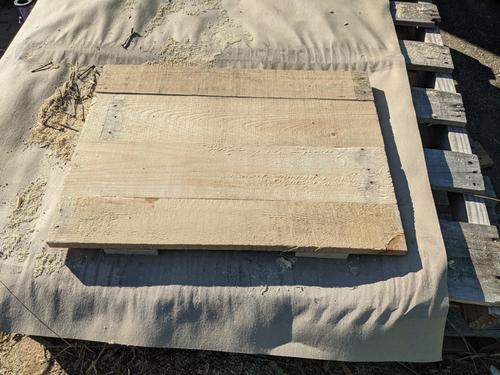
Attached the pieces underneath with screws. this provides a way to get your fingers under to lift.

Most of the way done.

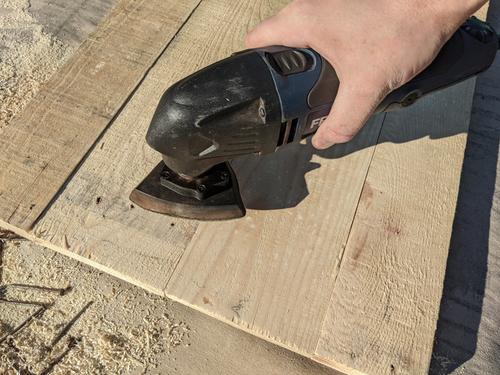
I sanded all the surfaces and made all the boards mate up better across the top.

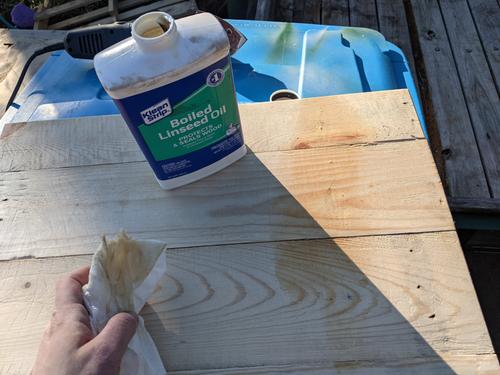
Treated the surface with linseed oil.

Finished rustic serving tray, roughly 16" x 22".
Staff note (gir bot) :

Paul Fookes approved this submission.
Note: I certify this BB complete for 1 point. Well presented design

 
Edward Norton
pollinator
Posts: 1495
855
2
trees bike woodworking
  • Likes 4
  • Mark post as helpful
  • send pies
    Number of slices to send:
    Optional 'thank-you' note:
  • Quote
  • Report post to moderator
Approved submission
Cargo Bike Upgrade - adding an electric front hub

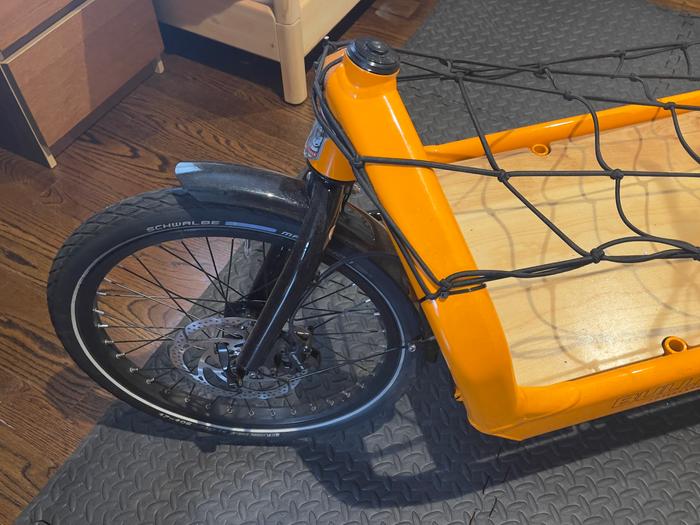
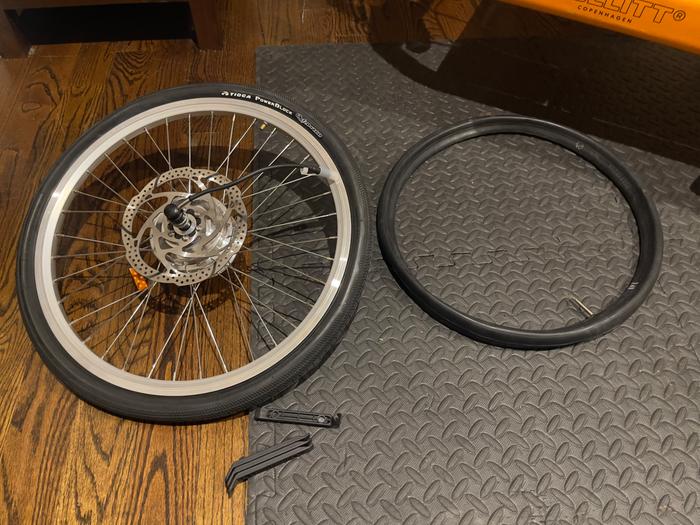
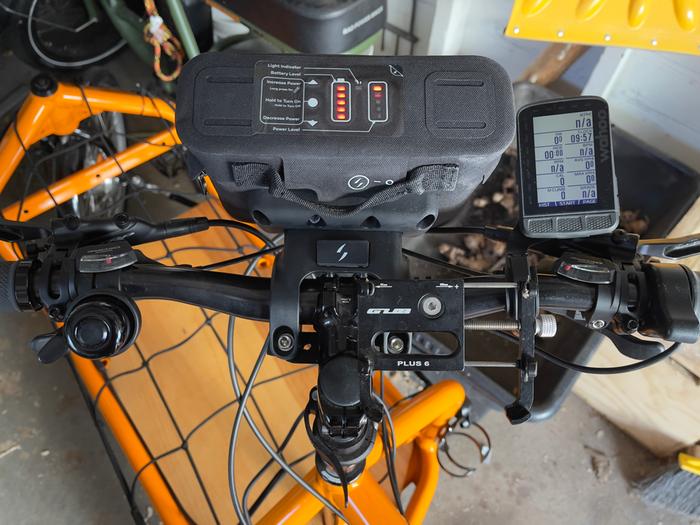
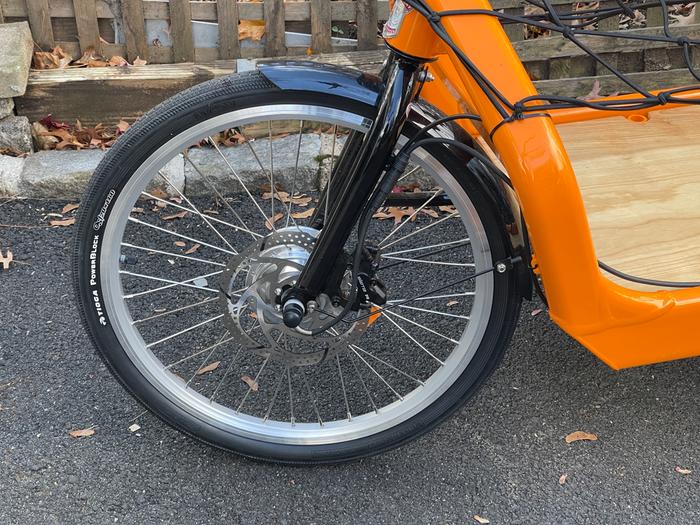
When I bought my cargo bike I wanted to retro fit a kit to convert it to an electric bike. After many, many months of research I decided to go for a simple, lower power, front wheel assist. Rear hubs with gears are more expensive than the bike itself, so that option was never on the table. Mid drive makes a lot of sense and it’s what most companies including Larry v Harry, the makers of The Bullitt, implement themselves. It’s technically challenging but doable. However, there’s much higher wear on components and with the massive global supply chain problem which seems to have hit bike parts especially hard, I decided against it. There was a Canadian company selling front wheel drive kits and the forums five or so years ago were full of people singing their praise. I read many blogs about people buying cargo bikes and either having front wheel drive added before delivery or adding it soon after. Alas the Canadian Company is no more. I did find an alternative, Swytch. There was a 12 to 14 week delivery from order, which fitted roughly with the expected delivery of my bullitt. I bought the 20” wheel package, an extra battery and power delivery extension cables. That was back in March. The bike arrived in July, but no upgrade kit. I entered a huge protected battle with Swytch and finally had everything I need, well that’s what I thought. (Awesome product, appalling, off the scale bad, customer support.)

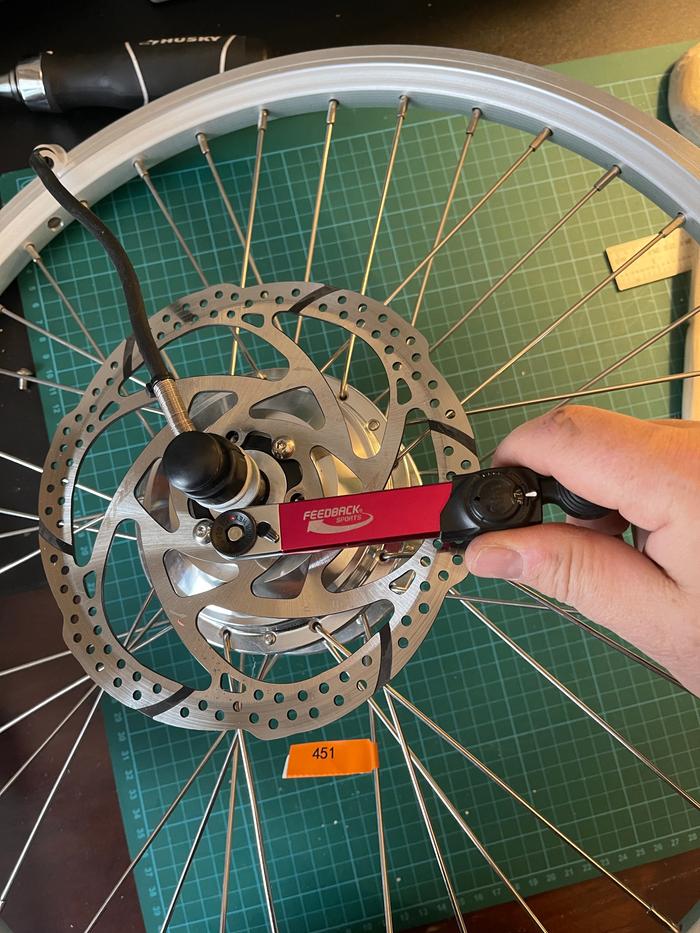
They had shipped a 451 wheel which in the UK is a BMX 20 inch wheel. The Bullitt front wheel is a BMX 20 inch wheel, but 20 doesn’t always mean 20. In the US a 451 is a 20 OS where OS stands for oversize. Basically the rim is 22 inches but you install a lower profile tyre and it still fits on a standard BMX fork. I failed to find this information online and it wasn’t until I visited a local shop did I get the full story. I spoke to a guy who builds wheels and he gets confused! So I had options, order a new tyre and tube or cannibalise my two wheels, which was possible as they both have 32 spokes. It would require ordering new spokes and a long wait time. There’s only one supplier of 20 OS tyres in the US so I ordered from them and they arrived yesterday.

Here’s how the build went.

Start point


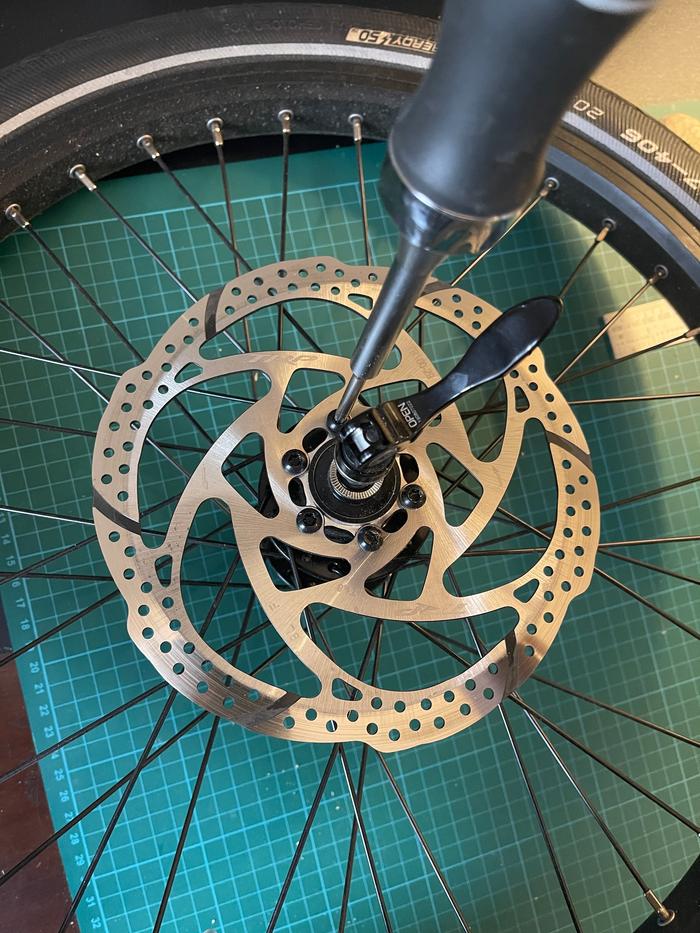
1) Remove wheel and swap over break disk, tyres and tube, or in my case, install new tyres and tub.


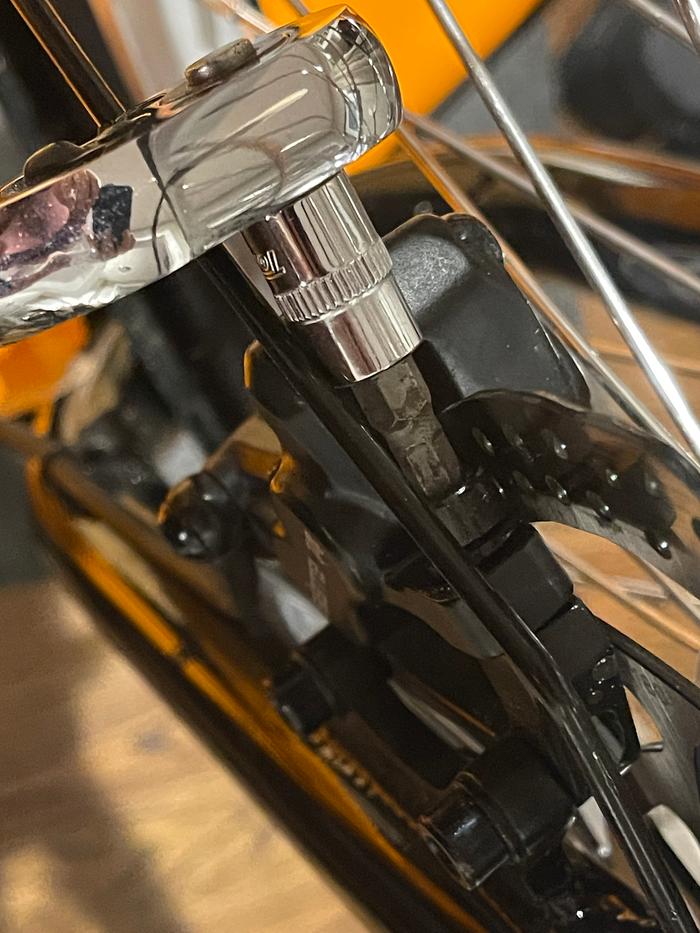
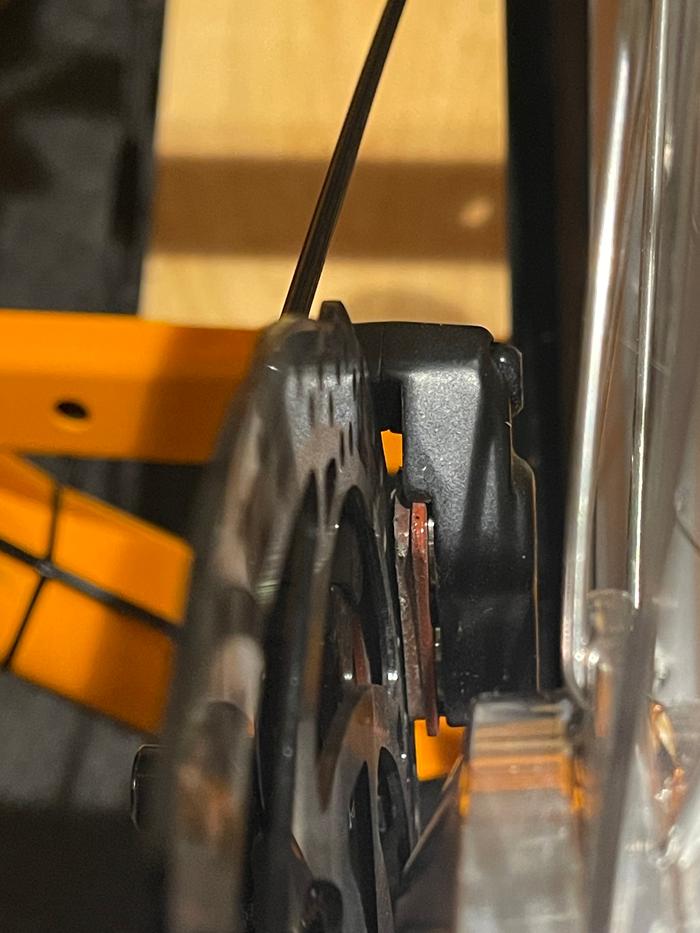
2) Recalibrate hydraulic disk breaks


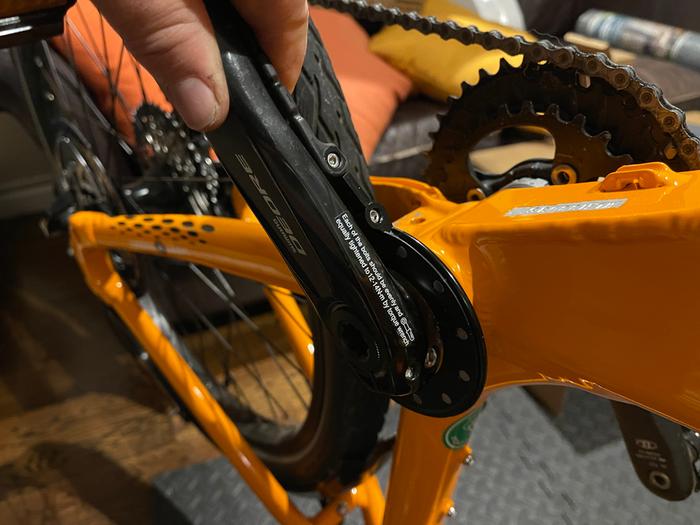
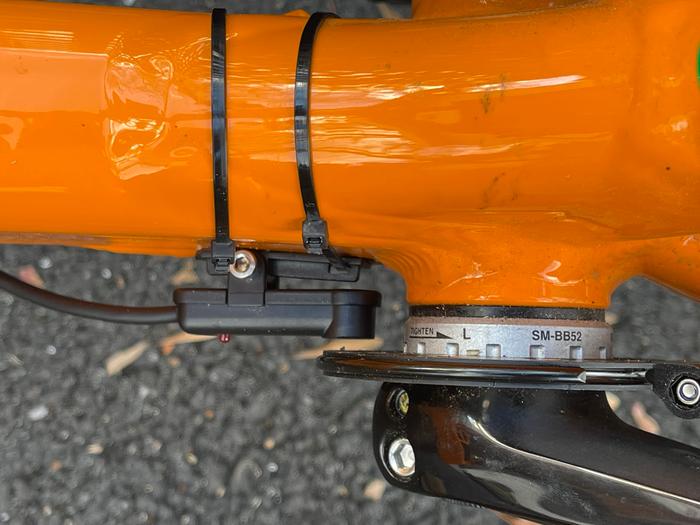
3) Add the pedal sensor - this is very tricky. There’s a disk studded with magnets that attaches to the crank arm and rotates when you peddle. There’s a sensor on the frame positioned to detect the movement of the magnets. Both have to be perfectly aligned. This single step took the longest and several trial runs.


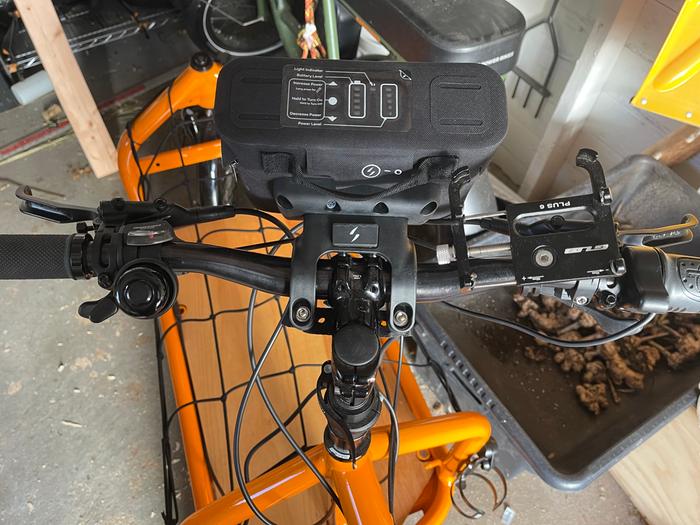
4) Add the head unit that includes the battery, controller and cable hub


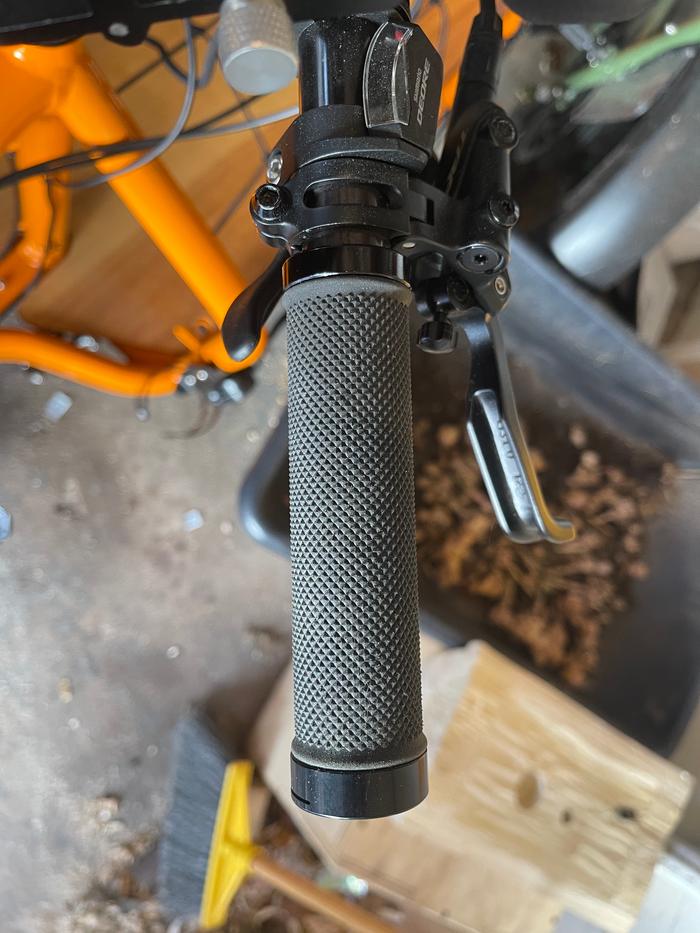
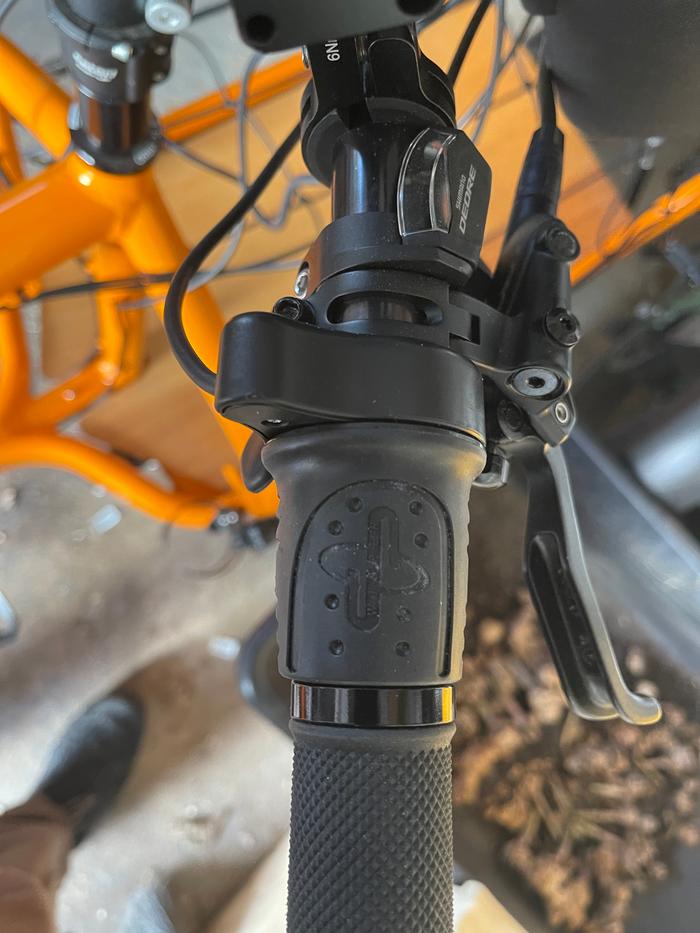
5) Add the throttle


6) Reorder all the handle bar attachments


7) Connect front motor, secure all the cables


I’ve been for a test ride. Everything is working. The motor isn’t very powerful but that’s ok, I just want some assist. It’s like riding with the wind behind you. My normal cruising speed is 16 - 18 kmph, now it’s 24 - 26 kmph  / 10 mph - 11 mph to 15 to 16 mph. This is a speed I can do all day.

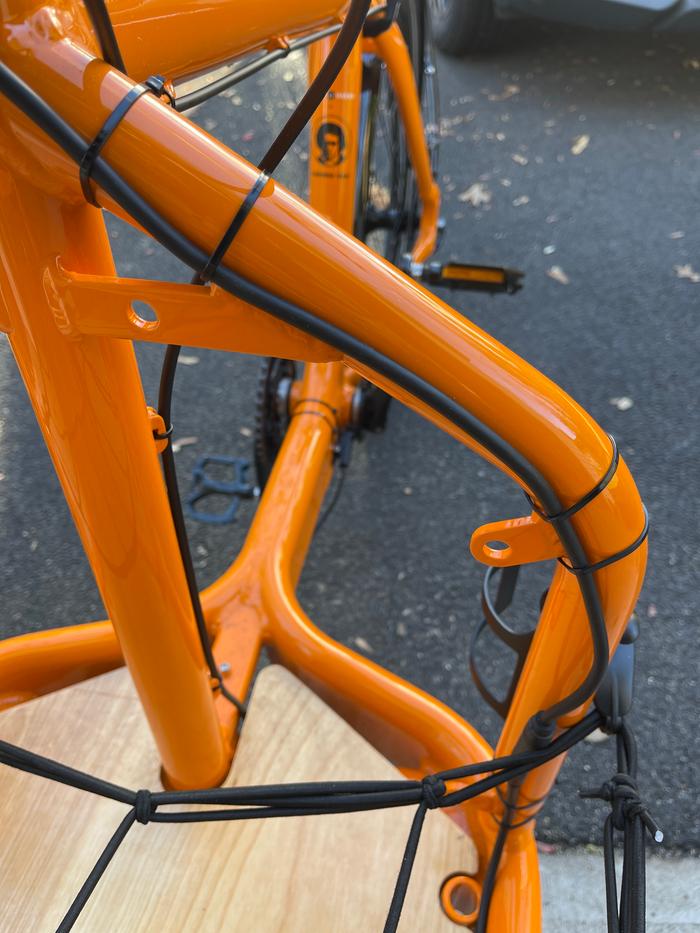
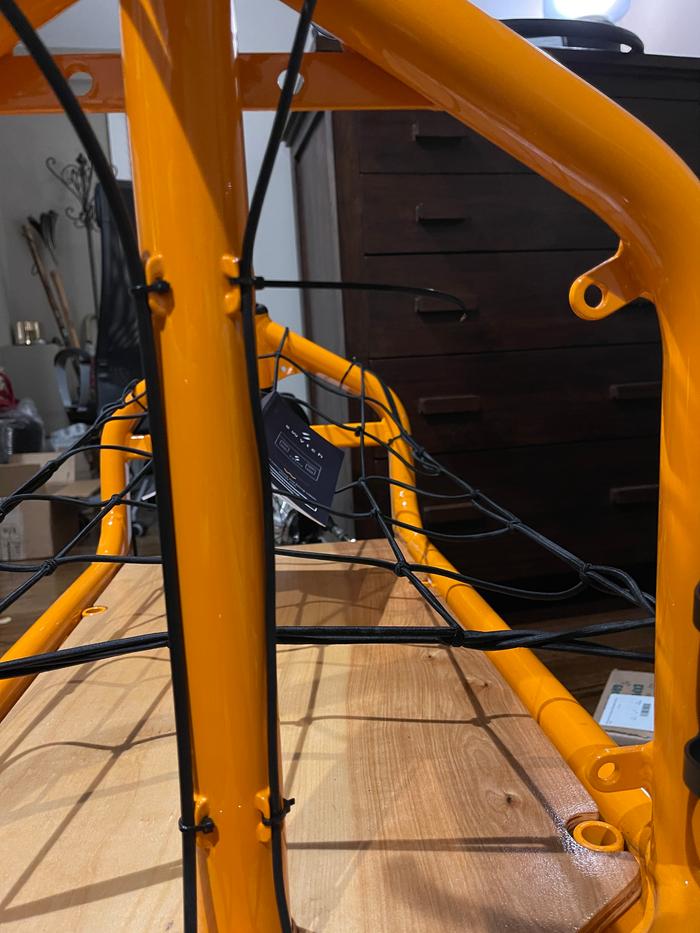
The power cable to the front wheel only just fits and the route it takes isn’t the best. I’ll order an additional extension and route it along the same path as the break cable.


Next job, build a big box for the dog - was going to use ply, but now rethinking.
Staff note (gir bot) :

Ashley Cottonwood approved this submission.
Note: I certify this BB complete! I award you 3 oddball points

 
gardener
Posts: 1871
Location: Japan, zone 9a/b, annual rainfall 2550mm, avg temp 1.5-32 C
930
2
kids home care trees cooking bike woodworking ungarbage
  • Likes 5
  • Mark post as helpful
  • send pies
    Number of slices to send:
    Optional 'thank-you' note:
  • Quote
  • Report post to moderator
Approved submission
Edward's encouraging post has motivated me to post some of my various projects to oddball. Who knows, maybe I can pick up a badge eventually by just posting pictures of various upkeep and project tasks that I was already doing!

First: A seed starting green house.

We had a vinyl covered pipe frame greenhouse that was once a dog house, later a storage heap. I cleared it out and built some shelves using scrap materials I had lying around. Mostly old cedar boards and some fencing material. Once I removed the shade cloth and pruned the persimmon shading the greenhouse it became pretty effective at getting seedlings going.
IMG_20210107_083342547.jpg
before clean-up one
before clean-up one
IMG_20210107_083346296.jpg
before clean-up two
before clean-up two
IMG_20210416_105253750.jpg
all cleared out 1
all cleared out 1
IMG_20210416_105309877.jpg
inside clear
inside clear
IMG_20210417_113055619.jpg
doing dimensional woodwork to get shelves together
IMG_20210417_113257477.jpg
sawing action shot
sawing action shot
IMG_20210417_125048872.jpg
screwing action shot - lots of screws used.
IMG_20210417_114958178_HDR.jpg
early progress
early progress
IMG_20210417_130414828.jpg
coming together
coming together
IMG_20210420_154913788.jpg
detail of connectors
IMG_20210421_162359256.jpg
mostly together
mostly together
IMG_20210421_162402217.jpg
another angle.
another angle.
Staff note (gir bot) :

Paul Fookes approved this submission.
Note: I certify this BB complete for 2 point. Well presented design

 
L. Johnson
gardener
Posts: 1871
Location: Japan, zone 9a/b, annual rainfall 2550mm, avg temp 1.5-32 C
930
2
kids home care trees cooking bike woodworking ungarbage
  • Likes 3
  • Mark post as helpful
  • send pies
    Number of slices to send:
    Optional 'thank-you' note:
  • Quote
  • Report post to moderator
Approved submission
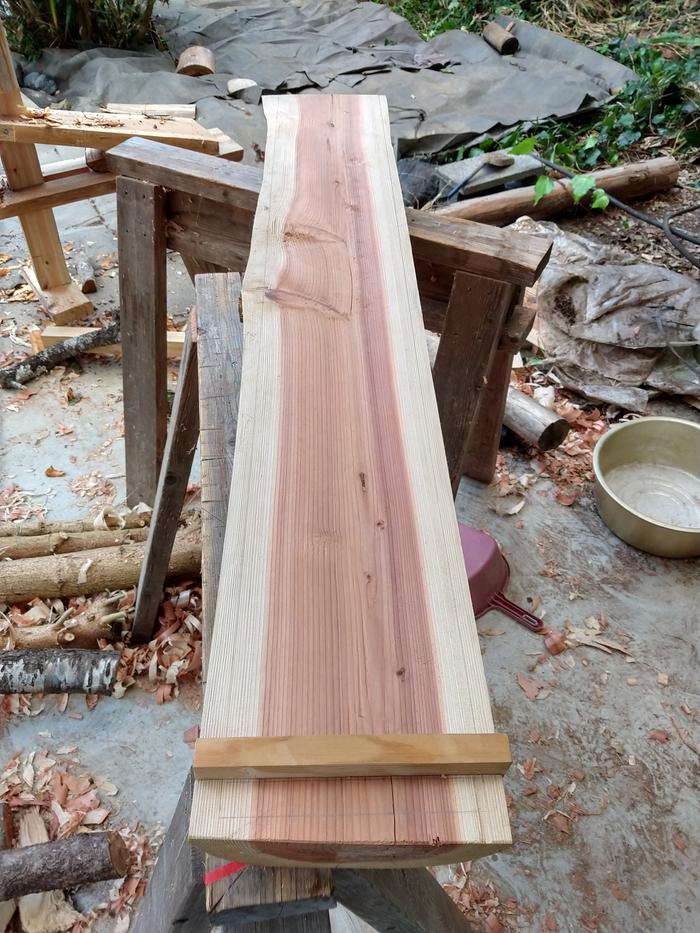
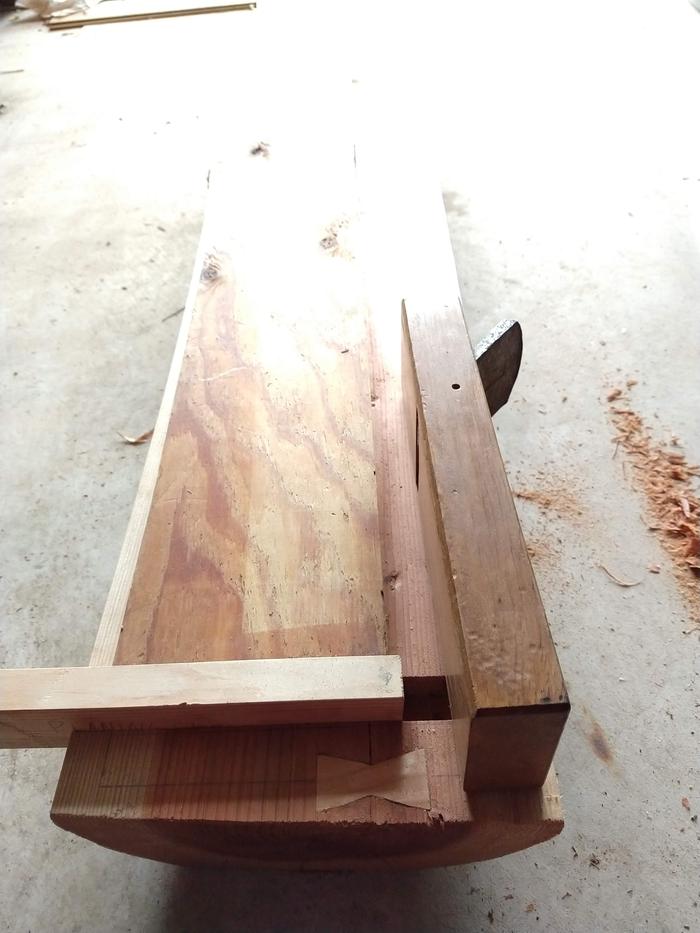
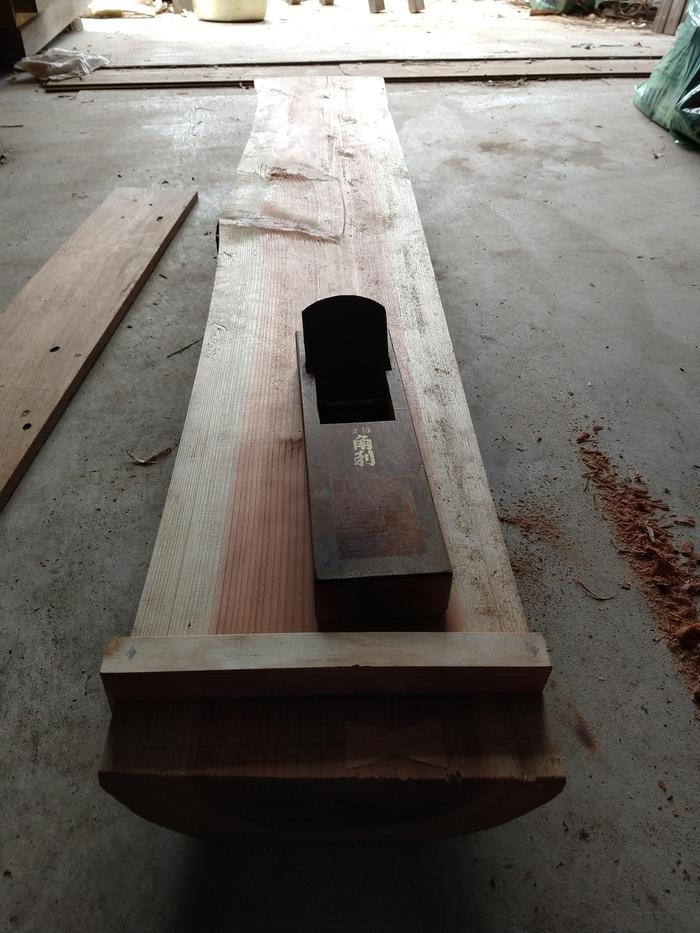
Next: Japanese style planing board

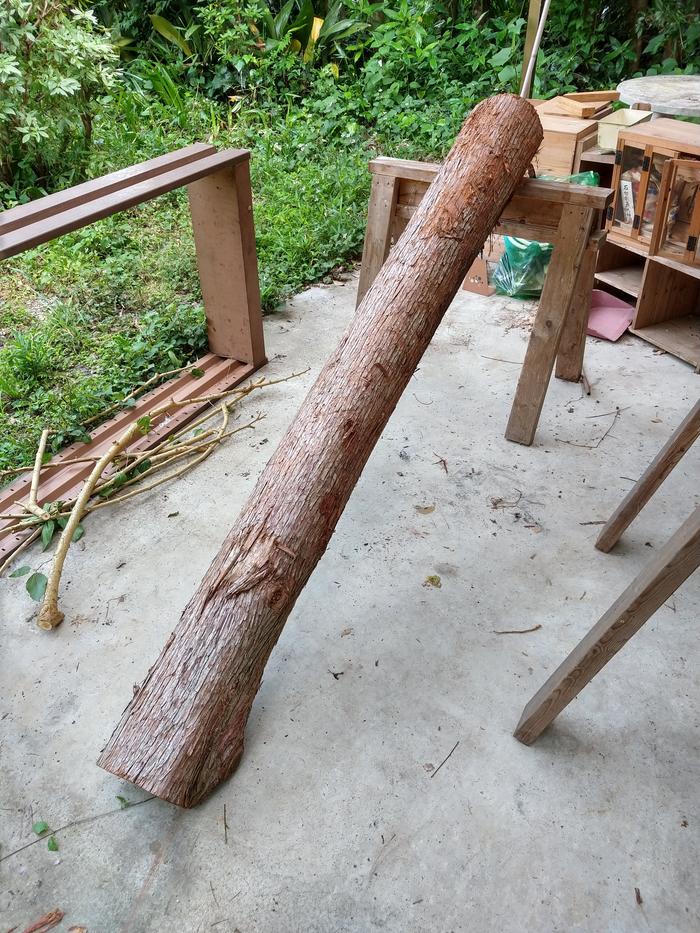
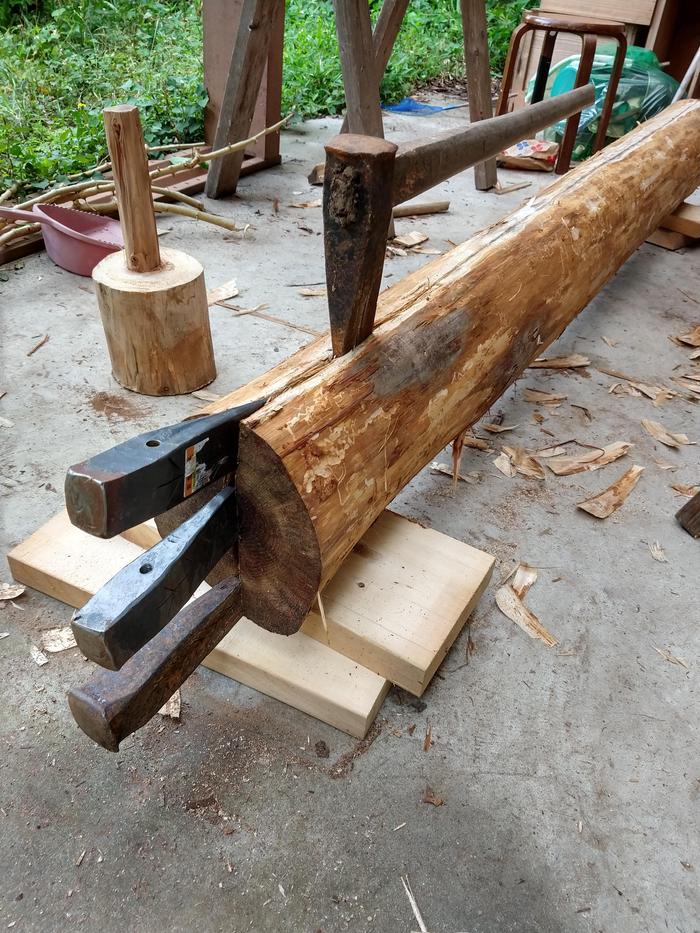
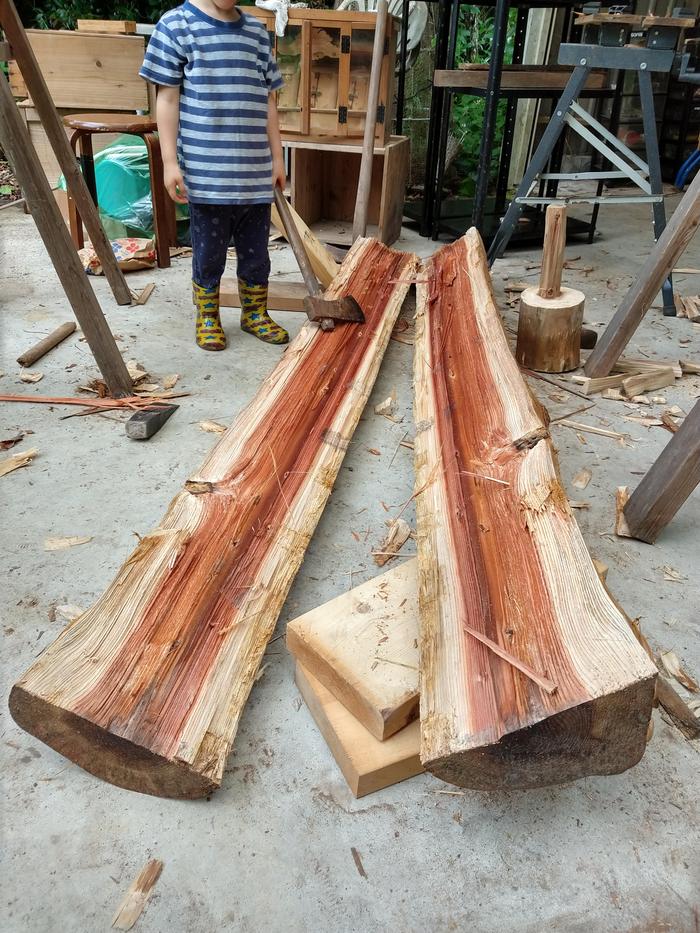
I split a log and used half of it for a shaving horse and the other half for this planing board. I'm showing splitting the log because I don't have many action shots of building, but I also submitted the shaving horse as a BB, so I don't know if you need to put the splitting effort into that or can count it towards this one?

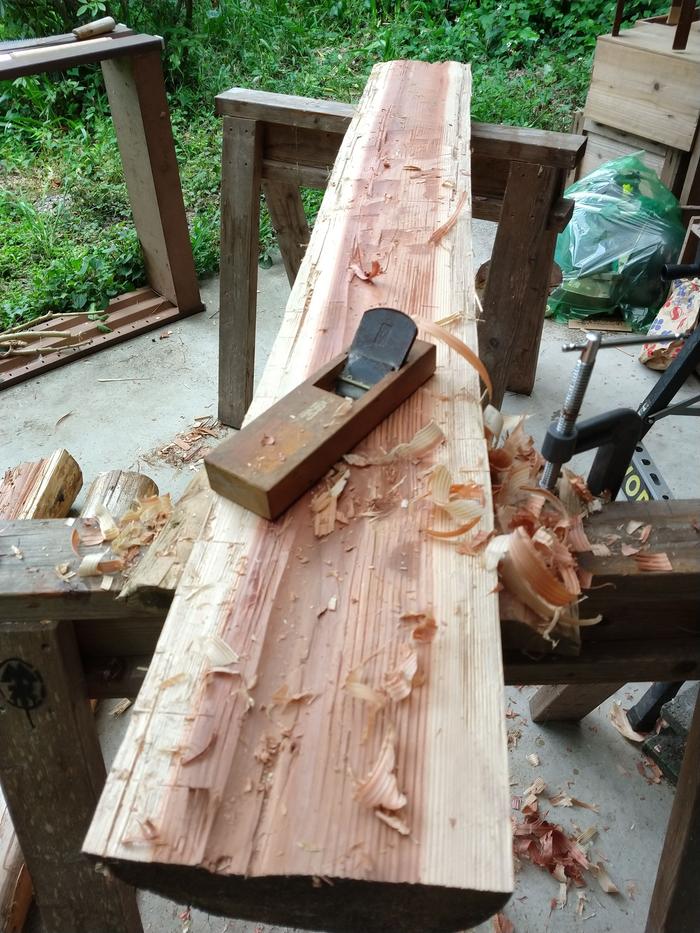
I hand planed the board which takes a really long time, several hours in total for me. If a pro ran it through a jointer it's like a couple passes and a few minutes. Judge how you will. I only have pics of me doing the planing for the shaving horse, and I'll show that here, but it's technically not the board I used here.

Apologies for the retrospective submissions (I've been taking more action shots recently).

Please give me 0 points if it's unacceptable.

Details:
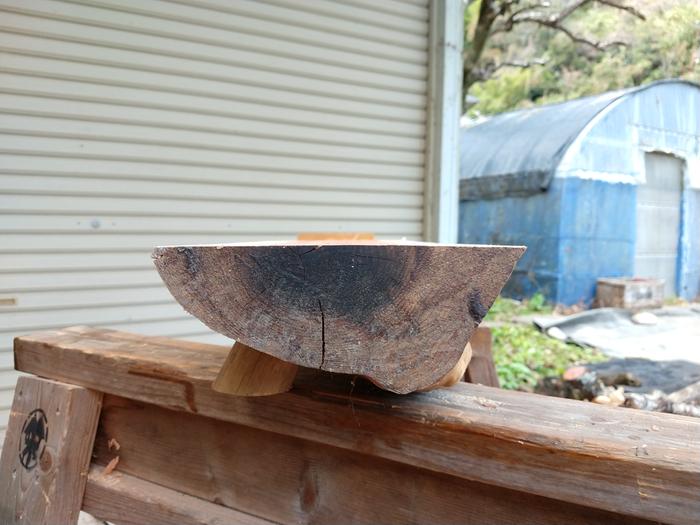
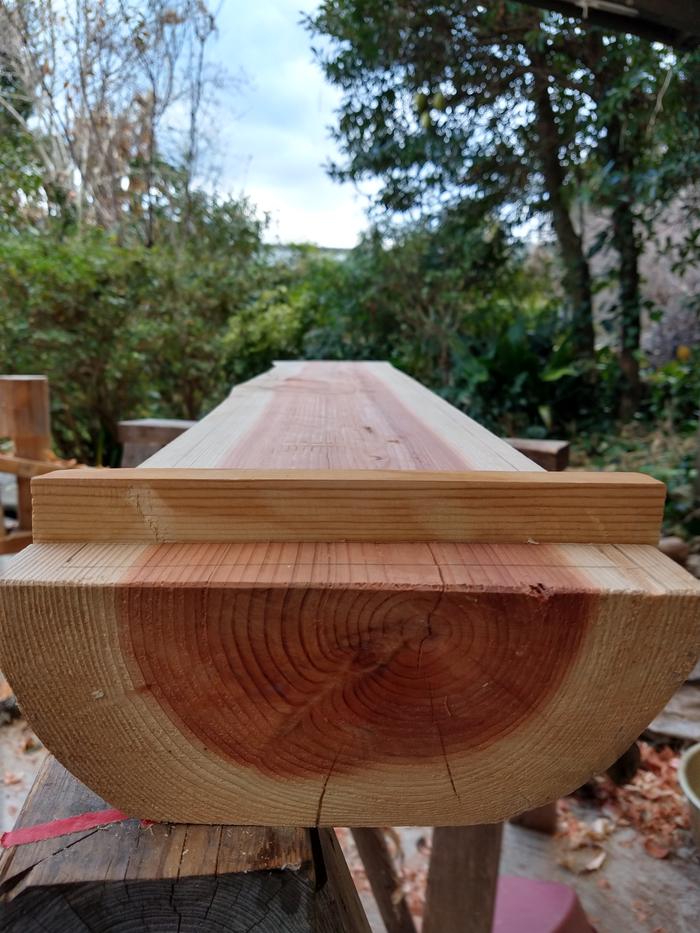
This is a cedar log split with wedges planed down to mostly true up to the knot. It dips a bit there, but most of the stock I plane don't extend that far. It has come untrue as it dried over the past few months. You can see it rises a little in the center. I will need to address that eventually. The planing stops are removable to set different height stops. And it can be used as a shooting board as shown in one of the pictures. The board sits flat on the ground to be used sitting in the traditional Japanese style. I only needed to add one foot for it to sit flat stably.

The log - same from shaving horse BB


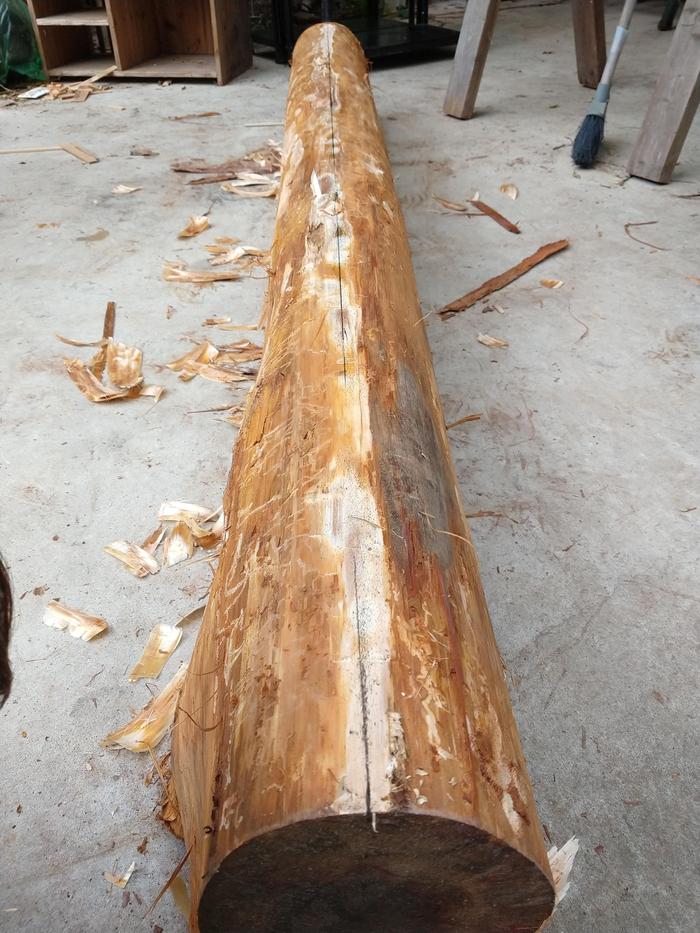
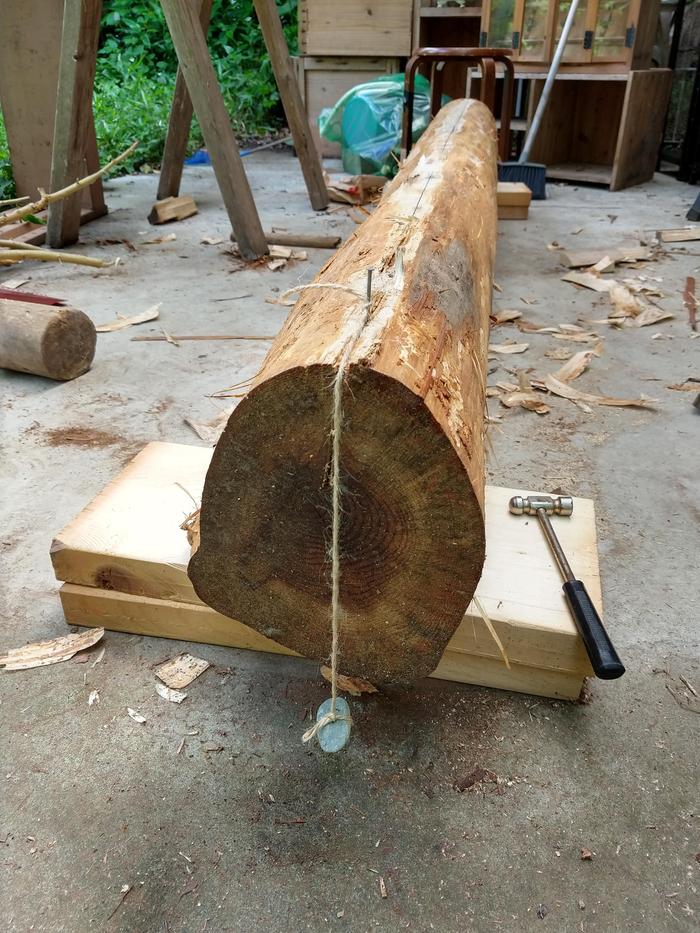
Marked up for splitting


Using gravity to find a straight plumb line.


Starting the split very carefully


The two halves - one was the shaving horse, one was the planing board


This is the planing work I did for both halves, though this board became the shaving horse.


Showing the foot I installed from the far end of the finished planing board when it was still true


From the action end with the tall planing stop inserted.


From the top of the board


Showing an inlay I set to stabilize a check and the board set-up for shooting


Showing it set-up for surface planing


IMG_20211204_114935842_HDR.jpg
The center of the heartwood raised a little less than 1mm for the first 50cm or so. Otherwise it's still true to the knot
IMG_20211204_114918638_HDR.jpg
another spot
another spot
IMG_20211204_114858808_HDR.jpg
near the stop
near the stop
Staff note (gir bot) :

Paul Fookes approved this submission.
Note: I certify this BB complete for 1 point. Well documented

 
Let me tell ya a story about a man named Jed. Poor mountain man with a tiny ad:
GAMCOD 2025: 200 square feet; Zero degrees F or colder; calories cheap and easy
https://permies.com/wiki/270034/GAMCOD-square-feet-degrees-colder
reply
    Bookmark Topic Watch Topic
  • New Topic