• Post Reply Bookmark Topic Watch Topic
  • New Topic
permaculture forums growies critters building homesteading energy monies kitchen purity ungarbage community wilderness fiber arts art permaculture artisans regional education skip experiences global resources cider press projects digital market permies.com pie forums private forums all forums
this forum made possible by our volunteer staff, including ...
master stewards:
  • Nancy Reading
  • Carla Burke
  • r ranson
  • John F Dean
  • paul wheaton
  • Pearl Sutton
stewards:
  • Jay Angler
  • Liv Smith
  • Leigh Tate
master gardeners:
  • Christopher Weeks
  • Timothy Norton
gardeners:
  • thomas rubino
  • Jeremy VanGelder
  • Maieshe Ljin

PEP Badge: Oddball

BB oddball - sand badge
 
steward
Posts: 15505
Location: Northern WI (zone 4)
4846
7
hunting trees books food preservation solar woodworking
  • Likes 1
  • Mark post as helpful
  • send pies
    Number of slices to send:
    Optional 'thank-you' note:
  • Quote
  • Report post to moderator
Approved submission
My trailer was falling apart.  The porcupine shaped hole in the plywood worried the people driving behind me.  So I replaced the wood with white pine I milled from my own trees last year.  It's not varnished or stained since I plan to keep it under a roof for most of its life.

I had to plane the wood to a consistent thickness and rip the sides of each board so that they were straight and parallel.  I made the stake pocket boards to fit snugly in the unusually sized pockets (why aren't they 1.5" by 3.5"???).  Carriage bolted some of the boards down and connected them underneath with cross boards.  Apparently the trailer designers assume you're using plywood on trailers like this so they don't have enough carriage bolt holes for all the boards...

Cut out the stake pockets at the front and back, added new side stake pockets, fitted wood to the old fenders to make them fit, screwed the sides and ends together and fitted hardware to make the ends connect and disconnect as needed.  For those who are interested, the awesome hardware for the tailgate latch is from Northern Tool and Equipment.  Mounted the spare and about a dozen other things I forgot and now it's done.  I've taken it about 300 miles so far and it's held together admirably.
Frame-while-wiring-it-(wiring-will-be-a-different-BB-submission-).jpg
Frame while wiring it (wiring will be a different BB submission!!!)
Fenders-attached-to-shaped-2x12s.jpg
Fenders attached to shaped 2x12s
Some-of-the-wood.jpg
Some of the wood
Some of the wood
Shape-of-the-stakes-to-fit-in-the-stake-pockets.jpg
Shape of the stakes to fit in the stake pockets
A-couple-hours-of-planer-work....jpg
A couple hours of planer work...
Floor-installed.jpg
Floor installed
Floor installed
New-stake-pockets-bolted-on-and-first-side-going-on.jpg
New stake pockets bolted on and first side going on
Sides-done-but-in-need-of-brackets.jpg
Sides done but in need of brackets
Nifty-tailgate-latches.jpg
Nifty tailgate latches
Simpler-front-end-latches-and-spare-tire.jpg
Simpler front end latches and spare tire
Staff note (gir bot) :

Mike Barkley approved this submission.
Note: Certified for 12 oddball points.

 
pollinator
Posts: 1495
855
2
trees bike woodworking
  • Mark post as helpful
  • send pies
    Number of slices to send:
    Optional 'thank-you' note:
  • Quote
  • Report post to moderator
Approved submission
Build scaffolding

A couple of weeks ago I identified a problem - my gutters weren’t function as intended. I fixed two of them
See Clean / Repair Improve gutters homestead Badge Bit

The third was more tricky, it looked like the fascia board was rotten. It needed further inspection and something more useful than just a ladder.

I would be doing a lot of work on the outside of the house and needed safe place to work. I investigated scaffolding - buying and renting. Then I brought up the subject here : Safe working platform to fix the outside of my house.

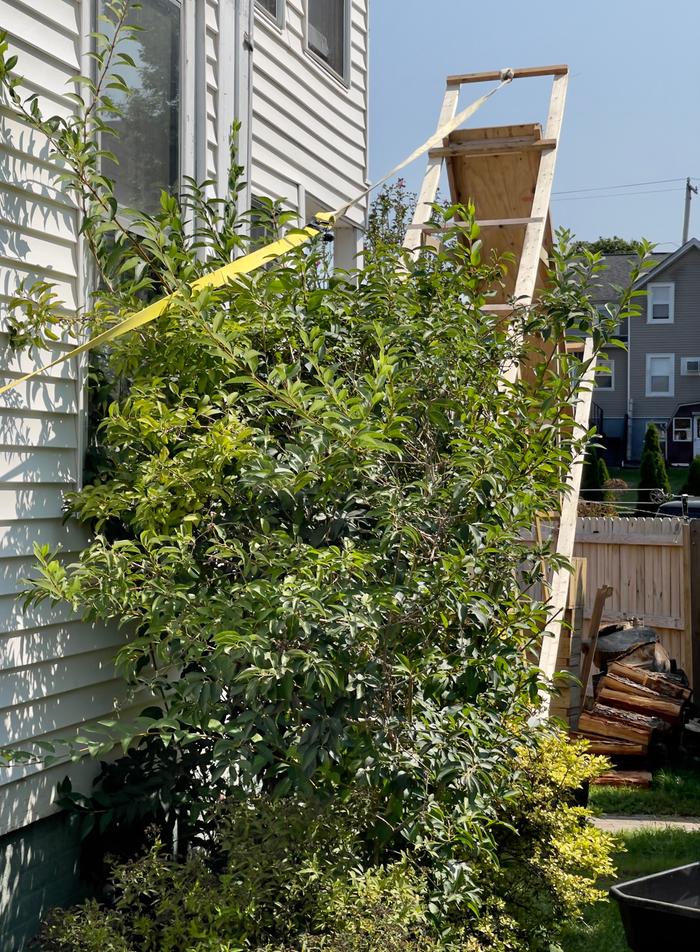
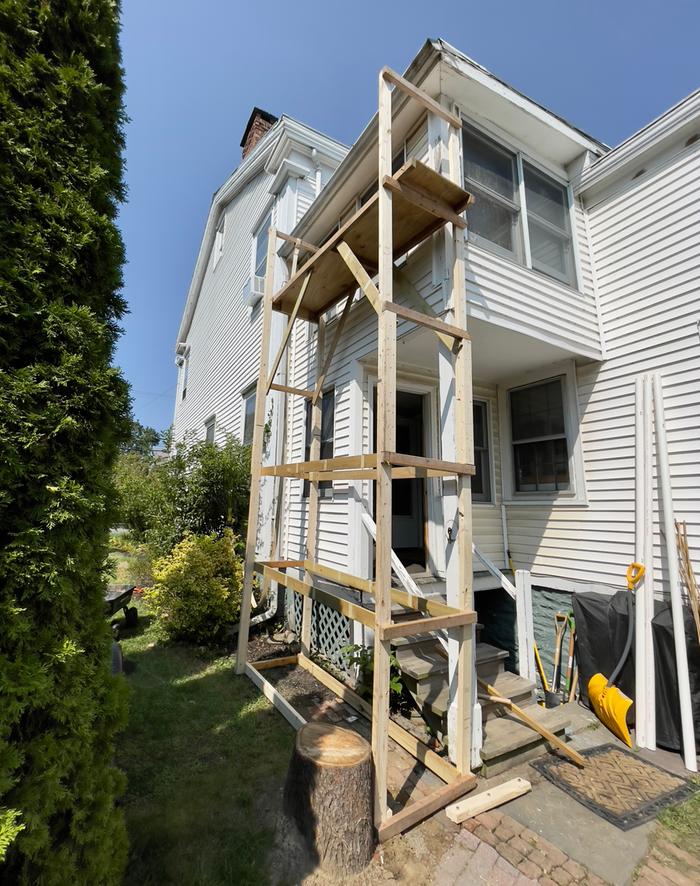
I don’t have a pickup so buying and renting weren’t an option, also very expensive and local suppliers all out of stock. Craiglist didn’t have anything and I’d still have a problem transporting it. So I decided to build it myself. These were my design goals.

1) Safety
2) Working platform 16ft from the ground
3) Sturdy but not over designed
4) Reuse / repurpose existing lumber
5) Light enough that I could easily lift one end
6) One man installation
7) Portable - be able to move around the perimeter of the house

I’m renovating my basement and I need to insulate the walls. One of the walls had a large shelving unit made of 2 x 3’s and ply. This would the main source of materials for my project. I used an entire shelf as the platform. I also had some 1 x 4’s I had recovered from some outdoor projects in my old house. I only needed eight new 8ft 2x4’s and a box of 3 1/2 inch decking screws.


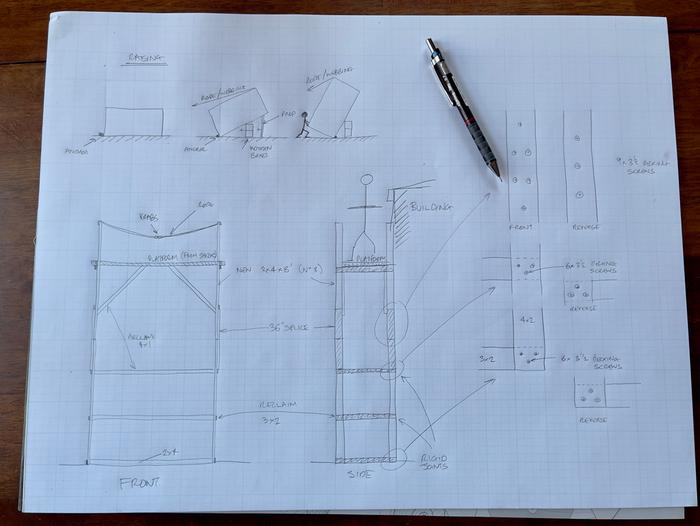
Design sketches


Shelving unit before deconstructing


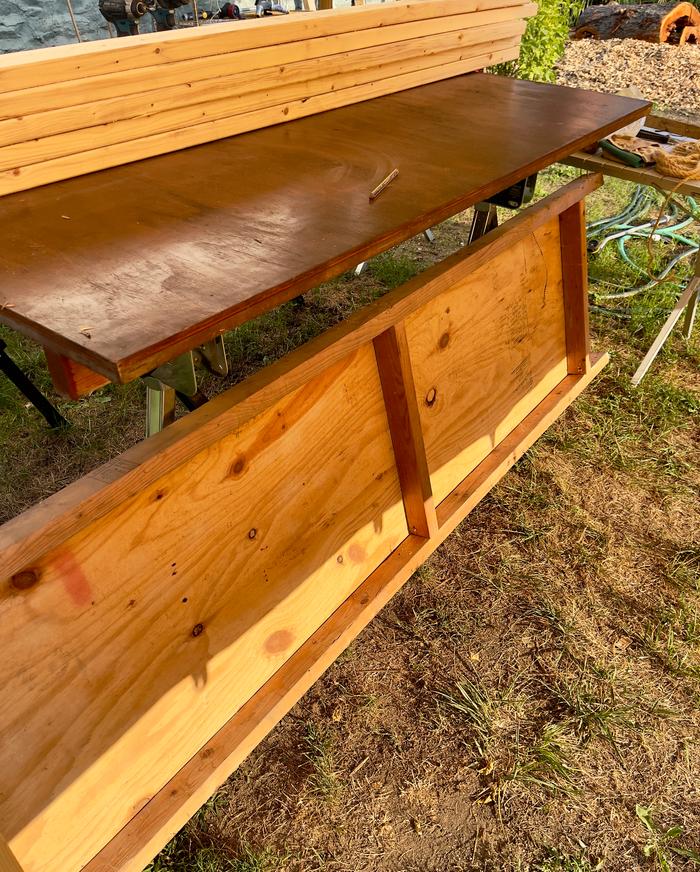
Shelf unit for the platform and 2x4’s


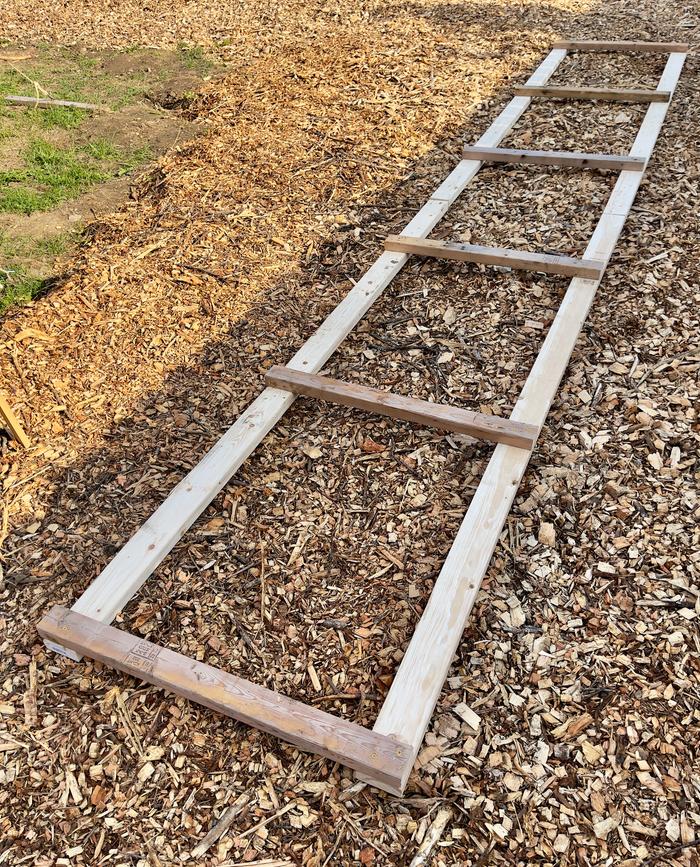
Making 4 “ladders” for the side units


Laying out the sections before splicing


Constructing side units


Sanity check


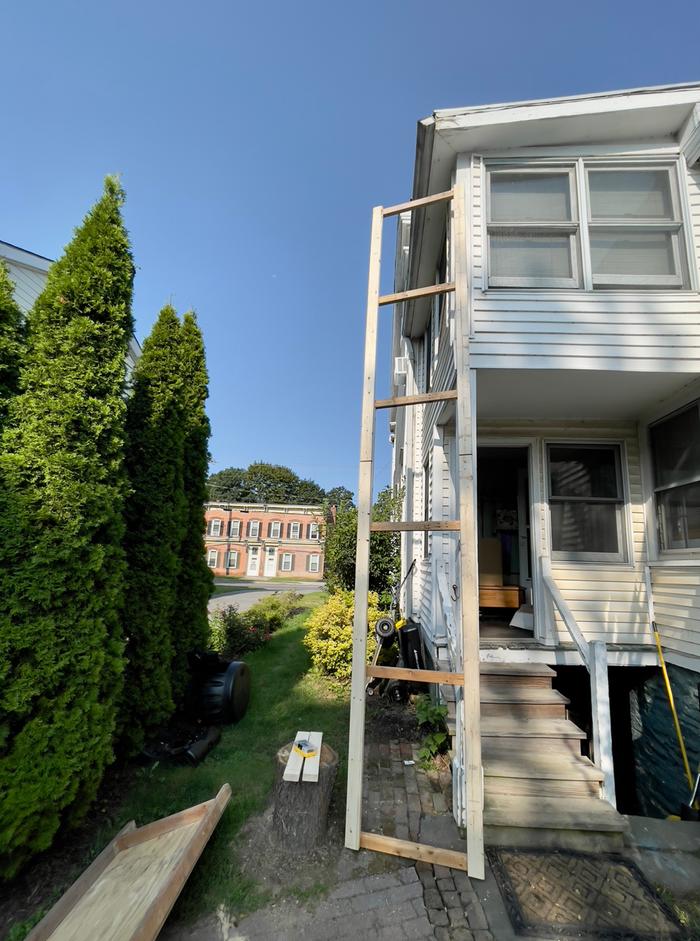
Nearly complete


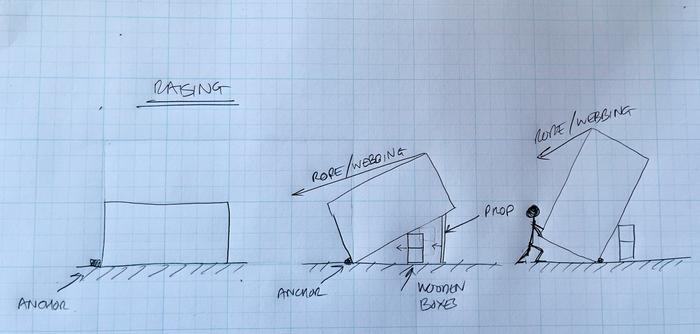
Raising plan


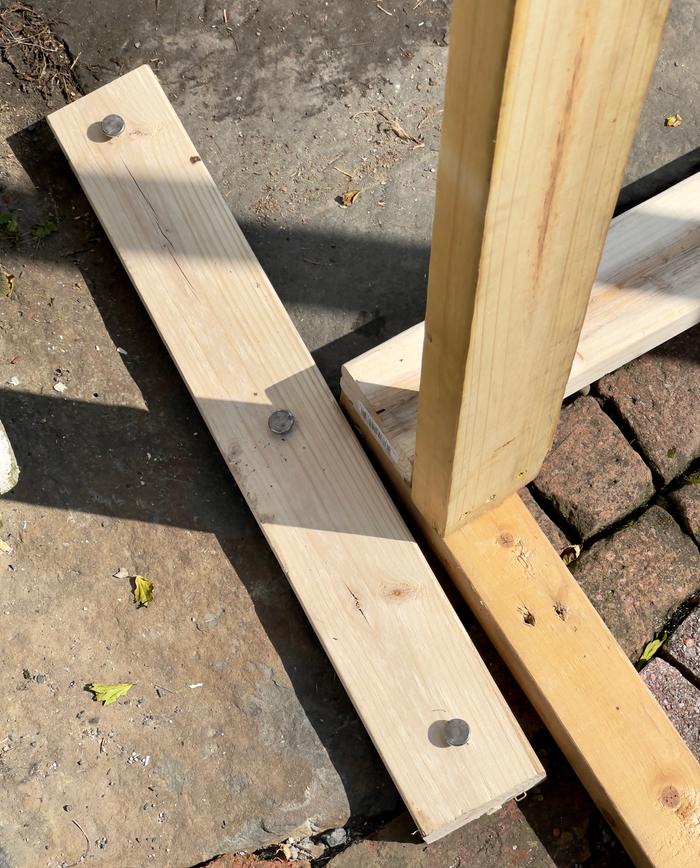
One anchor / pivot point / stop,  secured with 12 inch nails between paving slabs


First phase of lift


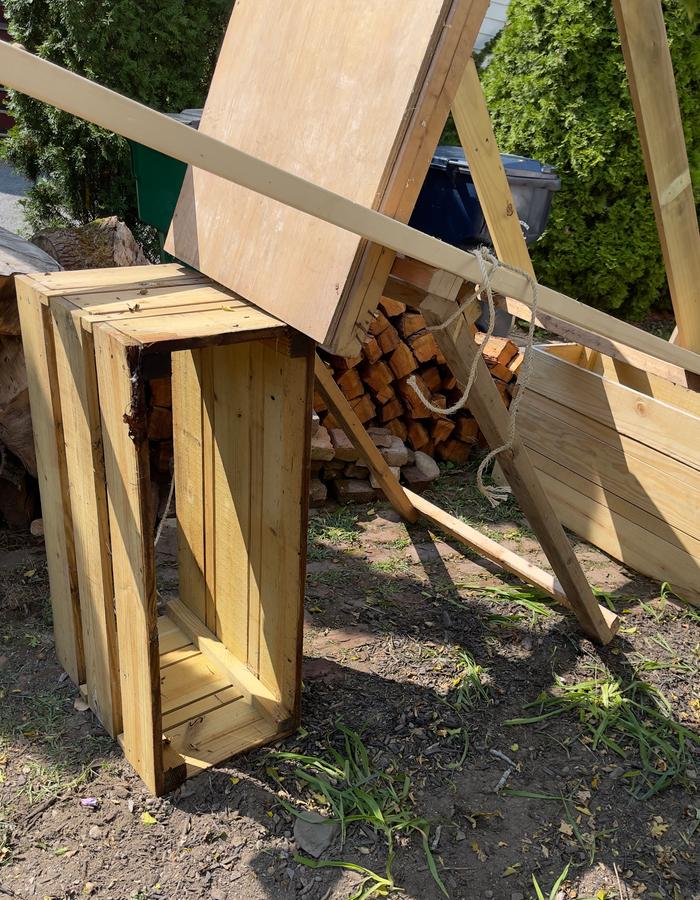
Hanging truss Part 1. Truss secured with rope so when I lift it swings into place.


Hanging truss Part 2. Success, now taking the load enabling me to move boxes etc.


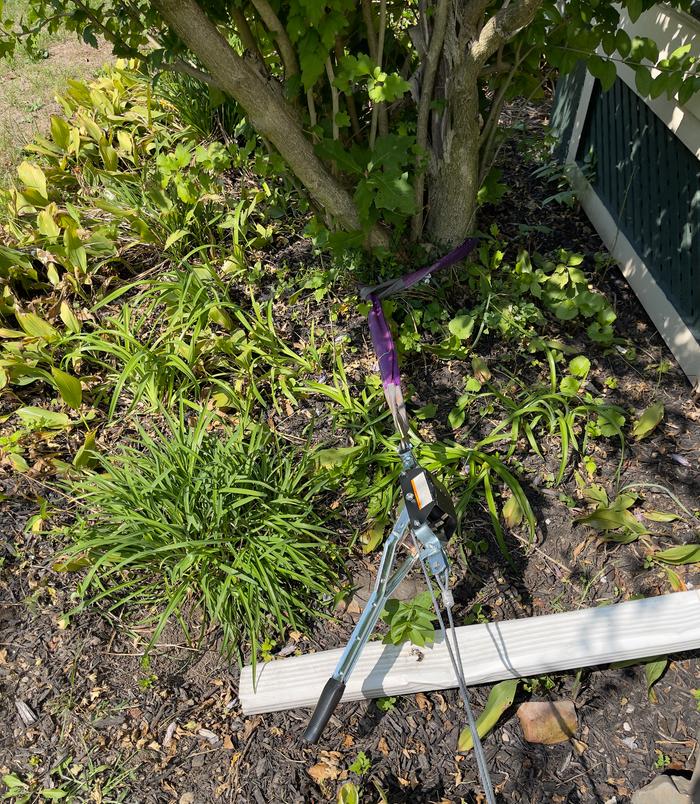
Webbing / rope anchor with ratchet


Scaffold nearly at tipping point enabling me to man handle into final position


Scaffold installed

I levelled with a few off cuts and then rested the ladder next to the platform. I installed a safety rope to close off the open side.


I can now work on the gutter.

The structure is light enough for me lift one end and easily drag.

In total this project took me 7 hours and an unknown amount of time thinking and sketching.
The shelving unit took me two hours to deconstruct. I had hoped to reuse the screws but 90% had damaged heads which is why it took so long.
Three and half hours cutting lumber and building. I used a Japanese pull saw to cut the wood and an impact driver for the screws
Half an hour getting it into place
An hour to raise
One trip to the box store on my cargo bike. Yes, you can easily transport eight 8ft 2x4’s on a cargo bike!

PS You maybe be wondering why there aren’t more diagonal braces. I needed to keep the weight down, so made it strong enough for the raise. If needs be I could add after installation. The cross brace end joints are very rigid with three screws from each side. There is very little lateral movement. If I was in any doubt, I would add more diagonal braces. As a trained civil engineer, I don’t think it’s necessary.
Staff note (gir bot) :

Someone approved this submission.
Note: Approved for 7 points.

 
Posts: 31
Location: Western Norway
27
forest garden foraging bee
  • Likes 1
  • Mark post as helpful
  • send pies
    Number of slices to send:
    Optional 'thank-you' note:
  • Quote
  • Report post to moderator
Approved submission
Would turning and reviving a dead compost heap count towards Oddball points?

Here's my submission, anyway. If it does not count, that's allright - maybe it will be helpful for other permies looking into compost turning, compost activators, and what to do when the heap dies on you.

I am still a novice, and though I have turned compost heaps before, it has not always been "successful", i.e. resulted in a warmer compost afterwards. I was not sure it would work this time either, as it is september and temperatures are dropping (around 10 C max temps during daytime). Last year, a compost heap was turned in october, and that had no effect at all.

This time, however, it worked!

The recipe was:
  • lots of water
  • lots of green fresh material (compost activators): nettles, ground elders, japanese knotweed leaves, black currant leaves, and some grass that came along with the nettles
  • breaking up all lumps
  • and mixing the material well.


  • It took me a full day of work in total, spread in bits over a week, as gathering material, breaking up lumps, and mixing properly took a lot of time. I guess it would have taken some time for an expert too...but then, an expert would have avoided the whole issue by remembering to water properly so that is very much noted for the future. (and if you wonder - the bins have roofs because of the rain, to avoid becoming anaerobic.)

    Note: Compost might not be in line with the PEP values, but maybe Otis would appreciate? Due to the wet, cold climate here, mulching with uncomposted materials lead to lots of slugs. I still do it in some areas (around potatoes and berries), but around vegetables, finished compost works much better. Also, I kinda like the compost work. Looking after the heaps feels a bit like looking after farm animals. That's not weird - is it?
    1_start.jpg
    start view
    start view
    2_sideview-and-temp.jpg
    sideview of the heap, and start temperature (all done)
    sideview of the heap, and start temperature
    3a_starting-to-turn.jpg
    Starting to turn the heap. Each layer of turned compost material was hosed down with water, and covered with a layer of green material.
    Starting to turn the heap. Each layer of turned compost material was hosed down with water, and then covered with a layer of green material.
    3b_gathering-knotweed.jpg
    gathering compost activators - here, leaves of japanese knotweed. In total around 7 wheelbarrows of various material was used.
    gathering compost activators - here, leaves of japanese knotweed. In total around 7 wheelbarrows of various material was used.
    4_dead-inside.jpg
    All dried up and dead inside!
    All dried up and dead inside!
    5_moving-outer-wall.jpg
    After a while, it is time to move the front wall to the new bin
    After a while, it is time to move the front wall to the new bin
    6_the-last-bit.jpg
    Finishing up the last bit, side wall now also in place
    Finishing up the last bit, side wall now also in place
    7_finished.jpg
    All finished and covered with cardboard to keep heat and humidity in
    All finished and covered with cardboard to keep heat and humidity in
    8_temp-2-and-4-days-after.jpg
    Temperatures two and four days later. Wohoo!
    Temperatures two and four days later. Wohoo!
    Staff note (gir bot) :

    Paul Fookes approved this submission.
    Note: I certify this BB complete for 4 points. Well done Ane

     
    gardener
    Posts: 325
    Location: NW Washington - Zone 8b (15 to 20 °F / -9.4 to -6.7 °C)
    270
    2
    cattle goat foraging trees earthworks cooking building solar sheep wood heat
    • Mark post as helpful
    • send pies
      Number of slices to send:
      Optional 'thank-you' note:
    • Quote
    • Report post to moderator
    Approved submission
    The Sand badge for Animal care has a BB to "build a nice birdhouse for a specific species of bird" and I already did that BB here. And as far as I can tell, none of the animal badges accept duplication, and there is no animal care oddball category, nor a roundwood woodworking oddball category, so I'm posting my roundwood bird house here. If there is a better place for it please let me know.

    For this tree swallow bird house I started with a 10 ft Western Red Cedar log. I peeled the bark off and hollowed out one end, made easier by the fact that it had some center rot. I cut the top at an angle and ensured the inside depth was 8 inches.  I drilled a 1.5 inch diameter hole such that the top of the hole was 6 inches above the bottom of the cavity.  I cut a section of cedar with larger diameter to use as the roof and left the bark on.  I used a router to route out a groove to match the top of the log so that the roof sits down over the top of the log like a hat.   To hold the roof on, I repurposed two metal brackets, cutting them to fit under the roof overhang and drilled two holes in each to accept screws.

    I hand dug a 2 ft 6 inch deep hole with a manual post hole digger and dropped the log in the hole with the bird entrance hole facing south as recommended for tree swallows, and screwed the lid on with easy to remove screws (metal roofing screws) for easier future cleanouts.
    20220917_102959.jpg
    End of the log hollowed out.
    End of the log hollowed out.
    20220917_102808.jpg
    Drilling the 1.5 inch hole.
    Drilling the 1.5 inch hole.
    20220917_103331.jpg
    Cutting the brackets to size.
    Cutting the brackets to size.
    20220917_103756.jpg
    Drilling screw holes in the brackets.
    Drilling screw holes in the brackets.
    20220917_105529.jpg
    Digging the hole.
    Digging the hole.
    20220917_110722.jpg
    Setting the log in the hole.
    Setting the log in the hole.
    20220917_114702.jpg
    Screwing on the roof.
    Screwing on the roof.
    20220917_114844.jpg
    All finished.
    All finished.
    Staff note (gir bot) :

    Mike Haasl approved this submission.
    Note: Certified for 2 oddball points.  Normally if a skill doesn't allow for duplication, it's also not supposed to be posted to Oddball.  But this is such an odd/different kind of bird house, we'll let it slide.  Just typing this out so that people don't submit lots of bird houses and carved spoons in the hopes of getting oddball points.

     
    Edward Norton
    pollinator
    Posts: 1495
    855
    2
    trees bike woodworking
    • Likes 5
    • Mark post as helpful
    • send pies
      Number of slices to send:
      Optional 'thank-you' note:
    • Quote
    • Report post to moderator
    Approved submission
    I’d like to apply for my first wooden Badge:

    permies.com/p/1321548 - 1 point
    permies.com/p/1331933 - 3 points
    permies.com/p/1333304 - 1/2 point
    permies.com/p/1341097 - 2 points
    permies.com/p/1344338 - 3 points
    permies.com/p/1406752 - 3 points
    permies.com/p/1508208 - 1/2 point
    permies.com/p/1525608 - 1/2 point
    permies.com/p/1525687 - 1 point
    permies.com/p/1560231 - 200 points
    permies.com/p/1566022 - 1/2 point
    permies.com/p/1571505 - 1/2 point
    permies.com/p/1572467 - 1/2 point
    permies.com/p/1577980 - 3 points
    permies.com/p/1586431 - 7 points

    Total = 226 points

    Thanks to everyone helping me get these badges, most involved lots of conversations in the forums. And thanks to everyone who debated and approved.
    Staff note (gir bot) :

    Someone approved this submission.
    Note: Congratulations!

     
    pollinator
    Posts: 333
    Location: Midwestern USA, Zone 6b/Now 7a
    100
    cat foraging urban books chicken food preservation cooking medical herbs writing homestead composting
    • Mark post as helpful
    • send pies
      Number of slices to send:
      Optional 'thank-you' note:
    • Quote
    • Report post to moderator
    Submission flagged incomplete
    I'm posting this here in the Oddball section because I don't have any images of myself holding up a beginning/ending clock in order to qualify for the Community BB.

    What I did: Gave three 20-minute talks + guided tours of our garden over three separate dates to a total of 90 people.

    I'm also a writer by trade, so I wrote up the experience on my Substack here: https://brunettegardens.substack.com/p/that-time-90-people-toured-our-garden

    I was invited to be a tour host by our local chapter (largest in the country) of the national organization Wild Ones. They chronicled the event here: https://stlwildones.org/june-2022-gathering-highlights/

    For both of the publicly-listed tours, we demo'd our Sun Oven as well.

    And here are some images.

    Thank you!


    Wild-Ones-tour.jpg
    [Thumbnail for Wild-Ones-tour.jpg]
    Wild-Ones-tour-2.jpg
    [Thumbnail for Wild-Ones-tour-2.jpg]
    Sun-Oven-demo.jpg
    [Thumbnail for Sun-Oven-demo.jpg]
    Sun-Oven-finished.jpg
    [Thumbnail for Sun-Oven-finished.jpg]
    June2022Gathering_Brunette_byDonnaShort_16.jpg
    [Thumbnail for June2022Gathering_Brunette_byDonnaShort_16.jpg]
    Staff note (gir bot) :

    Someone flagged this submission as not complete.
    BBV price: 1
    Note: Where theris a similar BB, unfortunately it does not qualify for an oddball submission.

     
    gardener
    Posts: 1871
    Location: Japan, zone 9a/b, annual rainfall 2550mm, avg temp 1.5-32 C
    930
    2
    kids home care trees cooking bike woodworking ungarbage
    • Mark post as helpful
    • send pies
      Number of slices to send:
      Optional 'thank-you' note:
    • Quote
    • Report post to moderator
    Approved submission
    My bicycle needed maintenance.
    I needed to get my bicycle off the ground to do it.
    Maintenance stands cost moneys.
    I had roundwood lumber lying around needing to be used.
    I made a roundwood lumber bicycle maintenance stand!

    It's not perfect. I need another arm or maybe a strap to keep the orientation of the bike steady. But it worked well enough for me to change the front shifter cable!

    These are the logs I started with. The three straight ones are probably J. cypress. The curvy one is mulberry from pollarding my mulberry tree. They are all peeled and dry.


    I split one of the cypress logs to make legs of even length.


    Then I shaved out round tenons to match my 24mm auger size.


    I drilled mortises with my brace and bit and hex bit holder. Getting the angle right here was tricky, but mostly eyeballing worked well. I used the leg with the tenon sized set against the main pole to judge, and then I traced the tenon angle with pencil. Then I used my eyes to follow the pencil lines while I drilled. Trust your senses.


    Checking with my round tenon guide. This is the best tool for roundwood work I've made yet, after the shave horse of course. (please ignore the units being wrong...)


    One leg in, from here I checked the angle on the second leg the same way.


    Two legs in, standing tall and proud. I love the curve.


    The arm tenon is cut square so that it can't rotate in the mortise. Everything is held in with friction and gravity and everything can be removed with a few pounds from a mallet. The wood is all dry and being used outside so I doubt I'll see much movement, if I do I can adjust it with shims and wedges later.


    This is the stand mostly finished, except for a peg to keep the bike from sliding into the post.


    Bike hanging on the finished stand. The curve of the mulberry post lets the bike sit almost directly over the center of gravity, making it very stable. Somehow that was intuitive in the design, but after the fact it seems remarkable.


    It probably took me about 4-5 hours in total, more if you count the original time I spent peeling the logs. I only use hand tools, so it takes me longer to do things than people who use power tools. I think professional green and roundwood craftsmen often use hand tools too though, maybe a mixed bag. The mulberry is from my property, the cypress were leftovers from the forest thinning lumber I got from a friend. All the wood shavings became mulch in my garden paths. No blisters, cuts, or injuries at all this time! I must be getting better at this.
    Staff note (gir bot) :

    Someone approved this submission.
    Note: Certified for 5 points.  Great use of roundwood!

     
    pollinator
    Posts: 773
    Location: Western MA, zone 6b
    479
    cat dog forest garden foraging urban food preservation
    • Likes 2
    • Mark post as helpful
    • send pies
      Number of slices to send:
      Optional 'thank-you' note:
    • Quote
    • Report post to moderator
    Approved submission
    Upcycling and repurposing a piece of furniture to improve the use and function of my small refrigerator and add storage to a small space.

    SUMMARY:

    Problem:  the height of my nice compact refrigerator and freezer was difficult to use without back strain and had poor visibility for items in the fridge without awkward bending.

    Solution:  source a thrift stand that was the right size, structurally strong enough, inexpensive;  repurpose it as a kitchen piece and install.  

    Permaculture aspects involved:
    - support local thrift shop
    - repurpose furniture destined for landfill (this piece was on its last mark-down)
    - minimize water usage
    - use up paints and materials on hand (no new purchases for project)
    - salvage hardware for later use
    - improve design and efficiency of living space

    LINK to FULL thread with pictures and DETAILS:  https://permies.com/t/197558/permaculture-upcycling/ungarbage/Repurposing-thrift-store-side-table

    My personal time and labor was around 4 hours for this,  including shopping, cleaning, finishing, and installing.

    Now my fridge is at eye level instead of counter-top level and the difference in the access has been exactly what I needed to make this smaller refrigerator unit work!

    Some sample before and after photos from the thread:

    beforeandafter.jpg
    Unit before and after
    Unit before and after
    handlebeforeafter.jpg
    Handles before and after
    Handles before and after
    fridgebeforeandafter.jpg
    [Thumbnail for fridgebeforeandafter.jpg]
    Staff note (gir bot) :

    Mike Barkley approved this submission.
    Note: Certified for 3 oddball points. Looks great.

     
    pollinator
    Posts: 196
    Location: In the foothills of the Blue Ridge Mountains
    118
    homeschooling cat personal care foraging trees hunting books food preservation fiber arts medical herbs writing
    • Likes 5
    • Mark post as helpful
    • send pies
      Number of slices to send:
      Optional 'thank-you' note:
    • Quote
    • Report post to moderator
    Approved submission
    I ordered my first recurve bow (Also the first bow I have ever owned, though I have borrowed other's gear) and I didn't want to pay for a leather quiver right now. So I decided to try and make one. This project took, I would say roughly two hours maybe and I had to do a lot of learning in the process. I wanted to make it out of tree bark but I discovered that it is really hard to peel the bark off in one piece at the wrong time of year. So, yeah, note for the future: it is important.
    Since bark wouldn't work I used an old pair of jeans I had. I wanted to be able to use it as both a hip and back quiver and I wanted to have those cool fringes on the edges (These actually had a interesting use and were often on coats, bags, and other things. Oh the things you learn from your learned sister! ).

    Now this is my first oddball post and I am not fully sure if I understand how the scoring works so I will not ask for a number of points.  Thanks everyone! Now my bow just has to show up. XD
    DSCN0750.JPG
    My arrows are 28"
    My arrows are 28"
    DSCN0752.JPG
    Sewed up the bottom
    Sewed up the bottom
    DSCN0753.JPG
    And cut the fringes
    And cut the fringes
    DSCN0755.JPG
    Now for the top
    Now for the top
    DSCN0757.JPG
    Sew sew sew!
    Sew sew sew!
    DSCN0758.JPG
    Top fringes cut
    Top fringes cut
    DSCN0759.JPG
    Using some d-rings to hang the quiver
    Using some d-rings to hang the quiver
    DSCN0760.JPG
    I found a slender stick to add as a brace to the top of the quiver to keep it strait.
    I found a slender stick to add as a brace to the top of the quiver to keep it strait.
    DSCN0762.JPG
    Brace sewed in
    Brace sewed in
    DSCN0764.JPG
    Hip quiver adjustment
    Hip quiver adjustment
    DSCN0767.JPG
    Back quiver adjustment. Yay! I am so pleased!
    Back quiver adjustment. Yay! I am so pleased!
    Staff note (gir bot) :

    Someone approved this submission.
    Note: Nice project!  Certified for 1 oddball point

     
    Impossible is for the unwilling --John Keats ... see, this tiny ad now exists:
    Freaky Cheap Heat - 2 hour movie - HD streaming
    https://permies.com/wiki/238453/Freaky-Cheap-Heat-hour-movie
    reply
      Bookmark Topic Watch Topic
    • New Topic