• Post Reply Bookmark Topic Watch Topic
  • New Topic
permaculture forums growies critters building homesteading energy monies kitchen purity ungarbage community wilderness fiber arts art permaculture artisans regional education skip experiences global resources cider press projects digital market permies.com pie forums private forums all forums
this forum made possible by our volunteer staff, including ...
master stewards:
  • Nancy Reading
  • Carla Burke
  • r ranson
  • John F Dean
  • paul wheaton
  • Pearl Sutton
stewards:
  • Jay Angler
  • Liv Smith
  • Leigh Tate
master gardeners:
  • Christopher Weeks
  • Timothy Norton
gardeners:
  • thomas rubino
  • Jeremy VanGelder
  • Maieshe Ljin
  • Likes 2
  • Mark post as helpful
  • send pies
    Number of slices to send:
    Optional 'thank-you' note:
  • Quote
  • Report post to moderator
This is a badge bit (BB) that is part of the PEP curriculum.  Completing this BB is part of getting the sand badge in tool care.

Sometimes bicycle tires get flats and they need to get repaired.

Here's a video on how to remove the rear wheel of your bike so that you can then repair a flat tire.


From the video description:
"Save yourself an embarrassing moment and learn how to quickly remove your rear wheel."

Minimum Requirements:
- fix a flat rear tire on a bicycle

Clarifications:
- could be a tube replacement
- could be a patch kit
- cannot use goo you put inside the tire such as "Fix-a-Flat"

Provide proof of the following as pictures or video (less than two minutes):
- flat rear tire
- repairing a flat rear tire
- inflated and reinstalled (mounted on bike) good tire
- show/describe the materials used to repair the tire
COMMENTS:
 
pollinator
Posts: 3089
Location: Meppel (Drenthe, the Netherlands)
1018
dog forest garden urban cooking bike fiber arts
  • Likes 2
  • Mark post as helpful
  • send pies
    Number of slices to send:
    Optional 'thank-you' note:
  • Quote
  • Report post to moderator
When I have a flat back tire I don't remove the wheel. On my bicycle wheels are difficult to remove at home (or somewhere along the road). In my opinion it isn't needed to remove the wheel to fix the hole in the tire ...
 
pollinator
Posts: 1234
Location: Chicago
422
dog forest garden fish foraging urban cooking food preservation bike
  • Likes 3
  • Mark post as helpful
  • send pies
    Number of slices to send:
    Optional 'thank-you' note:
  • Quote
  • Report post to moderator
Approved submission
Needed to replace a flat rear tire today:

Flat in situ


Tools for taking wheel on and off


Inner tube was really split open, needs to be replaced..


Took the opportunity to clean the gears a bit


New tube next to rim


All back together, pumped up and ready to go.


Staff note (gir bot) :

Mike Haasl approved this submission.

 
gardener
Posts: 466
Location: The North
227
cat purity gear tiny house books bike fiber arts bee solar woodworking ungarbage
  • Likes 3
  • Mark post as helpful
  • send pies
    Number of slices to send:
    Optional 'thank-you' note:
  • Quote
  • Report post to moderator
Approved submission
I was wondering when I'd get a chance to do this BB...

Hmph!! Manky staples!

Reparied with a rubber patch and contact cement.
IMG_20210322_111255_0.jpg
Is that flat?
Is that flat?
IMG_20210322_111858_9.jpg
Yep, that's flat.
Yep, that's flat.
IMG_20210322_112338_0.jpg
Ah, that would do it.
IMG_20210322_112934_3.jpg
Embarresing but these Marathon plus tyres are kinda tough
IMG_20210322_114136_4.jpg
Patch kit
Patch kit
IMG_20210322_115444_5.jpg
Patch glued in place
IMG_20210322_120437_9.jpg
Up to pressure
Up to pressure
Staff note (gir bot) :

Mike Barkley approved this submission.

 
gardener
Posts: 1569
Location: Washington State
985
6
forest garden trees rabbit earthworks composting toilet fiber arts sheep wood heat woodworking rocket stoves homestead
  • Likes 3
  • Mark post as helpful
  • send pies
    Number of slices to send:
    Optional 'thank-you' note:
  • Quote
  • Report post to moderator
Approved submission
Here is my submission for the Tool Care - Sand - Repair a Flat on the Rear Tire of a Bicycle BB.

My sister and I each have a bike that has been in the shed for a while (I haven't ridden in a decade - my sister rides every summer).  All four tires were flat so I started by filling them to test tube soundness then washed both bikes and degreased the drivetrain.  The rear tire on my bike held air but was apparently overinflated and blew out the bead.  I inspected the rim for damage (none found) and replaced the tube.  

A tech trick: inflate the tube with about 10-15 psi then insert it into tire.  Put tire/tube on rim then inflate while making sure the bead seats.  40-65 psi is recommended for my tires.  I inflated to about 50 psi.

To document the completion of the BB, I have provided the following:
 - Before pic of flat tire
 - Action pic of repairing a flat rear tire
 - After pic of inflated good tire
 - Describe what the tire was repaired with
1.JPG
tube burst bead off rim
2-new-Tube.JPG
new tube
new tube
3.JPG
getting ready to put new tube in the tire
4-installing-new-tube.JPG
installing new tube into tire
5-assembling.JPG
putting tube/tire combo on rim
6-inflating.JPG
inflating and checking that the bead seats
7-done.JPG
capping valve stem - done
Staff note (gir bot) :

Nicole Alderman approved this submission.
Note: I hereby certify that this badge bit is complete!

 
pollinator
Posts: 3844
Location: Kent, UK - Zone 8
703
books composting toilet bee rocket stoves wood heat homestead
  • Likes 1
  • Mark post as helpful
  • send pies
    Number of slices to send:
    Optional 'thank-you' note:
  • Quote
  • Report post to moderator
Does replacing an inner tube count as a "repair", or does this BB require using a patch kit to repair a tube?

Unfortunately I missed the chance to do this one recently. My daily commuter got two flats last week, having not had one in 9 months.

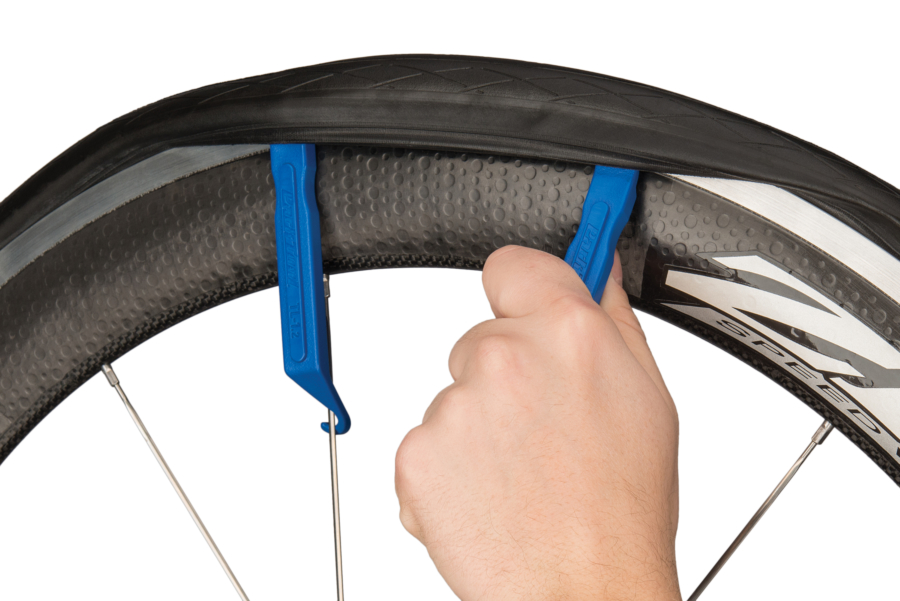
I thoroughly recommend proper tyre levers, rather than the old tea spoon handle method.
 
Opalyn Rose
gardener
Posts: 1569
Location: Washington State
985
6
forest garden trees rabbit earthworks composting toilet fiber arts sheep wood heat woodworking rocket stoves homestead
  • Mark post as helpful
  • send pies
    Number of slices to send:
    Optional 'thank-you' note:
  • Quote
  • Report post to moderator

Michael Cox wrote:Does replacing an inner tube count as a "repair", or does this BB require using a patch kit to repair a tube?


Hi Michael,
My tube blew out and I replaced it ( look at post above yours). My BB was approved, so yes replacing the tube counts as a repair.

I thoroughly recommend proper tyre levers, rather than the old tea spoon handle method.


I purchased these with my new tube and they work great!

I also got this tech trick: inflate the new tube to about 10-15 psi then insert it into tire.  Put tire/tube on rim then inflate while making sure the bead seats and the valve stem is parallel to the spokes.
 
gardener & hugelmaster
Posts: 3694
Location: Gulf of Mexico cajun zone 8
1970
cattle hugelkultur cat dog trees hunting chicken bee woodworking homestead ungarbage
  • Likes 2
  • Mark post as helpful
  • send pies
    Number of slices to send:
    Optional 'thank-you' note:
  • Quote
  • Report post to moderator
My opinion is replacing the tube is a better repair than a patch. I would approve it.
 
gardener
Posts: 1322
741
8
hugelkultur monies foraging trees composting toilet cooking bike solar wood heat rocket stoves ungarbage
  • Likes 3
  • Mark post as helpful
  • send pies
    Number of slices to send:
    Optional 'thank-you' note:
  • Quote
  • Report post to moderator
Approved submission
I was initially intending to post/submit this as an oddball BB but I'm thinking now perhaps the rear tire repair is a better fit.  Most of my flats happen when I'm out on the trails/roads and since I don't do cell phones I don't get to photograph the on site repairs.  :)  This is actually a repair after the trail repair to hopefully prevent another flat.  If this is deemed not applicable for this BB that is fine.  I'm sure I'll get another flat at some point.  (I recently decided to start buying my tubes by the half dozen since I seem to go through them so often.)

The cause of my flat this time was the valve stem getting cut by the metal rim.  This is not the first time I've had the issue.  What seems to happen is that for some reason even though I make sure the stems come out straight from the rim hole they end up shifting to an angle.  (Still scratching my head over that.)  Then since I use my bike for actual work hauling stuff the heavy loads can cause the rim to bear down and cut into the rubber tube right at the base of the valve stem.  In my role of metalsmith educator I'm often telling my students to "pay attention to your edges".  I realize this is probably what I need to be doing here myself.  The edge of the stem hole in the rim was fairly sharp.  It seems to me that if I were to file/sand/polish that edge down then it would be far less able and likely to cut through the tube.

So after I fixed my flat and got back home with my load of groceries I took the tire off again, removed the new tube, reworked the valve stem hole in the rim, and replaced the tube in the tire.  It's been several days so far and all has been well.  I'm honestly not certain this will fix the issue, but I can't see why it wouldn't.

DSC05772.JPG
After getting back home from my trip with the freshly replaced tube the valve was again at this angle! Argh!
DSC05771.JPG
This is what has been happening to my tubes due to that angle, the weight on them, and the sharp valve hole in the rim. This is also the tube that went flat.
DSC05773.JPG
Here is a close up of the valve stem hole in the rim that has the sharp edges before I try to fix it.
DSC05775.JPG
The tools I'm using, files, sand paper, and a burnisher.
DSC05776.JPG
My "action" shot partway through the reworking of the edge.
DSC05778.JPG
The rim edge after I've smoothed it out. (The inner rim lining is now showing too.)
DSC05779.JPG
The bonus of replacing a tube at home is that I get to pump it up with my "big" pump instead of the micro hand pump I keep in my trail repair kit.
DSC05780.JPG
A close up shot of the tube back in, with the stem coming straight out the hole which now has much smoother edges.
DSC05781.JPG
A shot of the bike with the rear wheel put back on. I kept the panniers off so you could see the wheel. :)
Staff note (gir bot) :

Opalyn Rose approved this submission.
Note: I hereby certify this badge bit complete.

 
Posts: 114
Location: VIC, Australia
78
kids gear cooking building solar homestead
  • Likes 3
  • Mark post as helpful
  • send pies
    Number of slices to send:
    Optional 'thank-you' note:
  • Quote
  • Report post to moderator
Approved submission
I had taken photos of the BB ages ago and never got around to posting it. Please note: looks like someone tried fixing this tube before I did really poorly, the silicone stuff is not my doing, I just went and replaced the inner tube.
20210531_134109.jpg
The flat
The flat
20210531_134945.jpg
The tool kit and new Inner tube
20210531_134923.jpg
What in tarnation
What in tarnation
20210531_135104.jpg
In progress
In progress
20210531_140316.jpg
Wonderful
Wonderful
Staff note (gir bot) :

Mike Barkley approved this submission.

 
gardener
Posts: 1958
Location: British Columbia
1113
3
monies home care forest garden foraging chicken wood heat homestead ungarbage
  • Likes 4
  • Mark post as helpful
  • send pies
    Number of slices to send:
    Optional 'thank-you' note:
  • Quote
  • Report post to moderator
Approved submission
- Before pic of flat tire
- Action pic of repairing a flat rear tire
- After pic of inflated good tire
- Describe what the tire was repaired with

This bike has had a slow leak in both the front and back tires for some time. Upon inspection, the tubes were cracking from age. I've had this bike for almost 20 years and I think this is the first time I've changed out the tubes.

Start:


Progress:


Finish:

Staff note (gir bot) :

jordan barton approved this submission.

 
Apprentice Rocket Scientist
Posts: 853
Location: 4a, high mountain dessert
410
3
kids foraging rabbit fiber arts medical herbs bee
  • Mark post as helpful
  • send pies
    Number of slices to send:
    Optional 'thank-you' note:
  • Quote
  • Report post to moderator
Submission flagged incomplete
This is my little-est son's rear bike tire. It won't hold air, so we pulled out the tube to see if we could repair a hole. Luckily, the hole was small, so with a little slime and air, the tire is holding once again. oops, yep, I posted it in the wrong BB. Sorry!
20220704_112345.jpg
squishy bike tire
squishy bike tire
20220704_111307.jpg
getting his chain lubricated, too!
20220704_113003.jpg
tube pulled out, squeezing in slime
20220704_113534.jpg
yay! holding air!
yay! holding air!
Staff note (gir bot) :

Someone flagged this submission as not complete.
BBV price: 1
Note: This BB is for a BACK tire.

 
Posts: 34
Location: Portland OR, 8b
40
2
urban bike woodworking
  • Likes 3
  • Mark post as helpful
  • send pies
    Number of slices to send:
    Optional 'thank-you' note:
  • Quote
  • Report post to moderator
Approved submission
After a ride the previous day, came out to find rear tire completely flat. Hadn't gone "whoosh" when I was riding, and didn't go "whoosh" when I pumped it back up, so it was relatively slow. If it goes "whoosh" and I can identify the location without taking the wheel off, I'll just take off a little section of tire and patch it without taking the whole wheel off, but since it was a slower leak, I had to take the wheel off.

After taking the wheel off and removing the tube, I inflated the tube and submerged it in a dishpan of water. Upon locating the stream of bubbles, I dried that section and marked it with a bullseye with a permanent marker. Pro tip: Marking in this way makes it easy to keep track of the location of smaller punctures after sanding the tube and applying glue.

I scuffed up the tube with a small piece of coarse sandpaper and applied a tiny dab of vulcanizing patch cement and schmeared it thin around the area. Upon allowing it to dry for 30 seconds until completely dry, I applied 1/4 of a Rema patch and pressed firmly for 30 seconds. Pro tip: Buy the box of 100 Rema patches, and cut them into quarters for patching the tiniest holes.

To avoid repeat punctures, I checked the inside of the tire for the offending sharp item. Pro tip: always align the logo on the tire with the valve hole in the rim to be able to know where on the tire to look for the pokey after locating the hole in the tube. I found a small piece of glass that had worked its way through, leaving a small cut about 1/8 of an inch long. The tire is fairly old, so is wearing thin and has more cuts like this, so will likely pick up more glass and get more punctures more frequently. I'm not sure if this will work, but I used some "Shoe Goo" adhesive to try to seal up some of the small cuts in the tire casing to prevent them from being weak points and picking up future glass and possibly slightly extend the tire life.

Reinstalled tube in tire, and tire in wheel, being mindful of tire logo orientation with respect to valve hole and ensuring that no portion of tube was caught between rim and tire. Upon reinstallation of wheel, rear cable-actuated disc brake was rubbing slightly indicating that the wheel was not sitting quite the same in the dropout as before, so I opened the quick-release back up and squeezed the brake lever while closing the quick release in order to make a tiny adjustment to wheel alignment in the dropout and ensure that the rotor was centered in the caliper.
PXL_20220820_022626896.jpg
Totally flat when I went out to the garage
PXL_20220820_023213576.MP.jpg
Patching small hole with 1/4 of a patch
PXL_20220820_023759889.MP.jpg
reinflated
reinflated
Staff note (gir bot) :

Mike Barkley approved this submission.
Note: Good thing you caught it before it went woosh while riding.

 
Posts: 18
Location: West-Flanders, Belgium
6
bike bee woodworking
  • Likes 1
  • Mark post as helpful
  • send pies
    Number of slices to send:
    Optional 'thank-you' note:
  • Quote
  • Report post to moderator
Approved submission
Oh no...had a flat tire
oh yes... a chance at another badge!

pleasefind attached pictures of the flat tire, the hole, contact cement and fix and reinflating.
PB140226.JPG
flat tire
flat tire
PB140232.JPG
tools
tools
PB140234.JPG
taking out the inner tube
PB140235.JPG
hole
hole
PB140236.JPG
making rubber rough
making rubber rough
PB140237.JPG
contact cement
contact cement
PB140238.JPG
patch
patch
PB140239.JPG
reinflating
reinflating
IMG_20221202_204713_041.jpg
inflated tire for resubmission
Staff note (gir bot) :

Someone flagged this submission as not complete.
BBV price: 1
Note: Looking great, but we need one more picture showing the fully inflated repaired tire after you finished.

Staff note (gir bot) :

David Huang approved this submission.
Note: I hearby certify this complete.  Looking through this thread I just today noticed you had added the requested photo.  Sorry it wasn't seen earlier.

 
pollinator
Posts: 72
Location: Spain
49
3
cat home care trees tiny house medical herbs greening the desert
  • Mark post as helpful
  • send pies
    Number of slices to send:
    Optional 'thank-you' note:
  • Quote
  • Report post to moderator
Submission flagged incomplete
Rear tire was completely flat. It was about time to replace the inner tube and the tire anyway.

The tools I used were some different size wrenches and also tire levers.
I first tried the metal levers, but they scratched the aluminum rim, so I switched to using plastic levers. I'm glad I caught it before I damaged the wheel!

First took the tire off (and found the hole in the tube), checked the wheel before putting a new tube in, put the new tire on, put the wheel back on the bike, some pumping and it was a done deal. Great!
Filename: RepairFlatRearTireBicycle_01_before.pdf
File size: 7 megabytes
Filename: RepairFlatRearTireBicycle_02A_repair.pdf
File size: 11 megabytes
Filename: RepairFlatRearTireBicycle_02B_repair.pdf
File size: 6 megabytes
Filename: RepairFlatRearTireBicycle_03_last-step-and-ready.pdf
File size: 12 megabytes
Staff note (gir bot) :

Someone flagged this submission as not complete.
BBV price: 1
Note: Sorry Klara, you need to post the video(s).  There are relatively easy ways to post a video to youtube and keep it "private" or "unlisted" (can't remember which) so that it's able to be linked here and yet not be out there for the whole world to see.

Staff note :

While a video is not required, photos are.  Please attach photos that are easy for the certifiers instead of PDF files.  BBV penalty stands.

 
klara stinders
pollinator
Posts: 72
Location: Spain
49
3
cat home care trees tiny house medical herbs greening the desert
  • Mark post as helpful
  • send pies
    Number of slices to send:
    Optional 'thank-you' note:
  • Quote
  • Report post to moderator
Whoop! I must have missed that there has to be a video (too), my apologies!
In the description for this BB, I read that to get certified for this BB, there must be a before pic, an action pic, an after pic and a description.
Can you please help me find the description with the requirements for the video so I can do it right next time?
Thank you!

Klara
Staff note :

Klara, you are correct that a video is not required.  However, photos are required - not PDF files.  This file type makes it challenging for volunteer certifiers to check and approve your submission.  Please resubmit your BB with photos embedded or attached to the BB - and we like it when you add captions too.

 
klara stinders
pollinator
Posts: 72
Location: Spain
49
3
cat home care trees tiny house medical herbs greening the desert
  • Likes 1
  • Mark post as helpful
  • send pies
    Number of slices to send:
    Optional 'thank-you' note:
  • Quote
  • Report post to moderator
Approved submission
Oh! You are absolutely right that PDF is not the way to go!
So silly of me, because I thought I had uploaded photos...

Let me try again, captions included!

Rear tire was completely flat. It was about time to replace the inner tube and the tire anyway.

The tools I used were some different size wrenches and also tire levers.
I first tried the metal levers, but they scratched the aluminum rim, so I switched to using plastic levers. I'm glad I caught it before I damaged the wheel!

First took the tire off (and found the hole in the tube), checked the wheel before putting a new tube in, put the new tire on, put the wheel back on the bike, some pumping and it was a done deal. Great!
RepairFlatRearTireBicycle_01_before.jpg
the wheel + the tire being flatter than flat + worn tire
RepairFlatRearTireBicycle_02A_repair.jpg
removing the tire + the hole in the old tube + checking the wheel for foreign object or abnormalities (luckily there were none)
RepairFlatRearTireBicycle_02B_repair.jpg
new tube + wiggling the new tube in the new tire + putting tube and tire into place
RepairFlatRearTireBicycle_03_last-step-and-ready.jpg
wheel ready to be installed + pumping + done!
Staff note (gir bot) :

David Huang approved this submission.
Note: I hearby certify this complete.  Happy riding!!

 
Posts: 22
Location: Baltimore, MD
8
transportation tiny house bike
  • Mark post as helpful
  • send pies
    Number of slices to send:
    Optional 'thank-you' note:
  • Quote
  • Report post to moderator
Approved submission
I got a flat tire toward the end of a ride today, seemed like the perfect time to deal with it. I took it apart, found the hole in the tube, found the tiny sharp rock that punctured the tire, replaced the tube and tire (I know I didn't really need to, but I already had them), tested it, and reinstalled the wheel.
1-flat-tire.jpg
[Thumbnail for 1-flat-tire.jpg]
2-taken-apart.jpg
[Thumbnail for 2-taken-apart.jpg]
3-hole-in-tube.jpg
[Thumbnail for 3-hole-in-tube.jpg]
4-hole-in-tire.jpg
[Thumbnail for 4-hole-in-tire.jpg]
5-action-and-tools.jpg
[Thumbnail for 5-action-and-tools.jpg]
6-new-tube-and-tire.jpg
[Thumbnail for 6-new-tube-and-tire.jpg]
7-holding-pressure.jpg
[Thumbnail for 7-holding-pressure.jpg]
8-reinstalled.jpg
[Thumbnail for 8-reinstalled.jpg]
Staff note (gir bot) :

David Huang approved this submission.
Note: I hearby certify this complete.

 
gardener
Posts: 416
Location: 6a; BSk; Suburbia; 0.35 acres
177
5
kids forest garden foraging bike medical herbs rocket stoves
  • Likes 1
  • Mark post as helpful
  • send pies
    Number of slices to send:
    Optional 'thank-you' note:
  • Quote
  • Report post to moderator
Approved submission
Here is my submission for the Tool Care - Sand - Repair a Flat on the Rear Tire of a Bicycle BB.

To document the completion of the BB, I have provided the following:
Attachment 1 - Before pic of flat tire
Attachment 2 - Action pic of repairing a flat rear tire
Attachment 3 - After pic of inflated good tire
Describe what the tire was repaired with: I'm replacing a rear flat on my daughter's bike (with my daughter watching as I explain the steps to replace an innertube to her). She got a flat while we were in cactus land. I used a 24x2.4 innertube to swap out and I plan to patch the punctured tube to use as a backup. I flipped the bike upside down, removed the drop-out axle, pulled the derailleur back, and pulled the wheel out. I checked for noticeable damage to the tire then used two tire levers to remove the tire from the rim. When I took the innertube out I pumped it up to find the puncture and checked the inside of the tire for any remaining debris that could cause a new puncture in my new innertube. I inflated the new innertube to almost 10psi, put it in the tire, then mounted the tire and tube back onto the rim. I returned the wheel to the bike frame, weaving around the chain and derailleur, then inserted the axle. I definitely need to lube her chain next.
Attachment-3-After-pic-of-inflated-good-tire.jpg
[Thumbnail for Attachment-3-After-pic-of-inflated-good-tire.jpg]
Attachment-2-action-pic-of-repairing-rear-tire.jpg
[Thumbnail for Attachment-2-action-pic-of-repairing-rear-tire.jpg]
Attachment-2-action-pic-of-rear-tire.jpg
[Thumbnail for Attachment-2-action-pic-of-rear-tire.jpg]
Attachment-1-before-pic-of-flat-tire.jpg
[Thumbnail for Attachment-1-before-pic-of-flat-tire.jpg]
Staff note (gir bot) :

David Huang approved this submission.
Note: I hearby certify this complete.

 
gardener
Posts: 1331
Location: Miami, 11a, Am, apartment dweller
886
8
hugelkultur kids forest garden trees books wofati cooking bike rocket stoves
  • Likes 1
  • Mark post as helpful
  • send pies
    Number of slices to send:
    Optional 'thank-you' note:
  • Quote
  • Report post to moderator
Approved submission
My tubes have been popping, so I got an extra thick inner tube to replace it.

This bike has an internal hub gear, so it was a bit tricky to get back on.

- Before pic of flat tire
- Action pic of repairing a flat rear tire
- After pic of inflated good tire
- Describe what the tire was repaired with
20240504_161950.jpg
Flatttt
Flatttt
20240504_162333.jpg
Action
Action
20240504_164737.jpg
More action
More action
20240504_173549.jpg
Final tool list
Final tool list
20240504_173440.jpg
After
After
20240504_161517.jpg
Thicc tube
Thicc tube
Staff note (gir bot) :

David Huang approved this submission.
Note: I hearby certify this complete.

 
Posts: 25
4
cat chicken food preservation
  • Mark post as helpful
  • send pies
    Number of slices to send:
    Optional 'thank-you' note:
  • Quote
  • Report post to moderator
Approved submission
Replace a tire that had a slow leak in the tube:

Tools used:
Socket wrench for removing tire and adjustment bar
Used pastic pry tool to remove tire
Used a air pump to inflate to 35 psi.
before.jpg
before with flat back tire
flat.JPG
tire taken off to remove old tube
image_67197441.JPG
removing old tube
removing old tube
image_67526913(1).JPG
inflating new tube and prepping for insertion into tire
image_67195393.JPG
installing new tube
installing new tube
image_67238913.JPG
installing tire back on bike
after.JPG
completed
completed
Staff note (gir bot) :

Paul Fookes flagged this submission as not complete.
BBV price: 1
Note: Describe what the tire was repaired with

Staff note (gir bot) :

Mike Haasl approved this submission.
Note: Looks good now.  Not sure what the original submisison and comments looked like pre-edits.

 
Rebekah Harmon
Apprentice Rocket Scientist
Posts: 853
Location: 4a, high mountain dessert
410
3
kids foraging rabbit fiber arts medical herbs bee
  • Mark post as helpful
  • send pies
    Number of slices to send:
    Optional 'thank-you' note:
  • Quote
  • Report post to moderator
Approved submission
The rear tire on this bike was ghastly flat! I used a slime tube to replace it, since my neighborhood is full of goat head stickers.
20240526_162521.jpg
Squishy and flat
Squishy and flat
20240526_163702.jpg
The repair items
The repair items
20240526_172803.jpg
Filling the new tube
20240526_172756.jpg
Finished, airy tire
Finished, airy tire
Staff note (gir bot) :

Paul Fookes flagged this submission as not complete.
BBV price: 1
Note: The BB is repair the tube not replace -  - Action pic of repairing a flat rear tire

Staff note (gir bot) :

Paul Fookes approved this submission.
Note: I ceertify this BB complete

Staff note (Paul Fookes) :

Filling tyre counts as an action picture.  Well done Rebekah

Staff note (Jay Angler) :

Rebekah, it would be awesome if you wrote a review in the gear section after you've tested this brand of inner tube for a while. We live in Himalayan Blackberry country, so I can totally relate to being surrounded by things that like to puncture tires!

 
pollinator
Posts: 223
Location: East Texas, USA
131
books chicken fiber arts sheep homestead ungarbage
  • Mark post as helpful
  • send pies
    Number of slices to send:
    Optional 'thank-you' note:
  • Quote
  • Report post to moderator
Approved submission

Dave Burton wrote:This is a badge bit (BB) that is part of the PEP curriculum.  Completing this BB is part of getting the sand badge in tool care.

Sometimes bicycle tires get flats and they need to get repaired.

Minimum Requirements:
- fix a flat rear tire on a bicycle

Clarifications:
- could be a tube replacement
- could be a patch kit
- cannot use goo you put inside the tire such as "Fix-a-Flat"

Provide proof of the following as pictures or video (less than two minutes):
- flat rear tire
- repairing a flat rear tire
- inflated and reinstalled (mounted on bike) good tire
- show/describe the materials used to repair the tire


The rear tire tube had a fast-leaking flat. Because the tire itself was also cracked and worn, I opted to replace both the tire and the tube. The method for replacing a tire with a coaster brake is a little different from that shown above, and requires a wrench (I used a socket wrench) and a screwdriver. I also used the tire levers that came with the tube, and an air pump.
IMG_3199.jpeg
Flat old tire
Flat old tire
IMG_3211.jpeg
New tire and tube
New tire and tube
IMG_3225.jpeg
Loosening the axle nuts
IMG_3226.jpeg
Undoing the coaster brake stay
IMG_3212.jpeg
old wheel parts off the bike
IMG_3213.jpeg
Pushing the new tire bead onto the wheel
IMG_3219.jpeg
New tube and whitewall tire on a bike
Staff note (gir bot) :

Jeremy VanGelder approved this submission.

 
Posts: 79
9
  • Mark post as helpful
  • send pies
    Number of slices to send:
    Optional 'thank-you' note:
  • Quote
  • Report post to moderator
Approved submission
I had a flat rear tire to fix from a free bike I picked up off the side of the road.  I used a 15 mm wrench to remove the rear wheel. I use my fingers to remove the innertube. I used an air pump to inflate the tube and find the problems. The tube was beyond repair so I replaced it with a new Ball 26“ x 1.75–2.25 tube.
IMG_8554.jpeg
Rear Flat tire
Rear Flat tire
IMG_8567.jpeg
Wheel and tube removed
IMG_8568.jpeg
Finding leaks
Finding leaks
IMG_8569.jpeg
New tube
New tube
IMG_8571.jpeg
Installing new tube
Installing new tube
IMG_8573.jpeg
50 pounds of air
50 pounds of air
IMG_8577.jpeg
Installed on the bike and ready to ride
Staff note (gir bot) :

Someone approved this submission.

 
When people don't understand what you are doing they call you crazy. But this tiny ad just doesn't care:
GAMCOD 2025: 200 square feet; Zero degrees F or colder; calories cheap and easy
https://permies.com/wiki/270034/GAMCOD-square-feet-degrees-colder
reply
    Bookmark Topic Watch Topic
  • New Topic