• Post Reply Bookmark Topic Watch Topic
  • New Topic
permaculture forums growies critters building homesteading energy monies kitchen purity ungarbage community wilderness fiber arts art permaculture artisans regional education skip experiences global resources cider press projects digital market permies.com pie forums private forums all forums
this forum made possible by our volunteer staff, including ...
master stewards:
  • Nancy Reading
  • Carla Burke
  • r ranson
  • John F Dean
  • paul wheaton
  • Pearl Sutton
stewards:
  • Jay Angler
  • Liv Smith
  • Leigh Tate
master gardeners:
  • Christopher Weeks
  • Timothy Norton
gardeners:
  • thomas rubino
  • Jeremy VanGelder
  • Maieshe Ljin

PEP Badge: Oddball

BB oddball - sand badge
 
pollinator
Posts: 259
Location: New Zealand
307
chicken food preservation fiber arts woodworking homestead
  • Likes 5
  • Mark post as helpful
  • send pies
    Number of slices to send:
    Optional 'thank-you' note:
  • Quote
  • Report post to moderator
Approved submission
Garlic rust is a serious problem locally for growing garlic. We had ours heavily mulched and under cover, which protected the plants from the disease particles getting splashed up from the soil. However, we left the cover off for a single day when it rained, and the entire planting then became infected and died off. To save the garlic remaining, I needed to make sure the innoculum of the disease was removed from the heads for storage. I carefully scrubbed each head of garlic and then braided them for storage to maximise storability--important particularly as the garlic was weakened by disease and can then be prone to white rot.

A bit of a lemonade out of lemons situation! I have a pretty braid now as a useful decoration, and burned all the infected material I removed to prevent it from getting into the compost and spreading further.
mb-bb-oddball-012-garlic-braids-1.JPG
Cleaning garlic of rust disease and dirt; braiding
mb-bb-oddball-012-garlic-braids-2.JPG
Braid with hanger
Braid with hanger
Staff note :

How long did it take to complete this?  Did you learn anything from doing the Oddball BB?

Staff note (gir bot) :

Someone approved this submission.
Note: Certified for 1/2 oddball point.  Please note that the majority of this task is part of another BB (Food prep - preserving food or Gardening - growing 100k calories) we're only giving points for the rust prevention work.  Edge case all around...

 
gardener
Posts: 1871
Location: Japan, zone 9a/b, annual rainfall 2550mm, avg temp 1.5-32 C
930
2
kids home care trees cooking bike woodworking ungarbage
  • Mark post as helpful
  • send pies
    Number of slices to send:
    Optional 'thank-you' note:
  • Quote
  • Report post to moderator
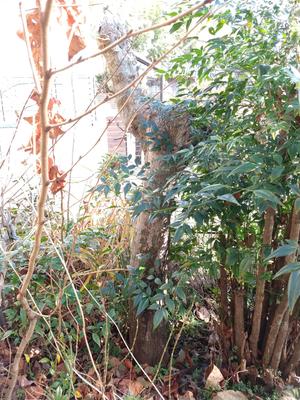
One of my maples died this past year or the one before. I was waiting to see if it would come back after a heavy pruning. It didn't. Small loss... the area is overgrown with trees shading each other out. Anyway, the top of it is sprouting mushrooms, and there's been no new growth six months. I pronounced it standing dead.

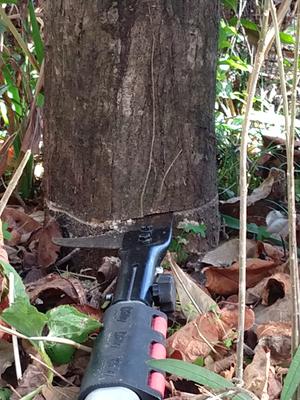
I felled it with a silky. It's about 18 cm in diameter. Didn't take me too long, maybe 15-20 minutes? I also cut off the branching to see if the trunk lumber was still good. It is! Some minor spalting, but that might be desirable. Sawing through it again with my smaller silky took another 10 minutes. It was a good workout and now I have an open space and some small lengths of hardwood. If I can split it successfully I will use the wood for several projects I have lined up.

So I present felling and preparing a standing dead maple for milling.

Standing dead


Cutting from both sides with an extending Silky (handsaw) - I was chatting to my neighbor who was practicing his putting while I was sawing. I offered him a go at the sawing. He respectfully declined. I said good choice.


On the wheelbarrow. It was heavy, but for this size of log obviously already dry. I don't think I could have lifted it so easily if it were still green.


Sawing off the top branches


My arm muscles were pumped at this point. Done for today. You can see some minor spalting at the bottom of the log. The upper branches are probably more heavily spalted. I can hopefully process them for some turning projects. More impetus to get my pole-lathe project going!


Edit: Doesn't fully fulfill requirements of woodland badge, so this submission is no good for oddball either.
Staff note (gir bot) :

Paul Fookes flagged this submission as not complete.
BBV price: 1
Note: Forms part of another BB - Woodlandcare No Points.  Convert to Woodland Care BB for reconsideration.

 
pollinator
Posts: 258
Location: Pacific Northwest
111
8
forest garden fungi wofati cooking solar homestead
  • Likes 3
  • Mark post as helpful
  • send pies
    Number of slices to send:
    Optional 'thank-you' note:
  • Quote
  • Report post to moderator
Approved submission
I turned a bunch of railroad spikes I found into a sign for my wife's band.  I spent 9 hours on the fabrication. (and probably about 15 hours of walking around finding the spikes)  About 3 hours were spent on the C and the U.  I had to heat them up in the forge and hammer out the ends to thin them then bend them in a jig.  The C had to have a good amount of metal added to the middle to make the cut ends match up.  The spikes second H, the I and the E all had to have a 3/4" section cut out and then welded back together in order to get the aesthetic I wanted.  I put all the letters into the forge to get the patina I wanted and hide some of the welds a little better.  They were then welded to an 1/4 x 2" bar to make a stand.
IMG_20220109_063827_600.jpg
finished product
finished product
IMG_20220109_063827_713.jpg
raw material
raw material
IMG_20220109_063827_811.jpg
in the forge
in the forge
IMG_20220109_063827_894.jpg
out of the forge
out of the forge
20220108_215832.jpg
The letters before finishing in the forge
Staff note (gir bot) :

Someone approved this submission.
Note: Certified for 3 oddball points.  Nice job!

 
L. Johnson
gardener
Posts: 1871
Location: Japan, zone 9a/b, annual rainfall 2550mm, avg temp 1.5-32 C
930
2
kids home care trees cooking bike woodworking ungarbage
  • Likes 5
  • Mark post as helpful
  • send pies
    Number of slices to send:
    Optional 'thank-you' note:
  • Quote
  • Report post to moderator
Approved submission
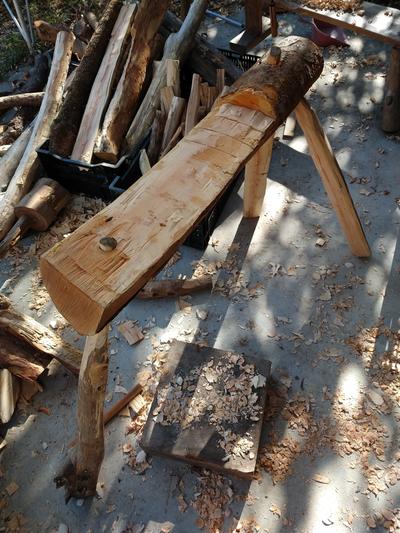
Today I finished my greenwood carving horse. I submit it for oddball points.

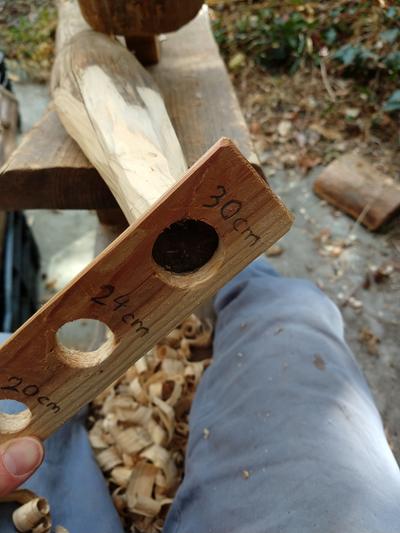
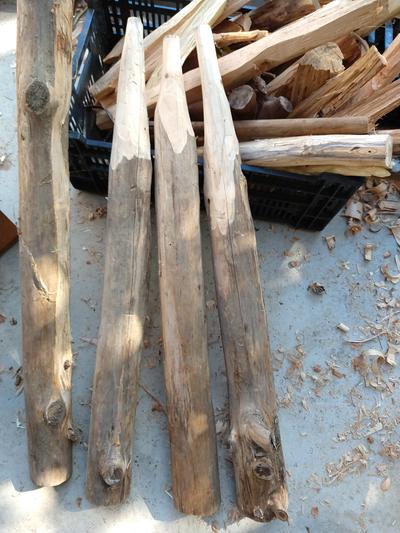
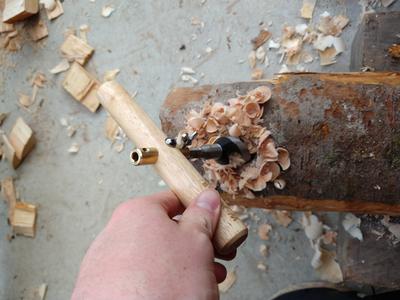
The main body is made of green loquat wood. The legs smelled like J. Cypress (very dry) when I worked them, so I assume that is what they are. I drilled the leg mortises with a hand auger, cut the work surface out by making dados with my silky pruning saw then knocking them out with a hatchet. I cleaned up the surface with a drawknife. The peg holes were also drilled with a hand auger. I made two pegs out of dried persimmon and wedges out of dried cedar. All the tenons were cut on the shaving horse with draw knife... I need to make a tenon cutter.

It's large enough to hold wood to carve small bowls or cups as it is. I could cut out the work surface area more and expand it a bit to make serving bowl sized bowls.

It took probably... about 6 hours over all, over the course of several weeks.

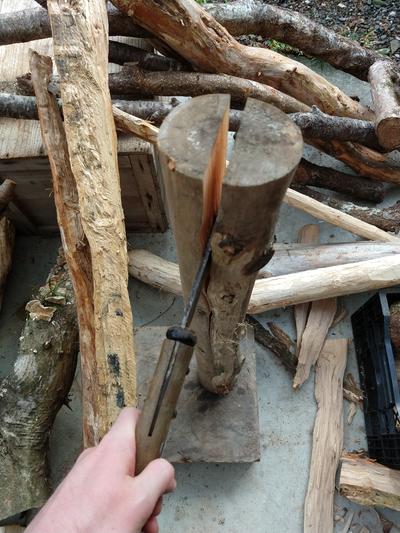
Splitting the legs


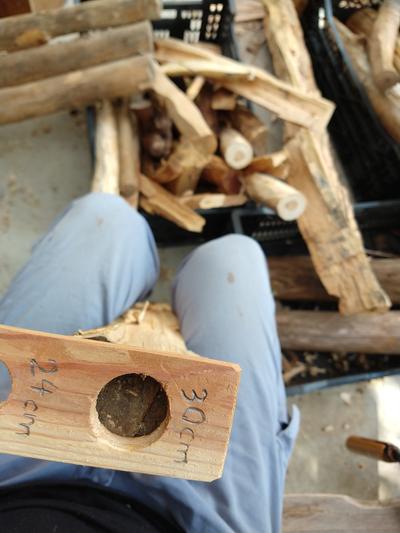
Sizing the tenons


Shaving with the drawknife


Working it down to diameter


Three legs are stable anywhere


Finding the log that will give me the most work surface area. These logs came from a neighbor's plot that were being cut down for dam maintenance, brought to my place by wheelbarrow and muscle... That was a work-out.


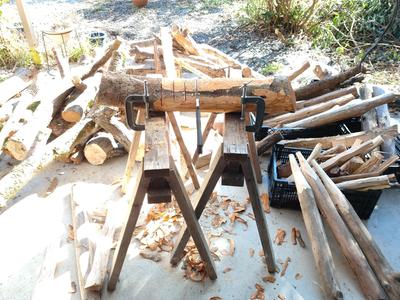
Rigged up a saw-buck with clamps on my horses. Two handed sawing on a stable log is much easier than one handed sawing on a wobbly log.


Drilling leg holes with a hand auger.


Almost there


Finished for now. Until I decide to expand the work surface.

Staff note (gir bot) :

Paul Fookes approved this submission.
Note: I certify this BB complete for 4 points. Well documented

 
Posts: 119
Location: Montréal, QC
77
2
foraging tiny house fiber arts building rocket stoves homestead
  • Mark post as helpful
  • send pies
    Number of slices to send:
    Optional 'thank-you' note:
  • Quote
  • Report post to moderator
Submission flagged incomplete
Didn't use natural materials as I'm trying to use up my old stock of acrylic yarn, so this doesn't qualify for a textile BB. Thought I would submit here instead since I'm making it anyway!

Saw a Finn hat from Adventure Time that someone made and wanted to figure out a better pattern. Learned a new stitch (slip stitch rib) and a lot of unintuitive-to-me 3D shaping to get the shape I wanted.

Took me 2+ hours just for the ribbed cuff because slip stitch is sooooo short. The rest of it was about 5 hours, including some unravelling and redoing to get the shape right.
20220126_162001.jpg
slip stitch rib. 2+ hours on this cuff alone
20220128_105134.jpg
[Thumbnail for 20220128_105134.jpg]
20220128_165902.jpg
[Thumbnail for 20220128_165902.jpg]
20220128_165942.jpg
figuring out sizing for the ears
20220129_192608.jpg
sewing and stuffing
sewing and stuffing
20220129_195745.jpg
finished!
finished!
Original_Finn.png
the hat I'm recreating
Staff note (gir bot) :

Someone flagged this submission as not complete.
BBV price: 1
Note: Sorry, since there's a regular BB for knitting a hat, this isn't a fit for oddball.

 
gardener
Posts: 1569
Location: Washington State
985
6
forest garden trees rabbit earthworks composting toilet fiber arts sheep wood heat woodworking rocket stoves homestead
  • Likes 1
  • Mark post as helpful
  • send pies
    Number of slices to send:
    Optional 'thank-you' note:
  • Quote
  • Report post to moderator
Here is my submission for the Oddball Aspect - Harvest, Dry, and Store Comfrey Leaf BB.

Comfrey leaf is not on Natural Medicine's "harvest, dry, and store one of the following for a tea, infusion, or decoction" list.  However, it is on the list for an oil infusion so I'm hoping that it will qualify for 1/2 point here.

Update: Per staff discussion, Comfrey will be added to the Natural Medicine Sand Badge and not approved here.
 
Posts: 20
14
3
  • Likes 7
  • Mark post as helpful
  • send pies
    Number of slices to send:
    Optional 'thank-you' note:
  • Quote
  • Report post to moderator
Approved submission
Submitting my COB PIZZA OVEN!

First I read some books and guides like this one - https://www.chelseagreen.com/product/build-your-own-earth-oven

Tested my soil with a shake test at only ~20% clay, so I picked up free higher clay fill dirt which was 50%+ clay


Purchased straw and sand. Found used fire bricks at a garage sale. Made a batch of test cob and "fire cob" (cob without the straw) bricks with different soil/sand ratios. Checked for quality and picked the 1:2 ratio.


Found a good spot not too close to the house and not too far from the picnic table. Measured about a 4' circle and dug a trench about 6" deep (no harsh winters here) to get to subsoil and stacked up old pavers as a foundation. Filled with rocks and earth and tamped solid.


Cob time! Borrowed extra feet and built a cob ring on top of the foundation.


Filled the ring with empty bottles for insulation.


Covered the bottles with a mix of clay slip and saw dust/chips for more insulation.


Capped with a couple inches of fire cob as a flat base for the bricks.


Laid out the fire bricks to cover the oven floor and entrance.


Built a 16" high (~75% of the width) sand dome with wet sand and a little soil to keep it from slumping. (useful tip: shaped the dome by patting with a piece of 2x4)


Covered dome with wet paper to keep sand from sticking to the inside of the oven and make sand removal easier.


Added 4" fire cob layer.


Cut an 11" high door (63% of interior height rounded up) in the fire cob layer and shaped an entrance.


Added 6" insulation layer of cob with high straw content. Dug out sand as the layers were drying.


While waiting for it to dry, built a shelter using round wood and added rebar stakes hammered in holes in the bottom of the logs to try and keep it from moving around. Used some dimensional lumber (2x4s & 2x3s), a few brackets, and some leftover unpainted metal roofing. Added a wooden door and made a pizza peel!


In action

Staff note (gir bot) :

Someone approved this submission.
Note: Approved for 14 oddball points. You may also be interested in: https://permies.com/wiki/127975/PEP-BB-naturalbuilding-straw-clay

 
Christopher Mulder
Posts: 20
14
3
  • Likes 3
  • Mark post as helpful
  • send pies
    Number of slices to send:
    Optional 'thank-you' note:
  • Quote
  • Report post to moderator
Thanks for reviewing! Do I qualify for the oddball sand badge?
Staff note (Nicole Alderman) :

Yes you do! Congratulations on your first Sand Badge!!!

 
pollinator
Posts: 1234
Location: Chicago
422
dog forest garden fish foraging urban cooking food preservation bike
  • Likes 4
  • Mark post as helpful
  • send pies
    Number of slices to send:
    Optional 'thank-you' note:
  • Quote
  • Report post to moderator
Approved submission
Handmade chocolate hazelnut spread starting from fresh cacao:

Neighborhood grocery store got a shipment of fresh cacao pods. I had always wanted to try the fresh cacao fruit, so I bought one. Daughter and I chewed/sucked the fruit pulp off some of the seeds. It was alright but nothing to go out of your way for.

I was interested in how to use the actual cacao beans to make some "real food" chocolate treats without so much of the child labor and corn syrup that usually goes into chocolate bars from the store.

I looked into how to make chocolate from the seeds and learned you should ferment the seeds to get a rich chocolate flavor. Cacao farmers pile up the pods and ferment then in rotting heaps. This method would not work for my little bowl of beans. I found a fun little blog by someone in the Philippines who tried making chocolate at home, which gave me some ideas for small scale work: Pinoy Chocophile Blog

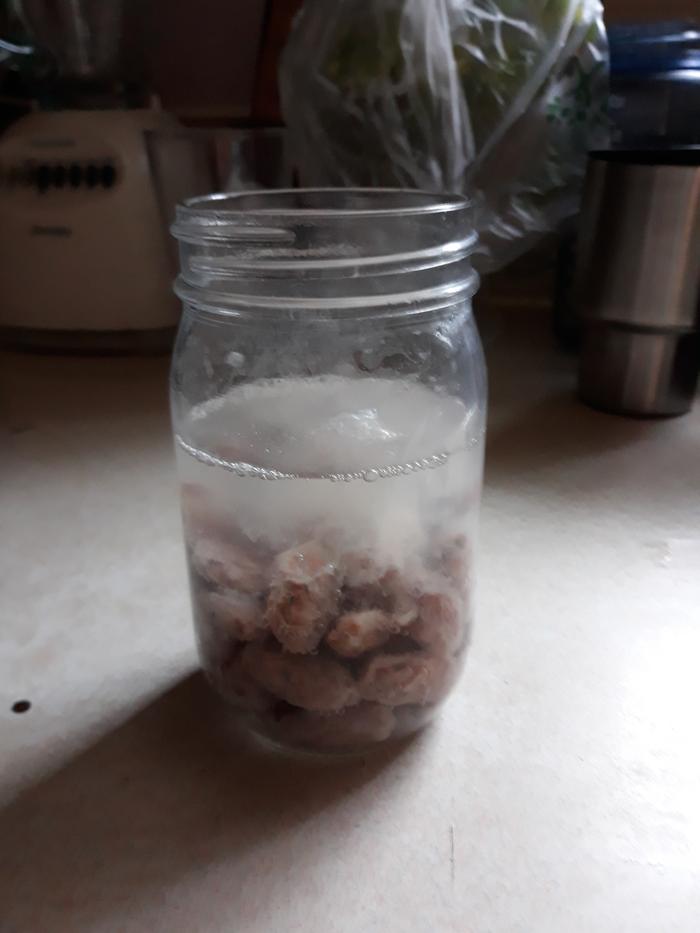
I decided to ferment the still- fleshy seeds in a jar with water, like I do for tomato seeds, rather than constructing a unitasker chocolate fermenting box. After about 2 days the jar was bubbly.


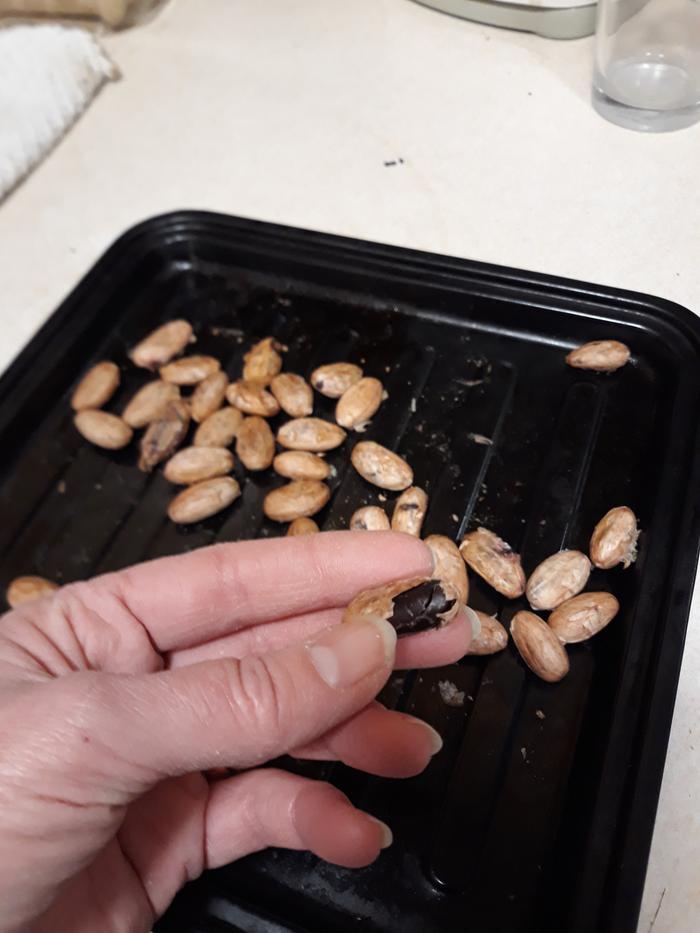
I put the slimy "beans" in oven on dehydrator setting for about an hour, and the fleshy coating dried and shrunk into something that looked like almond skin. Under the skin you can see that the fermented and dried "beans" are now dark brown and shiny like a good dark chocolate bar:


I hand-peeled the beans, which was just a bit more annoying than peeling garlic. Definitely would not want to do more than one pod's worth by hand. The beans easily crumble apart into "nibs" that remind me of the curds in colby cheese. The texture is waxy, like bits of crayon.

Without specialized equipment, I know I am not going to get a perfectly smooth commercial-type product. I also wanted to make my first project raw, to appreciate the texture and flavor of the cacao minimally processed. I had raw hazelnuts on hand and have made nut butter by hand before, so decided to start with a handmade, whole food version of Nutella.

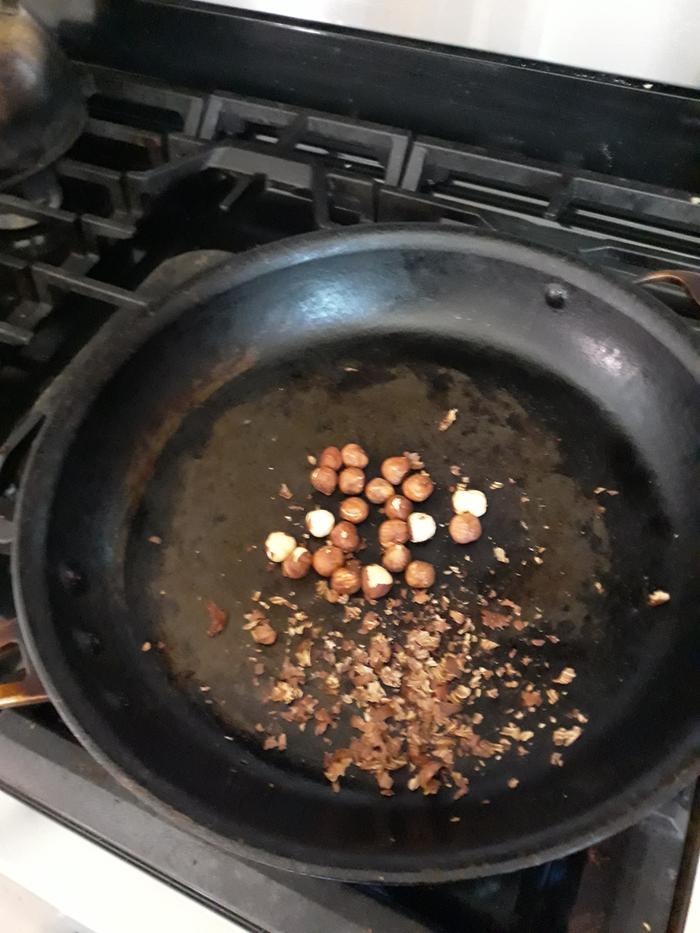
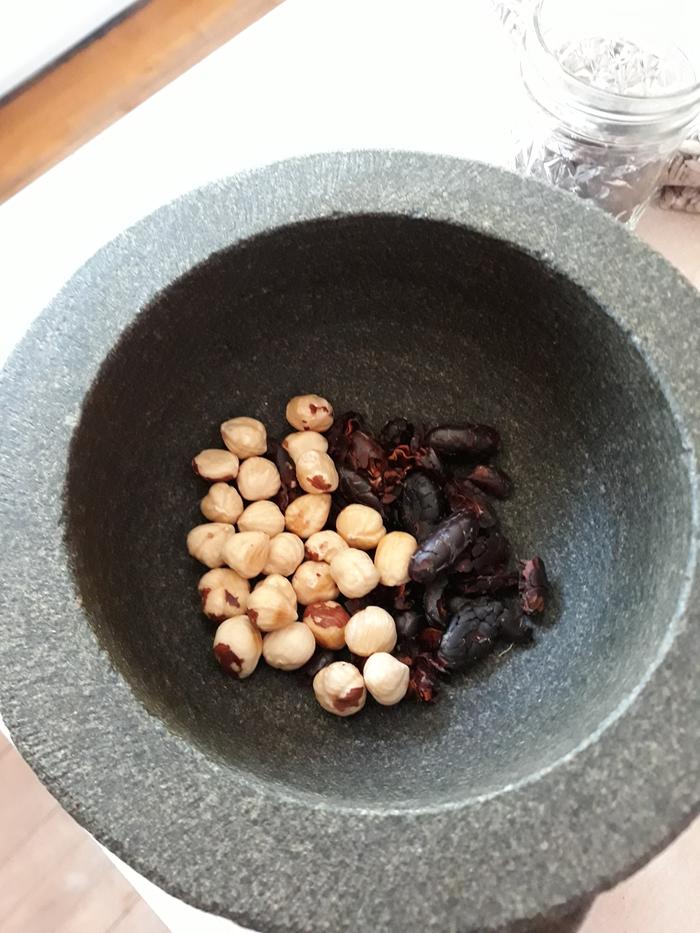
I toasted some hazelnuts to loosen the skins


Ground equal parts hazelnuts and cacao beans in a stone mortar:


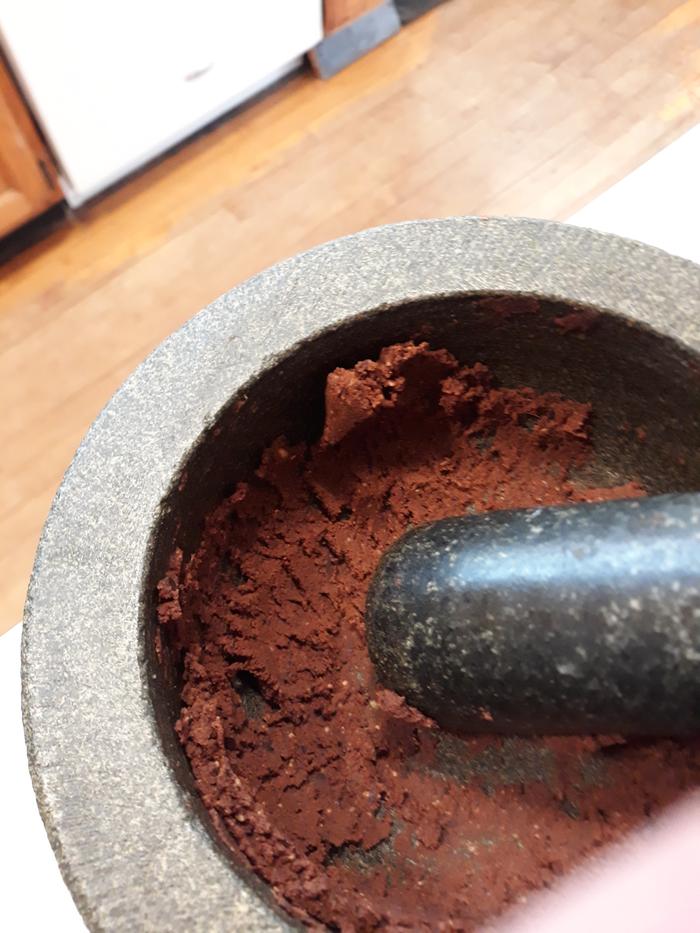
Halfway ground:


A smooth paste after about 10 minutes:


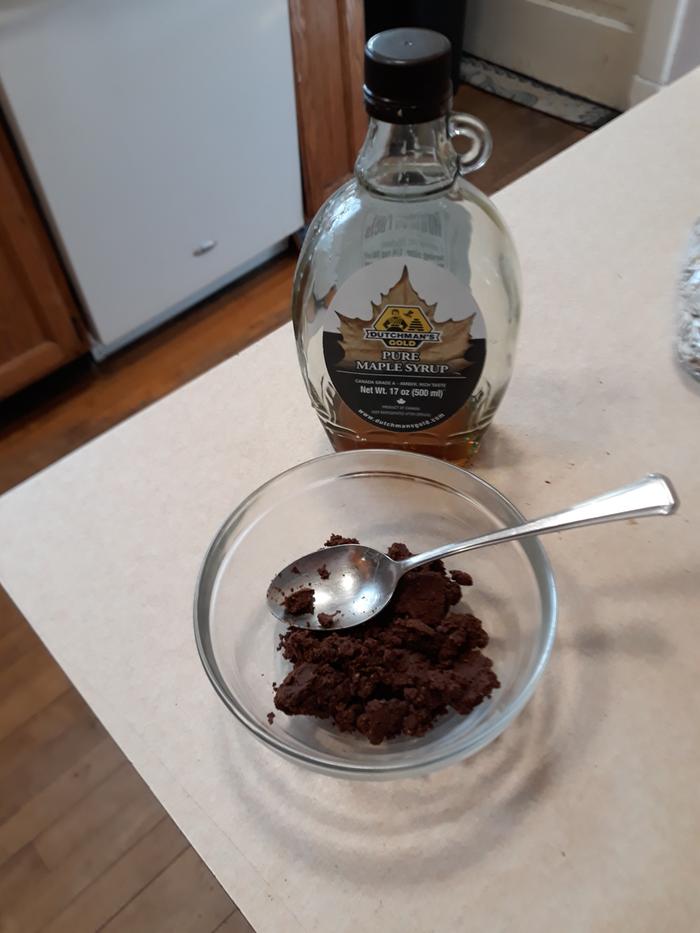
Mix in maple syrup to sweeten and to thin it to a spreadable consistency:


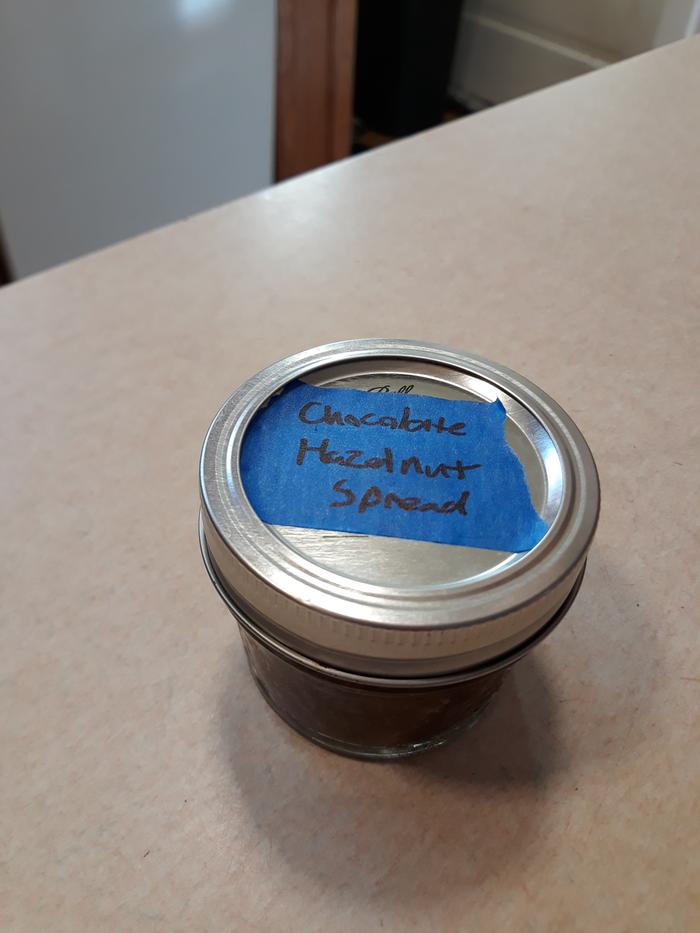
Yield from half the beans in the cacao pod and a handful of hazelnuts was about 4 oz of spread:


Start to finish, it was a five day process.  Of that time, only about 2 hours was "active" labor. The flavor of the chocolate was very nice, it was a bit "fruity" like some dark chocolate can be.

If I lived somewhere I could grow cacao, it would definitely be worth keeping some for home processing.


Staff note (gir bot) :

Someone approved this submission.
Note: Approved for 1/2 oddball point.

 
steward
Posts: 15505
Location: Northern WI (zone 4)
4846
7
hunting trees books food preservation solar woodworking
  • Likes 1
  • Mark post as helpful
  • send pies
    Number of slices to send:
    Optional 'thank-you' note:
  • Quote
  • Report post to moderator
Please note the following changes have been made to the Oddball badge:

Any projects that are in the Food Prep and Preservation or Gardening realm do not count here in Oddball.


The Failed/Almost BB Factor:  This is an adjustment based on if the project is shy of an already existing BB.  In these cases the score will be significantly reduced, typically 1/2 point will be awarded.  We strongly encourage people to complete BBs properly.

 
The overall mission is to change the world. When you've done that, then you can read this tiny ad:
the permaculture bootcamp in winter (plus half-assed holidays)
https://permies.com/t/149839/permaculture-projects/permaculture-bootcamp-winter-assed-holidays
reply
    Bookmark Topic Watch Topic
  • New Topic